Randyc Report post Posted September 15, 2008 I stitch my holsters with an Artisan Toro 3000. The machine does a great job. The only problem I'm having is the skeg on the bottom of the needle bar. I assume it helps lay the stitch down. The problem I'm having is the skeg leaving an ugly little groove when I start stitching. It's also a problem when I stitch a tight curve or make a 90 degree turn. I've thought of pulling the needle bar off, grinding off the skeg and using a groover to lay out my stitch lines. Are there any other options? Also, which presser foot and needle plate is prefered by you guys for holster making? Thanks! Randy Quote Share this post Link to post Share on other sites
BruceGibson Report post Posted September 15, 2008 Randy, I've got the Toro 4000P, and it does the same thing. Once the boning/molding is done, it's usually not an issue. I've also found that if the little grooves are still visible when it's molded, they can be rubbed out at the same time. I wouldn't worry too much about it. Quote Share this post Link to post Share on other sites
Trevor Report post Posted September 15, 2008 Hi there Randy I have a Toro 3000 and decided to grind off the skeg as you have talked about. It leaves an annoying mark so I decided to get rid of the thing. Sews beautifully now with no marks. If you suddenly decide that you needed the groove just pick up another foot. Remember that if you do grind it off to polish the bottom of the foot nice and shiney with no trace of the skeg. Cheers Trevor "Way Down Under" Quote Share this post Link to post Share on other sites
BOOMSTICKHolsters Report post Posted September 15, 2008 I have a "Tim Taylor Complex" when it comes to guns and machinery, so I can't leave them stock. I ground the stitch setting ridge off of my needle bar and even rounded and tapered the edge of my walking foot so it doesn't leave a foot print. (I also upgraded the servo motor and replaced the lamp's bulb with a brighter model ). As Bruce mentioned you can clean it up while you're boning the leather, but I make enough holsters that I wanted to save some time by skipping that step. If you're gonna make anything from dense materials you should definitely use a stitch groover, but other than that you're good to go. If you're a little squeamish about cutting and grinding on your machine, Artisan sells a needle bar that's already flat on bottom, along with several plates and feet that will meet your needs depending on what you're trying to do. If you sew the holster before you mold and bone it, a stock plate and walking foot will work just fine. If you sew the holster after you shape it, then you'll probably want to use a holster plate and a slimmer walking foot (so you can get right up against the edge of the molding). Quote Share this post Link to post Share on other sites
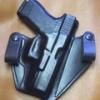
MattW Report post Posted September 16, 2008 I also suffer from the need to change things to my liking. I ground off the keel on the needle foot and reduced the presser foot to a presser "toe" I find it easier to do tricky stitching, stay close to molded areas, and leave a minimal footprint that i incorporate into the border. (I do have replacements handy if needed) The thread is coates 275 in buckskin color Quote Share this post Link to post Share on other sites
esantoro Report post Posted September 16, 2008 I also suffer from the need to change things to my liking.I ground off the keel on the needle foot and reduced the presser foot to a presser "toe" I find it easier to do tricky stitching, stay close to molded areas, and leave a minimal footprint that i incorporate into the border. (I do have replacements handy if needed) The thread is coates 275 in buckskin color Hi Matt, Where do you buy your buckskin Coats? Quote Share this post Link to post Share on other sites
Srigs Report post Posted September 16, 2008 Randy,I've got the Toro 4000P, and it does the same thing. Once the boning/molding is done, it's usually not an issue. I've also found that if the little grooves are still visible when it's molded, they can be rubbed out at the same time. I wouldn't worry too much about it. I have not ground down the foot but have thought about it. But like Bruce said, when you hot wet form it they generally don't show up so I have not. I might grind down the back half of it to reduce the size but that is about it. Quote Share this post Link to post Share on other sites
Randyc Report post Posted September 16, 2008 Thanks for the responces guys. In lieu of removing the needle bar skeg, I wonder if I can possibly adjust the needle bar so the skeg doesn't make such a deep depression? I may have to call Artisan on that one. Randy Quote Share this post Link to post Share on other sites
BOOMSTICKHolsters Report post Posted September 16, 2008 I wouldn't go that route unless you want the material to slip and the stitching to get spaced unevenly. Still, the folks from Artisan know a lot more than me so see what they say about it. Quote Share this post Link to post Share on other sites
Billsotx Report post Posted September 16, 2008 Thanks for the responces guys. In lieu of removing the needle bar skeg, I wonder if I can possibly adjust the needle bar so the skeg doesn't make such a deep depression? I may have to call Artisan on that one.Randy Randy, A while back I saw a thread over there under the sewing machine section about Artisan customer service and they named a guy there that's a wizard with set-ups and trouble shooting. Sounds like he's been down the road more than once. There was a bunch of talk in that thread and everyone was satisfied with customer service. He might be worth the call. I'm thinking about an Artisan and I'm listening to you guys. Keep sharing, I'm all ears. ~Bill Quote Share this post Link to post Share on other sites
esantoro Report post Posted September 16, 2008 Thanks for the responces guys. In lieu of removing the needle bar skeg, I wonder if I can possibly adjust the needle bar so the skeg doesn't make such a deep depression? I may have to call Artisan on that one.Randy I'd also like to know if it's possible to raise or lower the inner presser-foot bar. I don't think the needle bar should be touched at all, as that would throw off the timing or perhaps damage something. There are other adjustments on these machines that are very helpful to know about, especially when using a variety of presser feet and needle plates. I started a thread on some of these adjustments a while back. Ed Quote Share this post Link to post Share on other sites
MattW Report post Posted September 16, 2008 Hi Matt,Where do you buy your buckskin Coats? I order from Ferdco Quote Share this post Link to post Share on other sites
esantoro Report post Posted September 16, 2008 I order from Ferdco I've ordered peasant Coats from Ferdco. Is buckskin the same as peasant or is it a different color? I like the thread color in your pics. ed Quote Share this post Link to post Share on other sites
MattW Report post Posted September 16, 2008 I've ordered peasant Coats from Ferdco. Is buckskin the same as peasant or is it a different color? I like the thread color in your pics.ed Call and ask Cheryl(sp?) if they have any of the thread that Frontier Gunleather uses. We had to order a case last time. Also try Luberto's Sewing Machines Matt Quote Share this post Link to post Share on other sites
Prince Report post Posted September 16, 2008 Would someone please post a pic of the original thing that is causing the problem? I'll be getting one of these machines and I'd like to see if it would interfere with stuff I'll be working on. Quote Share this post Link to post Share on other sites
BOOMSTICKHolsters Report post Posted September 16, 2008 I don't have any pictures of the part before I changed it. If you order directly from Artisan, I'll bet they would work with you enough to sell the machine with the parts you wanted. Quote Share this post Link to post Share on other sites
Randyc Report post Posted September 17, 2008 (edited) I wouldn't go that route unless you want the material to slip and the stitching to get spaced unevenly. Still, the folks from Artisan know a lot more than me so see what they say about it. Thanks, Jeff your correct. After I mentioned adjusting the needle bar, I thought it through and decided that wasn't a good idea. I was busy cuffin and stuffin the bad guys today and didn't get a chance to edit my post. I molded a holster over the weekend and was able to smooth out the indentation made from the needle bar skeg. I may just leave well enough alone. If I do decide to remove the skeg, did you use a dremel tool when you removed yours? Randy Edited September 17, 2008 by Randyc Quote Share this post Link to post Share on other sites
Elton Joorisity Report post Posted September 17, 2008 Not to sound too picky here, but that is not the needle bar. The needle bar is where you put the needle in. What you are talking about is the inside presser foot. I have removed the ridge on mine (Artisan 4000 ) with nothing more than a file and some fine emery cloth and then buffing compound. You can adjust the presser foot tension on the rear of the machine but I only do this when there is a major change in thickness of projects being sewn or with the use of the holster plate. Steve is a great guy to walk you through any problems. Heck he helped me while they were having an earthquake...TALK ABOUT SERVICE!! Quote Share this post Link to post Share on other sites
Randyc Report post Posted September 17, 2008 Not to sound too picky here, but that is not the needle bar. The needle bar is where you put the needle in. What you are talking about is the inside presser foot. I have removed the ridge on mine (Artisan 4000 ) with nothing more than a file and some fine emery cloth and then buffing compound.You can adjust the presser foot tension on the rear of the machine but I only do this when there is a major change in thickness of projects being sewn or with the use of the holster plate. Steve is a great guy to walk you through any problems. Heck he helped me while they were having an earthquake...TALK ABOUT SERVICE!! Elton I'm refering to the needle bar sir. There is a protrusion on the bottom of the needle bar that pushes the stitch down. My issue is not connected to the presser foot. Randy Quote Share this post Link to post Share on other sites
greg gomersall Report post Posted September 17, 2008 Elton is right the only thing sticking out from the bottom of your your needle bar is a needle. Please read your owner's manual closely if you need more clarification. this skeg works like the pricker feet did on alot of the old machines did, to help seat the stitch and yes it can cause problems when starting or turning, your machine will not even notice it missing if your grind it off. I use to have a 205 Adler that had a groove in the needle plate for the bottom stitch to lay in as it moved back, this can be filled in ( i used silver solder) which will help push the bottom sticth up in as well on these machines. Greg Quote Share this post Link to post Share on other sites
Randyc Report post Posted September 17, 2008 (edited) Elton and Greg Thanks for your inpute. After studying my machine and manual, I found my machine has 2 presser feet. The part I refered to as the needle bar is a center groover presser foot that is attached to the needle bar with the needle passing through this foot. The other presser foot is a left side walking foot. The groover at the bottom of that foot directly below the needle bar is the one that is a problem. I think I may just file if off. Randy Edited September 17, 2008 by Randyc Quote Share this post Link to post Share on other sites
greg gomersall Report post Posted September 17, 2008 Grind or file it off. Greg Quote Share this post Link to post Share on other sites
Randyc Report post Posted September 17, 2008 Greg I'm dangerous with a Dremel. Think I will use a hand file!!!! Quote Share this post Link to post Share on other sites
Art Report post Posted September 17, 2008 Hi Randy, As you have found out, part names are important when talking machines. The needle bar is a rod that the needle fits into and by which the needle is propelled up and down. On smaller machines this bar or rod may be adjustable for length and this adjustment is used to time the needle - shuttle/hook relationship. On larger machines this is not usually the case and timing is done by adjusting the shuttle position. The inside presser foot is generally the foot with a hole or slot in it and often the aforementioned skeg on the bottom rear. This part usually attaches to it's own bar or rod and is actuated independently of the needle bar and is also spring tensioned. The purpose of the inside foot is to stabilize the work, assist somewhat (but not much) in the needle feed operation, and to keep the work from flagging as the needle goes down and up. The skeg serves the function of pushing the completed stitch down into the work and additionally similar to a boat causing the stitch to run straight without a lot of operator input. This is only really necessary at high speed, where the operator reaction time might be a lot slower than the machine. Removing the skeg will not cause many problems because of the machine speed we use in leatherwork. When removing this skeg, go slowly with hand tools and relieve any sharp or even semi-sharp edges you might generate (pay attention to side/bottom junctions) and then polish with crocus or a buffer, the smoother, the less chance of marking. Art GregI'm dangerous with a Dremel. Think I will use a hand file!!!! Quote Share this post Link to post Share on other sites
rdb Report post Posted September 17, 2008 As usual, thanks Art for sharing your machine knowledge. I'm no genius at machine sewing, but I kind of like the skeg on my 3000. I usually groove both sides for my stitching, and between the inside presser foot, and the skeg, the stitches are tight, and below the top of the leather. Things I have seen without this approach show wear on the stitches in very little time. They don't look as good either. I sew fairly slow, and the little groover skeg seems to keep the track in the groove. I do have problems at starts, and finishes, and around tight corners, but being careful and slow leaves little marking. Just my half penny... Quote Share this post Link to post Share on other sites