teufelszeug leatherwork
-
Content Count
10 -
Joined
-
Last visited
-
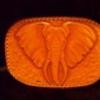
 problem solved. went for option #1. skived a piece of tooling leather as an inlay and glued it together, then just sew it back together and burnished/coated the edges. then i waxxed the hole thing. the customer was happy, even though i had no leather in matching color or dye left.
 -
Hey folks, i've got quite a problem lying on my workbench: a friend of mine wants a 60-70 year old knife sheath to be repaired/restored. it's ripped at the entry, just within the sewing channel and needs to be resewn. normally id simply make a new sheath, but he wants it for the vitrine, so at least it doesnt have to withstand as much as a sheath being used daily. i thought of 2 options: #1: skiving the inside of the entry area a bit and then glueing in a really thin leather inlay. the old leather probably wouldnt survive the skiving because its really dry and the rip would still be visible/open up again while resewing. #2 making a really thin strip of leather to put and glue over the ripped area to cover maybe the first 4-5 holes, approx. 0,4'' wide. would work but change the look and it would be a visible repair. any ideas? i really dont know what to do with this cheers, Jan
-
hey everyone! about one year ago i started off with working leather, because i couldnt find a proper belt and wallet in the shops. i had the crazy idea to have a wallet, belt, knife sheath and pocket knife pouch out of one hide. so i got myself a cowhide and started.... i think it might be intresting for some to see this kinda wallet, because if never seen anything similar so far made out of 3mm tooling leather, even though the work itself is really bad, due to being my first project. the only tools i had at this time were a cutter knife, a ruler, the awl on my swiss army knife, punch pliers, a skiver and one backround stamp (and needles, wax & thread of course). i also didnt put any finish on it... so it already looks quite aged. the hardest part was thinning the leather. used a hand skiver to get it down from 3 mm to slightly under 1.. took ages the "carving"(if you can even call it carving) was done with a cutter knife, a backround stamp AND the ear of a needle i decided on remaking some of the same kind now... using proper tools and better skills. i will most likely use bellies this time, cause i cant afford a splitting machine and they're the thinnest option. even though the work aint good i love the design & functionality of it. any ideas for improvement except for simply working better? cheers
-
Proper Tool For Curved Sewing Channels
teufelszeug leatherwork replied to teufelszeug leatherwork's topic in Leather Tools
you were right on hanging the groover a little more over the edge, works better but there's still some room for improvement... well, maybe i'm just to critycal my edges are absolutely straight and vertical, that actually was the first i was thinking about. i'm still very keen to see how a divider works... ill try it when i get the chance to. thank you pete! -
hey everyone, i ordered a couple of tools for making sewing channels lately, having mixed results. the only one providing decent results is a freehand stitching groover in combination with a ruler for straight lines, but when it comes to parallel channels next to curved edges (like on sheaths) i'm about to freak out: i got myself an adjustable stitching groover (L-shaped blade) and an adjustable creaser (using the freehand groover afterwards to get a deeper channel), both didnt impress me. groover: the metal piece sitting against the leather edge is round, so it tends to slip over the edge and even when working it slowly and carefully not providing a good result because it simply doesnt sit against the edge properly creaser: pretty much the same problem, simply doesnt sit properly on the leather edge because both sides of the tool are equally long... normally the side your making the impression with should be shorter anyway, what are you using for curved sewing channels? i own a copy of "the art of handsewing leather" and there they're using a gouge compass, anyone ever tried that? thanks for your help
-
hey folks! finally i get to post my first couple of pictures in the show off section my little sister had her enrollment ceremony for primary school on saturday, so i took friday off and spent a bit of time one putting together some presents and making a proper belt for myself to wear. the pencil case is made of veg tanned sheepskin. the pouch for the swiss army knife is made of natural veg tanned cow hide and has been treated with some bag kote and atom wax. the belt is made of dark brown buffalo leather, which has also been veg tanned and has a nice pull-up effect to it. that means it gets lighter when flexed. a highlight is the handforged buckle, which was made by a friend of mine. everything has been sewn with artificial sinew. critique and suggestions for improvement wanted
-
i just finished a belt with resolene as the top coat, but i'm not sure whether i like it or not. For once it really seals the leather, it's almost like an armor, so there's no danger of having water stains. But afterwards the leather just doenst really feel like leather anymore, even though i just put on two thin coats of resolene. after putting on the first coat i was quite shocked because the resolene left lots of streaks. when i was finished with the second layer the result was way better, despite you can still make out the streaks when having a closer look. ( applied it with a damp sponge) i also got myself some leather wax containing bees & carnauba wax... but that one's for the bin... water protection not existent, only softens the leather. i guess i have to experiment a little more.. to get a sunbathed look i simply decided to hang the belt outside for a couple of days
-
hello everyone, i've got a problem in finding the right finish for my leather projects: i'm mainly using natural, non-colored & non-finished veg. tanned cow hides. so far i didnt put a finish on my projects because i love the way the leather darkens by sun light & sweat when worn. but after a couple of months i'm really concerned with water stains or some dye my purse absorbed from a new pair of jeans. that's why i decided to put a finish on my next projects, but i dont want to miss out on the "sunbathing effect". so i'm looking for something that still allows the leather to absorb the sun light, but is waterproof and doenst make it look like plastic. is there anything like this on the market or do i have to sun bath my leatherwork prior to putting on a finish? another fact that doesnt make it easier is that i'm living in Germany. and unfortunately we dont have access to all the wonderful leather products you have, we only import a few of the dyes and finishes. here's a list with what is available from our retailers: from fiebing's: resolene, antique finish, bag kote eco-flow: satin-shene, all-in-one stain & finish and we have bees & carnauba wax, plus leather-oil (something similar to neatsfoot oil) i also added some pictures showing the sunbathing effect i'm talking about. thank you in advance! Jan