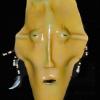
Boriqua Report post Posted July 22, 2015 Hey Everyone So how close can I get into the seam to stitch with a machine. Below is done by hand and is right in the crease. Im pretty sure I cant do that with a machine but I dont know. If you have pictures of a similar project sewn by mahcine that would be AWESOME!! Quote Share this post Link to post Share on other sites
JREESER1 Report post Posted July 22, 2015 With either a right or left pressure foot you can get pretty near that close to the crease. I prefer the left hand foot (it looks like a zipper foot on a home machine). I have vision issues with my right eye and can see the left foot better. I think there is a YouTube video on using a Left Toe on a Techsew 5100/4100. I remember seeing it a while ago. jr Quote Share this post Link to post Share on other sites
Ferg Report post Posted July 23, 2015 If I understand your photo correctly, your are actually sewing the raised front to a flat back, right? I do this all the time. There are feet with an 1/8" side, either left or right, and those can be modified so you do not have any foot on one of the sides. My experience shows me that if you have no foot on one of the sides of the needle it is more difficult for the machine to pull the item being sewn straight. You don't want to get so close that the machine will mark your finish and I do not sew closer to an edge than 1/8" on bags or most wallets. Watch straps are something else. ferg Quote Share this post Link to post Share on other sites
JLSleather Report post Posted November 1, 2016 You "could" do that with a machine, but you'd want to angle the project. With a needle coming straight down on a project which is horizontal (level), teh needle itself would mar the top portion, even if the foot didn't (since the needle would be 'in line' with the hole). You were able to hand stitch your project by bringing the needle in at an angle to the back piece other than 90 degrees. Tilt the table, and a machine will do that. Quote Share this post Link to post Share on other sites
TinkerTailor Report post Posted November 1, 2016 (edited) Develop a pre-form system. First step is basically form a bubble in the top leather, you want it higher than the finished thickness with sloping sides. If you pattern well, and pre-cut the top bigger than the bottom with the right profile to give you the extra leather you need to mold the final shape you can skip this wet molding step. Just carefully glue the edges with the top all bowed out then stitch. You also want your pre-form to have sloped sides to provide machine clearance. You then stitch it. After stitching, re-wet the leather and force the finished mold shape into the pouch. Be careful to keep the backside dry so it stays flat. The bubble of leather you left in the middle during the pre-form will end up being the material you move into the corners. I make formed business card cases that fit 40 or so business cards this way in 4-5oz, as well as molded cases for abus bordo bike locks out if 12 oz. This pattern is a little loose by design as the prototype was difficult to get the cards in and out. The clearance allows you to open it some to see what you are grabbing), however you could push that vertical to right beside the stitch line if you want it tighter. Edited November 1, 2016 by TinkerTailor Quote Share this post Link to post Share on other sites
brmax Report post Posted November 1, 2016 I totally see the point with the single outside presser foot, this particular use also noticed and still a fix concern I have on my Cobra 441 style. I know this style foot was made for a specific use and my general other use is best served with two feet and so I need to get another, the inside foot. I have seen a few with interest, and am going to look at further. good day Floyd Quote Share this post Link to post Share on other sites