bex DK Report post Posted February 15, 2010 I am trying to make a wallet for a friend (a woman's wallet) and one thing I wanted on it was sunflowers. So I found the free Tandy pattern, which turns out to work quite well for my needs. http://www.tandyleatherfactory.com/home/freepatterns/FP0022.aspx?feature=Product_10 The problem is that I can't figure out how they tooled the centers. The outside part with the seeder, I get, but what is the middle done with? I work with limited tools--slowly building up my collection and often make do with what I have unless I really need something. But I went through the tool list to see if I could make more sense out of it that way. My best guess for the centers from the list was maybe F924, but mostly because I can't figure out where else it could have been used. It isn't one I have. Another question left is what the heck did V407 get used for in that design? I happen to have that one, but I can't figure out where it has been used. It left me wondering if the lists were "expanded" to encourage tool purchase by newbies... Even if you don't know how it has been done there, suggestions for doing it would be appreciated. I'm going to have to do a couple test centers to get the feel of it before I hit the wallet, but I am wondering if I might be able to get away with A104. Unfortunately this is the wrong time of year for studying real sunflowers and trying get my own ideas for tooling them. Looking at pictures left me wondering if A100 might be a good choice, but it isn't a tool I have, so I can't experiment. Not sure if it makes sense to buy it right now just to play with it and figure it out, although I am likely to find other uses for it anyway. Suggestions will be appreciated. Yes, I know I sound like an idiot with this question. I sure feel like one anyway. Quote Share this post Link to post Share on other sites
Storm Report post Posted February 15, 2010 I am trying to make a wallet for a friend (a woman's wallet) and one thing I wanted on it was sunflowers. So I found the free Tandy pattern, which turns out to work quite well for my needs. http://www.tandyleat...ture=Product_10 The problem is that I can't figure out how they tooled the centers. The outside part with the seeder, I get, but what is the middle done with? I work with limited tools--slowly building up my collection and often make do with what I have unless I really need something. But I went through the tool list to see if I could make more sense out of it that way. My best guess for the centers from the list was maybe F924, but mostly because I can't figure out where else it could have been used. It isn't one I have. Another question left is what the heck did V407 get used for in that design? I happen to have that one, but I can't figure out where it has been used. It left me wondering if the lists were "expanded" to encourage tool purchase by newbies... Even if you don't know how it has been done there, suggestions for doing it would be appreciated. I'm going to have to do a couple test centers to get the feel of it before I hit the wallet, but I am wondering if I might be able to get away with A104. Unfortunately this is the wrong time of year for studying real sunflowers and trying get my own ideas for tooling them. Looking at pictures left me wondering if A100 might be a good choice, but it isn't a tool I have, so I can't experiment. Not sure if it makes sense to buy it right now just to play with it and figure it out, although I am likely to find other uses for it anyway. Suggestions will be appreciated. Yes, I know I sound like an idiot with this question. I sure feel like one anyway. Morning Bex, Don't diminish yourself...The only dumb question is the one you don't ask!!!!! I have done this pattern before and know what you are talking about. If you have Photoshop on your computer or something similar you can icrease the size of their image and in doing so see more clearly what is going on. I am surprised that they have made the recomendations that they have. The seeder they tell you to use is clearly wrong(you want a smooth sided seeder and not one of the seeders with little rays coming out. As to the V407...I don't think so. Why Linnel would put his name to this is beyond me. When Al Stohlman did a photocarve he did it right. Doing it right is more time consuming but in the end clearer for the person trying to carve it for the first time. This flower center being a prime example. The F924 for the center would be a great guess. I think that the E294 series is just as good or better. You want to rotateThe tool and stamp, shift rotate stamp and so forth. Same for the F924. You will want to bevel down the center circle because it shows itself as a depression. FIll in the center with the F294 or E294 but lighten up the pressure on the impression as you get to the outer edge. Then use the F976 to give that sharp jagged edge around the outside. With the seeder, on the third row in, you might want to try rocking back the seeder top toward the outside of the center thus fading the seeds closest to the center. Now the only thing I can think of use using that modeler in that ambiguous area between the third row of seeds and the edge created by the F976. Maybe the image attached will also help. We have all been here before in varying degrees Bex. It is not like you can drop into your neighborhood Tandy and grab the tool you need. However you could take the Chunnel and pop over to England! HA! Info just in case. Tandy Leather Factory UK #301 - NORTHAMPTON Manager: Roy Fisher Northampton@tandyleather.com Unit 2 Crofton Oak, N Portway Close Northampton , EN NN3 8RD United Kingdom Phone: 1604-647910 Fax: 1604-647951 Toll Free: 0800-085-676 Hope I helped in some way. All the best and good luck. Storm Quote Share this post Link to post Share on other sites
ClayB Report post Posted February 15, 2010 (edited) Hi Bex, The thing about tool lists is that they are usually just suggestions and most times there are other tools that can be substituted that will do just as good a job. Most teachers will encourage you to experiment with the tools you have if you don't have all the ones they used. I think you could achieve pretty good results with many different background tools for the center of the sunflower. Maybe even a combination of different ones for a special texture effect. Jim does an amazing job on sunflowers. He's got a couple more sunflower patterns available for free download on his website There's also a place to contact him from his website. Might not hurt to just ask him how he did it. Nobody could answer that better than he can. Edited February 15, 2010 by ClayB Quote Share this post Link to post Share on other sites
JLSleather Report post Posted February 15, 2010 Wow ... thought I'd pipe in and see if I could help. These boys covered that so well (with pictures, even #&%#%) maybe I'll just shut up Quote Share this post Link to post Share on other sites
bex DK Report post Posted February 16, 2010 Thanks everyone for the responses and encouragement! We have a local leather store with supplies, especially dyes and hides, but not the level of tooling experience. I checked out the pointed to Jim Linnell site. Thank you! The free patterns there include one that used to be on Tandy's site that I used once and failed to keep an extra copy of. I've been kicking myself for it since Tandy dropped some from the site. So I am a very happy person for that one! Additionally, the other sunflower designs are tooled differently than the one on the Tandy site! In several of those, he used the plain seeder on the inner flattened section as well as the outer ring. So that is probably a good way for me to do it. I did write to him on twitter to ask, but who knows if he will have time to respond. So now I just need to practice a few centers on some scrap leather. I'm not so worried about the petals.. that is pretty typical of the work I've been doing otherwise. Thanks again! Rebecca Quote Share this post Link to post Share on other sites
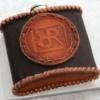
King's X Report post Posted February 16, 2010 I'll chime in and I may be wrong, but it appears that the seedpod is embossed? As for the center, Storm suggested some good tools to use. I use the E294 a lot and really like it. I haven't used the one on the upper left though. Good luck Quote Share this post Link to post Share on other sites
CitizenKate Report post Posted February 17, 2010 Whenever I need to see a "real" something, and that something happens to be out of season, I do an image search on Google. This image might help you figure out how you want to make a sunflower seed pod: http://upload.wikimedia.org/wikipedia/commons/d/d5/Sunflowers.jpg Kate Quote Share this post Link to post Share on other sites
bex DK Report post Posted February 17, 2010 I had googled pics but I couldn't imagine a way to tool what I saw effectively--probably because I am not yet experienced enough and my tool selection is pretty limited. But Jim Linell did answer me on twitter. elktracks @bexDK The center of the sunflower is done with the seed tool for most of it but the center area is stamped down with F924. So now I know what was intended and can decide from there. Quote Share this post Link to post Share on other sites
TimDreamer Report post Posted February 17, 2010 But Jim Linell did answer me on twitter.elktracks @bexDK The center of the sunflower is done with the seed tool for most of it but the center area is stamped down with F924. Good, I'm glad that Jim responded to you. This is the pattern that my wife wants me to put on her Bible cover (that I'll make for her someday) and I had contacted him through his website. He wrote me an email back (I won't copy it here unless you need the rest of the information he gave me.) I have purchased all the tools necessary to do this pattern and I practiced with the F924 a little bit. One recommendation, when you strike it, strike it very lightly as it has a narrow head and is very sharp. This tool will penetrate very deeply and will damage or even downright puncture through your leather. I was using my AS 16 oz Mallet and the tool was tearing up the surface and leaving rough edges until I found the right force to use (very light taps for me.) Basically he's using it as a matting tool to depress the inside of the seed pod. Once I got the right force figured out the results were very nice. I suppose you could make one of your own if you took a nail, flattened the end and then filed V shaped notches to make a shape of a cross or plus sign on the end. It was easier for me to buy the tool...... LoL. Good luck, whatever you do! Looking forward to seeing pics of your project. Quote Share this post Link to post Share on other sites
TimDreamer Report post Posted February 17, 2010 Ok, sorry for the double post but I realized that Jim's email to me had more information that you might find useful. To the mod's.... sorry for the double post. Hello Tim, Hopefully I can give you a general idea on where tools are used on this pattern to help you. The bevellers are pretty easy to understand except for the B204. This tool has vertical lines on it and is used to bevel around the outer edge of the seeds. This is done before the seeds are put in. The lined pear shading tools are used in the flower petals and if you look closely, you can see that they are heaviest against the seeds and fade toward the tip of each petal. The smooth shader is used on the broad leaves. The F924 is used to create the hollow area in the seed centers. The very end of the V707 is used like a stop where the petals touch the seed pod. The F899 matting tool is used around the entire design to feather out the halo created by the beveling. The hair blade is used to put fine lines on the stem of the flower. Hopefully when you look at the carving closely, you will be able to recognize where these tools are used. Good luck, Jim Linnell Store Operations Tandy Leather Factory (817) 872-3136 - office (817) 872-3120 - fax email: jlinnell@tandyleatherfactory.com website: www.tandyleatherfactory.com Quote Share this post Link to post Share on other sites
bex DK Report post Posted February 19, 2010 Thanks! That explains the veiner that I was still wondering about. It'll probably be a bit yet before I get to making it. My health prevents me from doing much at a time and I want to finish my spur straps before I get to the purse. I thought I had them closer to finished, but I messed up the one.. I mirrored the ENTIRE design, including the logo that doesn't work mirrored. I didn't notice it until long after it was finished. That was my punishment for trying to work on designs while down with a concussion from a riding accident. But I like to be prepared for my next project and the tools were worrying me, hence my post here. Not sure if I will get the one for the center or do like it looks like Jim did on some of his OTHER sunflower patterns--he used the seeder on the inside section as well, but seemed to have flattened it first, so it was still recessed and the design less prominent. I don't have lined pear shaders so will just make do with the smooth... I am sure I can make something that looks okay anyway. But my biggest challenge is casing. I did finally get some decent burnishing on this last piece for my spur straps... I have to let the leather dry a lot more than I feel like I ought to. I need a few more tools for the horse part of the planned design for that wallet and probably a bit of practice too. I got the figure carving finesse book for xmas and it made me want to invest far more than i can afford in tools. The hard part is deciding which ones to prioritize! Quote Share this post Link to post Share on other sites