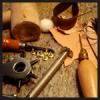
Urshag Report post Posted May 4, 2011 I have bought the two types of embellishments in the photos below. I want to attach them to the the front flap of a leather pouch. In both pictures, the top one is right side up and the bottom one is the underside of the embellishment. The question is, how to attach them? Glue isn't going to be strong enough on its own to do the trick I am thinking. I was planning on using thread and sewing them onto the leather through a few key spots of the embellishments. But, should I use glue as well? And if so, what kind of glue? The first one is a stamping and is hollow beneath the structure, so it would need to be a glue that would "fill in" the stamping. The other one is flat on the bottom, so then again, what kind of glue is best? OR... is there another method that I am not thinking of that would be better for attaching them to the front of the flap of the leather pouch? Any suggestions would be appreciated! Dennis Quote Share this post Link to post Share on other sites
wildrose Report post Posted May 4, 2011 I would rivet the top one on (if you look on the left and right sides, near the bottom, it has small circular holes that would be a good spot for that); and glue the bottom one. That's me! As to glue, probably a "white crafters glue" like Leather Weld. Sewing is certainly an option though. Quote Share this post Link to post Share on other sites
Tree Reaper Report post Posted May 4, 2011 (edited) You could frame them in leather then sew the leather borders trapping them inside. Edited May 4, 2011 by Tree Reaper Quote Share this post Link to post Share on other sites
Urshag Report post Posted May 4, 2011 Thanks for the fast replies! I should have included the dimensions of the embellishments, but the holes are too small for any rivets I have ever come across. Otherwise that would have been a great idea! covering the edges by using a leather frame unfortunately would defeat the effect I am looking for. There was a post in march of someone making a leather pouch that has a similar look: http://leatherworker.net/forum/index.php?showtopic=30281 I can't tell by the photo of the underside of the flap if he sewed it on or if the embellishment had metal brads that were punched through and bent over. Would e6000 glue (If anyone has any experience with it.) be a good choice for filling in the hollows of the stamping in the top embellishment? Thanks! Dennis Quote Share this post Link to post Share on other sites
Ladykahu Report post Posted May 4, 2011 I saved and zoomed in on the link you gave, and I am pretty sure I can see stitch holes around the edge in a few places. I am also looking at using some of these sort of embelishments soon (they are in the post) so am keen on answers you get as well. Natalie Quote Share this post Link to post Share on other sites
BIGGUNDOCTOR Report post Posted May 5, 2011 Are these plated or solid metals, and if so what are they? Brass, copper? If they are brass, or copper, you can solder a threaded stud to them and screw them down. If they are plated potmetal, you may be screwed in the wrong way. If they are plated steel you can still solder the stud on as the plating will facilitate a good joint. Don't know what your skills, or tool collection looks like, but a plate could be attached to the entire bottom, and either sawed to shape with a jeweler's saw, or filed to fit the profile. The plate could have tabs, or be threaded You can make rivets out of wire easy enough. Rivets do not have to be store bought. Quote Share this post Link to post Share on other sites
Urshag Report post Posted May 8, 2011 OK, well I went ahead and made the pouch. I've attached several photo's below. I sewed the embellishments on and then painted the thread with an antique gold acrylic paint. I'm happy with how it came out but I'm also excited to make the next one with some changes and improvements. I made it with a buckle, but the whole buckle assembly is attached at the top with a snap so it has the buckle 'look" but has the snap convenience. Quote Share this post Link to post Share on other sites
Ladykahu Report post Posted May 8, 2011 Wow, that looks great! Good idea with painting the thread... I might have to 'borrow' that when I do mine :-) Not sure about the size of your buckle, its a little overpowering for the corners, but I presume this is quite a small pouch? hard to tell with nothing for comparision Natalie Quote Share this post Link to post Share on other sites
Urshag Report post Posted May 8, 2011 Wow, that looks great! Good idea with painting the thread... I might have to 'borrow' that when I do mine :-) Not sure about the size of your buckle, its a little overpowering for the corners, but I presume this is quite a small pouch? hard to tell with nothing for comparision Natalie The dimensions are: 4 1/2 inch wide across the front 4 1/4 inches tall 3 inches wide across the side Thanks for the compliment! Dennis Quote Share this post Link to post Share on other sites
wildrose Report post Posted May 9, 2011 Wow! Gorgeous! You'd did a fantastic job with those, and the bag came out great. Quote Share this post Link to post Share on other sites
Urshag Report post Posted May 9, 2011 Wow! Gorgeous! You'd did a fantastic job with those, and the bag came out great. Thanks! I appreciate the encouragement! Quote Share this post Link to post Share on other sites
BIGGUNDOCTOR Report post Posted May 10, 2011 Instead of thread, you could also use brass wire to sew them on with. Quote Share this post Link to post Share on other sites
Urshag Report post Posted May 10, 2011 Instead of thread, you could also use brass wire to sew them on with. I like that idea, the brass wire would match the embellishment. My only concern would be the underside. The only way I can think of fastening the wire would be to twist the wire then fold it down against the flap. But I wonder if it would scratch the finish of the leather on the front of the pouch. Dennis Quote Share this post Link to post Share on other sites
BIGGUNDOCTOR Report post Posted May 11, 2011 Once you were done you could glue a patch of lining over the backside. With some low temp solder you could solder the wire to keep it all together, and smooth it out. There are also some good epoxies out now. But with wire, once it is bent, it won't unwind like thread will, so I would lean towards the lining glued over the whole mess to provide a smooth surface. Quote Share this post Link to post Share on other sites
Urshag Report post Posted May 11, 2011 Once you were done you could glue a patch of lining over the backside. With some low temp solder you could solder the wire to keep it all together, and smooth it out. There are also some good epoxies out now. But with wire, once it is bent, it won't unwind like thread will, so I would lean towards the lining glued over the whole mess to provide a smooth surface. I've never put a lining on anything before. Are there any good tutorials about what kind of material to use and how to put a lining on something? Dennis Quote Share this post Link to post Share on other sites
BIGGUNDOCTOR Report post Posted May 12, 2011 I am in the same boat, but I would think that a thin lining leather could be contact cemented onto the back. Try a forum search for "lining" and see what comes up. Quote Share this post Link to post Share on other sites