


silentghost
-
Content Count
13 -
Joined
-
Last visited
-
Very, very nice. That is a beautiful bible cover,
-
Thanks for the reply. I really appreciate it.
-
Just out of curiosity, I have just gotten into airbrushing the dye onto my leather. Wish I had done this sooner! What do ya'll use to clean up your airgun parts with? I am using the Feibings dye in various colors, and just wondered when you clean up your gun and all that good stuff, what do you use to do it? Thinner? or.... Thanks in adavance! I have the Badger 155 Anthem if it matters.
-
What Am I Doing Wrong.
silentghost replied to silentghost's topic in Gun Holsters, Rifle Slings and Knife Sheathes
Thanks again for all of the replies and suggestions. I have some new leather on the way and will try the boning techniques from above. -
What Am I Doing Wrong.
silentghost replied to silentghost's topic in Gun Holsters, Rifle Slings and Knife Sheathes
Thank you everyone for the replies. I will give those a try and see how it goes. Thanks again! -
In cannot for the life of me get my holsters (granted I am newer at this) to have that nice detailed look when I go to wet form them. I get the leather wet and I try and try to get nice definition of all the various creases and lines and such, but I just can't get it to look right. What am I doing wrong? Perhaps the quality of the leather is the concern (Got from Tandy)? Maybe I am not just working it long enough? Leather to thin or too thick (7-8 ounce)? Any suggestions someone may have for me would be greatly appreciated.
-
I think I understand what you are saying. Now the only problem will be actually doing it Thanks for the information!
-
I am curious how you get that roll that runs around the edges of your seat.
-
Thanks for the reply Leatheroo. The second see picture is actually pre burnishing/sanding the edges. The guy I was making it for wanted to see it before it was all done. The edges didn't turn out too bad, but I still have a long way to go. Thank you for the advice, it is very much appreciated!
-
Well, I've been a long time reader, learned lots of stuff. Figured I would finally post up my very first seat. I would like honest critiques good or bad please. I ran into several problems on this one. (obviously) That being said, I have several questions for some of you guru seat guys. I used a premade pan for this one. Put in 1 inch of marine grade foam and 1 inch of neoprene foam (Customer wanted more padding) I thought I had everything good to go, but realised when I went to wet form the top cover that I had drastically stepped out of my talent abilities. I was using 7-8 ounce pre-dyed leather. I am hoping that some of ya'll here can let me know where I went wrong, give me some pointers. I didn't like the way this one turned out, and even though I did this one for free, I kept it and made another one which I think turned out much better, but still needs some work. My biggest question I guess I have, is how do you get a good top cover shape that will fit once you wet form it to the foam? It is demoralizing to say the least when you spend all that time tooling, just to realise your cover is too small to fit. On to the pictures. My second attempt. Sorry I only have one picture of this one, same steps involved, removed the extra padding and just went with 1 inch neoprene foam. I just left ALOT more leather on the sides and cut it off after I sewed it up. (I really need to figure out the whole lacing thing, but the customer wanted stitching so...he also wanted a rough finish so I definitely gave him that!!! Thanks for looking
-
Ruger Single Six Holster
silentghost replied to Travis Fry's topic in Gun Holsters, Rifle Slings and Knife Sheathes
I think it looks really good, especially if this is your real first attempt at carving. -
1911 and 2nd amendment holster 3.jpg
silentghost commented on LastingLaserImpressions's gallery image in Our Leatherwork Galleries
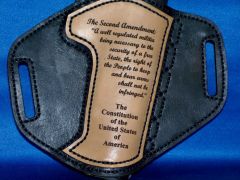 That is awesome.
 -
Those are very nice!