Jump to content
Sign in to follow this  
Toolingaround

Oops! An Alternative To Dye It Black

Recommended Posts

Hi Everyone

I am so wet behind the ears in leather work that I am dripping but I have done a lot of other artwork.

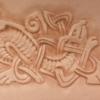
I came up with an alternative to the "dye it black" when you have an oopsy option. This is espeshally good for the "crap it turned out too dark!" order of oops. You all know that horrible dead brown I am talking about when your resist failed, you rushed things, your antique is blotchy and smeared and the color turned out like dog doo doo. Or maybe it only happens to me...... anyhow here is an idea before you pitch it in the trash. I can't believe I am actually showing this as my first piece on leatherworker.net but in the interest of helping someone else.........cringe here it is ( don't look at the swivel knife cuts or the edge or the design). Since this was destined for the trash anyway and my antiquing experiment failed horribly (sorry no before picture) I decided to do a copper verdigris finish on it. It is easy, cheap ( I spent four bucks at Wally world) and will happily put together a photo tutorial on how to do it if anyone is interested. I will use a better camera too.

Cheers,

Toolingaround

post-24535-041118200 1322767130_thumb.jp

Share this post


Link to post
Share on other sites

Hi Folks

My appologies, I realized latter I should have put this in the dyes and finishes section. I think I will do a tutorial on this anyway and a couple of other ideas for damaged projects even though I got no replies. The wretched tooling job and my bad iPod camera (I used auto enhance which made it look shinier and less like metal) don't do the actual technique justice. I will post it in dyes and finishes when I get it done. I will try to get this up sooner rather than latter as there is nothing worse than goofing up a Holliday gift at the last minute but if life interferes and I don't get it posted please don't be shy to ask me.

Cheers to you all 😊

Toolingaround

Edited by Toolingaround

Share this post


Link to post
Share on other sites

Hi Folks

My appologies, I realized latter I should have put this in the dyes and finishes section. I think I will do a tutorial on this anyway and a couple of other ideas for damaged projects even though I got no replies. The wretched tooling job and my bad iPod camera (I used auto enhance which made it look shinier and less like metal) don't do the actual technique justice. I will post it in dyes and finishes when I get it done. I will try to get this up sooner rather than latter as there is nothing worse than goofing up a Holliday gift at the last minute but if life interferes and I don't get it posted please don't be shy to ask me.

Cheers to you all 😊

Toolingaround

I think you've come up with a nice solution to a bad situation. It reminds me of the "nature" finishes we did back in the 70s where the depressions left by the stamps were left natural.

Share this post


Link to post
Share on other sites

I think you've come up with a nice solution to a bad situation. It reminds me of the "nature" finishes we did back in the 70s where the depressions left by the stamps were left natural.

Hi Sylvia

Thanks eh

Nature finish, that sounds like fun to play around with too.👍

I hope to do three related techniques for the tutorial that of course can also be used on non goofed up projects as well LOL

Cheers, Toolingaround

Share this post


Link to post
Share on other sites

Join the conversation

You can post now and register later. If you have an account, sign in now to post with your account.
Note: Your post will require moderator approval before it will be visible.

Guest
Reply to this topic...

×   Pasted as rich text.   Paste as plain text instead

  Only 75 emoji are allowed.

×   Your link has been automatically embedded.   Display as a link instead

×   Your previous content has been restored.   Clear editor

×   You cannot paste images directly. Upload or insert images from URL.

Sign in to follow this  

×
×
  • Create New...