RoosterShooter Report post Posted September 30, 2012 I have recently become sick and tired of paying $150+ for a good holster for my pistols. My main interests with leatherwork is holster making with maybe a few accessories, bags, etc .... I'm really confused about what tools I will need for hand stitching my own leather holsters. In the past few weeks I have spoken to several different people at Tandy Leather, and each of them gives me a different set of tools to buy, so I just leave without buying anything! I just keep scratching my head and thinking "The other guy told me I'll need this and that ... not that and this!!!". See my point? So, what are the tools that I will need to hand stitch my own 'Professional Style' holsters? As a side note, one individual told me that the best way to hand sew leather for holsters is to use a Dremel tool press with a 1/16" bit to drill the holes. He said that this makes a very professional holster, and with hand stitching, you have more options for stitches versus using a machine. What are your thoughts? What tools will I need? Quote Share this post Link to post Share on other sites
Chief31794 Report post Posted September 30, 2012 There is an excellent book by Al Stohlman, "The Art of Hand Sewing Leather". It is old, but still very valid. There are a couple of different ways to sew. The dremel Tool with 1/16th" bit is one, but it is not what the purists recommend. They recommend, a awl with a single diamond blade, groover (needed regardless), harness needles (needed regardless), waxed linen thread and a lot of sweat labor. Another method of making the holes is with a diamond punch, I think it's better than the drill bit but not as good as the hand awl. Some people punch holes with a 00 punch, I wouldn't recommend that method, it doesn't look very good at all. To do it with an awl it takes a lot of practice and developing the technique. I would get the book, study it, then decide. I'm sure some other folks will chime in. Chief Quote Share this post Link to post Share on other sites
electrathon Report post Posted September 30, 2012 There are a lot of ways of doing the same thing, it can get very confusing. TO START, and be cheap, but some thread, needles and a LARGE sewing maching needle. Tandy has all three, you will spend less then $15 dollars. Put the needle in your dremil and use it as a drill bit. You can push it through a half inch of leather fairly easily. You will be off and running. Quote Share this post Link to post Share on other sites
RoosterShooter Report post Posted September 30, 2012 Also, several of the workers recommended the Pro Stitching and Lacing Pony. Should I go ahead and get that, knowing that I might need it in the future? Quote Share this post Link to post Share on other sites
electrathon Report post Posted September 30, 2012 I have a couple stitching ponies and rarely use them. I usually work off the table or my lap. If you want to use an awl then you will need a pony, otherwise you can work without one. Quote Share this post Link to post Share on other sites
TwinOaks Report post Posted September 30, 2012 You do need to realize that you're buying a cow for free milk, right? Absolutely NEED.......leather, needles, thread, work space, something to cut with, and an idea. Being completely new to it, Al's book would serve you well. You can get it at Tandy, or online as an E-book. You can punch holes with a finishing nail, but an awl does a better job. You can sew with one needle, but two makes it faster. You can use a fork as a stitch spacer, but an overstitch wheel does a better job and will make the threads look better in the long run. Good quality glue or contact cement makes it much easier to keep things in place while you're stitching. You can use a stitching pony if you want, but I've always just sat back in a chair and shoved needles through the holes I'd punched...with an awl. Now you need to decide just how you want to color the leather, and how to seal/finish it. Oh, we can't forget the edges!!! Need to smooth and slick, then dye and finish those too. You will probably find that you are paying a premium for your holsters and that there are alternates available for less. Or...if you are getting some nice fully tooled holsters, perhaps even complete rigs, you may find that the holster maker is getting $150 for the holster because that's what the market will bear....not what the holster maker actually wants to charge. Most of us started this as a hobby and sell things to be able to get more leather...so we can do more projects....to sell more....repeat. A brief breakdown for you - (and I'm looking at Springfield for the prices) 1 sq ft of leather - $12 +shipping - should be enough for one holster if you lay it out right.....you might want to get more than one unless you have your method down pat. Or you could buy a shoulder, double shoulder, side, etc.....it's priced per foot, based on quality of the leather. Upwards of $150 for a side of decent quality leather is a good 'starting point' when considering your budget. awl - $11.50 needles and thread - ~$5 (I prefer regular needles I can get at walmart, and waxed linen thread from hobby lobby) all in one finish because it's pretty easy to use - $9 - $12 depending on where you get it. sand paper for your edges - cheap fork from your kitchen - free. Overstitch wheel - razor knife - cheap, if you don't have one laying around already. TIME - relatively cheap, or incredibly expensive.....it kinda depends on what else you could be doing with it. Expect to spend at least a couple of hours for your holster. Time per project decreases as you get the hang of it. Now, do you want just plain leather, or do you want fancy tooling? Add more tools and time if you want fancy. There's also a 'basic construction starter set' at SLC, that runs $230 and will get you pretty much all the tools you need to get started. Be wary of asking salesmen or saleswomen what you should buy. It's their job to sell you things. Quote Share this post Link to post Share on other sites
RoosterShooter Report post Posted September 30, 2012 Be wary of asking salesmen or saleswomen what you should buy. I see what you mean. Thinking back on it, all of them mentioned a few core tools that would be needed. 1) Leather knife or very sharp utility blade 2) Edge beveler 3) Burnishing tool 4) Gouge tool 5) Edge slicker 6) Bone Folder (since I will be wet forming leather) 7) Needles 8) Waxed Thread 9) Awl 10) 7 to 9 oz. veg tan leather 11) die 12) glue 13) resolene 14) edge dressing Does this sound like a good core set of tools, other than the obvious learning materials? Thanks Quote Share this post Link to post Share on other sites
TwinOaks Report post Posted September 30, 2012 I see what you mean. Thinking back on it, all of them mentioned a few core tools that would be needed. 1) Leather knife or very sharp utility blade 2) Edge beveler 3) Burnishing tool 4) Gouge tool 5) Edge slicker 6) Bone Folder (since I will be wet forming leather) 7) Needles 8) Waxed Thread 9) Awl 10) 7 to 9 oz. veg tan leather 11) die 12) glue 13) resolene 14) edge dressing Does this sound like a good core set of tools, other than the obvious learning materials? Thanks To do it on the cheap, drop the burnishing tool, edge slicker, bone folder, edge dressing, and gouge tool. You can use the handle of the edger for slicking (you can use a variety of mediums, or just use saliva....yes, spit. The enzymes in saliva do a nice job on activating the collagen in the leather fibers and getting it to slick up). Look up the edge finishing tutorial by Bob Park (Hidepounder) in the 'How Do I Do That' section. That should address the edge dressing for you. In place of the 'bone folder', use a spoon. Don't forget that it has a handle, which can be used for small areas. A large serving fork can be used to lightly scribe a stitch line by hanging one tine off the edge and lightly dragging the next one on the surface of the leather. Personally I use an adjustable creasing tool....but I don't adjust it any, I just use the same spacing all the time. This will put your stitch line a consistent distance from the edge. Another way to do it is build large, and trim the edge after you've stitched. Unless it's on small items, I don't use the gouge. I use a sewing machine for most construction, but when I hand stitch, I still don't cut a groove. With waxed linen (provided it isn't the dry rotted junk from walmart) you get about 20-25lb tensile strength. That's strong enough to pull it tight to the leather, and it will lay flat. You can always run over it with something if you need it to lay flat. The important part is that on anything that needs strength, I prefer to leave as much leather under the stitch as possible....so why cut a groove? Take a look at some of the holster work by Katsass - completely hand stitched, using an awl, two needles, thread, and a pair of pliers (to pull the needles through the holes). Spend some more time reading in "holsters, et. al" for tips on molding. Quote Share this post Link to post Share on other sites
RoosterShooter Report post Posted September 30, 2012 Thanks for the tips. It looks like I have my afternoon cut out for me in reading! Quote Share this post Link to post Share on other sites
katsass Report post Posted October 1, 2012 (edited) From the grumpy old guy: I agree with everything that TwinOaks says --- except to add that I'd include a #6 overstitch tool -- NOT one of those multi-wheel gadgets, but a single, good overstitch to mark stitch length, and for a final run over the stitching when done (hence the name - OVER stitch) I'd add a bar of Neutrogena (clear) bar soap. It's a glycerin based soap, used when burnishing edges. Now, in my time I've licked a lot of leather -- I now use a damp sponge to moisten my edges, (doing that I also stopped getting a strange flavor to my beer) then I wet a finger and rub it on the soap, then on the (pre-moistened) edge to be burnished. It makes burnishing those edges soooo much easier. Needles should be no larger than a #0 (I use a #1) HARNESS needles, oh, and add in a chunk of beeswax. Mike P.S. I don't generally use a stitching pony - except when teaching others to stitch. Edited October 1, 2012 by katsass Quote Share this post Link to post Share on other sites
RoosterShooter Report post Posted October 1, 2012 (edited) From the grumpy old guy: I agree with everything that TwinOaks says --- except to add that I'd include a #6 overstitch tool -- NOT one of those multi-wheel gadgets, but a single, good overstitch to mark stitch length, and for a final run over the stitching when done (hence the name - OVER stitch) I'd add a bar of Neutrogena (clear) bar soap. It's a glycerin based soap, used when burnishing edges. Now, in my time I've licked a lot of leather -- I now use a damp sponge to moisten my edges, (doing that I also stopped getting a strange flavor to my beer) then I wet a finger and rub it on the soap, then on the (pre-moistened) edge to be burnished. It makes burnishing those edges soooo much easier. Needles should be no larger than a #0 (I use a #1) HARNESS needles, oh, and add in a chunk of beeswax. Mike P.S. I don't generally use a stitching pony - except when teaching others to stitch. That was going to be my next question. I read where a lot of guys use beeswax, and I have that in abundance. I raise my own bees, and have around 100+ pounds of it lying around that I've accumulated over the past 5 or 6 years. Beeswax is something I DO have plenty of. At one time I sold it at the local Farmer's Market for candlemaking, but it got to be too much of a hassle. Edited October 1, 2012 by RoosterShooter Quote Share this post Link to post Share on other sites
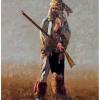
Deliveryboi Report post Posted October 2, 2012 (edited) This is an inventory list for Tandy Leather that I have made and am currently working towards. My father owns a boot shop, so I've got access to all I need until I can afford my own. Item # Tool Price 8170-00 Basic Seven Tool set $40 8170-99 Basic Stamping Set $20 3607-00 Wing Divider $16 3003-00 Mini Punching Set $12 3230-00 Pro Rotary Punch $48 3120-03 Heavy Duty Oblong Punch 3/4" $34.40 3120-04 Heavy Duty Oblong Punch 1" $38.40 8077-04 Keen Edge Beveler size 4 $16 3080-00 Strip and Strap Cutter $20 3081-00 Strap Cutter replacement blades $3.20 5 pack 32401-00 Delux Wood Tool Rack $40 8105-00 Delux Snap-All/Rivet Setter Set $26.40 Prices are accurate according to wholesale price. If you have an Elite account with Tandy Leather you'll get it cheaper, or you'll pay more if you're purchasing retail. P.S. I make quality holsters with just the tools listed above. Both belt and shoulder rigs. This photos my personal rig, but I've done some much fancier work as of late. Edited October 2, 2012 by Deliveryboi Quote Share this post Link to post Share on other sites
Curley Fryes Report post Posted October 2, 2012 This is an inventory list for Tandy Leather that I have made and am currently working towards. My father owns a boot shop, so I've got access to all I need until I can afford my own. Item # Tool Price 8170-00 Basic Seven Tool set $40 8170-99 Basic Stamping Set $20 3607-00 Wing Divider $16 3003-00 Mini Punching Set $12 3230-00 Pro Rotary Punch $48 3120-03 Heavy Duty Oblong Punch 3/4" $34.40 3120-04 Heavy Duty Oblong Punch 1" $38.40 8077-04 Keen Edge Beveler size 4 $16 3080-00 Strip and Strap Cutter $20 3081-00 Strap Cutter replacement blades $3.20 5 pack 32401-00 Delux Wood Tool Rack $40 8105-00 Delux Snap-All/Rivet Setter Set $26.40 Prices are accurate according to wholesale price. If you have an Elite account with Tandy Leather you'll get it cheaper, or you'll pay more if you're purchasing retail. P.S. I make quality holsters with just the tools listed above. Both belt and shoulder rigs. This photos my personal rig, but I've done some much fancier work as of late. Nice work "D". I hope my cowboy rig comes out as good as your rig did. Quote Share this post Link to post Share on other sites
Deliveryboi Report post Posted October 2, 2012 Nice work "D". I hope my cowboy rig comes out as good as your rig did. Thanks Curley, its a very very comfortable setup. I won't be using it much tho, as I made it with latigo. The Chromium Salts used to tan Latigo are hard on the finish of firearms, so I'll only use it until I can make a new one out of Herman Oak from Sheradin. I figure it doesn't matter much to use it right now, as I eventually intend to matte finish my firearm anyway hah. Quote Share this post Link to post Share on other sites
St8LineGunsmith Report post Posted October 6, 2012 (edited) Sending a PM you can save some money buying from harbor freight tools for certain types of tools you can get a good stitching awl from them for cheap utility knives and shears for cutting patterns and leather glue for gluing the seams leather punches. they have dividers for making the stitch line. You can also save money by shopping with springfield leather company http://springfieldle.../14/Hand-Tools/ and the tools they sell are high quality I would invest in a diamond chisel at least four prong and a buck stitching chisel a 4 in one hole punch you will want to get a overstitch set for perfect stitch spacing a stitching groover is not necessiary but sure makes a good looking stitching line. you can learn how to hand stitch, make buck stitch, loop lacing and double loop lacing as well as other tutorials here https://www.tandyleatherfactory.com/en-usd/home/infoandservices/Leathercraft-Videos/Leathercraft-Videos.aspx you can also make your own stitching pony for cheap I always use a stitching pony I but I don't like the ones tandy sells I would make a floor model where you can anchor it with your feet at a height you can sit and stitch A stitching pony makes stitching much easier, frees up both hands because you will need them and makes it easier to hold your work steady and rigid it also works good for clamping your leather parts together when gluing to keep the punch holes aligned. edge slickers, burnishers leather creasers are tools you can make. Edited October 6, 2012 by St8LineGunsmith Quote Share this post Link to post Share on other sites
Redrock64 Report post Posted November 7, 2012 Find a copy of John Bianchi's "The art & secrets of Advanced Western Holster Making" It was sold by tandy a few years ago but it is still available. Most on this site don't like to admit it, but most have learned from his teachings, just look at there designs they are mostly clones of what He has been creating for decades. The DVD is a value for making western holsters all the way to modern semi-auto holsters. If you are going to learn why not learn from the best, someone who has been very sucessfull. Then take what He teaches and come up with your own design and signature look. Quote Share this post Link to post Share on other sites