Jump to content
Sign in to follow this  
esantoro

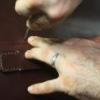
presser foot problems maybe?

Recommended Posts

I've been having some difficulty getting good-looking stitches when stitching 2 oz suede to the flesh side of 5/6 oz latigo. Top and bottom tension seem to be fine, as neither thread is being pulled to the surface. The top stitches don't seem to lie down nicely.

I'm using a size 24 needle and 207 thread. There isn't a problem when I stitch two or more layers of the 5/6 oz latigo, just when I'm stitching the suede lining onto one layer of 5/6 oz. I know that some have said in the past that 207 is too thick a thread for such leather, but this is the size I need when stitching together most of my briefcase parts. I would hate to have to go down to 138 whenever I need to do some of the thinner trim.

I may have found the problem but am not sure:

Does it seem plausible that a lighter duty, narrower presser foot may be the problem. Today, for the sake of experimentation, I switched to the original much thicker heavy-duty left presser toe that came with the machine, and it seemed to solve all my problems, but I'm not sure why that would make much of a difference. I'll experiment a bit more.

Thanks,

Ed

Share this post


Link to post
Share on other sites

Hi Ed,

When using smaller feet and lighter material it may be necessary to cut back on the presser foot pressure/tension. The bigger foot will have a larger area in contact with the material and can distribute that pressure well, whereas with the smaller foot the area is reduced considerably and the spring is still exerting the same pressure in a smaller area maybe compressing the leather too much or pulling it a bit. If you like the little foot (you are not alone, I don't really love the Artisan foot that came with mine) try backing-off the pressure foot tension screw on top of the machine here:

Presser_Pressure.jpg

I use this double foot for almost anything and it distributes the pressure quite evenly.

Double_Foot.jpg

I got this from Steve at Artisan at one of the shows.

Art

I've been having some difficulty getting good-looking stitches when stitching 2 oz suede to the flesh side of 5/6 oz latigo. Top and bottom tension seem to be fine, as neither thread is being pulled to the surface. The top stitches don't seem to lie down nicely.

I'm using a size 24 needle and 207 thread. There isn't a problem when I stitch two or more layers of the 5/6 oz latigo, just when I'm stitching the suede lining onto one layer of 5/6 oz. I know that some have said in the past that 207 is too thick a thread for such leather, but this is the size I need when stitching together most of my briefcase parts. I would hate to have to go down to 138 whenever I need to do some of the thinner trim.

I may have found the problem but am not sure:

Does it seem plausible that a lighter duty, narrower presser foot may be the problem. Today, for the sake of experimentation, I switched to the original much thicker heavy-duty left presser toe that came with the machine, and it seemed to solve all my problems, but I'm not sure why that would make much of a difference. I'll experiment a bit more.

Thanks,

Ed

post-18-1189965953_thumb.jpg

post-18-1189966002_thumb.jpg

Share this post


Link to post
Share on other sites

Hi Art,

I'll try backing off on the presser foot tension, but I think I already have it backed off quite a bit. I was thinking of uploading pics earlier but was lazy. I'll do it a bit later today. I think that perhaps the narrow presser foot is also made out of a lighter metal than is the one you have. Your's looks as if it is made out of tempered steel, as is the original presser foot that came with the machine.

Now what I have set up is the original large left presser toe (I had the right side of the original presser foot cut off) with a narrow center walking foot (it's easier than with the original wide center foot to gauge 1/8" from the edge). But to tell the truth, I think the nicest stitching is with the original toe/foot and original wide center foot for the precise reason you mentioned, more weight/mass distributed onto the leather.

By the way, Art, what is that silver knobby thing protruding from your lube something that comes standard or something optional? Mine didn't come with it, and when I use the lube pot, The lubricant gets a bit messy.

Thanks, again, for the tutorial,

Ed

Hi Ed,

When using smaller feet and lighter material it may be necessary to cut back on the presser foot pressure/tension. The bigger foot will have a larger area in contact with the material and can distribute that pressure well, whereas with the smaller foot the area is reduced considerably and the spring is still exerting the same pressure in a smaller area maybe compressing the leather too much or pulling it a bit. If you like the little foot (you are not alone, I don't really love the Artisan foot that came with mine) try backing-off the pressure foot tension screw on top of the machine here:

Presser_Pressure.jpg

I use this double foot for almost anything and it distributes the pressure quite evenly.

Double_Foot.jpg

I got this from Steve at Artisan at one of the shows.

Art

Share this post


Link to post
Share on other sites

Here are the pics.

Ed

Hi Ed,

When using smaller feet and lighter material it may be necessary to cut back on the presser foot pressure/tension. The bigger foot will have a larger area in contact with the material and can distribute that pressure well, whereas with the smaller foot the area is reduced considerably and the spring is still exerting the same pressure in a smaller area maybe compressing the leather too much or pulling it a bit. If you like the little foot (you are not alone, I don't really love the Artisan foot that came with mine) try backing-off the pressure foot tension screw on top of the machine here:

Presser_Pressure.jpg

I use this double foot for almost anything and it distributes the pressure quite evenly.

Double_Foot.jpg

I got this from Steve at Artisan at one of the shows.

Art

presserfeet.jpg

topmach.jpg

post-853-1189969763_thumb.jpg

post-853-1189969773_thumb.jpg

Share this post


Link to post
Share on other sites

Hi Ed,

Them's thread strippers and I use them to remove the excess oil from thread coming out of the lube pot. Size 346 can pull a bunch of lube out with it and it dribbles off the primary thread tension and generally gets all over; and this solves that little problem. I purchased the whole pot from Ferdco and it is for the 441. I had to do a little grinding to get the pot to fit on the bigger 4000P, but it only took about 15 seconds (belt grinders work great). This pot has two strippers in case you want to lube a bobbin without unthreading the primary. You get a much more even thread feed with this setup.

Ferdco_Pot.jpg

Ron might just sell the strippers but the whole setup wasn't that expensive.

The Campbell uses a little different setup with some BIG strippers, probably more so because they are the also used for tension, the Campbell uses timing to stop and lock thread when it needs to and these big strippers apply any tension needed to stop any inertial problems. Notice a stripper before the thread goes into the pot and after it comes out. The one out of the pot strips any excess lube. You can buy these parts from Campbell also.

Campbell_Pot.jpg

Art

Hi Art,

By the way, Art, what is that silver knobby thing protruding from your lube something that comes standard or something optional? Mine didn't come with it, and when I use the lube pot, The lubricant gets a bit messy.

Thanks, again, for the tutorial,

Ed

post-18-1189972376_thumb.jpg

post-18-1189972389_thumb.jpg

Share this post


Link to post
Share on other sites

I'd like to look into getting those thread wipers.

How do they connect to the lube pot? Are they glued on, with the hole in the lube pot (where the thread exits) no larger than that shown in the pic of my lube pot, or must one drill a larger hole and secure the wipers somehow?

I'd love to find the materials for this thread wiper/squeegee at a hardware or plumbing store, if it's something that can be installed easily.

Ed

Share this post


Link to post
Share on other sites

Ed,

A poorman's thread wiper suggestion. I had one of the lube pots like yours. What I did was to cut a 1" cube of dry cellulose sponge, then cut a diagonal slit part way in. Lay it under the thread between the hole in the lid (where the thread exits the pot) and the loopy thread guide to aim it to the primary tensioner. lay the thread in the slit, and its tension with the thread in it, and up against that guide will hold it in place. That 1" cube will strip alot of lube before it gets saturated. Then squeeze it out back into the pot, and cut another cube. You can also wash the sponge cubes in soapy water and let them dry to recycle them.

My new lube pot has the wipers, but I still use the sponge. Easier to change thread without tying on and pulling the new thread through.

Share this post


Link to post
Share on other sites

Bruce,

awesome idea. Thanks.

One more thing. I've had about a quarter inch of Lexol in the pot for about three months now and it's beginning to turn red. Does that sound normal?

Ed

Share this post


Link to post
Share on other sites

Hi Ed,

Been using anything but white thread?

Art

Bruce,

awesome idea. Thanks.

One more thing. I've had about a quarter inch of Lexol in the pot for about three months now and it's beginning to turn red. Does that sound normal?

Ed

Share this post


Link to post
Share on other sites

Art,

I haven't even been running thread through the pot. The Lexol has just been sitting there. I was under the impression that I could just leave it set there until the time came when I needed to run thread through the pot.

Ed

Share this post


Link to post
Share on other sites

Ed,

Yessir, it can get red. Must be some kind of oxidation reaction to air or metal. Should have told you, what I do now is to line my lube pot with a small plastic bag. Stick it in, and fold the sides back over the top edge of the lubepot and fill it. I haven't had it discolor in the bag as much (it still will a little), but easy to lift out and replace if need be. I figured this out after taking the pot off and washing it for the 4th or 5th time. LOng enough ago that I forget some of the learning curve.

Share this post


Link to post
Share on other sites

I called up Ferdco. THey're sending me the materials for two thread wipers, about $10 for everything. I'll have to drill the existing thread holes in the pot, tap them, then install the wipers. I would have bought an entirely new pot with the wipers from Ferdco but I'd hate to have a spare pot lying around taking up space.

Ed

Share this post


Link to post
Share on other sites

Art,

In a post of yours in this thread, you mention that you use oil in your lube pot. Are you using lilly white oil? I'm about to install thread wipers similar to what you have and use the lube pot full time. Previously I had used lexol in the pot.

Ed

Share this post


Link to post
Share on other sites

Hi Ed,

I use Weaver's Silicone Thread Lube in the threaded needle machines. I use Lily oil or Campbell/Randal light machine oil to lubricate the machines. I use wax to lubricate the linen thread on the Campbell Needle and Awl machine.

However you could use any lightweight mineral oil in a pinch, helps if it is colorless, and mix that with neatsfoot oil for your own custom blend, however organic oils will oxidize if not fully hydrogenated (saturated).

Art

Share this post


Link to post
Share on other sites

Thanks Art.

It hasn't been that easy finding silicone thread lubricant. I ended up having to buy a 5 gallon container from Clearco, thinking that maybe others on the forum may want to buy some off me, as long as I can find a way to bottle it up securely.

$22 a gallon, plus whatever shipping costs.

ed

Share this post


Link to post
Share on other sites

Hi,

Does anyone know where I can buy one of these standard cast iron lube pots for the 441 that doesn't come with the thread wipers. Soon I will be trying my hand at drilling and tapping the one I have to install a thread wiper but want a backup just in case I screw it up. Right now I'm using Bruce's idea of a little sponge cube atop the pot, which works marvelously. Until I get a backup pot, I'm not going to tempt fate. Besides, I'm having some difficulty locating a 7/16-20 tap.

Ed

Share this post


Link to post
Share on other sites

I have the 25/64 bit for the hole but I've been having some trouble finding a 7/16-20 tap to prep the threaded hole for the Ferdco thread wipers. ANy suggestions for a source?

On a related note, though ferdco's wipers are engineered very nicely, we should have a contest for the best improvised thread wiper. Bruce's sponge is awesome, and does make changing thread very easy. It got me to thinking about what other types of wipers are possible.

Ed

Share this post


Link to post
Share on other sites

HEY ED... WHERE IS THE PARTY TONIGHT ????

THREAD LUBCRIATE POT... I HAVE FASTENED TWO PCS OF FELT TOGETHER

THEN USE MINERAL OIL TO SATURATE THE FELT AS IT IS PULLED

THRU THE FELT. I HAVE ONLY USED THIS SETUP FOR OLD LEATHER IN SADDLE REPAIR.

Share this post


Link to post
Share on other sites
HEY ED... WHERE IS THE PARTY TONIGHT ????

THREAD LUBCRIATE POT... I HAVE FASTENED TWO PCS OF FELT TOGETHER

THEN USE MINERAL OIL TO SATURATE THE FELT AS IT IS PULLED

THRU THE FELT. I HAVE ONLY USED THIS SETUP FOR OLD LEATHER IN SADDLE REPAIR.

Hi Luke,

That sounds like a good idea.

Fold over some felt an inch wide, stitch it closed. set it between the thread exit hole atop the lube pot and the pig's tail, ala Bruce's sponge....yes.... have a few of these set aside. This is a twist on the sponge idea.

Merry Christmas,

ed

Share this post


Link to post
Share on other sites

Join the conversation

You can post now and register later. If you have an account, sign in now to post with your account.
Note: Your post will require moderator approval before it will be visible.

Guest
Reply to this topic...

×   Pasted as rich text.   Paste as plain text instead

  Only 75 emoji are allowed.

×   Your link has been automatically embedded.   Display as a link instead

×   Your previous content has been restored.   Clear editor

×   You cannot paste images directly. Upload or insert images from URL.

Sign in to follow this  

×
×
  • Create New...