


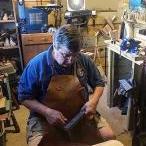
thecapgunkid
-
Content Count
39 -
Joined
-
Last visited
-
 thecapgunkid changed their profile photo
-
Moving from Connecticut to Newmanstown Pa. and I don't want to take this Boss with me. I'll be going away from Cowboy leather and back into 18th Century so I won't be doing any machine stitching. It has a bunch of extra needles, an extra spool and bobbin or two, the manual, and everything in the little plastic box that came with it. It is cast iron as were all the early models and almost in the same shape it has always been in because I don't use it a lot...mostly gunbelts and an occasional special project such as chaps. I'd show some pictures if need be but the fact is this Boss looks just like a Boss...not a lot of personality in it if you know what I mean. It'll need to be tuned a little because , like a lot of other Bosses, it needs adjustment before each job. Looking for $500 plus shipping Thanks The Capgun Kid 724-968-8795
-
A cobbler in New MIlford taught me this trick years ago, and I use it principally on my Singer Patcher. The END is defined as where you are starting the stitch line.. The ENDPOINT is defined as the direction you are going and where you will finish the seam. Start at the END do four stitched toward the ENDPOINT GO back, heading to the END, and go over those stitches. Reverse, and go over the stitch line again and keep going to the ENDPOINT until the seam is finished. Use the same process at the ENDPOINT Burning the nylon is also a good idea when you trim it, as one of your replies below cited. Nylon thread had nothing binding it and there is virtually no friction hold inside your seams. That's why it gives. IT won't hold wax well either, and some brands even slip Crazy Glue. By doing it this way you are not relying on one bend to hold the stitch, but rather two bends. Hope this helps Don't shoot yore eye out, kid The Capgun KId
-
The best I've ever come up with is to cut not one, but two or three deep grooves as pone of your replies suggested. I also had to wet form the bend area to get it tight. What I did learn, though, through mostly cartridge boxes and gun leather, is that no fold will stay perfect on anything medium or large size. It is not as reliable as, say, a similar project with a wood lid. The other thing I learned was to keep an eye on my work after I sold it. Going up to a re-enactor or another cowboy, for example, during an event, eyeballing something I sold a while ago, and doing a little re-finishing of an edge or oiling a surface went one whale of a long way for customer service and repeat business. Don't shoot yore eye out, kid, The Capgun Kid
-
I hadda have two or three people speak to me about how they did this because I had the streak problem in a couple of projects when I applied the bottled product instead of relying on oil and buffing. Anyway, what I was taught is as follows; A smooth Tan-Kote type finish starts with the leather itself. John Bianci has a section of his gunbelt making video where he shows a body how to read the leather by rubbing it with a damp sponge. Slap my face and call me liberal if that is not exactly what my Cordwainer Master taught me when I first started out. Another technique that helped was to glop on a dose of neatsfoot oil before I began to dye up the piece. If the liquid helps retard dye penetration and allow it to sink in more evenly, ( you can see this right off because the dye "pools" and doesn't go right into the fiber) then a second ,light coat after the dye is on will help the Tan-Kote provided you let the oil sink in and appear dry.. They are quite specific about not adding anything to Tan Kote, so be sure to let your surface dry first, and then buff it. Some guys like to tighten the surface with a glass slicker. You go to your church and I'll go to mine. Once it is me against the leather, I always used terrycloth rather than daubers or wool. The former will hold together whilst the latter two leave pieces of themselves on the surface as if leaving a scent for the female tan kotes during a rut.. I noticed that my finish was smoother in the more humid summer air than in the drier winter air, so it'd help to have a humidifier nearby. This stuff evaporates real quick unless the humidity is a little higher, and the label is not kidding in warning you as such. The only other thing I can think of is wet the applicator thoroughly, rub fast, and don't look back. Hope this helps, and... Don't shoot yore eye out, kid The Capgun Kid SASS#31398
-
Finishing Inside Of An Unlined Holster?
thecapgunkid replied to Tallbald's topic in How Do I Do That?
There really is no way to smooth over the flesh side ( unfinished) if really grainy and ..."hairy"...as you put it. Moreover, the dust coming off it will actually help dirty and wear your gun. You 45 auto wild bunch guys don't want that stuff in your action. In a cynical moment most of us will tell you you get what you pay for, and even a casual journey through dvd's and tapes by Masters such as Bianchi, Hurst and Dusty Johnson will certify that they use only the best materials and, of course, price accordingly. However, that is not to say that the Masters of old always had access to the best materials. Yet still made product. The only way to get a good finish on the flesh side is to start with your selection. If the leather hide has so much of the loose flesh, then remember that there is a reason pigs don't fly so don't buy 'em goggles. You might also want to stage your patterns on the underside so you can pick and choose and avoid the raw finish. Of course, this will de-value your square footage which, by-the-by, drives up your cost. If the flesh side has manageable or very little grain, then the only thing that ever worked for me ( whether or not I dyed the project) was to use a glass slicker on it when it was still wet from casing or cutting. This can be risky if you carved the flower side, so try to do it before carving. Dusty Johnson's saddle making video is pretty clear on how he uses a Tan-cote type product on the surface after it is dry. This works whether or not you dyed the flesh side. You might also wanna use two coats. It will seal for a long time, but all leather wears out regardless of what you do. Hope this helps, and... Don't shoot your eye out, kid. The Capgun Kid -
The only thing really holding artificial sinew together is the wax...separate some and you'll get the idea. If you gotta you gotta, so use off the shelf beeswax because it is the same or really similar to what is on there in the first place. The only time I ever waxed it was when I had broken it down into three or four thinner threads when I was beading. Inasmuch as I cannot stand beading, I don't much wax sinew any more. Another use is if you are trying to tapedr the end of the sinew to thread your needle without that bulge at the eye. A little beeswax on the end will help keep the threading together if you are using the common method of poking the needle through the thread, sticking the end through the eye and pulling the thread back over the needle. Hope this helps. PS...is there some acronym or symbol for ..."hope this helps"... like LOL or :-) or something?
-
Anybody got any suggestions on how to apply and use the hi liter product once carving is done? Up to now all the gunbelts I have carved on I painted the background in the way they did in the 30's and 40's Now I am bored and would like to try something different without streaking or clumsiness. Thanks The Capgun KId
-
The Capgun Kid Rides The dirty little task of dye-ing leatherwork for the amateur craftsman. The Year of The Bike. That's what brother Chris and I called the Christmas of 1959. He got a some little Schwinn with training wheels because he was only five but I qualified for the kid hot button in Pine Avenue Grammar School that year...the English Racer. I don't even remember whether or not it had gears, but it was sleek, with thin tires and I knew just by looking at it under the Christmas Tree that it was fast. The problem was, out there in Suburbia, there were the remnants of about a foot of snow on the ground and nobody was going to ride those new bikes until a body could see the street. Not that we were limited to being housebound in the winter, but there was a limited range of things you could do with your toys outdoors. Indeed, last year, when I got my Mattel Winchester I was horrified at my own thoughtlessness when my new rifle ejected all of its Mattel play bullets into the snow. It took me a half an hour to find them, and a whole season before I brought 'em outside again. For the most part, unless you could find another street urchin to play with, you were limited to indoor recreation amid the hum-drum of a school year that seemed never to end. But that was still a week away amid the aftermath of another Christmas Morning that the best Santa and Mrs. Santa in the world ( AKA Mom and Dad) worked so hard for. Almost as an after thought brother Christ wandered over to the stockings hanging from our RCA TV ( we didn't have a fireplace until Dad expanded the little ranch) and the prizes they held. Dad had a thing about the foot long candy canes and an orange. He was a depression child, and our grandparents of European descent placed a value on fresh citrus fruits as if they were luxuries limited to the upper class. He also thought about batteries for the toys that needed them, a Pez Dispenser, a fountain pen and a jack knife. But there, at the bottom of these stocking as long as your arm, was the real treasure of that year...the sleeper that I always treasured even to this day. The Louis Marx Toy Company ( God bless 'em) had figured out that a line of miniatures, sold as a collector series, could feature western cap pistols that had an exceptional detail. Mounted on a card in my stocking was a little six shooter that broke in the middle to accept a cap and was really well detailed to look like a real sixgun with a white, steers head grip. They are all over E-Bay and at Capgun Shows to boot. It didn't take long to figure out that, if I cut back on Chunkies and Bonomo Turkish Taffy on allowance day I could afford to buy one of these on my own. Moreover, every visit to Grandma Bea's where the overindulgent Grandparent took the little prince to the Five and Dime store with the sawdust on the floor, yielded another addition to my miniature arsenal of Navy Thirty Sixes, Winchester '73s, Sharps Rifles and Derringers. The Pandora's box opened when Grandma Bea showed me a small pile of leather samples from a visiting sofa upholstery salesman that had left behind. Thus, the world created a monster when I began cobbling leather. I got my grimeys on some toothpicks for bullets, a scissor, a needle and some thread and an old watchband buckle and put together my first rig. I still have it today. My mother did not start working for Tandy for another year or two, and I did not start formal training in disciplines such as shoemaking until years later, but there is something blissfully ignorant when you set to a project and hack out something pleasing without really knowing what you are doing. There is also something dark and brooding when you make a mistake and can't get it back because your resources are so limited. So, that's why I put this together. It is based on the conversations throughout the shooting year when some cowboy shows me his handicraft, or asks me how to do something. Since there is not a lot I enjoy with my pards as much as chatting about the craft, here are some pointers for the amateur who does not have a lot of tools, or who is starting out and cannot afford same, or who maybe is going to do one project here or there and wandered into this website. How to dye stuff without getting divorced because of a ruined carpet or table. You probably will get divorced because you ruined a carpet or table, but at least your work will look better for it and your newly dyed gunbelt can keep you company whilst you try to live out of your car because you got thrown out. Some guys like to prep their leather with an off the shelf spirit that is a cleaner. Makes your eyes tear and your nasal membranes swell. Some guys will take a spray bottle and mix water with a few drops of liquid detergent. OK. I'm not a big fan of that, but whatever works. I prefer a small paint roller and a boatload of neatsfoot oil. Roll it on there and glop it on good. Of course, you got a piece of poster board under the piece you are working on...right? Work fast and smooth over each piece with a dry cloth to try to even out the oil. Let it sit long enough to have a cup of coffee. If you are not satisfied with leaving the un-dyed piece in the sun so that the oil darkens the leather to a honey color that is really sexy, then break out the alcohol based dye. Here's a little tip; for a couple of hours, put the dye in the freezer. Yup, that's right, the freezer. It's alcohol based, so it will take a lot to freeze it and separate the color from the alcohol, but you are not gonna leave it in there even close to that point. Now, here's the other half of the chilled thing trick. I use daubers and those little plastic cups the no-sugar-added peaches come in from the grocery store. You wanna daub the dye in tight little circles, gopping it on good and refreshing the dauber frequently. Oh yeah...I forgot...keep your piece flat and never try to dye something after it has been assembled or stitched. The neatsfoot oil is going to inhibit the dye from penetrating so fast as to be uneven. The dye coming out of the freezer, because it is so cold, will be a little thicker and be slower to penetrate. That'll give it time to sit there and slowly spread evenly over the leather. When you see that the dye is just sitting on the leather and not sinking in right away but rather gradually, you're on track. Remember, you want it to spread evenly first and penetrate second. Leather that absorbs too quickly results in visible dauber marks, ugly lines and overlaps, and otherwise undesirable things that will ruin your piece because this is the finish work...the first part to catch the eye beyond stitching. You're gonna have to brush the leather when dry to get off the excess pigment. If your leather is of the economy grade, where you have little chance of having everything perfect because you get what you pay for, the worst thing that will happen to you is that the dye will have gradual light spots that look as if the piece is aged and worn from years of use. You won't get this hard lines and swirl marks that display poorly dyed leather. One cobbler who owned New Milford Shoe Service in New Milford, Ct., used to light the dye with a cigarette lighter on small pieces, but I found that burning off the alcohol also distorted the color...or I am just one of those Klutzes who cannot master the technique and would burn the house down, take your pick. When I shot with The Bluff Head Bushwackers Cowboy Action Club, a really talented leather worker named Frank, AKA The Leather Man, told me that he will daub on in three sets; once lengthwise, once width wise and once in circles to make sure the dye penetrated, so using the chilled alcohol based dye seemed to penetrate well when I took his advice. Most of the other Craftsmen I spoke to along the way will use either a patch of sheep skin or the daubers that are little cotton balls on a stiff piece of wire. The former gets cut into two inch squares and the latter can be bought by the bag at your local retailer for leathercraft. Almost everybody uses rubber gloves, and I once bought enough boxes of surgical gloves at a local flea market to outfit me for life. As far as tools go, there really aren't any. I prefer using the rinsed out plastic containers that come with fruit cups off the shelf in the grocery store, a spare bottle of rubbing alcohol to thin occasionally, the things mentioned above, and a piece of poster board to act as a mat and protect my bench. I like using a trim paint roller and pan to glop on the neatsfoot oil, that being a staple before putting on the dye with or without a cleaner. A couple of the craftsmen I spoke with in the last two or three decades will use a darker shade of dye, a cotton glove, a beeswax/paraffin mixture and a burnisher on a fan belt motor to work the edges. Leatherworker.net has an excellent piece by a fellow called Hidepounder that describes a more detailed effort that produces glass edges. It's the best piece I've ever read on the topic. For the guy without tools and little room, follow Dusty Johnson's advice in his videos and wet/color the edge and then rub it briskly with either a piece of denim or a cotton glove. Keep your strokes going the same way and you will be surprised at the outcome. Get thee to E-Bay ( if you can put up with their anti-gun nonsense) and spend a lot of time here, on Leatherworker.net. If you are serious about starting to expand and sell some leather work, find the Leather Crafters and Saddlers Journal or one of the other trade journals with a search on the net. Most of us cowboy shooters tend to gravitate to crafts during the winter as opposed to during the shooting season because clubs tend to shut down over access and driveway issues, and that's when it helps to have your supplies and tools at the ready. Even now, I will break out a special toolbox that I have arranged to work with the little Marx Miniatures Brother Chris and I used to get in our Christmas Stockings. They are antiques now, and I have found that gussying them up and outfitting them with their leather can be a relaxing way to pass the time while waiting for a capgun show or the start of the shooting season. Don't shoot yore eye out, kid The Capgun Kid
-
The safest thing I have found to do for guys who are going to lose weight, or rotund cowboys, is not to stitch the billet to the belt. I'll set two rows of lacing holes where each hole is 3/4 inches apart and where the two rows are also 3/4 inch apart. I'll make eight sets of holes on the belt and four on the billet. If I am l;acing with deerskin, then I'll make 3/8 inch holes with 1/4 inch thick lacing where the lace is tapered and stiffened at both ends The seven hole idea in the billet for the buckle pin is sound thinking. So is the idea of putting the inside rim of the buckle, where the pin hits it, exactly on the edge of the belt. When I lace the billet to the belt, I will start by making the traditional "X". However, I will feed the left lace up through the right hole and right lace up through the left hole where my "X" ended. In this way I have a tight series of continuous "X" lacings. XXXX. The tightness of the lacing on an inch to one inch and 5/8 billet adds a more professional look, and the billet then becomes adjustable because the four holes of the billet will ride up and down the eight holes on the belt. Most of my customers bring back my work when they want it re-buffed or adjusted, anyway, and I can stay in touch with them that way. In the last Cowboy shoot I was in, one of my customers told me that she had to have the belt I made for her taken in twice because she was losing weight for her pending wedding. Cowboy shooters tend to be of an age where we gain and lose weight by design, and I could see where the adjusted belt was downright mauled by the replacement stitches the local shoe repair guy had moved everything. Do a search on John Wayne's gunbelt and you will stumble upon one ratty looking thing that he wore in several movies where the billet was laced to the belt with the same style lacing found on saddle cinch straps. If that can hold for the big guy then your tight lacing on your billet will hold for King Kong. Hope this helps Don't shoot yore eye out, kid, The Capgun Kid
-
Burnishing edges on a holster
thecapgunkid replied to LeatherCaptain's topic in Gun Holsters, Rifle Slings and Knife Sheathes
Somebody oughta send Hidepounder to Congress to straighten out the economy...If he can do 10% of the effectiveness and quality on the economy that he does on edgework he just might save the whole country. You got a lot of great advice on this topic and almost all of it will work as written. The one thing I question is who taught you to put your work in an oven? You might wanna share that with these guys and get some alternative ideas. Intense heat is pretty hurtful to leather, and, although you might not see it immediately, some of your seams or rivet joints might give out a little faster down the road when a customer gripes and you are not there to defend yourself. Slap my face and call me liberal, but I have always let my leather air dry, even after shaping. Hope this helps, and Don't shoot yore eye out, kid The Capgun Kid SASS#31398 -
Ask the guy running this forum about the hand stitching articles by The Capgun Kid. Last year I submitted a bunch of articles on hand stitching as taught to me when I learned to make historical shoes and boots. In that article sequence is a section about awls, how to make them, how to engage them and how to taper thread and make finer stitches and holes. I dunno what happened to those articles and have not seen them since. They were originally published in The Cowboy Chronicle years ago. The long and the short of it is stop using the drill press, pay attention to the replies you received about marking wheels and overstitchers. Finely taper and then polish your awls and they will glide through the leather, especially when using the Stohlman book and stitching in a clamp. I attached one of those articles and, hopefull;y, one of the pics. There is no Photopoint.com anymore, so if I can find some time I'll dig up the photo's if you think they will help. Hope this helps Don't shoot yore eye out, kid The Capgun Kid SASS# 31398 gjgeiger@zoominternet.net Stitching by hand.gunfighter.doc
-
Holster Leather Question
thecapgunkid replied to johnggrg's topic in Gun Holsters, Rifle Slings and Knife Sheathes
John, there really is no way to seal leather when rubbing against an unyielding surface like the metal of a gun.. Any Chrome tan I've ever used has been lined well with veg tanned, usually 4-5 ounce or higher. The other problem you encounter is that the finish is the finish...you get a little careless with your tools and a lifelong scratch pops up and you end up living with a mistake or a round file project. What kinda holster project are you making? -
Thanks, Pard, for the info. Check the Brown/Bohlin/Gilmore rigs of the B-Westerns and the 1950's or check out the rigs Roy wore and you will see what I mean for shaped spots other than simple domes.
-
OK. So I hadda have a John Wayne True Grit Rig for an upcoming Cowboy Action Match. Into the shop I go, beating off unatural heat for Pittsburgh and...worse...a hoarde of stink bugs which has been plaguing the area. Stalwartly and with great resolution I pound out the rig, complete with added shotgun loops, and then, looking down at the finished product, realize that now I gotta have a Roy Rogers Rig. Even the stink bugs agree with me. It's my destiny, Luke. No big deal...right? Noper, Pilgrim. I open up the little plastic drawer that holds all my spots, kill off a few stinkbugs, and, lo and behoild I ain't got no old-timey scalloped , half inch spots. IN fact, I can't even remember when or where I got them in the first place. Now, you gunbelt and holster makers know what I am talking about and how to avoid off-the-shelf domed spots, so if any of you coyotes know where I should be looking please write back and lemme know. Thanks Don't shoot yore eye out, kid The Capgun Kid
-
At some point, dying leather...especially dying leather black... has given most of us fits. I've only gotten two or three crans (tips) on doing it, and they seem to work well. First, it is mostly the tanning process or its salts in the leather that is turning your dye away. Cut out a small chunk of the hide, and see if using degreasers on it makes for a smooth finish. You'll have to oil it to prevent it from drying out in this case. Second, use oil based dye and not alcohol based dye. Lately, with the gunbelts I make, I have taken to neatsfoot oiling the crap out of my piece before I dye it. I've been told that the oil in the surface helps spread the dye more evenly, but I have found also that there is less of that white haze and rub-off when doing it that way. Thirdly, stop using bottled dye altogether. I wrote a piece earlier this year on making black dye by stuffing a load of fine steel wool into a clean glass jar and then saturating it with white vinegar. Let it stand for a day or two and then pour it out into another clean glass jar with a tight lid. Over time, when stored in a moderate temperature in a place removed from direct sunlight, it will darken veg tan into a deep charcoal grey with an amazingly even coat. This is a touchy-feely kind of thing because you also have to use a finish, usually a balm or an oil finish rather than a lacquer, that takes the dark grey into a black. I have also found that buffing black leather is also a chore, and it is one of the few times I use a machine...essentially the fan motor from an old forced air furnace driving a buffing brush, a sander and a burnisher at 1700 RPM's will almost burnish the good dye in and exorcise that evil stuff that rubs off. Hope this helps, and... Don't shoot yore eye out, kid The Capgun Kid