Jump to content

Recommended Posts

I'm sure someone has already started a thread about this somewhere, but I did a little poking around and couldn't really find what I was looking for so I thought I'd start a new thread.

I've very recently started working with leather and so I apologize for any stupid questions. :wacko:

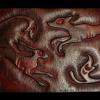
What I ended up with was this:

fox & hare cuff

Which is still ok-looking, but not what I had in mind. I had applied Super Shene over all the raised areas (rabbit, fox, filigree) but obviously that didn't do a whole lot. The staff at Tandy had told me that Super Shene would work as a resist - is that what the problem is?

I read in a different thread to apply antiquing only over the areas that you DON'T want resisted - but first off I'm not sure I could rub it in effectively without risking getting it over the other areas, plus then how do you get the darker lines on the carving you've done? I found examples of what I'm trying to describe but I can't seem to add the image here, sorry if that's a little unclear.

Share this post


Link to post
Share on other sites

I've recently been doing stuff with resisting and antiquing. If you are using the Tandy antique, I have found that resolene tends to works as a pretty decent resist. Ironically, it works better (for me, at least) than Block Out. I haven't tried it with Super Shene.

When I antique, I cover everything with my resist (again, in this case, resolene) and work the antique over and into everything. Then just wipe it back off, making sure to not press so hard with your cloth or whatever that you pull it back out of your lines. Nice deep, crisp lines makes it easier. Thinner leather or shallow cuts/impressions makes it a bit more likely that you will pull the antique back out of the lines.

Also, try using a few coats of the resist, and make absolutely sure you let it dry long enough. If you don't, the antique just ends up mixing with whatever resist you are using and dying the leather.

Hope this helps a bit.

Edit: I'm sure the "only resist the certain parts" thing is a good way to do it, it's just not what I have personally done yet.

Edited by Tzalabak

Share this post


Link to post
Share on other sites

I had wanted the rabbit and fox to be lighter than the background - I suppose I could achieve the same effect with dyeing the background first... though I attempted that with a different cuff I made and I ended up with a nasty smeary mess. I'm not sure if it's just the Eco-Flo dye (it seems most folks around here don't really think much of it) or if I didn't wait long enough to make sure the dye was completely dry... I had left it for about 4 hours and it felt completely dry, but since then I've read that it's good to leave it overnight or longer.

This is a picture of that first attempt - it was supposed to be a black background with brown/reddish accents - that's kind of what it ended up as, but the lines weren't as crisp and the whole thing was darker than intended:

destrier cuff

It's entirely possible I didn't wait long enough for the Super Shene to dry. I'd like to pick up some resolene to try though.

Edited by Destrier

Share this post


Link to post
Share on other sites

I've never really had much in the way of happy results with any of the Tandy dyes other than the pro waterstains.

The drying time is a pretty reasonable excuse for some of the problems. For dyes, in most cases, you usually want at least overnight. Sometimes at least 24 hours. You might also want to try buffing the original color after it dries, to pull up some of the excess pigment before trying to add more color or antique.

For the resist itself, I find that, if I park the item in front of a fan after I apply my resist, a few hours is sufficient time for drying. Could probably get away with less. Not really sure how long I'd let it dry without a fan. Maybe still just a couple of hours. *shrug*

Share this post


Link to post
Share on other sites

Good to know, thanks. I'll try to curb my impatience and actually give things a chance to dry! :)

Share this post


Link to post
Share on other sites

I had applied Super Shene over all the raised areas (rabbit, fox, filigree) but obviously that didn't do a whole lot. The staff at Tandy had told me that Super Shene would work as a resist - is that what the problem is?

I read in a different thread to apply antiquing only over the areas that you DON'T want resisted - but first off I'm not sure I could rub it in effectively without risking getting it over the other areas, plus then how do you get the darker lines on the carving you've done? I found examples of what I'm trying to describe but I can't seem to add the image here, sorry if that's a little unclear.

What was the antique you used? Gel Antique?

Helps to know what you are using to be able to answer the question.

Tom

Share this post


Link to post
Share on other sites

What was the antique you used? Gel Antique?

Helps to know what you are using to be able to answer the question.

Tom

Sorry, yes it is the gel antique.

Share this post


Link to post
Share on other sites

Sorry, yes it is the gel antique.

I thought so. It looked like one of mine!

The gel antique doesn't behave the same as other antiques. The first project I used it on did not turn out as it should have. It did the same as yours, except I used Saddle Tan and it turned out very red. The instructions on the bottle are much less than adequate. There is a video by George Hurst that shows how to use it.

The link to the video should be in the instructions! It would certainly help anyone new to this product.

In George's demonstration, he is doing a relatively small project. By the time you get the antique worked into all the cuts and depressions, you don't have much time to wipe off the excess. Have paper towels and a wet sponge ready before you start. Start with your leather slightly moistened too. I don't recall if that is in the video.

For your existing project, you may be able to improve it somewhat if you haven't applied any finish to it yet. If you scrub it with mop 'n glow, you can remove much of the overall colour. Since the gel antique is water based, the mop 'n glow will lift a lot of the surface dye.

For other types of antiques, there is a video on use of various Tandy resist type products at

Good luck with fixing your project, and with future projects.

Tom

Edited by northmount

Share this post


Link to post
Share on other sites

I honestly find that SuperShene makes a crappy resist when used with Tandy's gel antiques. Anything less than three coats of it just lets too much dye through, and even with three coats the resisted areas still pick up a bit of the dye color.

Block Out is better with the gel antique, but again, I wouldn't trust it with anything less than three coats.

On the other hand, I recently gave BeeNatural's RTC Sheridan Resist a try with the gel antique and it did a superior job to anything else I've tried. Two coats seems plenty, three almost completely stops all penetration into the uncut/tooled resisted areas. The carved betta in my avatar was done on undyed leather with three coats of the RTC followed by dark brown gel antique. Here, let me attach the full size shot so you can see it better.

post-25665-0-95890400-1361564048_thumb.j

A lot of people here have low opinions of the tandy gel antique (compared to the paste made by Fiebings) but I've found it just takes experimentation to get the hang of. And using the right resist, and enough of it.

Edited by cjdevito

Share this post


Link to post
Share on other sites

I honestly find that SuperShene makes a crappy resist when used with Tandy's gel antiques. Anything less than three coats of it just lets too much dye through, and even with three coats the resisted areas still pick up a bit of the dye color.

Block Out is better with the gel antique, but again, I wouldn't trust it with anything less than three coats.

I would second that. Satin sheen is even worse than super sheen, and block out isn't much better. As far as I'm concerned, if I'm doing a larger piece where I only want certain parts antiqued and other parts lighter, the last thing I want is to have apply multiple coats. Seems like a waste of time.

I recently bought some resolene to use as a finish, but have yet to try it as a resist. I'm guessing it will work better than the Tandy products (certainly can't be worse!) I don't really have a problem with the Tandy eco flo antiques, but their resists and finishes suck!

Share this post


Link to post
Share on other sites

Thanks everybody - I might give Super Shene another chance, since apparently it will work for George Hurst... plus I already have some! That BeeNatural stuff looks like it worked really well on the betta - I will most likely try ordering some of that soon.

I don't really mind how the fox & rabbit design turned out, it just wasn't what I had originally planned, so I think I'll leave it as-is. I just finished carving another piece though and so I'll try SS again or maybe pick up some Block Out. Unfortunately Tandy is the only local store so unless I wait a few weeks for shipping I'm stuck with their products, and living in Canada shipping is always a cost factor too.

Share this post


Link to post
Share on other sites

I read in a different thread to apply antiquing only over the areas that you DON'T want resisted

Was this a miss-statement? If not, I think you may be a little confused on the use of a resist. Resist is supposed to stop the antique. So anything that you don't want to have the antique color has to be resisted. Regardless of how much resist you put on, the antique WILL get into the cuts and tooling, which is part of what it's supposed to do. But, on top of that, you'll find that Super Shene isn't a resist to be used with gel antiques. It pretty much only works with the eco-flow Hi-Lite in my experience.

remember the steps.

Dye

resist with finish of choice

antique

reapply finish to entire project

Edited by Cyberthrasher

Share this post


Link to post
Share on other sites

Was this a miss-statement? If not, I think you may be a little confused on the use of a resist. Resist is supposed to stop the antique. So anything that you don't want to have the antique color has to be resisted. Regardless of how much resist you put on, the antique WILL get into the cuts and tooling, which is part of what it's supposed to do. But, on top of that, you'll find that Super Shene isn't a resist to be used with gel antiques. It pretty much only works with the eco-flow Hi-Lite in my experience.

remember the steps.

Dye

resist with finish of choice

antique

reapply finish to entire project

Sorry, I had originally tried to add a picture of what I was trying to say but it wasn't working. From something someone else had said (not in this thread, can't remember where it was now) I was picturing having to rub antiquing on to everything around the areas you didn't want to absorb the darker colour (like my rabbit and fox) and leaving those untouched and just couldn't see that working very well, plus then you wouldn't get the darker contrast on the carving in the rabbit and fox. I apologize if that's as clear as mud... I'm not very good at trying to convey what's in my head sometimes, would you believe my other hobby is writing? :P

Hmm, good to know about the Hi-Lite - I do have some of that kicking around, maybe I'll try using that instead of the gel antique. Since they kind of seem to be the same idea, what's the difference between gel antique and Hi-Lite?

Share this post


Link to post
Share on other sites

I'm not very good at trying to convey what's in my head sometimes, would you believe my other hobby is writing? :P

Hmm, good to know about the Hi-Lite - I do have some of that kicking around, maybe I'll try using that instead of the gel antique. Since they kind of seem to be the same idea, what's the difference between gel antique and Hi-Lite?

Yeah, I'm not very good at getting my brain to spew thoughts very well either :)

There are times where people use the antique to color an entire project on purpose. Here's a good blog post showing some differences. The meat of it that I went looking for right now is about 2/3rds down and is titled "Using Resist - For Antiquing". This is actually from the leatherlearn.com website. I'm not sure why the finish archive links here, but they have all kinds of stuff for beginners and refresher courses.

http://www.johan-potgieter.com/ll/?cat=8

Honestly I can't say why Super Sheen doesn't work with antique gel - I've never tried it myself but time and time again I've heard people say that it WILL NOT work.

Share this post


Link to post
Share on other sites

I am also new to leather work and trying to get the hang of the stains, resists, antiques, finishes etc.

I quickly found out that I am not a fan of Tandy's Eco stuff or their gel antiques. And I really don't like the All-in-One from Tandy. I tried some of that followed by the gel antique on my first job and it did not work at all...the gel antique stained areas of the leather darker where apparently the all-in-one didn't protect good enough.

I have been using the Fiebings Acrylic Stains and then I use the Fiebings Leather Sheen if I want an all over coat before I antique. Or I use Super Sheen if I want to resist an area. Then I use the Fiebings antique paste. I found it works much better than the gel antique. Then of course follow up with the Leather Sheen as a top coat.

I am not completely happy with acrylic stains for a dye and would like to try some of the different dyes..but thats another story.

Good luck...keep experimenting

Chris

Share this post


Link to post
Share on other sites

What you need to block out parts of your project is an art medium called "Art Masking Fluid". Winsor&Newton and Daler Rowney makes one.

This is a type latex fluid that you paint on to what you would like to block out and when done you just peel it of. It does not leave any stains on the leather. I use the light yellow collored one, makes it easy to se where the maskig is at. Clean brushes with white spirit...Paint2 layers of it on to the leather.

I enclose a picture where I have blocked out every natural color leather that's left on the piece, then I used the old style of Tandys antiquing. To be sure not to disturb the surface I have used an airgun for the acryllic finisher. Good Luck with your project :-)

post-5624-0-95859000-1361596401_thumb.jp

Share this post


Link to post
Share on other sites

Brief aside: Tina, that piece is gorgeous!

Share this post


Link to post
Share on other sites

Brief aside: Tina, that piece is gorgeous!

I was just going to say that! That chamfron is amazing, and pretty much exactly the type of thing I'm aiming to do someday! My logo is a even a chamfron.

Share this post


Link to post
Share on other sites

Tina, I started using the liquid latex sold for modeling (I'm pretty sure it was your recommendation) and I LOVE IT!!!

The only complaint I have is that I'm not entirely sure it cuts down on my time because it takes a while to apply it perfectly. I'm sure I'll get quicker with it. It's just a matter of getting used to brushing on something that flows like dry Elmer's glue.

Share this post


Link to post
Share on other sites

Thank You all for your comments, it's very nice when you hear someone liking your work :-)

Truth is that this masking fluid is not going to shorten your worktime, possible even make it longer but, the end result is going to be worth the hazzle using the fluid in my book.

Cybertrasher: I have only used the art masking fluid but I know of others here that uses the modeling stuff and recomend it and I'm farly sure it's a very similar product and one can use either one of them :-)

I have another chamfron laying around just waiting to get dyed/colored but ever since we moved from the US in to our new house in Sweden, most of my leatherwork has suffered...Right now I'm more painting walls and staircases, laying down floors and trimmings than anything and hopefully I can get back in the leather saddle by the end of summer.

Share this post


Link to post
Share on other sites
Truth is that this masking fluid is not going to shorten your worktime, possible even make it longer but, the end result is going to be worth the hazzle using the fluid in my book.

If it gives a superior end result, I'm definitely ok with putting in a little more time and effort. For the most part I would like to stick with Tandy products just because being able to make a quick trip in to the store and pick up anything you're short on is preferable to having to wait weeks for shipping (and paying for shipping!), but I'm certainly willing to try new products. Where do you buy the masking fluid? Is it something an art supply store might carry?

Share this post


Link to post
Share on other sites

This is the stuff I'm using. I got it off ebay and it will last a LONG time. If you're searching, make sure to include "woodland scenics" so you don't get some not so family friendly results.

http://www.hobbylinc.com/htm/woo/wooc1204.htm?source=froogle&gclid=CPKkroTMz7UCFQk4nAodnDgANw

Tina, as far as timing, I think it will be best used for me on natural stuff like one I'm just wrapping up. I just did one with the masking all around on natural and some flame work while I airbrushed the background black. I have about 2 hours into the masking on it and about 3 1/2 hours into the dye job. But, I should add that I was scared of the latex's ability to truly mask if it got fully coated with dye (my first test didn't go so well), so I hand brushed around anyway to keep from having to spray too heavily next to the masking. I think that time can be cut back pretty well with the multiple coats and less fear :)

Share this post


Link to post
Share on other sites

Sorry, I'm not entirely clear on the use of the masking fluid - that would be for something you don't want to have any colour at all (including antiquing), right? Like the border areas on that fantastic chamfron? While I can see that coming in handy, at the moment I'm more looking for something that I can antique over and get those darker lines in the carving, like in the braiding, coat of arms, and filigree on the chamfron. Or did you use the masking fluid on those parts too, Tina?

Share this post


Link to post
Share on other sites

The masking fluid can be found in any good art store...Maybe even Joanns/Michaels have it? I use to buy it from MrArt online in the US.

Masking fluid blocks of something that you don't want to have touched at all. When doing antiquing the traditional way you put a resist on top of everything you want to antique, then the antique paste after that. I always let the resist (super shene or others in the same category) dry for at least 24 hours and I do put it on in 2 layers.

On the picture of the chamfron there is no resist under the brown, I used the antique as a color for the leather in this case, putting it on in a cirkular fashion to get some movement going on in the color. Then I airbrushed the resist and more antiquing over it to get those black lines in to the groves. Only after doing all that did I remove the masking fluid and then I air brushed the whole thing again with an acryllic finisher (I use Angelus brand of resist and dye) so I did not disturb the antique/paintjob by using a sponge/rag or brush.

I hope this makes sense, I'm not the best to explain things but I'll always try :-)

Share this post


Link to post
Share on other sites

I should add that I was scared of the latex's ability to truly mask if it got fully coated with dye (my first test didn't go so well), :)

I have found that 2 layers of the masking fluid is the way to go, it has to be thick enough and that's not easy in just one go. I'm also checking after the 2 layers to see if it looks to translucent, then I know I have to ad some more on those parts.

Edited by Tina

Share this post


Link to post
Share on other sites

Join the conversation

You can post now and register later. If you have an account, sign in now to post with your account.
Note: Your post will require moderator approval before it will be visible.

Guest
Reply to this topic...

×   Pasted as rich text.   Paste as plain text instead

  Only 75 emoji are allowed.

×   Your link has been automatically embedded.   Display as a link instead

×   Your previous content has been restored.   Clear editor

×   You cannot paste images directly. Upload or insert images from URL.


×
×
  • Create New...