amuckart Report post Posted May 23, 2011 Hi all, I'm disassembling a 29k58 to overhaul it and there are a couple of taper pins giving me grief. The first is the one holding the thread take-up lever into the arm on the top of the machine, and the second is the one holding that arm onto the head. As near as I can tell, both should be driven out from the rear of the machine towards the operator, but neither will shift. Both are a little flattened on the small end, but not mushroomed, which makes me wonder if a tool steel pin punch is the right tool to remove them or if I should be using a brass rod or something. Can anyone offer advice on shifting stubborn taper pins like these? Cheers. Quote Share this post Link to post Share on other sites
BIGGUNDOCTOR Report post Posted May 23, 2011 Make sure that they are going the right direction. One side should be noticeably bigger than the other. Taper pins have a .250" per ft taper. Do you have a manual that shows the parts in an assembly, or exploded view? IE: are you sure that they are taper pins? If they are in fact taper pins , and you are mushrooming the end, stopping was the right move. A taper pin should pop out with a good rap or two. Does it have a set screw, or something else used to lock it in place, or has it been Loc-Tited? If Loc-Tite has been used , you will have to warm it up to release it. Be patient, and don't beak anything. Quote Share this post Link to post Share on other sites
amuckart Report post Posted May 23, 2011 I'm pretty sure they're taper pins, and I'm fairly sure I'm trying to tap 'em out in the right direction. Singer seems to be pretty consistent about that sort of thing and the other ones on that axis came out back-to-front. I don't have a parts chart for the k58 specifically, but I've got two k13s and a parts chart for that from http://parts.singerco.com/IPpartCharts/29K1_4_10_12_18_23_30 TO K33.pdf The taper pins on the k13s come out back-to-front and shift with a sharp tap, I'm not seeing anything materially different in the construction of the k58, except that the damn things won't shift, even after soaking in penetrant. There's no set screws holding them in, I've cleaned off the gunk around them to check. I'm reluctant to apply heat because the finish on the machine is still pretty good (under the accumulated gunk of 20 years in a shed). Thanks. Quote Share this post Link to post Share on other sites
suem Report post Posted May 23, 2011 I'm pretty sure they're taper pins, and I'm fairly sure I'm trying to tap 'em out in the right direction. Singer seems to be pretty consistent about that sort of thing and the other ones on that axis came out back-to-front. I don't have a parts chart for the k58 specifically, but I've got two k13s and a parts chart for that from http://parts.singerc..._10_12_18_23_30 TO K33.pdf The taper pins on the k13s come out back-to-front and shift with a sharp tap, I'm not seeing anything materially different in the construction of the k58, except that the damn things won't shift, even after soaking in penetrant. There's no set screws holding them in, I've cleaned off the gunk around them to check. I'm reluctant to apply heat because the finish on the machine is still pretty good (under the accumulated gunk of 20 years in a shed). Thanks. I had the same problem on my 72, tap from back to front, reinstall front to back. Mine came right out a couple of whacks, but getting it back in .... now that was a different issue, I couldn't get it in all the way and I was afraid I'd break something or mushroom it so far so good nothing's gone south, I hope, and maybe I'm dumb to hope this that eventually vibration and use will loosen it up and it'll either come out or I'll be able to get it in position. Quote Share this post Link to post Share on other sites
BIGGUNDOCTOR Report post Posted May 23, 2011 The link you posted is not working. Hard for me to give any more advice without knowing exactly what you are dealing with. Being a machinist, and a plant mechanic at one time, I have dealt with taper pins before, but they usually pop out without too much fuss. As to the one not going all the way back in. You may want to pull it out, and replace the pin. If it got swelled during removal, or slightly bent it won't seat correctly. That could be why this one is not coming out, it's bent, or notched. If that is the case, drilling it out to relieve some tension is an option. Pins are inexpensive compared to the parts they hold together. Being a machinist, and having tools like milling machines, and drill presses at my disposal , drilling it out is a "simple" solution for me. If you don't have access to to these it could be a difficult solution. The idea is to drill it out progressively to thin the walls down so that it can collapse and come out. Taper pins are good in that if you do nick the bore, all is not lost. With a standard round pin you might have to open it up to the next bigger size. With a taper pin you just ream it a little deeper. to seat the pin deeper. It is basically a round wedge. The only other thing I could be is that being in NZ it is opposite than up here Quote Share this post Link to post Share on other sites
suem Report post Posted May 23, 2011 (edited) As to the one not going all the way back in. You may want to pull it out, and replace the pin. If it got swelled during removal, or slightly bent it won't seat correctly. That could be why this one is not coming out, it's bent, or notched. If that is the case, drilling it out to relieve some tension is an option. Pins are inexpensive compared to the parts they hold together. Being a machinist, and having tools like milling machines, and drill presses at my disposal , drilling it out is a "simple" solution for me. If you don't have access to to these it could be a difficult solution. The idea is to drill it out progressively to thin the walls down so that it can collapse and come out. Taper pins are good in that if you do nick the bore, all is not lost. With a standard round pin you might have to open it up to the next bigger size. With a taper pin you just ream it a little deeper. to seat the pin deeper. It is basically a round wedge. Right now it won't come out or go back in. Since it's in the upper arm of the 29k 72 (that holds the needle bar onto the arm) I'm terrified of stressing the metal in the arm if I bang it too hard. I'll probably need to investigate your idea of drilling it out, I have a good drill and some titanium bits. I don't suppose heating it a bit may help at this point? I did order some new ones after the original one got stuck of course. I'm also wondering if the pin not going in may have something to do with the parts involved, it's the pin that holds the needle bar to the "trapeze(?)" that goes up and down on top of the machine, it was tough to get everything in just the right position all lined up. All the parts are replaceable but stil.... Anyway thanks. Edited May 23, 2011 by suem Quote Share this post Link to post Share on other sites
amuckart Report post Posted May 23, 2011 Gah! For some reason the board software obfuscates hyperlink text. The correct link is here If I do get to the point of having to drill it out I don't mind doing that, I'll just have to order another one since I'm no machinist, but if the hole needs to be bored out, presumably that needs to be done with a special bit/reamer that matches the taper on the pin? I'm pretty sure they don't go a different way in NZ, they're all made in Scotland Quote Share this post Link to post Share on other sites
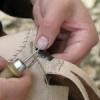
CowboyBob Report post Posted May 23, 2011 Sometimes they are hard to get out,if never had to drill one in the 100's I've worked on.It might help to support the front part w/a a small nut around the pin & put a hammer against the nut so more force of the hammer from the back will go into the pin. If you don't understand what I mean & can post a pic tomorrow. Bob Quote Share this post Link to post Share on other sites
amuckart Report post Posted May 23, 2011 Thanks Bob, that makes sense. I'll give that a go tonight. Quote Share this post Link to post Share on other sites
BIGGUNDOCTOR Report post Posted May 24, 2011 Strike 2! That link doesn't work either....I get some generic site for Http listings. That is correct Sewmun, and I failed to think about that aspect, as I just took it for granted. When driving pins it is imperative to have a solid backing , so that the full force is directed into the pin, and not sucked up by the mechanism moving, flexing, etc.. I should have mentione dthat as I have chastised a couple of fellow workers about driving pins out of unsupported parts. I lend them my bench block, and it pops right out, and with less force. The reason I get on them is that if they bend the push rod, it makes more work for me since am the tool maker for the company. Quote Share this post Link to post Share on other sites
amuckart Report post Posted May 24, 2011 http://parts.singerc...%20TO%20K33.pdf Right, that one worked in preview, if it don't work after posting I don't know what will. Click it, don't copy and paste, the forum software obfuscates it in the posting. Quote Share this post Link to post Share on other sites
gordond Report post Posted May 24, 2011 Hi Alasdair and all just confirming the 29K58 Check lever joint pin is part # 8554.[Thread take-up] this tapered pin is used "throughout" the 29 Class machines....at least per the 5 parts manuals I have [i.e.....29-4...29K51,53,55,56 ... 58,60,62....70.....71,72,73]. I need to get one of these out [K58] , but had the same issue -tricky, so left it for a more patient time. cheers Quote Share this post Link to post Share on other sites
BIGGUNDOCTOR Report post Posted May 25, 2011 Score! that one worked, just didn't show what I was hoping for, and exploded view that shows the relationship of each part to the other. From the other comments it sounds like you have the direction correct, but may not have a solid backing to drive against. Take you time, so you don't damage anything. Can you post a pic of what you are dealing with? Quote Share this post Link to post Share on other sites
amuckart Report post Posted May 25, 2011 Gordon: That's one of the ones I need to shift. I'm also completely failing to get others to move, vis: "Balance wheel shaft pin" Plate 161 part 11663. "Needle Bar Driving Lever Joint Pin" Plate 161 part 8586 (at least I'm assuming the "needle bar driving lever" is the rocker arm thingy on the top of the machine) Biggun Dr: Thanks for your help. I'll take pictures tonight and add them here. I'm sure I've seen an exploded diagram of a 29k clone but I'm darned if I can find one now. I'll poke around on my hard drive when I get home though. It's not mentioned in that parts list but on the k58 there's also a taper pin that's part of what holds the rack assembly onto the arm of the machine and that's refusing to shift either, and that's the one pin I can (albeit awkwardly) back up with a bit of wood wi' a hole in. There's all sorts of frozen stuff on this machine. I had to resort to an impact driver to get the rack assembly screws to move. I couldn't even get them to turn with the impact bit in a socket wrench. It's difficult to get the needle bar driving lever joint pin backed up with anything because I can't get the @$!#$!@!! balance wheel off the side of the machine. All the grub screws shift really easily but there's a big ol' screw in the middle of it that I simply cannot get to shift either. I'm not real keen on going after that one with an impact driver. Cheers. Sometimes they are hard to get out,if never had to drill one in the 100's I've worked on.It might help to support the front part w/a a small nut around the pin & put a hammer against the nut so more force of the hammer from the back will go into the pin. If you don't understand what I mean & can post a pic tomorrow. Bob Thanks Bob, that makes sense, even if it does sound like an operation that requires about five arms :-) I'll give it a go. Quote Share this post Link to post Share on other sites
Anne Bonnys Locker Report post Posted May 25, 2011 Do you actually need to remove all of them? Once you get the main one out from the top rocker arm the whole rocker arm can be lifted out. Quote Share this post Link to post Share on other sites
amuckart Report post Posted May 25, 2011 Hi Darren, Do you actually need to remove all of them? Once you get the main one out from the top rocker arm the whole rocker arm can be lifted out. Alas, the one holding the top rocker arm is one of the ones giving me real trouble. I finally managed to get the balance wheel off the front of the machine by deploying a Bigger Wrench which let me lay it down and I managed to get the one holding the thread take-up lever out after following Bob and Biggun Dr's advice. The three remaining ones that are stubbornly stuck are the one holding the rack assembly in, the one holding the rocker arm on the top and the one holding the drive wheel on the main shaft. None of them are shifting so much as a millimetre, even when backed up by a solid thing with a hole for the pin. Of those, the only one I don't really have to shift is the one holding the drive wheel on, but I need to get the other two out to get this machine working properly. It would make life much easier if I could get the drive wheel off too. Quote Share this post Link to post Share on other sites
Anne Bonnys Locker Report post Posted May 25, 2011 Hi Darren, Alas, the one holding the top rocker arm is one of the ones giving me real trouble. I finally managed to get the balance wheel off the front of the machine by deploying a Bigger Wrench which let me lay it down and I managed to get the one holding the thread take-up lever out after following Bob and Biggun Dr's advice. The three remaining ones that are stubbornly stuck are the one holding the rack assembly in, the one holding the rocker arm on the top and the one holding the drive wheel on the main shaft. None of them are shifting so much as a millimetre, even when backed up by a solid thing with a hole for the pin. Of those, the only one I don't really have to shift is the one holding the drive wheel on, but I need to get the other two out to get this machine working properly. It would make life much easier if I could get the drive wheel off too. There is a pin removal tool available. The smallest ones are used on pushbike chains with the design such that the back is supported to avoid bending, or, in this case, terminal cracking. When driving pins out you should use a 'drift', something made of a softer metal than the pin. Brass is good as it will not deform the pin head. Quote Share this post Link to post Share on other sites
BIGGUNDOCTOR Report post Posted May 26, 2011 Good job on the ones out so far. Don't know if you can get it where you live, but I have a penetrating oil here that is called Kroil, and it is amazing stuff. It is advertised as penetrating gaps as small as 1,000,000th of an inch, and I believe it. You may have to take a break from this project, and let some type of penetrant do some of the work while you do something else, especially if you have gunked, or rusted parts. Glad the wood worked, but even wood will not stop all of the impact, even your eucalyptus. My bench block is made of steel. Another thing that you need if the backer is hand held is weight, Sometimes I have had to have a friend hold a big block of steel behind what I was driving. It acts like an anvil would, and will stop the inertia of the hammer blow solidly. You will see bucks being used in old movies of bridge riveting, and aircraft production. If the buck bounces on the back side it is too light. If you do need to apply some heat to get the parts separated the outer part will need to be heated quickly to expand it before everything else gets heated too. You shouldn't have to get much more than 300F to do it, unless someone Loc-Tited the pins in, then you will need to get up around 400F to loosen them up. Again, good job so far, just don't get impatient, and you should be fine. Quote Share this post Link to post Share on other sites
amuckart Report post Posted May 26, 2011 Don't know if you can get it where you live, but I have a penetrating oil here that is called Kroil, and it is amazing stuff. It is advertised as penetrating gaps as small as 1,000,000th of an inch, and I believe it. You may have to take a break from this project, and let some type of penetrant do some of the work while you do something else, especially if you have gunked, or rusted parts. I'm familiar with it from domestic sewing machine lists I'm on. I've found one place that sells it in New Zealand, but they wanted darn near as much for a little bottle as I paid for this machine. An 8oz bottle is, what, ten bucks in the US? This place wanted forty-something NZ for one. According to testing carried out by someone on one of the domestic SM lists, a 1:1 mix of power steering fluid and acetone is actually a better penetrant/release agent than Kroil. Not sure I'd use it as a bore cleaner though. Glad the wood worked, but even wood will not stop all of the impact, even your eucalyptus. My bench block is made of steel. Another thing that you need if the backer is hand held is weight, Sometimes I have had to have a friend hold a big block of steel behind what I was driving. It acts like an anvil would, and will stop the inertia of the hammer blow solidly. You will see bucks being used in old movies of bridge riveting, and aircraft production. If the buck bounces on the back side it is too light. If you do need to apply some heat to get the parts separated the outer part will need to be heated quickly to expand it before everything else gets heated too. You shouldn't have to get much more than 300F to do it, unless someone Loc-Tited the pins in, then you will need to get up around 400F to loosen them up. Again, good job so far, just don't get impatient, and you should be fine. Thanks for all the information and assistance. I'll probably wait until the weekend when I can dig my length of rail track out of the garage. That's the closest thing I've got to a bench block. I'm pretty sure I've peened the big pin at least a little bit so I'll have to hunt out my safe-edge file too and take the rim off Quote Share this post Link to post Share on other sites
amuckart Report post Posted May 26, 2011 Gordon, who has much more luck finding stuff on the 'net than I do found the exploded diagram of a model 29k and a parts chart for the 29U - the last version that Singer made, but it's fundamentally the same beast as all of the later model 29ks. This isn't the one I was thinking of, but it's close enough. 29U Parts Chart Page five of this pdf, part #8586 is the one that's giving me grief. 29K exploded Diagram Cheers. Quote Share this post Link to post Share on other sites
BIGGUNDOCTOR Report post Posted May 27, 2011 OK, if I am reading it correctly, the problem child is the main pivot pin for the upper truss beam. I would be surprised to hear that that pin is a taper pin. You usually don't see pivot pins tapered, as the working action could pop them out. You will definitely need good back up, and watch out if there is side clearance on the frame to the beam. Too much clearance will allow the side ears to flex if stuck to the pin, and possibly lead to cracking. If there is a gap over say .003" wide I would stuff some shim stock in the gaps before attempting to drive the pin out. The shims will essentially make the assembly solid, and direct more force where it is needed instead of where you don't want it to go. I would suspect that the pins are tight on the frame, and the operating clearance is in the beam. Too bad about the Kroil being $$$$$. Yep, there are tons of home remedies. I would suspect that the acetone in the ATF mix would evaporate fairly quickly, whereas the Kroil stays wet. I do know how well Kroil works though, as it has saved me some busted knuckles. I have over a gallon here at the house. Interesting that yu mentioned bore cleaning, as I have seen it at the gun shows here to loosen copper, and lead fouling in the barrels. Spray it in, let it sit, then use a tight fitting patch to push the fouling out. I also like the smell of Kroil. Yet another method you might explore is one used to pop brake drums off of the old tapered axles. Put quite a bit compression on the end of the pin with a C-clamp type device that has room for the pin to move opposite the screw, then belt the end of the clamp screw with a hammer. Make sure that the C-clamp is backed up with your rail. The shock may pop it lose, then just press it out. I have some C-clamps made by Armstrong that are extremely beefy for their size, I don't think that a regular home use one would be stout enough though. You don't mention your skill level, or tools available to you. Being a machinist I tend to look at making tools as something easy to do, sorry if this is not an option for you. If not, do you have any friends who do machining? Quote Share this post Link to post Share on other sites
amuckart Report post Posted May 27, 2011 Hi Biggun Dr. Thanks for your ongoing help. I don't know for sure that it's a taper pin in the 'k58, but it is in the UFA and the 'k13s. I don't have my caliper to hand to tell you the end diameters, but laying it on the table and putting a steel rule on it it's obviously not a straight cylinder. As far as this particular pin is concerned, it's tight on the beam and rotates in the frame on the 'k58. Looking at the wear on the one I've knocked out of the 'k13 it's the same there too; there's longitudinal scratch marks on the centre third of the pin and the outer thirds are smooth. That's a good idea about the shim stock, I hadn't thought of that. The last thing I want to do is break the cast-iron frame of the machine. If I'm visualising things right with the C-clamp idea you're suggesting using it like a whackable bearing-puller, yes? If it helps scale your replies, I'd class myself as not stupid and basically mechanically competent, but I'm certainly not a machinist. I've stripped things like domestic treadle machines, a Pearson A1 add a couple of Junker & Ruh Sd.28s right back to individual screws and reassembled and timed them so they sew again, and I've taken my #6 Pearson down to minor sub-assemblies and reassembled it without a manual or leftover bits. I have basically no power tools beyond a dremel, a drill and a poxy little belt grinder I've adapted for sharpening. I have a hand-cranked drill press kicking around in the garage someplace but I've yet to set up a bench to put it on. I can forge things on the scale of small knives, but I'm not trained or practiced in fine work and I have no formal mechanical or engineering training, and the last time I touched a metal lathe was getting on for 20 years ago. I'm mostly clever enough to ask for help before I break things, and I know enough to have worked out that I need a much wider range of screwdriver bits than I currently have I'm also not bothered by replies suggesting things I've already thought of, if it's not immediately useful to me, then it might be to someone reading the archived thread later. All that said, I've a friend who's a volunteer steam engineer and tram driver at MOTAT who can put me in touch with real engineers who might be able to turn up small things in exchange for a case of beer if it's an interesting project. Quote Share this post Link to post Share on other sites
BIGGUNDOCTOR Report post Posted May 28, 2011 Your mate at MOTAT should be able to help out, as I am sure that they have dealt with their fair share of stuck hardware. I have read on the blacksmithing forum that "tinnies" are a universal currency in OZ, and NZ. I like the fact that you are not afraid to tackle a job like this. Knowing how things work can come in very handy at times. Yep, on the C-clamp. With the brake drum puller the screw is pushing against the axle, and the arms are bolted to the drum. As you run the screw down it tensions the drum outwards. When you whack the end of the screw it it sends the shock against the axle, and hopefully popping the drum off. I have never done it, but a way to pop tie rod ends is to whack opposing sides with a couple of ball peen hammers. The impact ovals the hole enough to pop the tapered pin out. You might want to check out www.iforgeiron.com too , lots of folks down your way are registered up, and they are pretty active too. Quote Share this post Link to post Share on other sites