muerte
-
Content Count
11 -
Joined
-
Last visited
-
Thanks, Can't wait to do more work once I've moved and gotten settled in.
-
My First 2 Holsters. New To The Forum.
muerte replied to muerte's topic in Gun Holsters, Rifle Slings and Knife Sheathes
I like my Diamondback but it has some issues I'm still working on. Been back to the manufacturer once and hoping my current issue is a mag problem and not a gun problem. Thanks for the info on the snaps. Not a big issue for me since I will probably only carry it in my back pocket but something to think about when I make another. I had to kinda do it that way since I had to recess the snaps on the holster part when I got line 20 snaps to go through 2 layers of 8oz leather. It was easier to cut out enough leather to recess that side than try to get it right on the other sides snaps. I definitely don't want to steal someones design/idea so if I do anything wrong let me know. Still new to this and don't know whats allowed in the world of leatherwork. I looked at the Al Stohlman book when I was at Tandy but I decided to wait till I knew how I felt about working on leather and if I would make it a hobby or just something I tried once. So far I'm hooked so it will be in my library once life settles down a bit. Thanks guys, Matt -
My First 2 Holsters. New To The Forum.
muerte replied to muerte's topic in Gun Holsters, Rifle Slings and Knife Sheathes
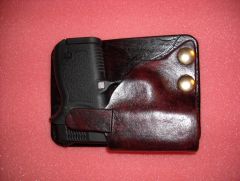
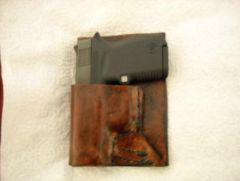
Thanks, I didn't come up with the idea for the removable holster but thanks. I just took the elements I liked from what I had seen online while researching different pocket holsters and the buttons did help keep the holster sitting a bit more level and not right on the back. I really like the design and the thumb push helps if the pistol wants to stick a bit on draw. I like having options... The second holster has no stitching at this time. I used the newer Loctite superglue gel that says it's ok for leather and it has made a quite impressive seal/hold so far. I had planned on sewing it but haven't gotten around to getting one of the overstitchers that marks the holes and if I do do it I want it to be right and look good. Also the only thread I have is some waxed thick stuff from Tandy and haven't found anything smaller that I felt would hold up good since I want a thinner thread especially on the thumb push. I have to say the Loctite added a nice dark line where it pulled some of the dye I guess giving a neat look to the edges. As for the edges I beveled them and then began sanding first with 180 grit then 220, 330, 440, 600 and then1500 grit. Man that 1500 makes a nice edge... Then I just wet the canvas a little and buffed the hell out of it till I got a nice shiny edge. Then redyed and sealed. I can't wait to make another and think I want to try a IWB tuckable kinda like a supertuck for my Glock 19. First I have to move, get settled in and get all that stuff needed for a new place and then but some proper tools. Thanks, Matt -
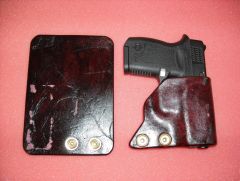
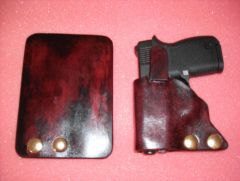
I have been lurking for a few weeks since I decided to make my own holster for a new pistol I bought. Before this I had never done any leatherwork so I looked at similar holsters like what I wanted and then headed up to the local Tandy leather and bought some 8oz leather and thread and made a go at my first holster. I molded the holster part to the pistol then sewed it together. Cut it to fit the back and then attached it. The molding was rather tight so I had to work the pistol in and out a bit to get it loose enough to be easily drawn. I made another trip to Tandy and got some dye, sealant, one of the plastic burnishers and an edge beveler. I dyes the holster after it was put together so it isn't covered that great behind the holster but it was a good learning experience. Here are the images of my first holster: The next weekend I decided to make another holster that was a little better designed and cleaner cut with some additions like a thumb push and buttons to allow it to be a front or back pocket holster. I made a template using autocad and cut and dyed all the leather before forming then I glued the holster pieces together and sanded then burnished the edges using canvas. I redyed it and then installed the buttons. I am much happier with this new holster other than where the sealant stuck together causing some tears when I separated the back from the front. Here is what my new holster looks like: I am enjoying working with leather and have alot more to learn but so far so good. I did post this in the members area as well but thought this part of the forum would be a better place to get criticism to help me along the way. If it needs to be removed or moved please feel free. Thanks, Matt
-
Just wanted to say hello and introduce myself. I live in North Carolina and work in IT. I collect guns so making holsters was a natural transition I guess. Only 2 holsters in and I have learned alot from trial and error and from this board. I have been lurking for a few weeks since I decided to make my own holster for a new pistol I bought. Before this I had never done any leatherwork so I looked at similar holsters like what I wanted and then headed up to the local Tandy leather and bought some 8oz leather and thread and made a go at my first holster. I molded the holster part to the pistol then sewed it together. Cut it to fit the back and then attached it. The molding was rather tight so I had to work the pistol in and out a bit to get it loose enough to be easily drawn. I made another trip to Tandy and got some dye, sealant, one of the plastic burnishers and an edge beveler. I dyes the holster after it was put together so it isn't covered that great behind the holster but it was a good learning experience. Here are the images of my first holster: The next weekend I decided to make another holster that was a little better designed and cleaner cut with some additions like a thumb push and buttons to allow it to be a front or back pocket holster. I made a template using autocad and cut and dyed all the leather before forming then I glued the holster pieces together and sanded then burnished the edges using canvas. I redyed it and then installed the buttons. I am much happier with this new holster other than where the sealant stuck together causing some tears when I separated the back from the front. Here is what my new holster looks like: I am enjoying working with leather and have alot more to learn but so far so good. Thanks, Matt
-
I'm getting a little better. Not bad for a weeks time between this one and my first. No stitching to see how the glue holds up. The sealant did stick together causing some finish issues on the inside.
-
-
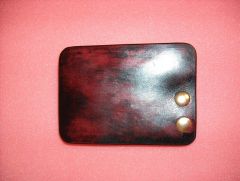
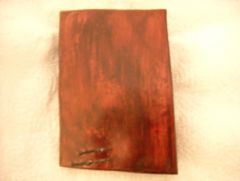
This is my first holster. Quite rough but a good learning experience.
-