Randyc Report post Posted May 23, 2008 I have have always been taught to stitch then mold my holsters. I'm now thinking of molding then stitching a holster to see how it goes. I think with the proper pressure foot, I should be able to pull it off. I'd like to hear the opinions of my fellow holster makers. I stitch with 277 weight thread through my Artisan Toro 3000. Randy Quote Share this post Link to post Share on other sites
Jordan Report post Posted May 23, 2008 Done both ways, but sewed by hand on the mould first one, there just was not enough room to get the foot close enough, saving up for a skinny one though. I like to change things up so it was just another way to enjoy the leather adventure. Quote Share this post Link to post Share on other sites
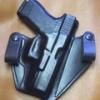
gunfighter48 Report post Posted May 23, 2008 The last holster I made, I cased the leather rather than get it good and wet for molding. Got the leather just damp enough so I could do a light molding job, just enough molding to get an idea of where I wanted the stitching line to be. Then laid out the stitching line and laid some weight on the leather to flatten the leather and let it dry over night. The next day I glued and sewed the holster together, then dunked it water for about 20-30 seconds and did my molding. Worked good, the gun was a tight fit and it's much easier to sew flat leather. I used a 500 watt heat gun to speed up the drying time and it also helps to harden the holster, be sure to not get the leather too hot. The finished holster was tight enough so you could turn it upside down, shake it and the gun would not fall out. By the time the owner gets it broke in it will have just the right tension for an IWB holster. Quote Share this post Link to post Share on other sites
Shorts Report post Posted May 23, 2008 Well, since it's more difficult to hand stitch a molded holster, I'm not a fan of it. I did however, make a holster pretty much spot on the same design as gunfighter (frankly its uncanny how similar they are!), but I did not use the same process. Instead I cut the pattern and mouth support w straps. Then I flipped to the inside and marked my stitch pattern with a marker so I know where to apply glue. And on the outside of the holster I marked the stitch lines with scratch awl (those are to be my groove lines so they get covered). Then I sewed the mouth support on the main piece. Then I ran hot water down the inside center of the pattern where my fold line was to be, and gently folded the holster over into place. I applied glue to the flats and pressed them together (I left an extra inch or so) and I clamped them tight with some padded spring clamps. When the glue was dry, pulled the clamps off and grooved my stitch lines and stitched. Then I sliced off the extra leather on the flats and did the edges. Now it was time to wet mold. That holster came out tight! Quote Share this post Link to post Share on other sites
Srigs Report post Posted May 24, 2008 I do stitching both ways pre-molded and non-molded. Pre-molded is for when the back piece of leather is flat and top curved. Non-molded is for pancake style or pocket style (folding over the leather) holsters. Generally Non-molded is easier and faster needless to say. Quote Share this post Link to post Share on other sites