

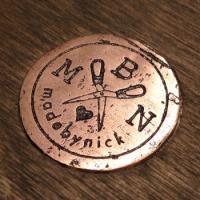
Madebynick
-
Content Count
59 -
Joined
-
Last visited
-
8" Splitter W/spare Blade - Osborne 84 Clone - Almost New
Madebynick replied to Madebynick's topic in Old/Sold
Hello everyone. Unfortunately the splitter has now been sold. Thank you for all your enquires. -
8" Pull Through Splitter With Spare Blade For Sale. $250 shipped to North America I have two pull through splitters and barely use this one. In fact, it's probably only split 25 pieces of leather in its lifetime. This model is a clone of an Osborne 84 and works well. It comes complete with a spare blade that has never been opened and the fitted blade was kept sharp using a simple jig and a lansky sharpening system. The current edge is very clean, polished, and free from nicks or dents. I've also attached a simple collar and pin to the depth adjustment arm to allow more accurate repeated splits. This is attached via friction and can easily be removed is so desired. The paper scale you can see has arbitrary units and is simply a reference scale when splitting multiple pieces of leather to the same thickness. Please see the the images below for more details and don't hesitate to ask any further questions you might have.
-
This item has now been sold
-
Hello everyone. I hope you're doing well. I'm hoping for some advice in solving my zip installation problems as shown below. This is the first zip I've fitted, and although it turned out ok, it's just ok, and needs to be better. In brief, and for some background, the case you see below was hand stitched with a 2oz leather exterior, a stiffener board, and then a veg tan lining of approx 3oz. I'm wondering if anyone has any advice as to how best to fit a zipper that wraps around the sides of a product, specifically where the zipper and product meet at 90 degrees. More specifically, I'm looking for advice as to how to tackle corners in this situation. I realise in my model that I've attached the zip to close to the edge of the product at the corners, which explains why the gap between the front and back cover are not even all the way around. This I can solve in version two. What I'm not sure about is how to avoid those puckers / pleats at the corners. When I examine commercially available products like this, I notice that there do not seem to be any pleats at the corners, and the zipper fits (in many cases) perfectly. Secondly, when making something like this, how do you all ensure that the outer and inner components align perfectly, so that your stitches are equidistant from the edges? In my case, I pre-marked my stitches, punch a few using my awl, and used a handful of needles to align the components. This was semi-successful. Does anyone have a better solution? I've often been able to solve problems like this by finding a YouTube video or two showing a professional making something similar. This time however I'm stuck for resources. Help! Thanks in advance to anyone who can offer some suggestions. Nick www.madebynick.co.uk
-
The tool cost me $400 shipped. As it's brand new, I'm looking for offers as close to that amount as I can get...
-
Hello 25b. This machine takes a standard disposable razor blade and will skive an equivalent an amount of material - approx 32mm. It is designed for relatively thin leather, probably no more than 4-5oz. Hope this helps. Nick
-
Brand New Scharffix 2000 Leather Paring Device For Sale. Sensible Offers Considered Long story short, UPS delivered this late and I had to forfeit the commission for which it was purchased. Outside of this project, I do not have a use for this tool. Unfortunately, the company I bought it from want to charge me $80 to return the product, and so before doing so, I thought I would offer it for sale here. This tool has never been used, and comes in its original box, with instructions, spare blades, and adjustment wrench. Scharffix tools are made in Germany and as such are of very high quality. I was very impressed with how well made it is! For those of you who aren't familiar with this tool, Schmedt, the makers of the tool, have a video here. Skip to 1.26 to see this tool in action. I'm understandably looking to recoup as much as my original expenditure as possible and will consider sensible offers. Please let me know if you would like any further details or images. Nick
-
Hip / Liquor Flask Case
Madebynick replied to Madebynick's topic in Purses, Wallets, Belts and Miscellaneous Pocket Items
You're very welcome! Just make sure you share what you come up with! -
Hip / Liquor Flask Case
Madebynick replied to Madebynick's topic in Purses, Wallets, Belts and Miscellaneous Pocket Items
You're along the right lines, Lel. The grey suede has a canvas lining that prevents the back of the snap from scratching the flask. The grey suede was lined with canvas after the snap was fixed in place, and then wrapped around the flask A strip of the grey suede was glued vertically along the seam on the inside, and then folded over the top edge to cover the seam externally too. The flask was then inserted into the suede 'tube', and the grey suede/canvas lamination was folded over the base of the and glued to a piece of rigid card to form a rigid base. A second piece of card wrapped in the same canvas lining material was then dropped into the 'tube' (after removing the flask) to cover the card mentioned above. Once complete, when the flask is removed, the inside of the 'tube' is fully lined with canvas, and no stitches or snaps are visible. The leather details were made in three parts: the base; the wrap at the base; and the 'flap' to secure the flask. The flap is a two part lamination as both bottom and top will be visible, whereas the wrap and base as single thickness. To ensure consistency, I spit the leather used for the 'flap' so that the resulting lamination was the same thickness as the wrap and base pieces. The 'flap' was saddle stitched at 9 spi using a 4 ply thread I wound from upholstery thread (as I couldn't find teal / turquoise thread in the correct thickness). Again for consistency, the base wrap was stitched in the same way. These lines of stitching are purely decorative as I didn't want any stitches visible internally. You're correct that I could have box stitched the base onto the wrap, but as this piece doesn't call for a super strong construction, I'm happy that the adhesives will provide a strong enough joint. There was also no real need to hand stitch this piece, but as I don't own a sewing machine capable of stitching neatly through leather, it was my only option! I hope this helps to clear up some of your questions! -
This case was commissioned by a friend of mine who is getting married in July and will be a gift to her husband-to-be on the morning of the wedding. What do you guys think?
-
Watch Strap Prototype
Madebynick replied to cjmt's topic in Purses, Wallets, Belts and Miscellaneous Pocket Items
Charlie! This was very inspiring work! I had been meaning to try a watch strap for a while now. Here is my first attempt (without edge treatment / hot glazing - pictures to follow detailing this process) Thank you.