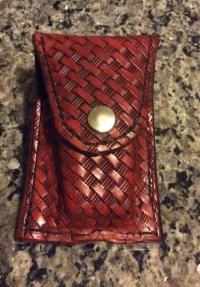
I haven't made any belts yet, but I have made quite a few holsters and knife pouches that are all tooled first while the leather is flat, and before stitching any linings to them. Things that I have determined work best for me:
Case the leather and stamp / tool it
Glue and sew lining in place
Trim lining
(do not stain the piece yet)
Sew the holster or pouch
I do not completely submerse or soak my holsters and pouches, I will pour water, or hold it under running water from the sink to fill the inside of the holster getting the non-tooled/stamped inside more wet than the outside, then i quickly run the outside of the holster under the faucet to lightly wet the outside of it. Finishing it or staining it before this step tends to make the finish run. Getting the outside too wet, or letting it stand in water will cause the stamping / tooling to blur, fade, or rise a little.
I let it air out for a couple minutes, Then I put the item in the holster/pouch to mold it. I generally do the initial shaping / molding with my fingers. Sometimes I use a vacuum sealer if the piece is very detailed, or heavily tooled. (Use non textured plastic or the texture will transfer to your piece)
Boning the piece, is going to smooth out the tooling/stamping proportional to how much pressure you use, I generally use a rounded wooden tool handle in the curves of a piece lightly, and really only use pressure in grooves.
After the outside of the piece has dried I remove the item it was formed around to let the inside finish drying. Then do any staining or dying.