All Activity
- Past hour
-
I really admire those that hand sew and tool leather but for me I don't have the temperament or the artistic ability. So for me it is all mechanically aided, sewing machines, presses, skiver, embosser, 3D printer, etc. kgg
-
I do agree with @Dwight but the grit of the sand paper selected has a lot to do with the speed of the machine. Too course a grit say 60 at slow speeds will tear chunks out while too fine a grid at high speed will burn. I use 120 grit on my machine which is a modified variable speed bench mounted buffer with a 4 3/4" long X 3"diameter sanding disk at 3400 rpm. kgg
-
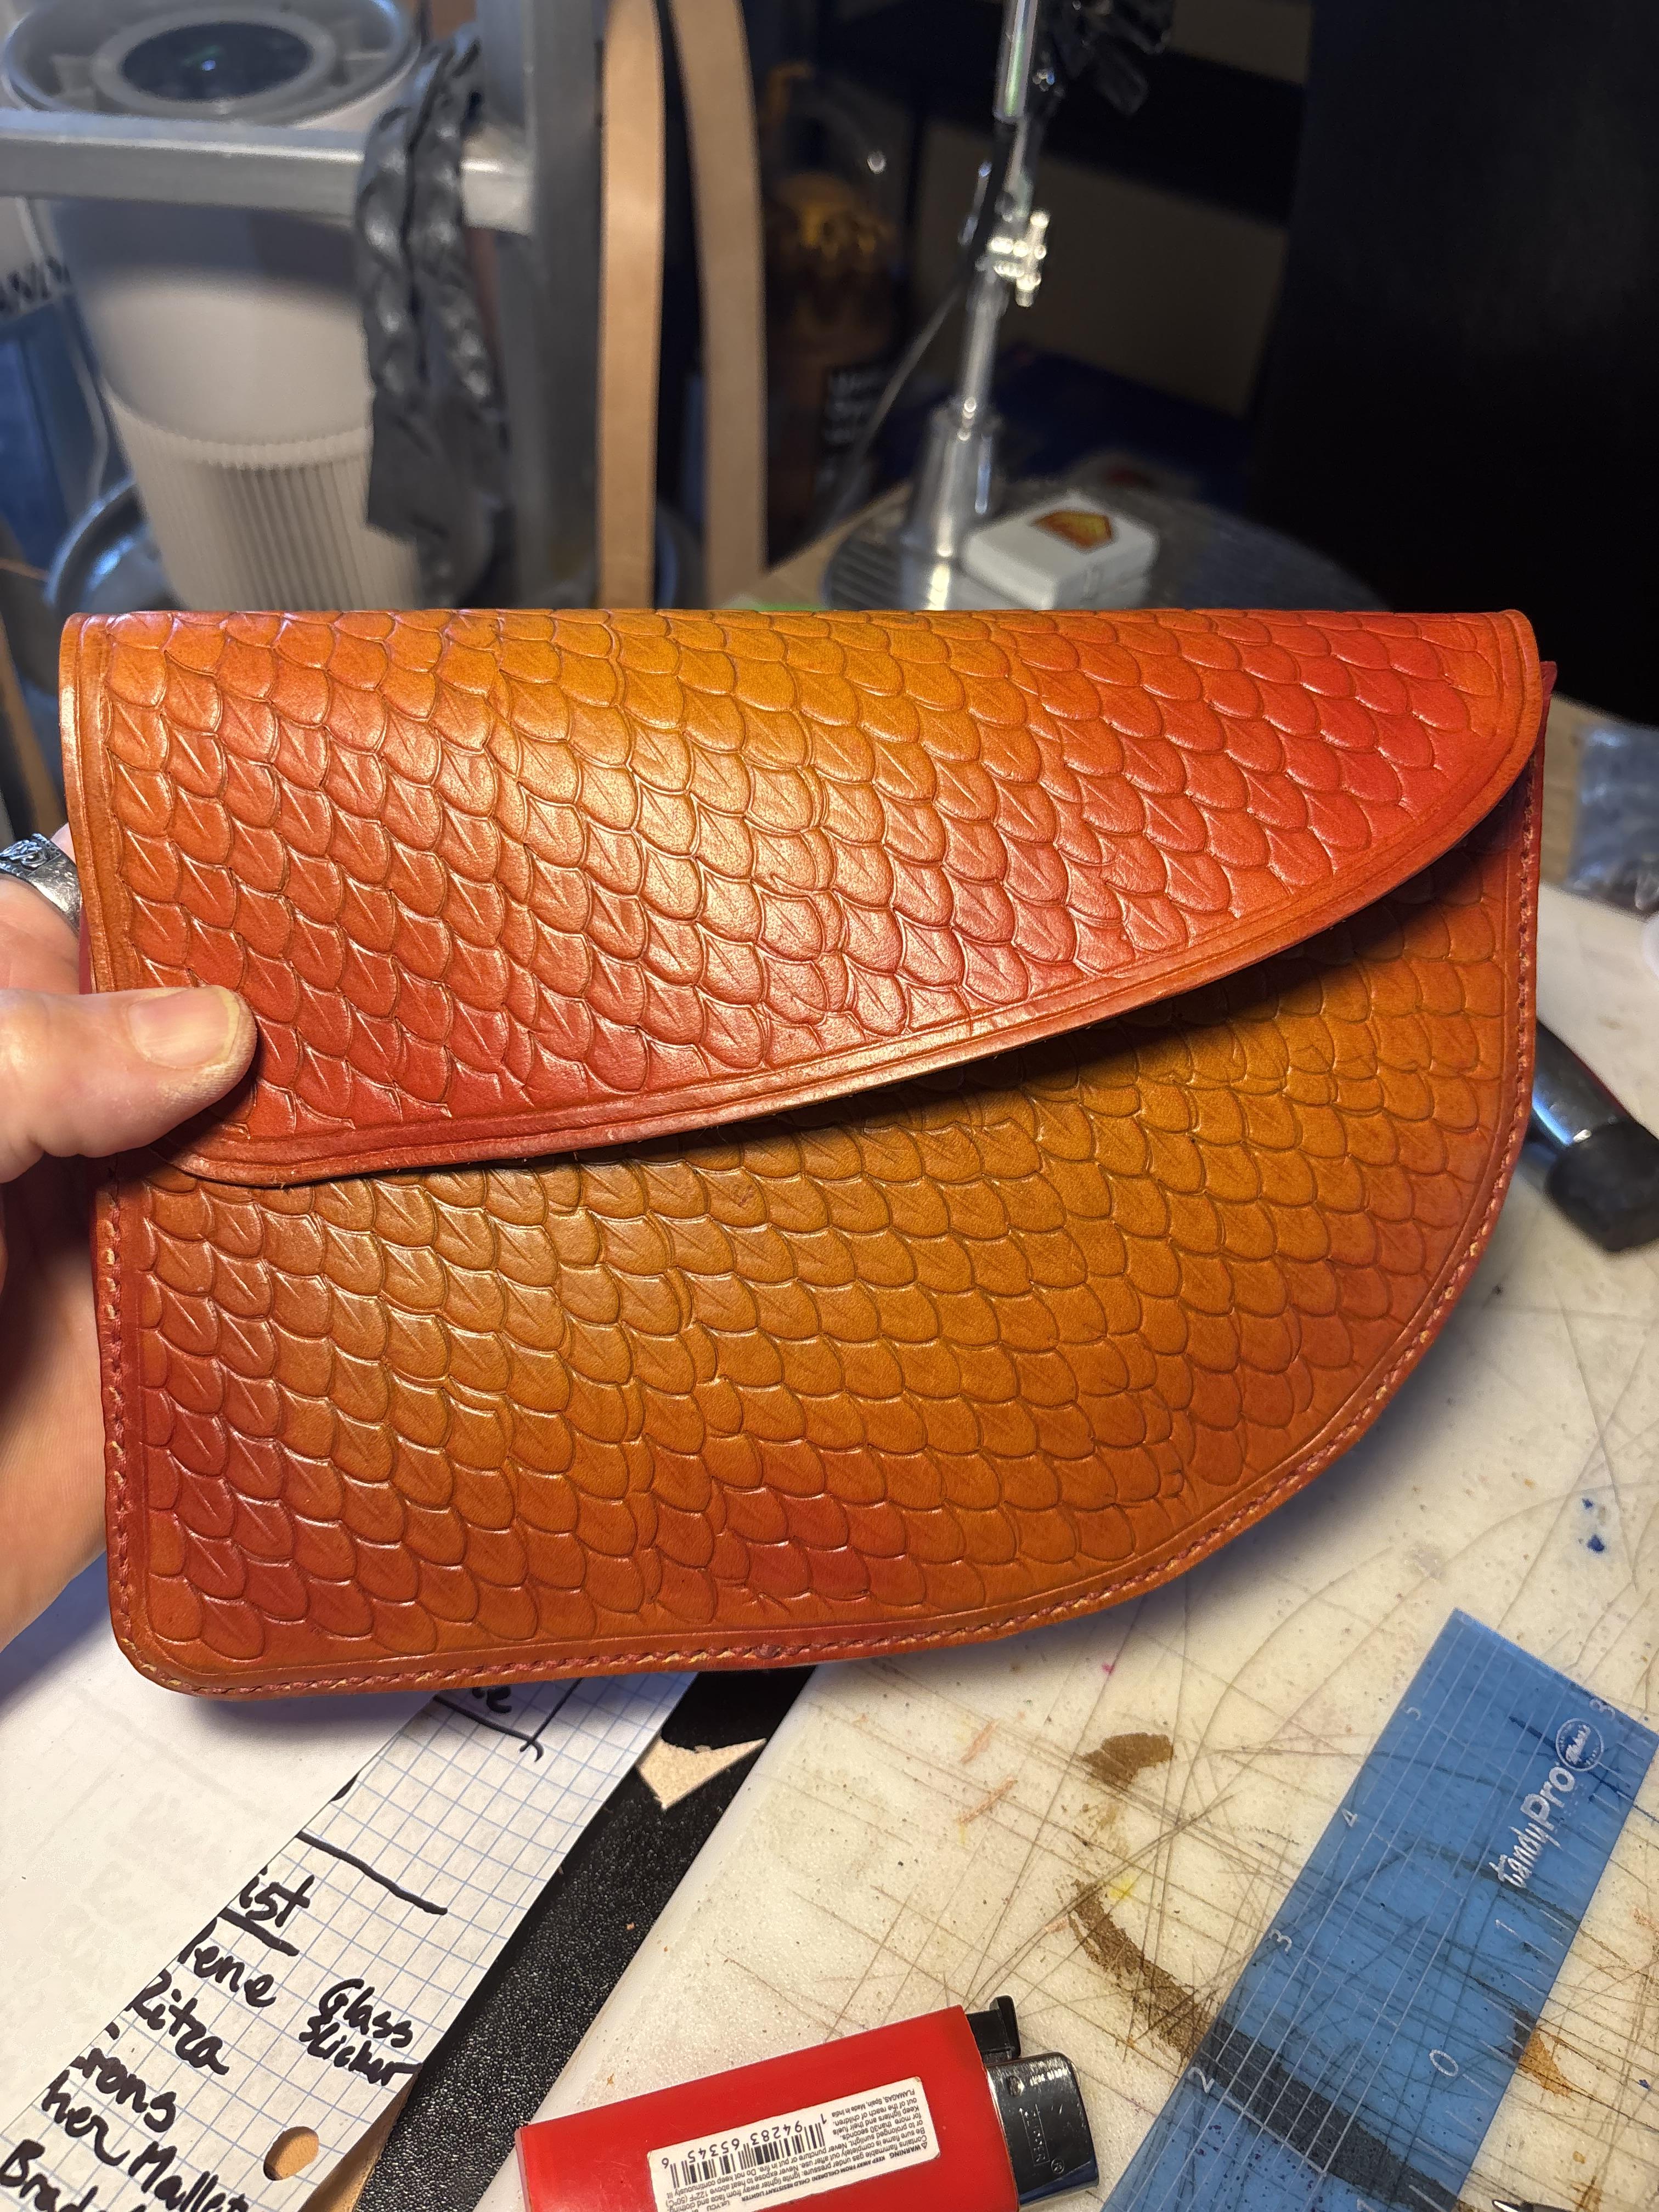
I haven’t seen a bag like that before. Very cool! Maybe Tandy’s mini saddle template could be incorporated? (I have no clue about the size of the finished product) — AZR
-
Springfield Leather Co has a free template for a mini-saddlebag-type purse. I’ve recently made a couple bags from the template, and personally, I think it’s a cool design. It is reminiscent of motorcycle saddlebags versus horseback, but check it out, maybe it’s up your alley… Hope there’s no copyright issues here, but it is free… — AZR MiniSaddleBag.pdf
-

BBC caught with its knickers down . . . .
Darren8306 replied to fredk's topic in All About Us and Off Topic
There can be no accountability. At least I am not forced to pay for their production of 'news content'. -
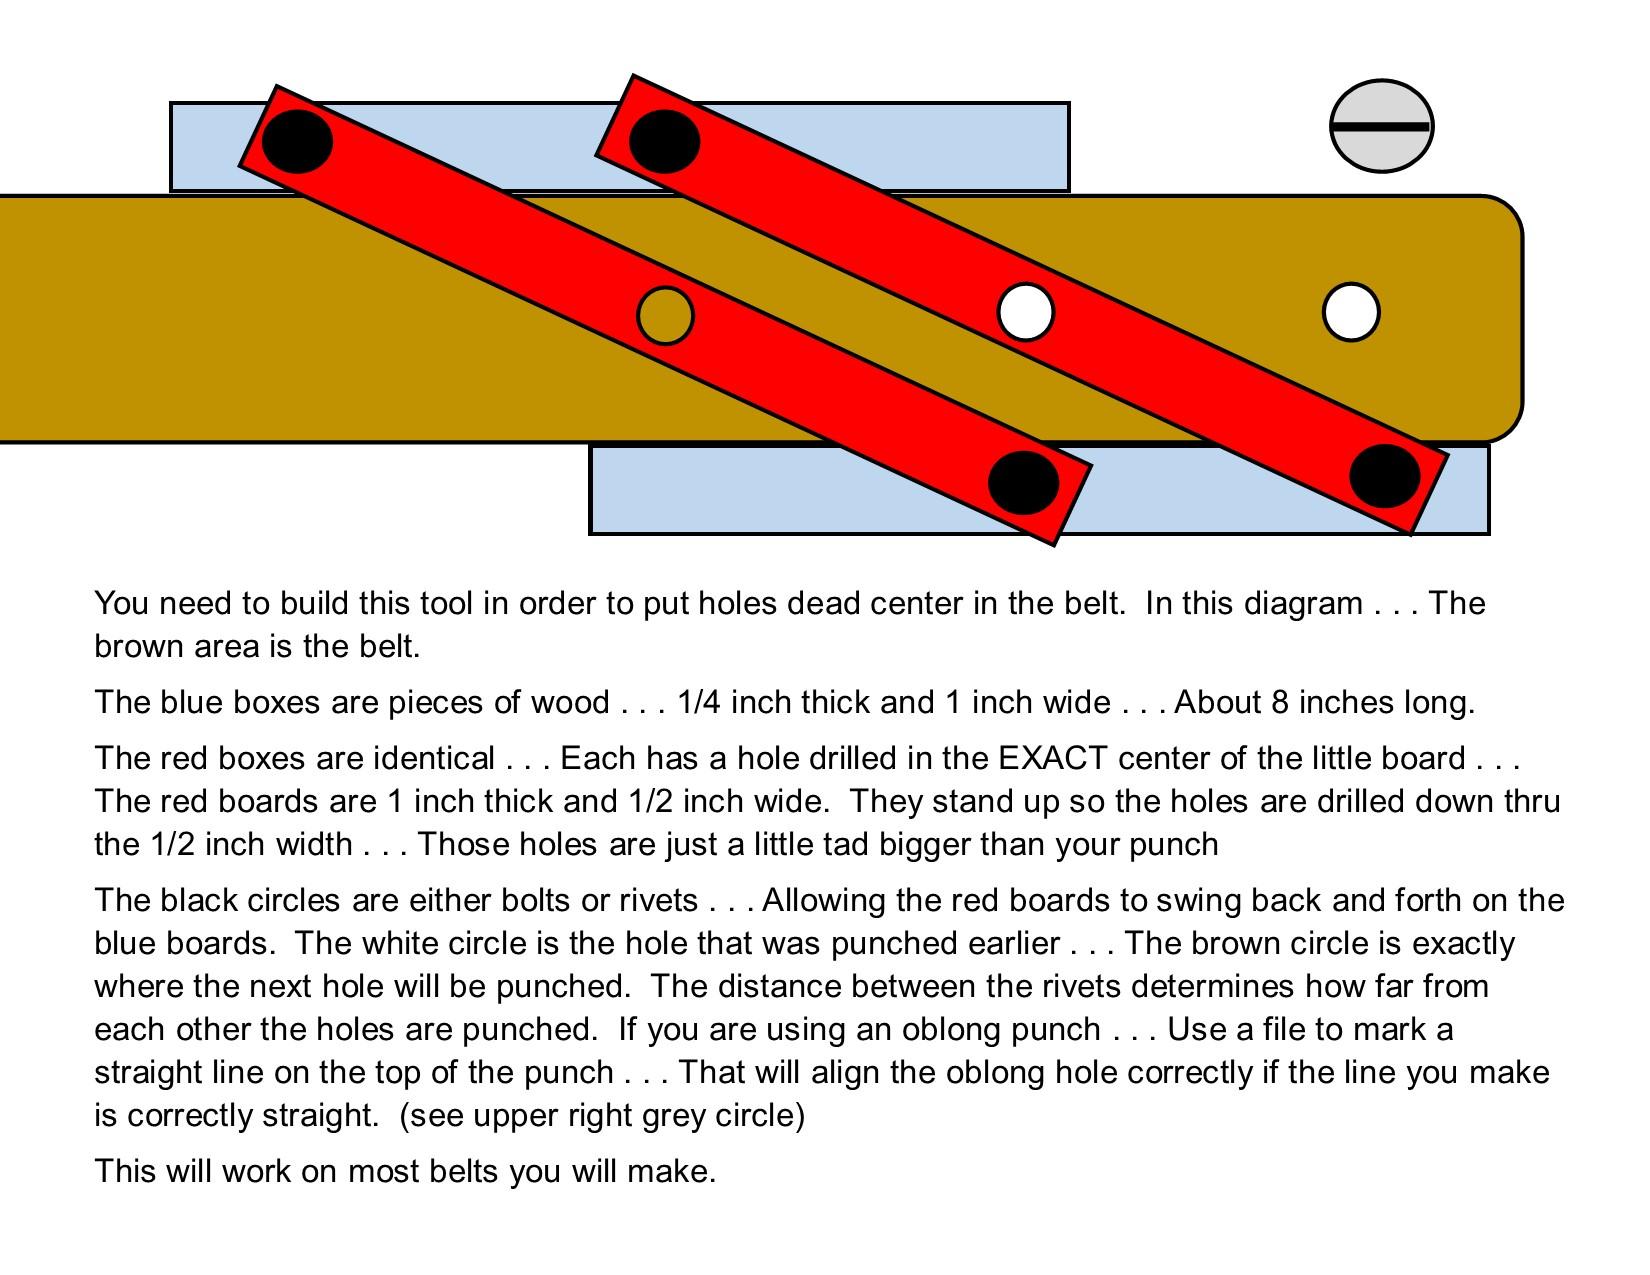
I took another approach to punching oblong holes in leather belts. I 3D printed two simple jigs, one for the belt buckle holes and one for the other end. kgg
- Today
-
Thank you Dwight. My belt is an 80 grit b/c that’s what it came with. I’m gonna do all your suggestions and we shall see.
-
You need to do 3 things: 1: get 120 or 150 grit sandpaper . . . and you may even want to to up to 180 or 200. It looks like you have 80 or 60 grit on there now . . . and it is way too coarse. You also might want to hook up a vacuum to the sander . . . I did with mine . . . it grabs the dust and makes a better experience. 2: move your machine so there is almost zero distance between the sandpaper and the shelf on which the leather will sit. Mine would not move so I made a topper for the table . . . out of 3/16 basswood plywood and contact cemented it to the table. I purposely changed the sanding belt . . . and then placed the plywood shelf up so it was just barely touching the sandpaper. When I started it up . . . it sanded the plywood slightly . . . but left a VERY THIN space between the shelf and the sandpaper . . . THAT is the desired effect. 3: make sure your table is exactly 90 degrees angled from the sandpaper. I sometimes have a problem with seeing my project . . . so I outline where I want the sanding to go with a black ball point pen . . . and I sand it until the ink line just disappears . . . works perfectly. The technique is to slide the project back and forth . . . barely touching for chrome tanned . . . you can apply a bit more pressure with veg tan . . . especially if it is layered thicker . . . like a knife sheath or holster. When you have your desired edge . . . comes the final tricky part you need to do. Turn your project over and VERY LIGHTLY touch the sandpaper. It will take off a little "edge" that the earlier sanding produced. Try it . . . you'll like it. May God bless, Dwight
-
Actually if you do it that way . . . it is about identical to the one Weaver Leather sells for some exorbitant fee . . . I don't want anything in my shop to be intentionally built or made by me that could be interpreted as patent stealing. That's why my design did not use the stiff wire pointer . . . theirs does . . . But going back to your clear plastic . . . do you actually have the plastic? And do you have the drawings? Reason I ask . . . I have a laser engraver that I've never used on plastic / plexiglass. AND . . . what little I have . . . it is really thin . . . wouldn't work for the thicker belts I make. I'd be interested in doing a "shared experience" project if you could supply the drawings and plastic. I'd put it on my machine and see how well . . . or even IF . . . it would work. We would both learn something from the process. So far . . . I've cut 3/16 basswood plywood very successfully . . . but that is about all I've cut. It engraves beautifully. May God bless, Dwight
-
I made a bigger jig like this years ago, out of thick plastruct plastic sheets, and used chicago screws as the pivot points. To make it a little more versatile, I sized the centering holes the same size as the other holes, and with a couple more screws that allowed me to add a third arm in the center which can be exchanged for different needs, exactly the same length as the ones at the edge. Need extra small belt holes? Make a center arm with small holes that fit that small punch. Need an oblong for the buckle tongue? Make a center arm, use that oblong to punch the plastic the right size and orientation and your oblong is centered and as straight as you were able to make get the plastic. You can also make a couple of holes in the edge arms and add a stiff wire pointer to set up hole spacing to help you move the jig the right distance for even holes. I took the idea so far as to put the design into cad software with a measurement scale on the arms to assist with spacing, and some accessories with the intent of having it laser cut in some nice clear plastic! Unfortunately, before the laser cut folks could get to my project, they went out of business. So, for now - my old jig still works even if it doesn't have all the niceties. - Bill
-

BBC caught with its knickers down . . . .
chuck123wapati replied to fredk's topic in All About Us and Off Topic
And if you think the BBC are the only ones doing this shit your dumb enough to believe them. -
I found this while perusing YouTube. A ton of good info, names, numbers and contact info and Bruce hisself lol. I have no idea where to post it, so you mods can figure that out.
-
Need more info, how was this jig made, I need a bit more depth Need more info, how was this jig made, I need a bit more depth
-
This is a question that needs addressing. I feel that many of the videos that are out there are misleading inasmuch as hard thick leather is used or the amount of work involved in burnishing is understated. I too have found that the initial sanding raises so much more fibres than expected and I realise that a lot more work is needed to be done and wished I'd left it alone in the first place.
-
Thank you for your answer. I saw that file too but cannot find the parts, strange enough. I wil send a picture and explain more my question.
-
 BeatnikBandit joined the community
 -
OK I'll bite .. how about Ebay . Plenty of ' Faux ' Louie Vuitton on Ebay ...LOL . Also sell scrap Fabric remnants 'claiming' authenticity . also.. Amazon ... Louis Vuitton I always under the impression the LV designs, materials, and patterns are all proprietary owned international copyright. Now doing your own ( LV Artistic Interpretation ) is legal as long as zero reference or labeling is made as Louis Vuitton. I have bought LV knockoff items overseas markets.. LOL, BUT The only way to buy or sell from, or have authorized fabrics Milled Louis Vuitton, is from LV . I don't think that even selling LV remnant fabric bolts or scraps is actually legal to do under LV Lic. agreements. LV might or might not be aggressive as Disney with their Lic. fabrics. Disney is pretty ruthless, and I know someone who was sent a cease and desist from Disney lawyers, after purchasing a large amount of leftover remnant Disney print fabric bolts. .
-
Will do and report in some time (not all the time in the workshop, where I usually dye leather). Hmm..I never considered it using before dying as I had NFO in my mind as it's finish, not a prep. liquid. But certanly will make some tests in the future, as will test this aswell. Haven't had problems with customers for stiff belts, but I don't prefer it being so stiff, it nearly stands up alone (if holding in 1 hand). Will keep in my mind. I also use resolene vs. water 1:1 ratio (often, not always, depends if I'm not lazy enough to mix it :D ). But there's this great leatherworker I've admired, also on this forum (I think), Road Agent leather. In video here (https://www.youtube.com/watch?v=1-QAUSqSrRs), he is using Pro dye, NFO and Fiebing's PRO RESIST (which I assume, is simmilar finish to resolene). And here's the idea I got, that I can use NFO with PRO DYE at first. No, but will check! Thank you. I don't have California sun, but might consider drying it as such. I got Fiebings Leather Balm With Atom Wax, but didn't gave it a chance yet. Will do soon, as only thing at Resolene I dont like most, is it's gloss. I'd prefer more matt finish.
-
I recently picked up a bench mounted belt sander for cleaning up my work. It seems like I’m making more dust then actually making my work look better. What grit belt do I use? Also do I apply pressure? I’ve been putting my leather on the table and moving it back and forth. I’ve been working with 3 layers on 2-3oz chrome tan leather. Thanks tj

-
Thank you. I followed the video and now she’s sewing great.
-
I like the jig idea. Centered and spaced correctly, all at once.
-
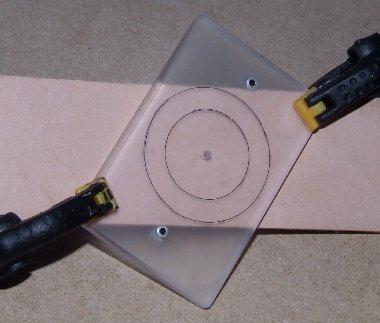
I use these ; Two pins with a hole centred on them. Fits virtually any size of strap or belt. Just put each pin against the belt and the hole is the centre of the belt. I've made 3 of them, just for handiness sake Swivel it and the centre of the strap or belt can be marked. The circles are at 1/2 inch and 3/4 inch. If you want 3/4 inch between holes move the guide so that the 3/4 circle is over your last hole

-
I couldn't picture that shaft until I went back and looked at one of mine. Now I see it runs in the lower part of the arm! Another lesson learned for me. I, too, will have to double check where it gets oiled.
-
Use wing dividers. Will get you centered everytime.
- Yesterday
-
 It-might-sew joined the community
 -
For punching belt holes and not having problems . . . take 2 or 3 hours out of your day and make this little jig. It will darn near end all your belt hole problems . . . May God bless, Dwight
-