

Newbee
-
Content Count
47 -
Joined
-
Last visited
Posts posted by Newbee
-
-
Wow!.. I knew the acrylic paint was tough, but not to that extent. Did she put a sealer on them? I do use the cheaper acrylics a lot. I am going to take your advice and use the Leather Sheen. Thanks for answering so quick. The Bible I am covering is for my Granddaughter's Sunday School Teacher, so it will get opened and shut every day, I have no doubt. I am going to make one for mysel next!
-
Thank you so much! Everything you said makes sense, especially the part about the bending. I will add, I mostly use the cheaper acrylic paints, but I do have a set of Tandy's Cova Colors and the Cova Color Highlight Colors and I do love them. They paint on so smooth. You can really tell the difference immediately, but for the price, and me being very amateur, I mostly use the cheaper acrylics. This is a lot of fun, and I have learned a lot from this site!
-
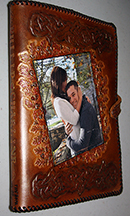
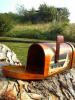
Can someone explain how to apply Clear-Lac and Acrylic Relolene? I am working on a Bible Cover. I painted the flowers with Tandy's Cova Color and Highlighter Stain. The cross & Cover background started out with beige stain, but was too orange for me. I made the mistake of finishing the edges of the cross with gum tragacanth stuff before staining, so anyway this is what I came up with and am pleased with it. I would like to have a very good seal on it, but I am afraid of running the colors together. I think one more mistake may be one too many...lol I have sprayed a light coat of Fiebings Leather Sheen on it. Would I be better off to use Acrylic Resolene or Clear-Lac? Should I just brush it on? Will it cause the colors to mix together? Will it darken the flowers?

-
Cutting Fringe...June Taylor Quilting Template...Many different templates to choose from, so read carefully about which one you choose...Rotary Cutter, be sure to get one with a bigger blade...One Template cuts 1/4 inch strips, most cut 1/2 inch strips...I used the 1/4 inch Template and went back and cut 1/8 inch strips...The cuts are clean and crisp...To make longer fringe, (1/4 inch Template is only 6 inches long), I carefully moved the Template and cut longer...I have cut 3 pieces of leather at a time with great success. I found this to be much faster and safer than using a ruler. I have learned so much from this site and I hope this will help someone else.
-
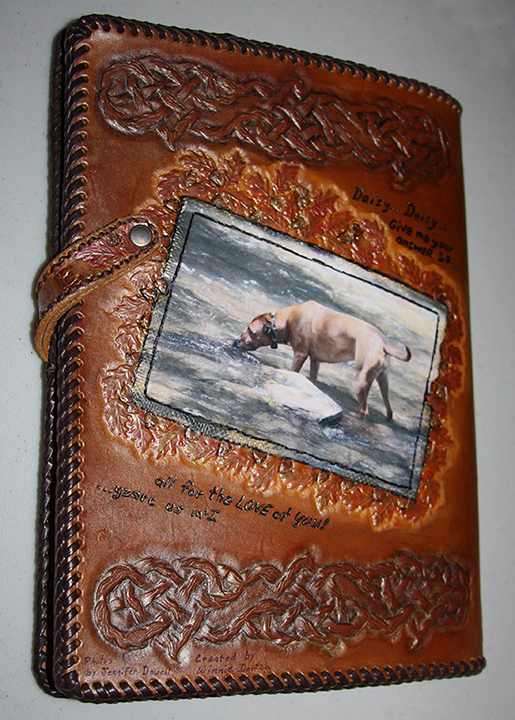
Thanks for all the compliments! I will search on you tube for video. Seeing is sometimes a lot easier. For the pictures, I used the method that 2-Shews explains in his video. He charges $25/00 for the video, which I ordered from a post here at Leatherworker.net. He uses a product called Picture It by Plaid. It is does not transfer perfect, but better than anything else I have tried. The technique he uses is amazing, and as bad as I hated to hand over $25.00, it was worth every penny! I will check out kingmere craft also. This site has been so valuable!
-
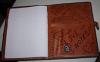
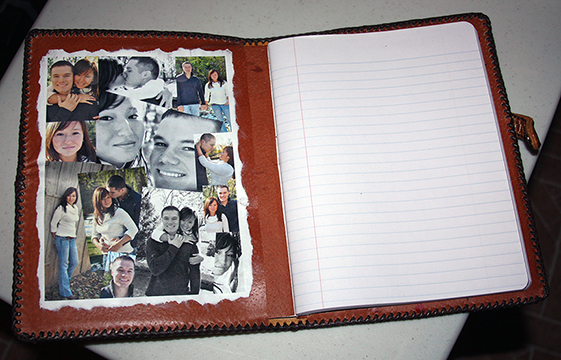
This book was meant to be fun and personal. I'm still learning, but having a lot of fun, when I can find a little time to work with leather. Daisy is their dog..I guess you figured that our already. I had to do this in a hurried manner so I made a couple more mistakes than I normally would have. I can't figure out how to end the lace properly.

-
That is so cool! Thanks for showing it. I'm fairly new at leather work so I have no idea what 2-shew technique is, but I like it.
Charlie
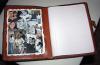
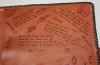
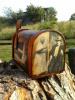
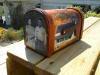
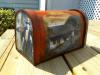
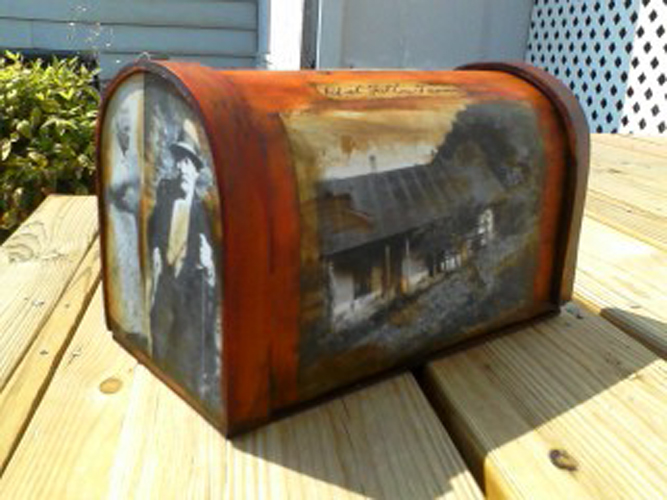
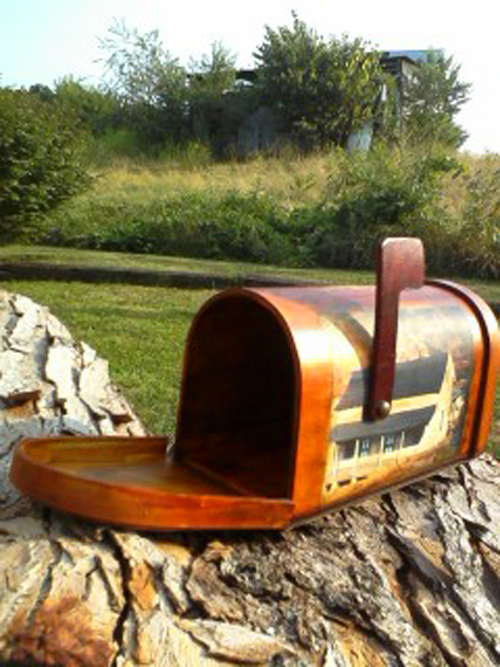
I forgot to mention that I copied my Grandfather and Great Grandfather's signitures from their WWI Draft Regestration Cards and using the picture transfer method added their signitures to the box above the houses.
I stumbled onto leather crafting a couple years ago. I also love photography. I have tried all kinds of techniques to transfer pictures onto leather. Billy 2-Shews offers a video demonstrating the technique he uses. http://www.leatherworker.net/whois.htm They ask for a 25.00 donation. I had to think about it for a long time. I finally gave in and got the video. It is worth 25.00, and the technique does work. I was pretty amazed watching him work. Besides transfering the picture, he finishes the picture in a unique fashion. I am really grateful for all the information and advice I have received from people at leatherworking.net! (FOR FREE). Joanna states that 2-Shews has an illness and will not be doing leather anymore. I have no idea about his condition at present, but I certainally hope the donation has helped in some way. There is another technique I learned about from this site. It leads to another site which explains a technique using 80% Zippo Lighter Fluid and 20% Damar Varnish. The image is printed on baking paper, using a Lazer Printer. The mixture is applied lightly on the leather becoming tacky. The image is than transfered to the leather. I have a Lazer printer, but the baking paper will not run through it without getting jammed. I want to try a different brand Lazer Printer to see if the baking paper will feed through without getting jammed.
-
Our family reunion will be held at Diana, WV this year. We have an auction each year. The proceeds are used to pay for food and emergency money for any family member who needs help. This piece of nostalgia has two pictures of the house I grew up in. One was taken in 1920, the other around 1970. A picture of my Great Grandparents on the back. My Great Grandfather built the house in 1900. The house was passed on to my Grandfather (picture on front). I used the 2-Shews technique to get the photos on the leather.
-
Cody,
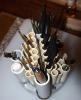
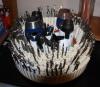
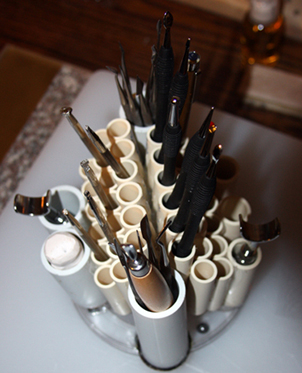
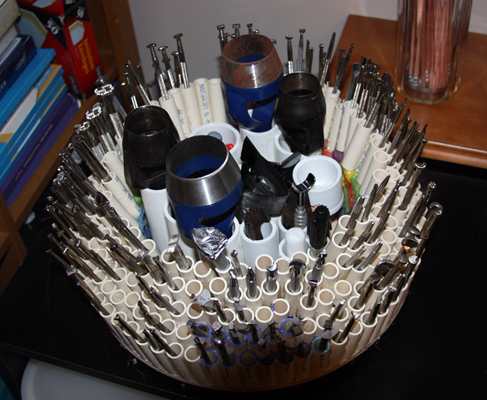
I love your design! I have learned so much on this site. Here is two tool holders I made because I am pressed for space. I used some pvc pipe I had left over after I replaced the water and sewage lined in my house a few years ago. I cut the pieces about 2 1/4 in. long and held them at an angle and hot glued them together making each tier a little taller. In the middle I used large pieces of pvc to hold punches & so on. On the bottom I purchased a box of little long round Styrofoam pieces at hobbly lobby in the kids craft section and hot glued them to the bottom of each the 2 1/4 long pieces. I used a round piece of wood for the bottom and placed it on a 6in turn table thing. Of course gluing them together in a circle pattern, each tier didn't fit in a circle, but it came out ok to serve my purpose. I have been using it for about 1 year and it is very sturdy. I made a smaller one to keep at my little work bench. I don't have a lot of time to do leather craft, ( I gained custody of 2 of my Grandchildren, 3 yr and 1 yr. )but I enjoy it very much. Maybe someday I can get them interested in leather craft!

-
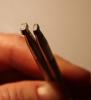
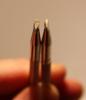
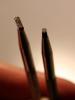
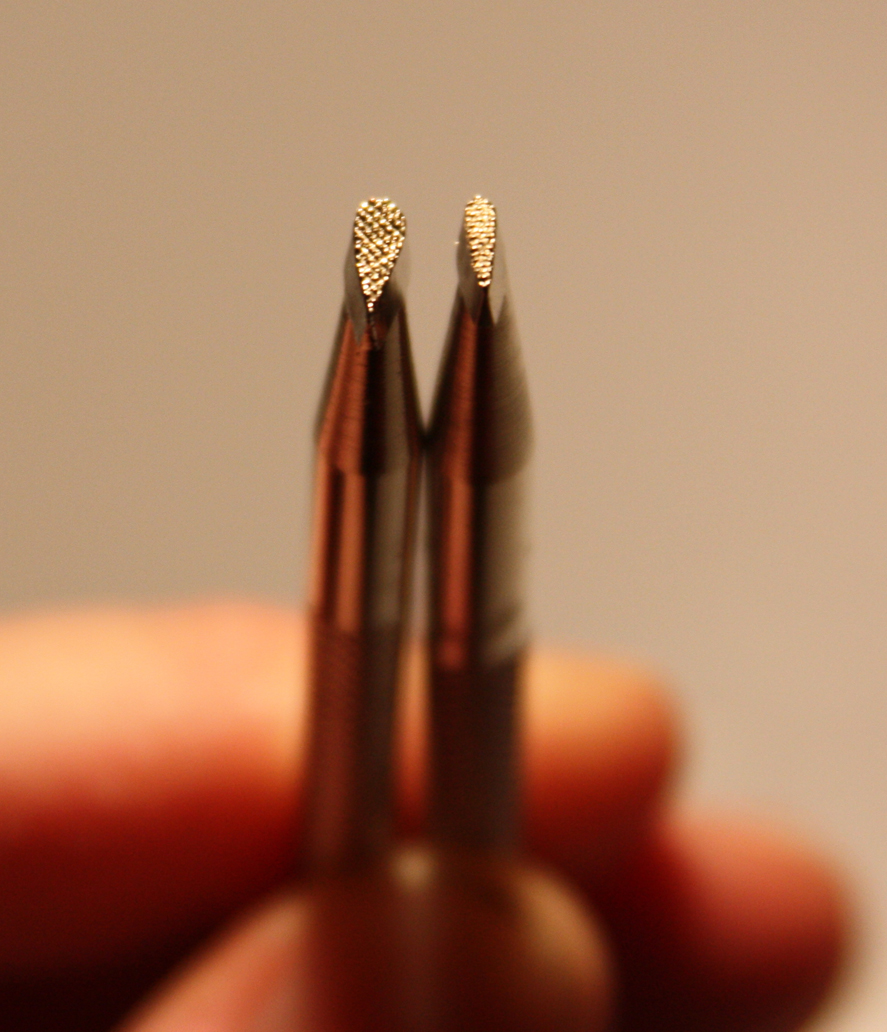
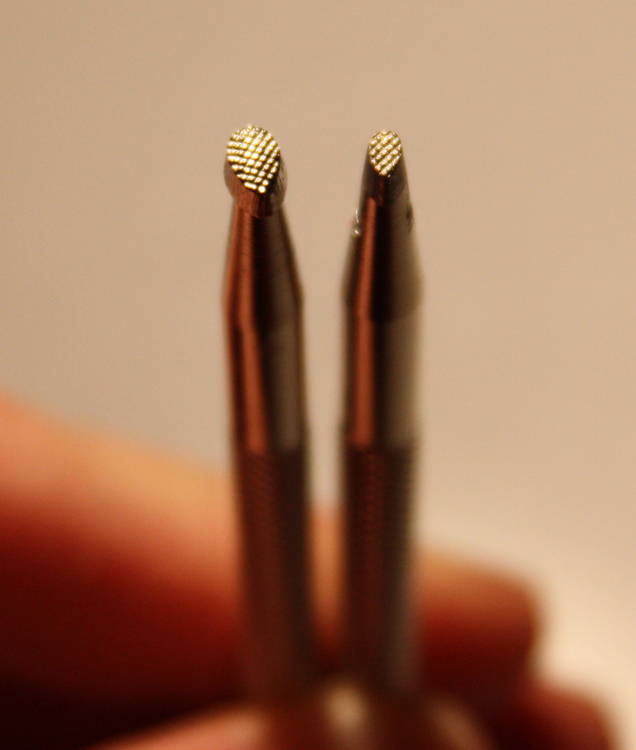
Here are the tools. The ones on the right are the original size. The ones on the left are the ones I ground down. One Beveler and 3 Background.

-
Have you tried using a small modeling tool to bevel? I would guess you are doing figure carving? I just use a scratch awl to background tight areas.
I used my Dremel to grind 4 tools down to the size I wanted them. They are so tiny!..and they work great! I was afraid I would have really rough edges, but after running some sand paper around the edges, they are fine. If I ever make any money with leather I might consider investing in some Barry King tools. I'm sure they are worth every penny, but for now my new tiny little tools will serve my purpose.I have tried using the molding tools instead of beveling. I don't really care for how it looks. I 'm sure as I go along and figure out how to case the leather just right it would make a difference. I will try to post a picture soon.
-
Hello fellow learner.

A lot of the people here modify their tools, and not just stamping tools.
http://leatherworker...?showtopic=3935
Thanks for the links. The posts sure have boosted my confidence a little. Maybe I am on the right track! I have a couple extra tools I got off ebay, so I am going to grind away and see what I come up with.
-
I am still learning. Most of my tooling projects are extremely small images, meaning a lot of areas I need to bevel and background are tiny. The smallest beveling & background tools that Tandy offer seem to be too big. Does someone make smaller tools or do I need to learn the right technique to use the ones I have? I considered trying to grind one down with my Dremel. I love this site, and appreciate everyone who takes the time to help folks like me who get hooked on leather. Any advice would be greatly appreciated!
-
3M Make a product called Scotch Guard Protector that is advertised to be for suede. Anything that isn't waxy or oily and will dry and allow the suede to be slightly fuzzy should be fine.
Suede is mostly chrome tanned these days, but the word only describes the surface treatment, not the tannage, so you can have veg tanned suede. Most of what we think of as suede is really skivers, the leftover stuff from splitting chrome leathers down to thickness. As far as I know, true suede is a brushed finish on full-grain leather.
That was really an aside, the checkers board is almost certainly chrome tanned.
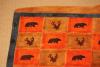
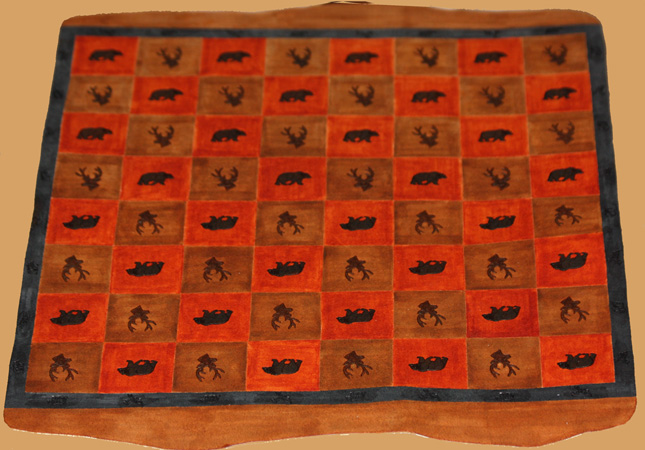
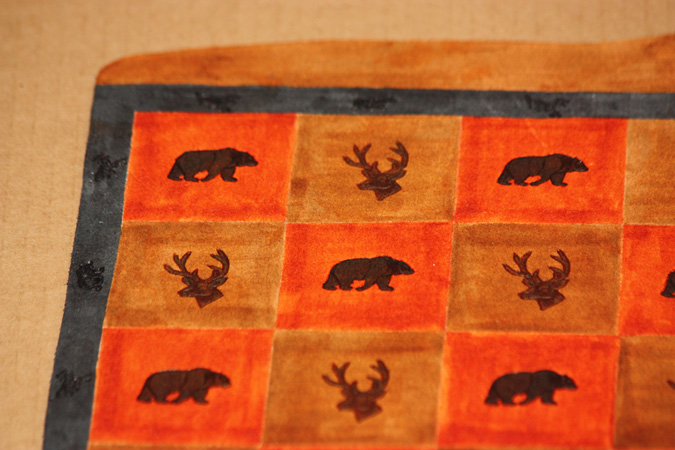
Thanks!...I will certainly take a look at the Scotch Guard Protector. I appreciate everyone's input. I am glad I ask before I started trying something. I would have leaned toward something waxy! I am working on the checkers now. One set has crossed riffles stamp and the other a bow with arrows. My Grandson killed his first deer when he was six. He will be eight in Nov. He loves to play checkers and is very excited about his board.
-
Granny, suede leather is produced by chrome tanning (or chrome-oil tanning), which varies quite a bit from vegetable tanning. The leather we use for carvings, holsters, sheaths, saddles, etc. is veg-tan leather, and is subject to absorbing moisture, then drying out and getting very stiff. To prevent this, we condition and seal it. Chrome tanned leather won't get stiff like veg-tan because it was tanned in a different way. Though it might need to be cleaned periodically, using a suede cleaner, you don't need to worry about sealing it.
Also, most of the products we use as sealers ( like lacquer based, or wax based liquids) would cause the suede to lose it's soft feel.
Thanks for your input!..Since my Grandson is 8yrs. old, I am trying to think of a way to protect it a little. Do you think if I sprayed it with Scotch Guard it would effect the stain or texture, or should I leave it alone?
-
I made my Grandson a checker board for his birthday. It is Suede. What do I use to Condition & Seal it? Any suggestions would greatly appreciated. Learning Granny

-
I am so glad you asked that question. I have been reading everything I can find, trying to learn about acrylic paint,dye,conditioning, and sealing leather! (all will be performed on a project) Should I condition the leather before acrylic paint and dye?..or after?...should I apply a conditioner after sealing the leather? Is Neat Lac a sealer and conditioner or just a sealer? Is Super Sheen just a sealer or is it a conditioner too? I would love to know a procedure for a Newbee (me) to follow that would involve acrylic paint, dye, conditioning, and sealing one project. I know there are a lot of products out there to use. Maybe if I start with a way that will work for sure, I can experiment as I go from there.
-
Heeeelp............I have read so much trying to find a straight answer to this question, I have confused myself! Should I condition the leather before applying acrylic paint?...or after applying acrylic paint? Should I condition leather before applying a sealer?...and/or after applying a sealer? For a Newbee who is going to use stain and acrylic paint, what would be the best procedure to stain, acrylic paint, condition and seal a project? I have learned so much from this site and really appreciate all the advice and information. Is Neat Lac a sealer or conditioner or both?
-
Thanks for all the advice! I am learning more and more that I do much better when I can get past the fear that I am going to mess something up because I am not doing it exactly right! I am also amazed at how many mistakes I have made and have been able to find a way to camoflage them. The advice really helps my confidence!
-
Can leather be carved/stamped before or after molding?
-
I am definately a Newbee. I am curious about molding leather. I have done some research, but I haven't seen anything about the carving I have seen in molded leather. Can someone list a lint that would explain the procedure to use if I wanted to carve leather and mold it?
-
I am a Newbee. I have created a few things and love the craft. I have purchased several books,craftaids and such. Each project shows which tools were used. I need to know, does it really make a difference if you use the tools that the pros used when writing these books, or if I have a bevel tool that is close the same size as the one recommended, will I do just as well? I am a firm believer that having the right tools for a job, can make most of the difference. I own several tools, but I have a lot of projects I would like to try that calls for tools I do not have. I don't want to waste money on tools I don't need, but if it really makes a difference it would be worth it to me. Any advice would be appreciated.
-
I am very new to leather carving. I love this web site! I have learned so much! Of course knowing and doing are two different things, but I sure have a lot of fun trying! I was searching for the best method of gluing leather to hold for carving and I think I found my answer. Thanks, everyone!
-
Thanks for suggesting the book Al Stohlman's book, "Picture Carving Finnese" I just finished ordering it. Looks like it may be a lot of help.


How To Apply Clear-Lac And Acrylic Resolene
in How Do I Do That?
Posted · Report reply
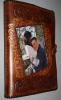
Thank you! I used a Cuttle Bug machine to emboss the cross, (using a Darice Embossing Folder) I mixed leather shavings and glue, and filled in the back side, hopefully it will help maintain the embossed impression over time. Here is a picture of a bag I made for my cousin. I used the cheaper metallic acrylic paint. The colors are much more vibrant than this picture is showing. I am going to have to experiment with the Resolene, and figure how and when I want to use it. I love all the input I get from this site!