


Gawdzilla
-
Content Count
271 -
Joined
-
Last visited
Posts posted by Gawdzilla
-
-
Hi, I've been offline for a while as you can tell. I'll find a new location for the zip file in the next few days and post a new URL here. Stay tuned.
-
Looks good, Mark!
Anybody ever tried substituting bungee cords for the elastic? Done correctly it would look rather different. Three thin bungees instead of one wide piece of material.
-
If you have a printer/scanner/copier you can scan in the pieces and manipulate them as you wish. I've taken pieces that I've scanned and doubled the size, then added the bits of the original image to get the hole pattern correct. I suggest saving the scans in greyscale or b&w rather than color. I also add pieces of paper with "information" to the scans, so the image has the name of the pattern, the rough sizes, etc. You can add this later in your photo program, but I'm taking notes anyway, so the snippets of info are already available.
-
would this help? let me know
Hmmm. I'm a belt and suspenders kind of guy. I think I'd leave the snaps off the two front "legs" and just loop my belt through the ends.
-
I found some Line 20 snaps and some glove snaps. The glove snaps look perfect for the more delicate bracelets and the Line 20's will do for the heavier ones. I'm getting some resistance from the Center in regard to doing some really punk cuffs.

-
Make a button out of a stick on one side and loop a piece of leather around it from the other side.
I was considering making a cylinder button do the job. I was going to put 3-4 holes on each end, so the user could thread the loop on the cylinder button in one and out the next and then loop over the button. I'll have to test this on my bracelet tester. (She'll demand diner at Red Lobster again, I just know it.
 )
) -
Thanks for the tips. :hugs:
I'm wondering if there isn't a kind of fastener that would be easily adjustable to the end user and be "low tech" as well. I lean toward the 1850s/1860s with this kind of thing when I can. I like to point to the dense woods at the Center and ask them what they would think of going through there in a Conestoga wagon drawn by four to six horses. The Center is just west of St. Louis so the Forty-niners would have gone through there regularly on their way to the gold fields, if they didn't take river transport up the Missouri.
-
I make trinkets for the Endangered Wolf Center Gift Shop. They want me to make wolf-themed bracelets for adults and kids. So far I have looked at snaps and velcro for the bracelets. What I'm wondering is if any of you have a clever way to fasten a bracelet that you'd recommend. There needs to be room to adjustment if possible, I can't do every bracelet in every size, some of them would never sell and as I'm donating the materials and labor my budget doesn't allow that "massive response" to the issue.
Any help appreciated.
-
I like the hose clamp thing. It would be a good way to mark a circle exactly the size you need it. And tamping it down on damp leather would give a clear cut line without ink.
-
One or more of these should be able to translate to leather. At minimum you get the dimensions.
http://sewing.about.com/od/bagstotespurseproject/ig/Free-Bag---Purse-Patterns/Cellphone-case.htm
-
Gel ink pens require very little pressure. Try weighting the point you're tracing. A pint ziplock full of pennies is handy.
-
Inlaid leather chess board?
-
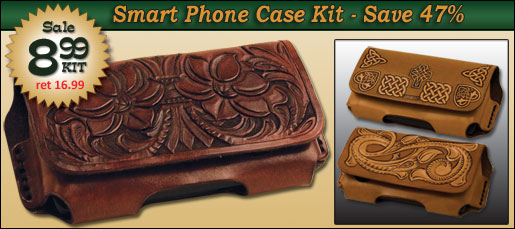
This one Tandy sells looks dead easy to reproduce.
Adding: I cut a "relief" hole where the charging cable goes in when I know what model phone the buyer has. That allows them to charge the phone while it's in the case. One person got into the habit of charging it in the car while it was still on his belt. He learned to remember to disconnect after a few "oopsies".
-
This one Tandy sells looks dead easy to reproduce.
-
It's really easy. Take a circular piece of fairly stiff leather. Cut out a section and bend the edges together to make a shallow cone. Two holes for the ties and you're done. You can use one lace to keep the knots from showing.
-
Just took a quick look and the hardest part of redoing that pattern is getting the curves right, going from a oval cylinder to a 2d object is a pain
I can resize the top in a few keystrokes to make it taller or shorter.
If I get time this weekend I will see if I can create a pattern that is as good as the Tandy ones
I looked at the holes and I think I can line them up. The pattern seems to be using 25/6" spacing which is probably closer to 3/8"
I can get you any measurements you need off the hardcopies.
-
Well I just got my first kit and and banged up the kitchen table testing the different stamps. Then I got to thinking about making patterns for different items and wondering how to do it. At work i am a mechanical designer so I am pretty familiar with the cad programs so I decided to whip one up and see what people think.I am not sure on the dimensions, such as holes for rivets or how far to space them apart to fold them over
I attached it as a pdf, if anyone wants to make it or give me any feedback
You're the person I asked for a few months ago. I was hoping there was someone with CAD skills who could take the Tandy designs and clean them up. They're basically sketched right now, with the holes spaces pretty near evenly. Pretty near until you start to line up two pieces of leather, that is. I have the Tandy Hat Pack 2062 in PDF, if you'd like to give it a shot? I'm sure that once you got the basic design in CAD you could create some interesting variations and new styles out of that raw material.
-
Thank you so much for sharing these invaluable patters.
No prob! Post some pix if you get the chance?
-
BTW, if anybody needs the specs for a Nook, send me a note. SWMBO has one I can measure for you. Especially the measurement they don't normally give on the websites, like where, exactly, the recharge connection is located.
-
Is the intended recipient content with the current sleeve, if they have one? If so, work from that. If they don't have one, observe how they hold/store/carry the reader. This will let you know if you want a top or side opening. Would a handle be useful to them?
Also consider the location of the charging cable. Make sure they can charge it without taking it out of the sleeve.
A lining with add weight and thickness, is that an issue?
Do you need lining on both sides or just on the screen side?
You can lose a welt by making the whole thing out of one piece of leather.
-
Greetings from a Boilermaker living in Missouri. This place is a gold mine.
-
One summer I worked with a guy who worked out of his camper, doing fair, swap meets, whatever. The sign on the side said, "Empty Cows for Sale."
-
leather workers and users are doing more than most with regards to being green, recycling a byproduct of meat production into useful items that will be around for a long time and ultimately will biodegrade itself, not like all the plastics and such that clog up the landfills.
And very often making things that useful, beautiful, and much better to touch than plastic.
-
I was at Earth Day in St. Louis, wearing my outfit I don for storytelling at the campfire howls we have the Endangered Wolf Center (plug, plug, plug) and a lady came up and said, "Are you wearing animal parts?!?!?!" all huffy like.
"Yes, I am. They're not made in a factory, they're not made with petrochemicals, they're a renewable resource, and they're being doing service past their original Use By date."
She shut up and walked away.
Tandy Hat Pack 2062.
in Patterns and Templates
Posted · Edited by Gawdzilla · Report reply
http://www.ibiblio.org/pha/EWC/2062.zip
Let me know if you have any problems with that link.