


RiverCity
-
Content Count
252 -
Joined
-
Last visited
Everything posted by RiverCity
-
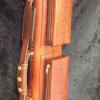
"Reverse Dye" Tooling - Impressions Remain Natural Color
RiverCity replied to BenjaminKortz's topic in How Do I Do That?
Brass escutcheon pins 3/4" -
"Reverse Dye" Tooling - Impressions Remain Natural Color
RiverCity replied to BenjaminKortz's topic in How Do I Do That?
Block dying is the correct answer, but you dont need a block. I use a piece of tshirt (I buy tshirt rags by the box/lbs) folded over a few times, and go very lightly from there. The main trick is, you need to get most of the dye off the cotton before you touch leather. So have another piece of cloth there to blot off excess dye. Another tip is to make sure your impressions are clear and deep. Another tip on the stamping. Wet the leather and then stamp. Do not case the leather, do not wait for it to lighten in color. Stamp when it is too wet. The reason for this is to avoid the stamp burnishing the impression as best as possible. It will stay pretty much the color of the hide. Here you can see the difference in appearance on a light brown (the burnish from the stamping is close in color), black, and a medium brown. Hope this helps. -
Since you are making a 'sandwiched' strap anyways, you can use thin nylon inside the strap. IMO the main strength becomes the nylon, with the added strength of the leather. It is also a good method of strap making for anything that is under a lot of tension and might stretch. From there, you can splice the leather however you choose. you can even make patchwork looking straps with this method.
-
Material For Making Reusable Templates?
RiverCity replied to AusSimon's topic in Patterns and Templates
Lots of good ideas for stuff you can use already mentioned. If you are going to be using them a lot, I prefer to have them laser cut out of acrylic. I always used Black River Laser. Not the best pic of the templates themselves, but this was the stack of templates for this particular case. -
Ive never used theirs, but it is heavy duty http://www.strapworks.com/Elastic_p/e.htm Bear in the stretch is from rubber, so over time it will still lose its memory, be it from age or climate, some more than others of course. When you are making things that have what I term expendable parts, you need to design it so that parts that can wear out can be easily replaced. Chuck
-
To do what you are suggesting, I would get a standard carpenters square, drill 3 holes, one on each end and one on the corner say 9/32". Get some 1/4 20 t nuts, short compression springs( compressed they need to be thinner than the thinnest leather you plan on using) fender washers and some 1/4 20 thumb screws. Use the square that you drilled are your template to mark your table. Drill the 3 holes in the table for the t nuts. Hammer them into the table from the under side. Put your springs over the holes. The square sits on this with fender washers over the holes, then the thumbscrews through everything into the t nuts. The springs keep the square above the table surface, and can be tightened down to whatever thickness leather you are working on.All of that said, its not needed, the square works fine as a stand alone tool. But you can certainly engineer something cool that might work great for you! Chuck
-
If youve got a dremel or the like, get a 5-6" number 8 hardened steel bolt smaller in diameter than the washer, and grind a concave "dome" the right depth for the exposed post into the end on it. Gives a nice finished dome to the post. Chuck
-
Needing A Faster, Better Way To Paint Leather!
RiverCity replied to texasfireleather's topic in How Do I Do That?
Im still not understanding why 1-2 coats is supposedly a bad thing? Ive never had angelus chip off, or look gloopy. Not saying its not possible, just that Ive never had it happen. Especially if you seal it with resolene. Here is instructions straight from angelus, and they suggest 3-5 non dilluted coats for large coverage areas like shoes. Painting letters etc for me 1 coat supplies great coverage, with a touch up sometimes if it dries lighter in spots because it was too thin on that area. http://angelusdirect.com/pages/faq Chuck -
Needing A Faster, Better Way To Paint Leather!
RiverCity replied to texasfireleather's topic in How Do I Do That?
I use angelus paints, I dont thin them, and I only use one coat. That might save you some time. Chuck -
https://images.promotionsonly.com.au/product/corporate-glass-coaster.jpg http://www.handmadeinpa.net/wp-content/uploads/2009/02/sandy5.jpg Heres a couple examples of what Im talking about. Look for the thicker ones and youll save 20+ dollars. Chuck
-
Another way to get there on the cheap is glass drink coasters. If you hit thrift stores from time to time, you can find stuff under a dollar. Chuck
-
Vegetable tanned tooling leather is indeed full grain. Dont believe me, call Wickett and Craig, Hermann Oak etc and ask them. Full grain means the leather as it is taken off of the animal and the hair removed then tanned. The "grain" or epidermal layer is intact. And yes if someone was selling veg tan splits, it would still be veg tan, but the top piece with the epidermis would be still be called full grain. Top grain is synonymous with corrected grain, meaning the epidermis has been sanded etc and is usually used to describe chrome tanned leather.
-
Veg tan leather is full grain period. The grading is about how clear the hide is ex. range marks, brands, bug bites and other scars. The better the grade the less marks on the surface. Hope this helps Chuck
-
Composition Notebook Cover
RiverCity replied to RiverCity's topic in Purses, Wallets, Belts and Miscellaneous Pocket Items
Thanks for the kind words! As for the weight, I used 4-5 for the whole thing just because I had it laying around. 5-6 or 6-7 would definitely be better if you are going to carve it, then use thinner for the pocket flaps. I had some Wickett and Craig I was using up, cause Im going back to Hermann Oak. I dont know but to me the W&C leather just doesnt carve as good IMO. It feels like youre dragging your swivel knife through p gravel where HO feels like butter. You almost have to do your cutting in when its too wet and wait for it to dry to be able to cut in smoothly. Chuck -
Christmas almost done..... Couple more things to go! Notebook cover with a little Sheridan style carving and basketweave for my daughter. Chuck
-
Leather Glasses/sunglasses Case Leaving Scratches?
RiverCity replied to zaynexpetty's topic in How Do I Do That?
You should line it with a soft fabric of some sort. Even felt is an option. If you can find a nice microfiber cloth, that should protect the lens nicely. Use a little spray glue to hold it in and stitch around the edges. Hope this helps Chuck -
Sunburst Color Belt
RiverCity replied to Allan1972's topic in Purses, Wallets, Belts and Miscellaneous Pocket Items
Looks great! Out of curiosity, why so thick? Gun belt? Chuck -
You could, but that would put most of the stress on the stitching itself. For something that needs to be "tough",you should glue and sew. What this tape is good for is holding stuff together until its sewn. Its on par with rubber cement, it will stick together, but you can still pull it apart easily. Chuck
-
WOW Super nice work! Chuck
-
Two journal covers, a checkbook and maybe another moneyclip left to go.... Woooooohooooo! Chuck
-
If you are still seeing the post, then yes. Here is a post I just did in another thread that may help. First as others have mentioned, make sure the post is the correct length to begin with. Typically youll see rivets in 2mm increments. I find the 9mm is right for two layers of 8-9, even 9-10 but thats pushing it. 7mm for two layers of 6-7, 5mm for two layers of 4-5 etc. Also it should be noted that the holes for the rivets be tight, the rivets should "pop" into the leather and be tight enough to hold themselves in there. The rivet on the right is about how much exposed post you should be seeing. All setters are not created equal either, the Tandy setter is ok at best, but its not domed good enough IMO. I use a setter from a pack of various setters available from Springfield Leather for under 10 bucks, and I modified it and polished it to make it better. The Springfield tool is longer and a larger diameter. Makes it easier to handle and use. I put mine in a drill press and sanded/shaped the dome to make it even bigger and smoother, the polished it with Flitz. A was just hammered flat, but I find the look bad, and if it fails the top part of the cap typically falls off. B was set with Tandys tool, and while it does an ok job, if you are off centered at all the cap will be dented, and the post can bend. C was set with the modified tool, it sets deep, but does not bend the post. It also leaves a nicer dome to the rivet. I set a lot of these rivets. Every case I make has just shy of 100 each, and I have torture tested them. If they are set correctly, the leather will tear out or the rivet will literally tear around the base of it before it seperates. Hope this helps! Chuck
-
From my experience, the newer Osborne tools seem to be lacking in finish quality. Everything Ive bought with their name on it has needed to be sanded and polished. I use 1000-2000 grit auto body sandpaper and flitz on a felt wheel in my dremel. I bought a creaser from them that was so misshapened that I had to take it to a belt sander. And while I have decent workable tools now, I honestly wonder if I should have just bit the bullet and bought Douglas, or Gomph or the like and saved the time right out of the gate. Chuck
-
Thanks for the kind words! When I made my own, it was PVC irrigation pipe and upholstery velvet. Those interiors cost me over 20 bucks in materials and about 2 hours labor to cut and prep the pipe, cut and sew the liners, then assemble. But Ive found a better cost alternative, and now have a case factory make the interiors for me. The new ones are an oval PVC tube, with a padded foam interior. Overall it saves me money, a lot of time and offers great protection for the cues inside. It also has the benefit of a lighter weight, which some people find very attractive. It cut about a pound and a half - 2 lbs off the total case weight. Thanks Chuck
-
First as others have mentioned, make sure the post is the correct length to begin with. Typically youll see rivets in 2mm increments. I find the 9mm is right for two layers of 8-9, even 9-10 but thats pushing it. 7mm for two layers of 6-7, 5mm for two layers of 4-5 etc. Also it should be noted that the holes for the rivets be tight, the rivets should "pop" into the leather and be tight enough to hold themselves in there. The rivet on the right is about how much exposed post you should be seeing. All setters are not created equal either, the Tandy setter is ok at best, but its not domed good enough IMO. I use a setter from a pack of various setters available from Springfield Leather for under 10 bucks, and I modified it and polished it to make it better. The Springfield tool is longer and a larger diameter. Makes it easier to handle and use. I put mine in a drill press and sanded/shaped the dome to make it even bigger and smoother, the polished it with Flitz. A was just hammered flat, but I find the look bad, and if it fails the top part of the cap typically falls off. B was set with Tandys tool, and while it does an ok job, if you are off centered at all the cap will be dented, and the post can bend. C was set with the modified tool, it sets deep, but does not bend the post. It also leaves a nicer dome to the rivet. I set a lot of these rivets. Every case I make has just shy of 100 each, and I have torture tested them. If they are set correctly, the leather will tear out or the rivet will literally tear around the base of it before it seperates. Hope this helps! Chuck
-
Agreed, youll burn the edge very quickly at that speed. Look for a dual speed buffer that has the 1700rpm range as Aaron suggested. I was on this same idea while back, to make a weaver style machine. I eventually gave up on it and went back to the drill press. Chuck