

filipblaauw
-
Content Count
55 -
Joined
-
Last visited
Everything posted by filipblaauw
-

Makers stamps, who’s the best?
filipblaauw replied to paulamoose's topic in Leatherwork Conversation
I have ordered from LW Leather and been very happy. I have a basic brass stamp with screw threads plus a handle for it. My next stamp I will order with a heat iron to see how that works. Calvin (man behind the site) also confirmed that all stamps come with the standard threading, so the handle and heat irons will work with any stamps ordered from him. I have abused my stamp, warming it over open flame, used it under my arbour press, and have not seen a single sign of wear yet. Very happy with the quality - and pricing. -
As discussed in this thread: dopp-kit.pdf
-
Wow, that video was really an eye-opener, I might buy a proper skiving knife and have a go. Color is tan @Roustaboutgoods
-
Thanks for good tips and kind words! Clas Ohlson has in fact closer to 300 stores here in Norway. I have 3 just in my neighbourhood. But to be honest, I would rather invest in a proper skiver I can mount to my bench. Not only does it seem easier, but also it generates less waste and fuzz all over...
-
I got myself a hide of oiled latigo in tan from W&C, and its become my favorite so far. This is a simple 1 1/2" belt with a antique brass buckle, matching rivets and my logo hot stamped on the side. English point and oval holes. I think it's a bit tricky to get the oval holes 100% aligned, but I'm practicing. The edges is rounded, sanded and treated with Takanole gum. Apart from the sanding, the skiving is the least fun bit. I'm using the curved razor blade on a handle. This gives an un-even skiving, and I really hope to get a proper skiving tool in the future. How do you all skive your leather? Happy to hear some thoughts about the design and color, and how your belt making process looks like.
-
Very nice bag! I want one!
-
Thanks for very nice comments, really appreciate it! I don't know if canvas were used because of added strength, or maybe because it would prevent scratches every time you place the reel inside the case. Could also be a cost issue. The loops is to hold accessories for the reel: one bottle of oil and a small cylinder for tools. Here´s a ebay ad where all the parts is pictured: https://www.ebay.com.au/itm/RARE-VINTAGE-ABU-GARCIA-AMBASSADEUR-5000-W-BROWN-CASE-TOOL-OIL-PARTS-SWEDEN-/302625517005 The case sure looked worse for wear before I began, but the parts itself were in pretty good condition. I could also use the existing holes for the box stitchting, so that made the job a bit easier.
-
Passport Wallet
filipblaauw replied to dfrensdorff's topic in Purses, Wallets, Belts and Miscellaneous Pocket Items
Very nice, love the color - and nice photos as well. A bit difficult to see the details of the edges. Have you painted them? -
Could not stand watching my dad's old reel case any longer, so I took on to restore it. It's for an Abu Ambassadeur, and the case has cardboard walls as a base. I removed the old and rotten thread, and luckily the cardboard was fine underneath. So I used the old holes, and sowed it back together. I also removed the old canvas lining, and lined the interior with a thin goat kid leather. Finished off with some leather balm to bring the colors back. I don't think any high quality leather were used originally, and I did not spend a lot of time on the edges. Just some basic burnishing and sealed it with beeswax. Now I'm inspired to make reel cases from scratch, for my fly reels
-
Thanks for comments and helpful tips!
-
@garypl I also tried burnishing first, but it then felt like the first coat of paint had too little rough surface to grip on to. Some places I was able to peel off the paint. But I will try to burnish the painted egde after two coats and see if that will give an even smoother edge. And by burnishing you mean with a hand slicker, not an electrical crease tool? Thanks for commenting!
-
I just got some edge paint from Giardini (Italy). Until now I have used Fiebings Egde coat, but I never seemed to get any good results with it. Here's my first items using the Semi Dense tan color. Two coats, each of them sanded. Then a coat of protecting gloss. All is sealed together with a final coat of buffed beeswax. The edge feels a lot smoother than anything I have achieved before, but I still feel there's a way to go to get it even and without bubbles/cracks. Interested in hearing other tips about egde finishing. I do like a burnished egde, but the painted does look appealing to me as well. Happy to hear your inputs!
-
Belt straps cut at 41-42 mm - suggestions on buckles?
filipblaauw replied to filipblaauw's topic in How Do I Do That?
Thanks for your replies, I just tested with beveling the edges and sand it smooth, and it fits - even if it's a bit tight. I don't think I want to go back to them, as I stood beside them when they did the cutting. I should have double checked the measurements. Also, it's a one day journey to the tannery. A bit frustrated after my first belt leather purchase. Next time I will order uncut pieces and cut myself. Thanks again! -
I made my first trip to a tannery outlet, and got them to cut me some straps of 40 mm. When measuring them after I got home, they are approx 41,4 mm (see picture). Maybe they did not compensated for the blades. Now I realize that my choices of buckles is very limited, as it seems that most of the buckles out there have a inner width of 40mm. Does anybody have suggestions on heel bar buckles that would fit straps of 41-42 mm? Maybe in this style: https://www.buckleguy.com/1035-1-1-2-nickel-plate-heel-bar-buckle-solid-brass-ll/ I know there are buckles for 1 3/4" width. Are they going to be too big if belt is 41mm wide? I really don't want to re-cut all my straps and trying to cut off 1,4 mm - I just don't think I will get any good results. Or is this possible with a strap cutter? The next time I will measure it before paying..
-
I am looking at the CS Osborne 158 Oval Drive punch tool for making oval holes in belts. Do any of you have suggestion on which size will be suitable for belts from 1" to 1 1/2"? I have not started making belts yet, so I am grateful for any tips. The avaiable sizes are listed here: https://www.csosborneleathertools.com/product_detail.php?p_id=376
-
Coaster with inlay
filipblaauw replied to filipblaauw's topic in Purses, Wallets, Belts and Miscellaneous Pocket Items
Thanks for good advice on texture. I forgot to specify that I did not take pictures of my first attemt. All pictures are of the second one. -
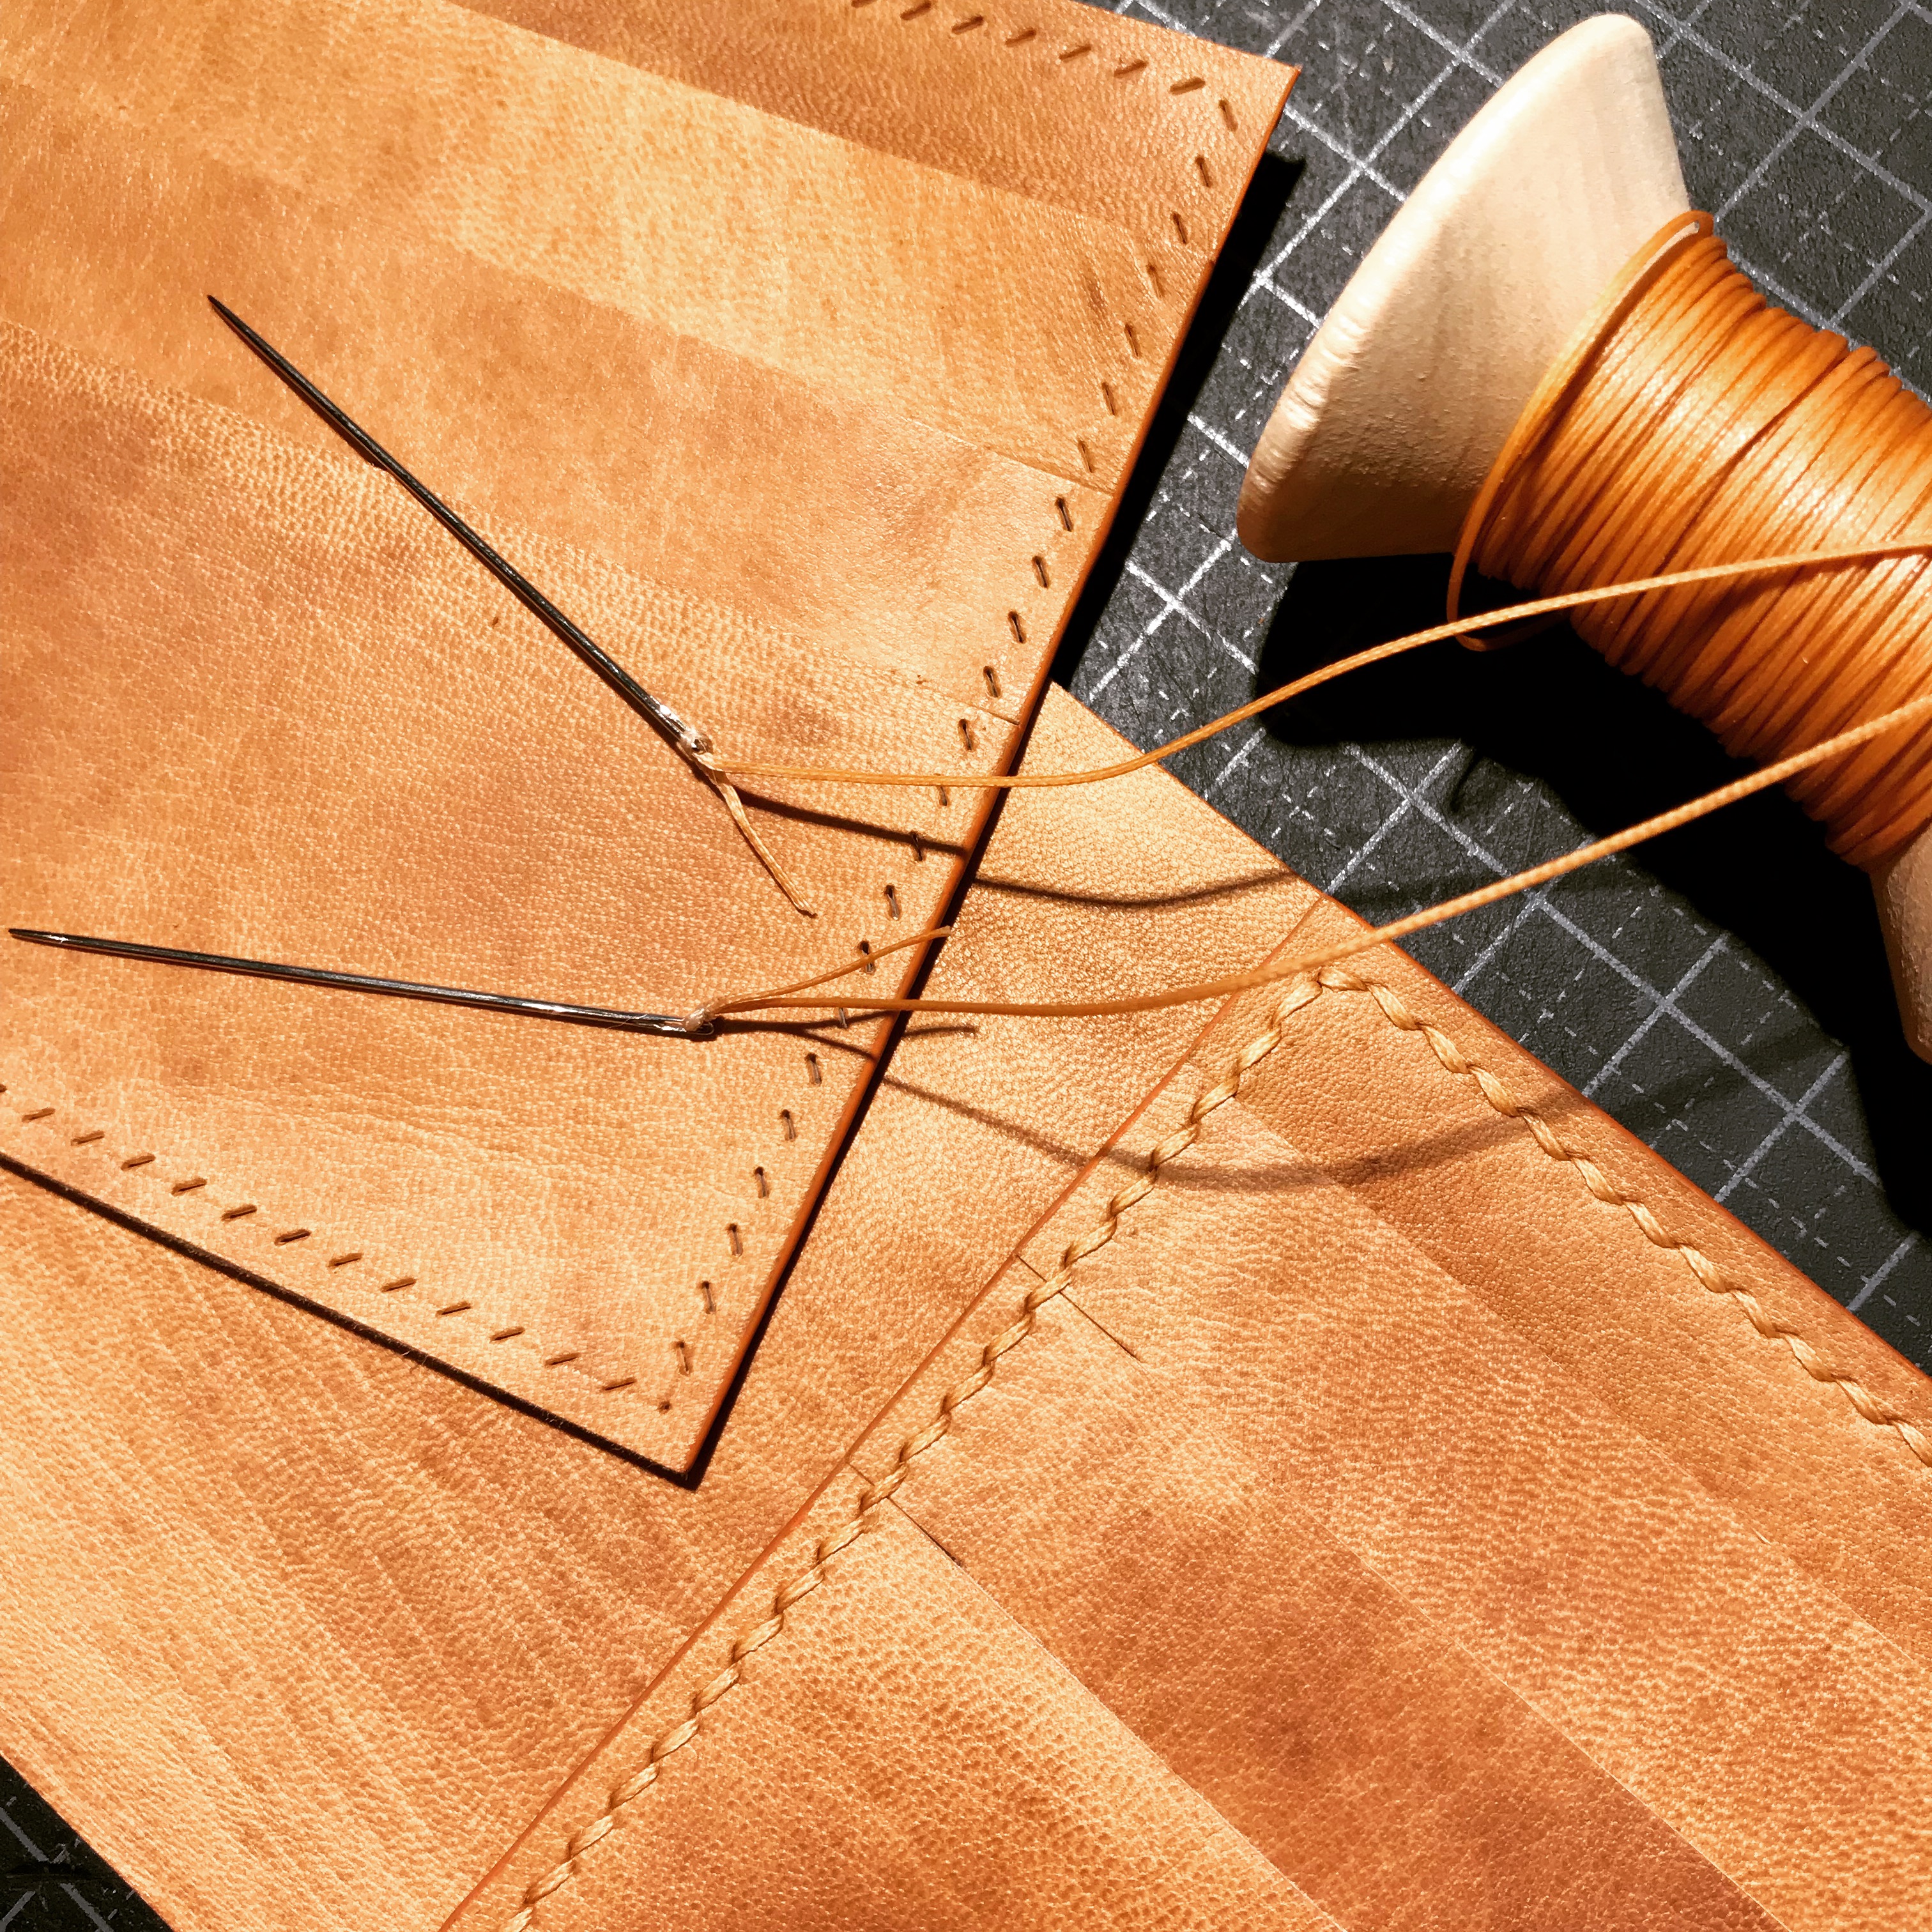
My second attempt on this item. On the first one I used a Seiwa chisel and 0.8mm thread, but I am more pleased with the stitching on this one. I used a 9 SPI pricking iron and 0.6 mm thread. I have borrowed the pattern from Kinnari leather, and he makes it in this video. I did not have the measurements, but used an old coaster I had as a template. The outer leather is veg tanned 2mm, dyed brown. I'm not too happy with the result, and I struggle to get an even coat of color using cotton dobs. Inner leather is calf skin from A & A Crack, pre dyed whiskey color. I stamped my logo on it to make it a bit more personal. Stamping is a gamble for me at the moment. I only use a screw vice to press my brass stamp to the leather, so I have no control over pressure/force. I am overall satisfied with the stitching and edges. It may had looked a bit cleaner with colored egdes, instead of burnished ones. Happy to hear any feedback and where I can improve. Also, since this is for putting cups and glasses on it, should I treat it with something else than leather balm?
-
I see. I'm using a poly board but with a thin scrap leather between the board and the leather I'm punching. So I may have to get rid of the scrap leather to make the surface harder. I just found it easier to fully get through with the chisel when I used the scrap leather.
-
Hi Richard, thanks for the tip! I am currently using a very cheap chisel set: https://www.tandyleather.com/en/product/diamond-hole-chisel-set and have been using the 3.1mm and 2.3mm. It does not say how many stitches per inch this gives, but somewhere around 6-7 spi? It may also be that my stitching is off - I have spent the past weeks studying Nigel's excellent videos on saddle stitching - and am still learning! I am waiting on a pricking iron set with 9 spi, an diamond awl and some 0.6 mm Tiger thread, and will compare that to the stitches with my chisel set and 0.8 mm thread. Will have a go with 18/3 linen thread as well. What I did not like with the chisels, is that I seem to get some ugly markings on the backside from where I hammer. It's like the leather have some round markings around the hole, like it has been teared. I'm hoping that a pricking iron and awl will leave a more subtle hole. As you well have noticed, I'm a complete beginner and have much to learn! Thanks again for your linen finishing tip! Filip
-
I'm absolutely new to leatherworking, and have only made a couple of wallets yet. I first stitched with 0.8mm Tiger thread, but I thought it looked a bit chunky. So for my second wallet, I stitched with a 18/3 linen thread. My question is how I best can finish my stitching with this linen thread. I make a couple of back stitches, and get both the ends on the back side. Should I just cut them of and add a drop of glue? Or should I thread them under a previous stitch? I have also tried melting a drop of beeswax and rubbed the thread ends with it. What are your suggestions?