


CZoc
-
Content Count
32 -
Joined
-
Last visited
Posts posted by CZoc
-
-
8 hours ago, robs456 said:Thanks for explaining.
Do you do anything so that the gold doesn't get stuck all over the bracelet, like powder it or such?A big challenge. I have learned no matter what you do it tends to stick to everything. It's removable but difficult as you must know. Painters tape over adjacent areas keeps it to a minimum.
-
21 hours ago, robs456 said:Finally someone else that does gold leaf! I had to abandon it for paint on my last project, could you tell me your process, please?
The gold leaf looks a bit scratched or brushed in the pic, is that for effect or natural?.
Any info you can give is appreciated.
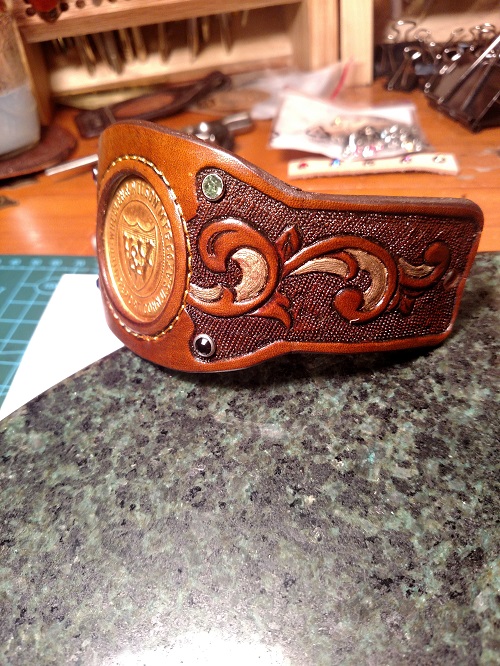
Also, I like the way you incorporated the GL in your design, looks good.Good catch...yes for effect. That gold leaf will mimic whatever surfce texture it's applied to. I use the hair tool to make the lines on the leather and the gold leaf will set right in those grooves. Too much glue and it will not..so that's my tip.
-
4 minutes ago, kiwican said:That looks awesome! Can you explain the process a bit?
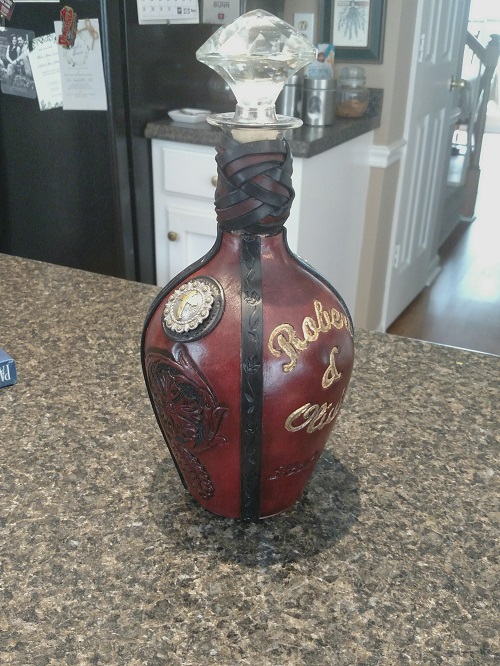
I wet mold around the bottle 4 panels with plenty of extra material. I had to cover the leather with plastic wrap while wet and used painters tape to really keep it in place. It took much longer to dry but they all came out pretty close. They were even still wet a little and I allowed to dry even more once off the bottle and plastic.
Finding the right shape for all 4 panels was difficult. I used a kind of chalk line approach on the bottle to identify the shape of each panel. Mock ups revealed gaps. This is when I had to change my original plan from lacing the panels together and went to a seam trim piece (Black Strips in picture) . I just couldnt get the panels to match perfectly. Too many curves. I got them within 1/8 to 3/16 gaps and kept moving.
I had to create a concrete mold of the bottle to use for carving / stamping. Shoe box size cardboard box - fill with concrete - wrap bottle in plastic and set in concrete at least half way. Let that set up and remove bottle. Then - line that mold with plastic and pour concrete in that. What I ended up with is a half concrete bottle pretty close to the original. This gave me something to hammer on.
Once finished on all 4 panels, assembly was pretty easy. I used Contact cement, applied the thin strips to cover my gaps, and tied the turks head on the neck. The bottom is a simple round piece applied directly to the bottle. That gap was easy to close. I sanded the bottom to get a flat surface and cemented the leather bottom.
If I had to do it again, I would pick a more symetrical bottle shape but this was as close to my grandparents bottle as I could find. This bottle was very delicate and thin Thus the concrete mold to avoid breaking. A thicker bottle may be able to withstand the stamping process - But one would have to figure out how to hold it still?
-
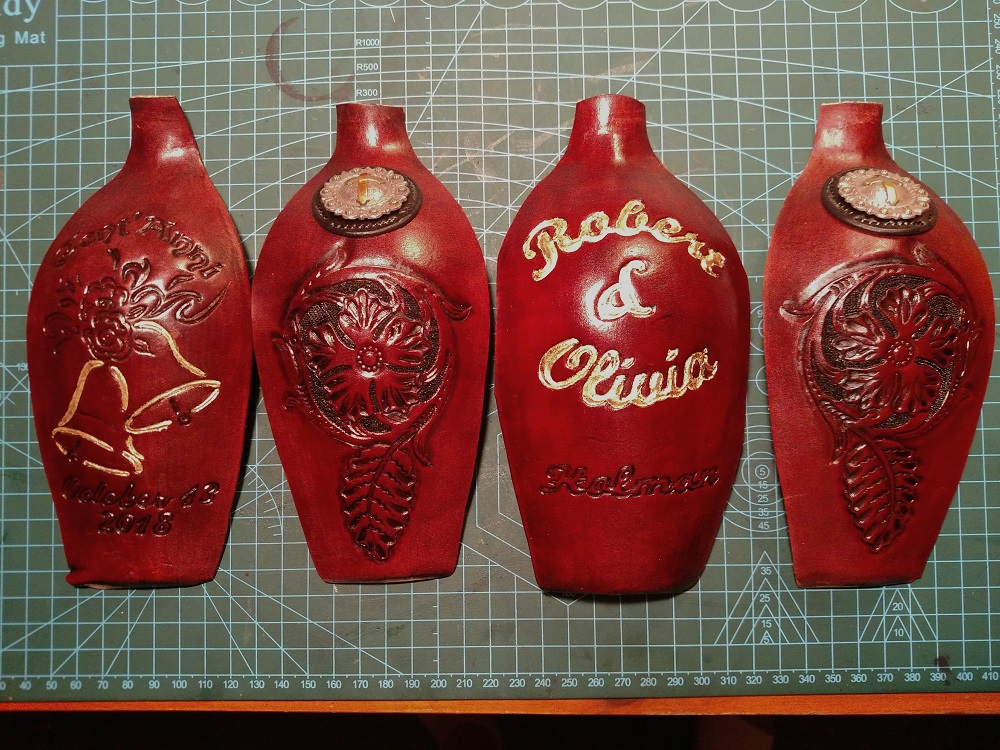
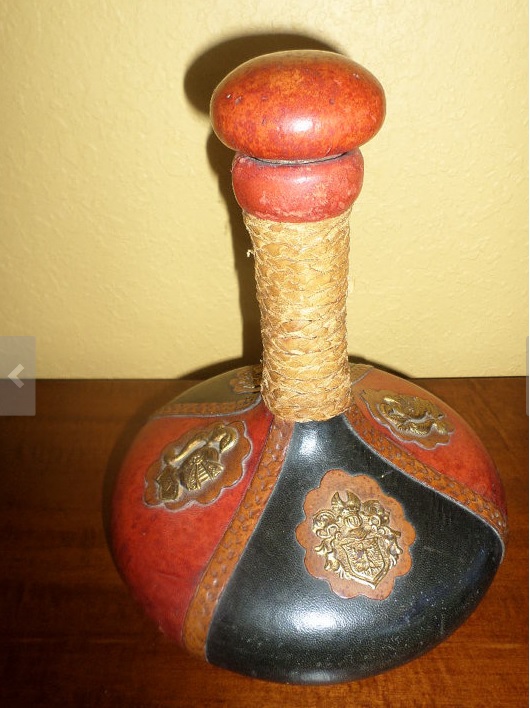
Last January 2018 - I posted a request for some info on these Old World Leather wrapped decanter / bottles and didnt get any feedback. Kinda specific category I suppose. They are pretty common in Italy and Spain using very thin leather. (Goat skin I think)
Long story short - My Grandparents had one from Italy for their 50th anniversary and my daughter loved it. She married in October of 2018 and I was ready. Let me know if you want to know the process I went thru. I may be able to save some time if interested.
6oz Veg tan, wet mold.
4 Panels, with seam trim
Leaher Turks head
conchos
.....Names, date, Italian toast, wedding bells, gold leaf and some sheridan carving.

-
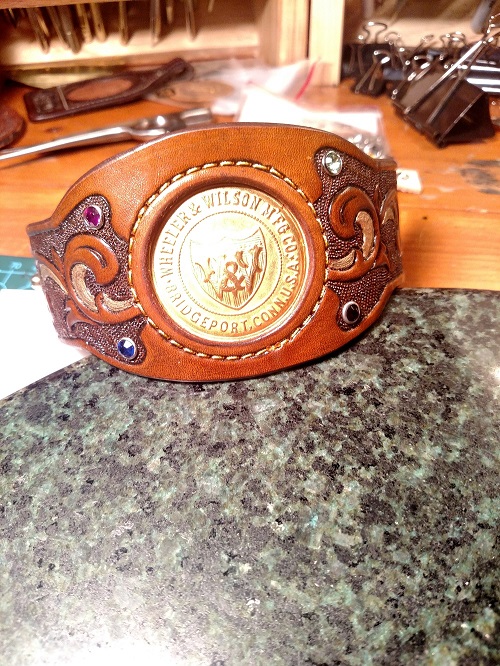
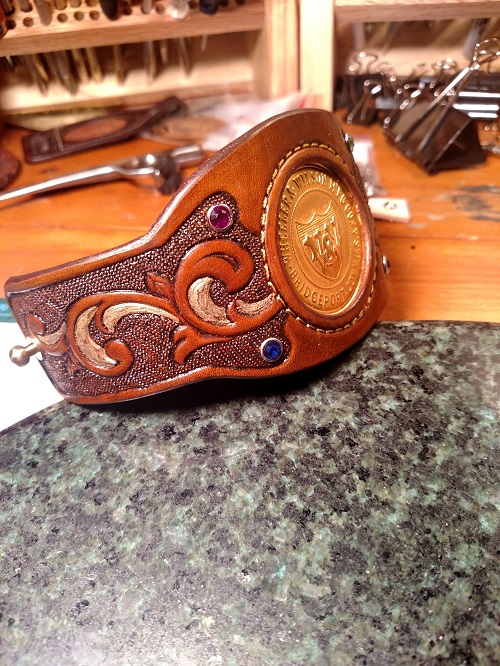
Here is a Wheeler Wilson Badge I made into Bracelet for a collector in Texas. I have been experimenting with gold leaf on leather to hi-lite stuff. Im not sure if its better than metalic paint but it works easy enough. The stones are typical synthetic for color.
-
That's it!!! Cowboy Bob your machine has the long decal too!!!!
I suppose this means that the available decals have been missing the last 3-4 inches. Thanks Bob...!
-
I have seen a lot of 29-4 machines. I have rebuilt two of them. The decals are pretty easy to identify on all the machines parts and sides, including the arm. When restoring the decals with water slide, its pretty easy to compare and confirm the accuracy of the decals, but the arm decal may have been different than I originally thought. My friend recently purchased a 29-4 that we both agreed the machine has unusually low miles. He ordered the decals and discovered that the arm decal did not match.
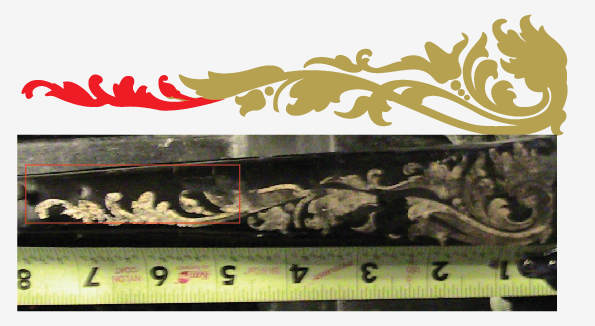
Attached is an image. It is the result of a communication between the owner and a known decal supplier. It reflects the decal companies graphic rendition of his 29-4 decal with the change in red. The gold represents what is currently offered for 29-4 decal restoration and matches ALL of the machines I have ever seen, until now. The company has indicated they will send him an adjusted decal by making an "extension" or "upgrade" to match his machine.
My thought is -The arm decal on his machine is what the original 29-4 decal must have looked like. It is LONGER than what is generally understood and that makes sense. The arm on these machines would have been subjected to the most abuse, especially towards the bobbin end. They were commercial machines, right? A 29-4 machine with an entire arm decal in tact for the purpose of decal restoration may be very hard to find?
Thoughts?
Has anyone ever seen a decal on a 29-4 this long? To be clear, its is not a 29k model and has the short arm. The serial Number puts it around 1910-1915 I think. Since this exchange has taken place, we both have been looking for 29-4 machines with original decals this long and have only found one candidate. (its the pintrest link)
NOTE: The company has indicated that they will make available this newer version going forward as an optional decal for this machine. I'm not interested in naming the company because I don't want to imply I'm speaking on their behalf, but this is good information I wanted to share and get feedback. I'm not an expert on decals or even the 29-4, but I think this is new information.
https://www.pinterest.com/pin/373446994077356864/
-
agree - that lacing does look awesome. It looks like a Mexican round braid.
If it is, you have got some serious time invested.
-
one of the cleaners.....you could try saddle soap. Long dry time but if you really get a suds going and work it deep, it shouldn't hurt anything I would think.
I used to shoe repair ...years ago...this was stage one on a complete re dye for shoes.
-
Help needed.
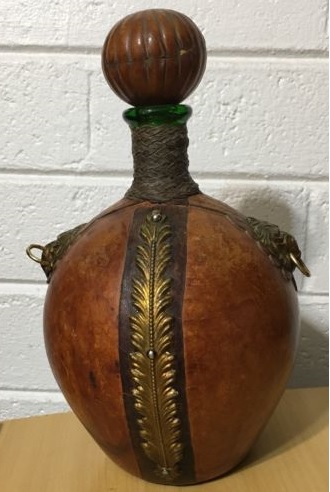
I want to try and make one of these. I'm hoping for more information than the internet can supply. There is just not much out there. I have about 10 months before a special wedding in my family. My grandparents had one of these made for the 50th wedding anniversary back in the 60's. It was very similar to these pictures and was custom made with their names and dates on it. Here are my questions.
1) What kind of leather (or hide) do you suppose was used? (very thin - applied when wet I imagine)
2) Do they still make these? Where? Most ones I've seen are "made in Italy", or Spain, some in Mexico.
3) Has anyone ever made one or know someone who has?
4) What kind of paint ? Did they carve or stamp or? As I recall, it was adorned with a type of paint that had a reflective quality. Not gold leaf, but gave that impression. other colors were dark and rich. Very middle age looking colors and style.
Any direction or input would help. I'm going do make one for sure, but I would like to understand the process, if there is one.
-
I have to say, this discussion has been awesome! Reading the different theories, experience, methods , opinions on stitching leather from folks that I consider experts is inspiring to me !
I'm considered a subject matter expert in a completely different industry and I participate in these types of conversations way too often. The technology industry is advancing so fast, these discussions typically end up with the guy who knows the latest R&D development carries the topic. Guys like me are relegated to the "old school ways" and I often take offence.... So when I hear (read) people like you discussing a historical method or tradition of craftsmanship - it rings true ! Its unmistakable ! The perfect blend of fact, history, pride in craftsmanship and you lead the way.
Im not an expert in leather work, but you provide the education and opportunity on a subject that can NOT be dictated by technology. Some things are truly valued because they have stood the test of time and tradition, and those things needs to be kept alive!
Seriously - Bravo to you all for keeping it all alive!
NOW, have any of you measured the shear strength of a saddle stitch VS a straight stitch using dual-column gas chromatograph, Hewlett-Packard model 5710a with flame analyzing detectors????
-
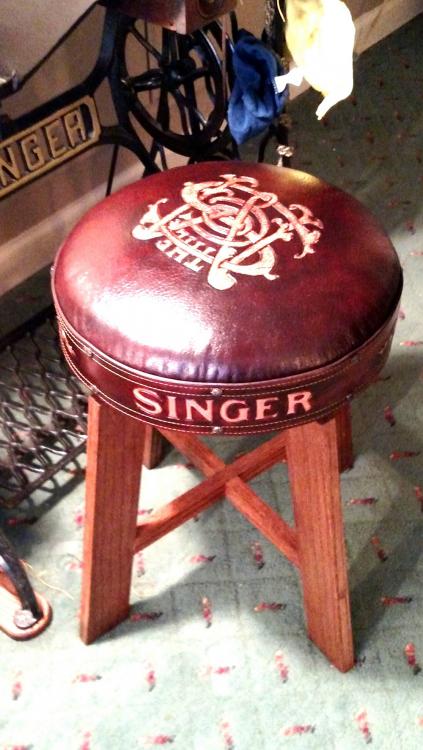
Singer Stool
in Art
I haven't figured out how to respond directly, without messaging. I think it has to do something with that Quote button.
Anyways -
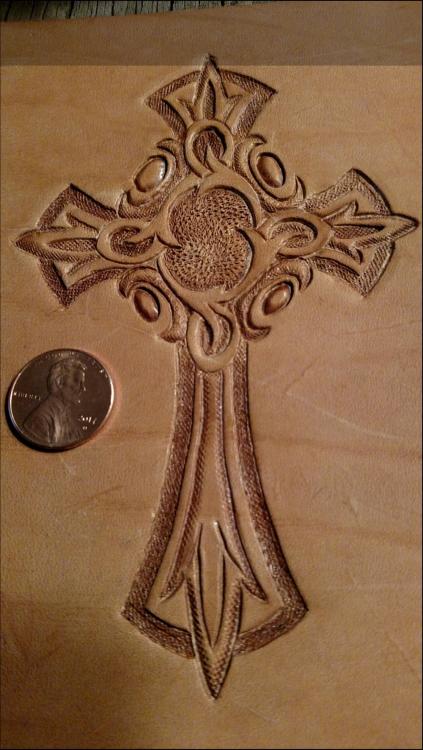
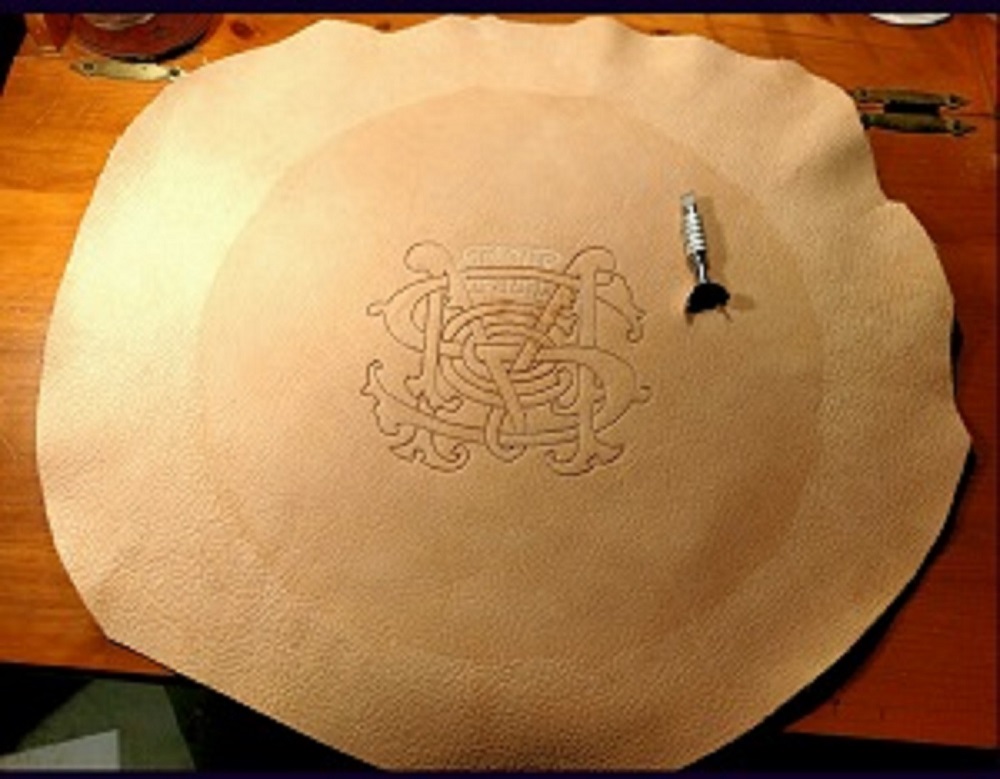
Garypl - No tricks. I didn't really tool it. I just carved it then spread the cut open more with a ball scribe. I tried to tool a piece of that milled leather, but it was too soft. It just mushed outward. It left an impression, but it just wasn't right. Plus I think it would ware of quickly because the leather is so pliable.
Leathersmyth - That stool is awesome! I actually looked for one of those as my first idea and found one in UK somewhere, and it was pricy. Very nice! Let me know if you ever want to sell that, or know where to get one. I think they are pretty hard to find.
-
That looks great !
I have been using a buckle lately from Jeremiah Watt..is that one of his buckles? (Horse Shoe)
-
Singer Stool
in Art
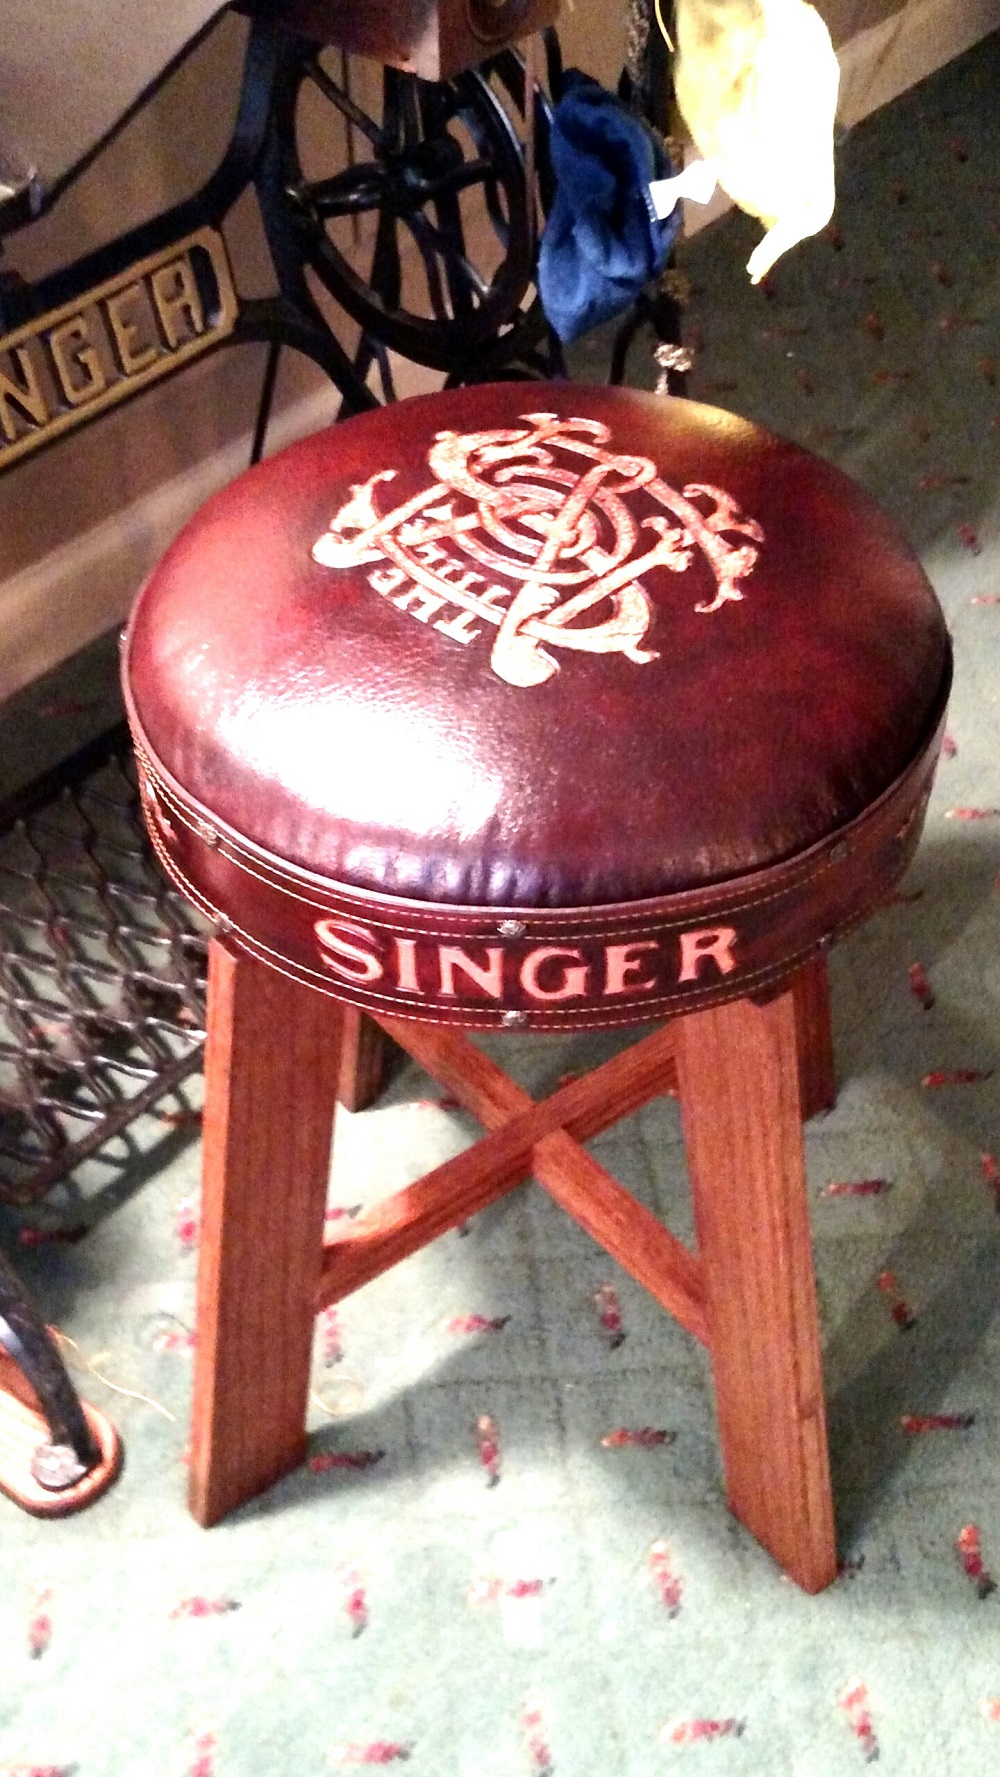
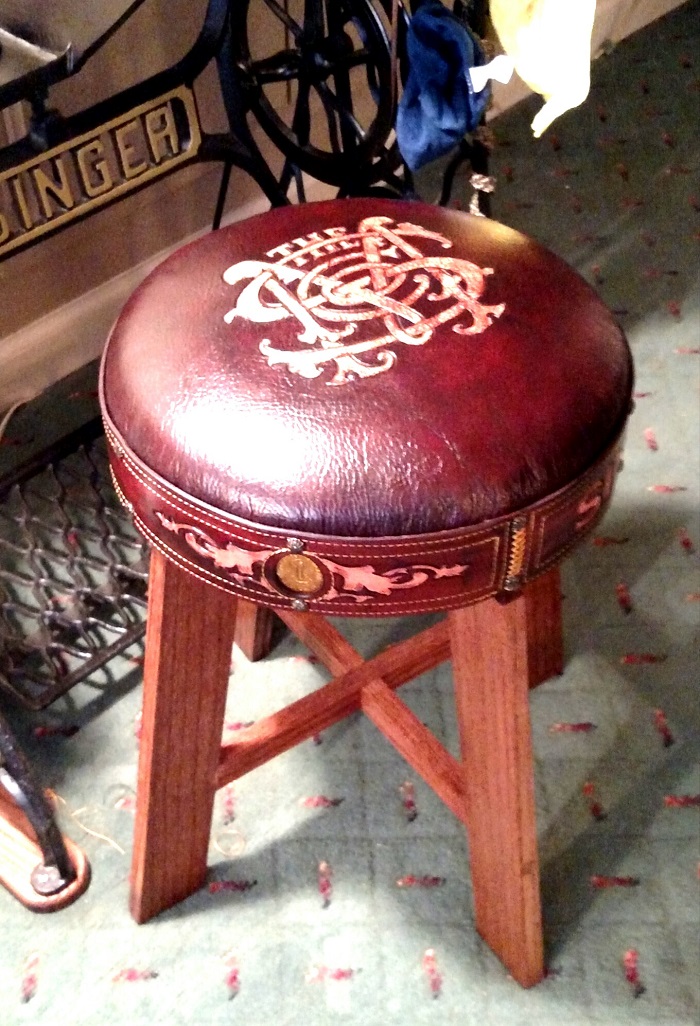
I have been wanting to do this for a while and finished it up during Christmas vacation.
I built the Oak stool during the summer. I used 2 inch Foam, Milled leather for the top / Veg tan for the sides and a couple old badges.
Presto !!
I now have a fancy place to put my buTT!


-
Hi Again YinTx,
Back to your original post on the mind numbing detail for small cross carvings..... I hear ya clucking brother!
-
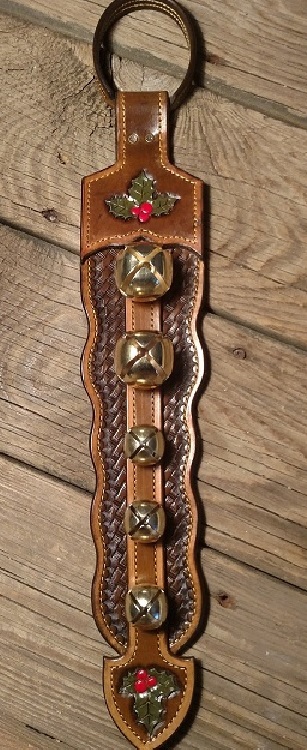
YinTx - The bells sound just OK in my opinion. I have been spoiled and own a bunch of the solid cast brass ones that have a great sound. Weaver sells them brand new, pricy but worth it. These brass plated bells kinda sound "twangy" in comparison. When attached to the door they make noise, but not a whole lot. You really have to slam the door to get a good sound out of them.... which my family has been telling me to stop doing because its getting irritating...
")
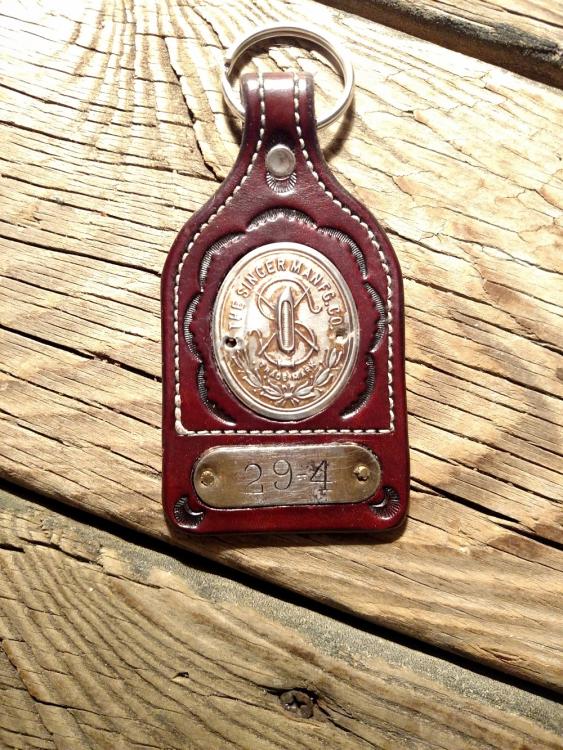
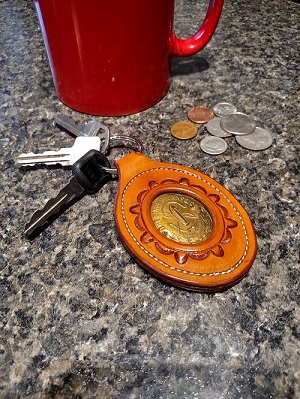
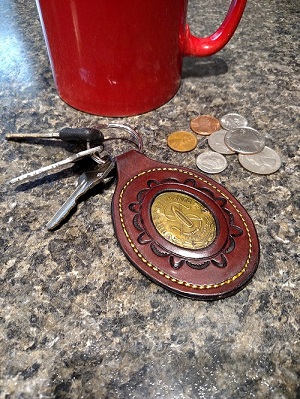
Rodneywt1180b - I really do appreciate your sentiment. I also hate the thought of a perfectly good machine, or a candidate for refurbish being discarded. I have one such machine. It was a cracked casting issue on my first 29-4. I parted out all that was salvageable and still couldn't get rid of the cracked carcass. It now hangs on my wall in my garage...and is unmistakable! It was the badge plate and Model plate from this machine that generated the idea. I saved them both and made MY key fob. See Attached.
-
Well - I have been busy giving stuff away for gifts or EBAY (don't sell? re-gift it) . The nice thing about this type of work is the quick turn around but they can still have a level of quality.
The sleigh bell Door hanger has evolved and this is the final version. I have made anywhere from 2-7 bell configurations with different stains / stitching color. This one has Gold stitching but Red stitching looks real nice too. I made two for myself using the heavier solid brass antique bells but these are brass plated from Weaver.
The key fobs are an attempt to "Keep the Singers Alive" by repurposing old badges. These are my favorite. I even had a guy ask for a 100 year anniversary badge and it turned out good too.
Merry Christmas all !


-
Hi Everyone,
I have some pretty cool leather encased Singer badges for sale on Ebay, and thought this would be a place to get a little more exposure. Please let me know what you think about the price too. I have sold a few and think the price is reasonable, but who knows.
Thanks - Here is the link -
-
Old thread, but right topic.
This all makes sense, but each hole on each side has a second hole. The needle can only go down one of these on each side. Right next to them at an angle, is another smaller hole....what is that for?
-
oh..ok..that's painters tape, wrapped around about 10 or 15 times to increase the width of the small ones.
-
Ha..good eye alpha...
That was an old piece of walnut from a tree on my father in law property. I made a few things with it, and that was the last chunk left. I couldn't throw it away...so...there it is.
-
Thanks all...I'll try to keep up.
-
Yes..one of my friends is a real trekie..but he has a great collection of knives and tomahawks.
-
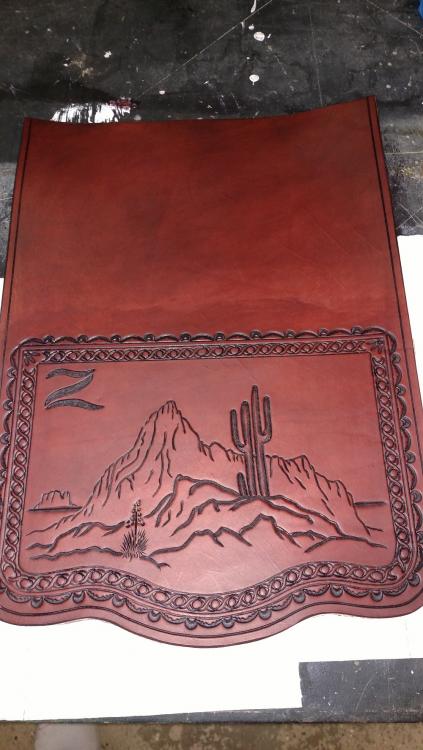
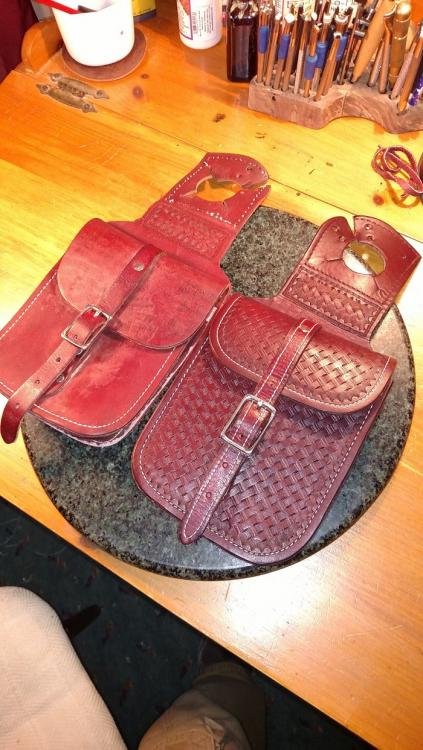
I am in the middle of my first saddle bag. This is the cover flap to the left bag. I have all the pieces cut out and the border done on the compartment front, but that's it for now.
The other picture is a set of small saddle horn bags that I refurbished. They will be for the same horse rig so I am using the maroon color for all.


Couch arm table
in Furniture: Inlays and Upholstery
Posted · Report reply
Just an observation....is that basket weave stamp from toolpaw? The guy in Czech republic?...if so..I have one just like it....amazing quality tool from that company.