

Sterlclan1
-
Content Count
18 -
Joined
-
Last visited
Everything posted by Sterlclan1
-
Thanks a bunch.
-
would like them please
-

Getting Started - Leather Upholstery Machine
Sterlclan1 replied to EdJ's topic in Leather Sewing Machines
i second the youtube guy....from what ive found you will have trouble getting the upholstery guys to give any help. look at the hot rod sites some good advise there . the hog ring forum is of no use to a diy type guy they wont even let you look at the posts without a business doing upholstery. -
found this on thingverse 50MM_V-Belt_Pulley.zip
-
it smooths the top surface by running the nozzle over the last layer while feeding just a little filament it moves in the opposite direction of the last printing movement and fills the ridges smooth.no more heat just melts the top smoother
-
cura has the option of ironing the top for a smoother finish.its in the advanced settings
-
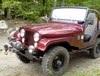
Old sewing machines Harley triumph and Jeep they don’t leak they mark their turf. If it’s leaking it has oil.
-
Browning 1911-380 holster
Sterlclan1 posted a topic in Gun Holsters, Rifle Slings and Knife Sheathes
The gun is an 85%version of the original 1911 so the pattern was reduced to 85% of the Springfield one that’s floating around. ( thanks jls) it’s only the second holster I’ve ever done as most of my sewing is seats and soft tops. It’s left handed and works great got the bug now and working on a hunting knife sheath. I have loosened the presser feet and replaced them with smooth ones to avoid presser marks in future projects in leather. -
Have tried a few different ways. Still practicing but learning. Thanks guys.
-
Thanks I’ll try some before committing to the actual holster.
-
I’m looking to dye some leather for my holster would I dye the edges before burnishing? I’ve been practicing edges ant they look pretty good. Now to the dye process. I have made a few holsters as practice with some uphoyleather glued together to get the thickness right. Now for the “real “ one. Thanks Jeff.
-
dirt worker,(excavator), truck driver,ase certified master auto body technician ,the dirt thing pays most of the bills.
-
the frame was some kind of shoe display its all tubing and had three square tubes on top, worked out that two run right under the machine,the other just misses the motor mount. the top is two layers of 5/4 pine boards and finished with automotive 2k clear. the drip pan is a slant 6 Chrysler oil pan. as soon as the right needles get here im off and running...
-
watched some really good videos (thanks uwe) checked the whole machine out adjusted the timing a little and adjusted the needle.it seems to be better,thanks for the help cowboy bob i think the take up lever thing was the trick,it sure is different than the 1909 new home shuttle machine i started with.
-
so that will pull the last loop out ?it would be the last stitch making the loop?if i stitch by hand i can see it catching but it slides off, at speed i cant see whats going on.I have made a few decent runs just not consistent.
-
yeah but its the top thread that makes a long loop,it gets caught and travels around with the hook tightening the top tension makes no difference.at the end of the stitch run when you pull the fabric out there is three top thread strings and one bobbin thread,cut the top thread and the long piece will come out.
-
I recently picked up a 211g165 it had fabric sewn in when i got it.oiled it built a table and tried it out...the first pass went well,but only managed to get one like that. the upper thread catches the hook fine but as the loop slides off the hook it loops and catches the back side of the curved part that holds the bobbin case in(it has two screws and and if you remove them the case comes out) is this a timing issue or a tension issue? if i try enough i can get a good run of stitches without the extra loop and even with the extra loop the stitches look fine. it appears that the take up spring disk is worn some there is a groove where the thread goes over the little tab any advise? the screwdriver is pointing to what he loop catches when the needle starts to rise at that time the edge of the clamp is under the needle plate thanks Jeff
-
I too jumped right in. i used clear plastic and spray adhesive,tracing the lines where i wanted the seams..