


ivan7342
-
Content Count
46 -
Joined
-
Last visited
Posts posted by ivan7342
-
-
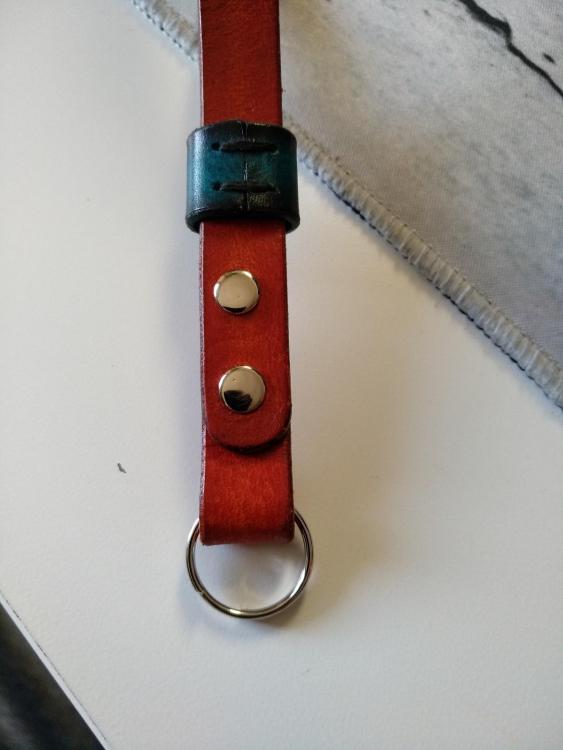
I don't have experience with rivets and such, but i think my issue now are that the ones i'm using are too long (The silver one)
And the brass one didn't tried it yet but looks too short, if so, i should the the right lenght ones if possible, if not, do some skiving on the leather to use the bronze ones, or maybe cut a bit the tip of the longer ones...
Not sure how much over the surface of the leather they need to be...
Thanks!
-
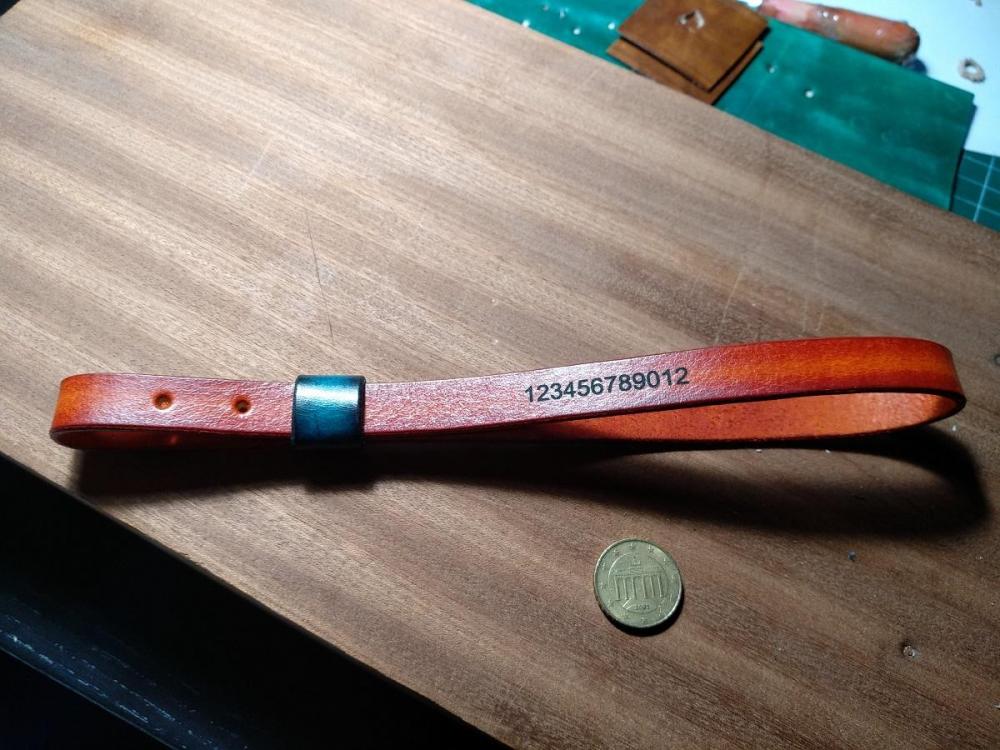
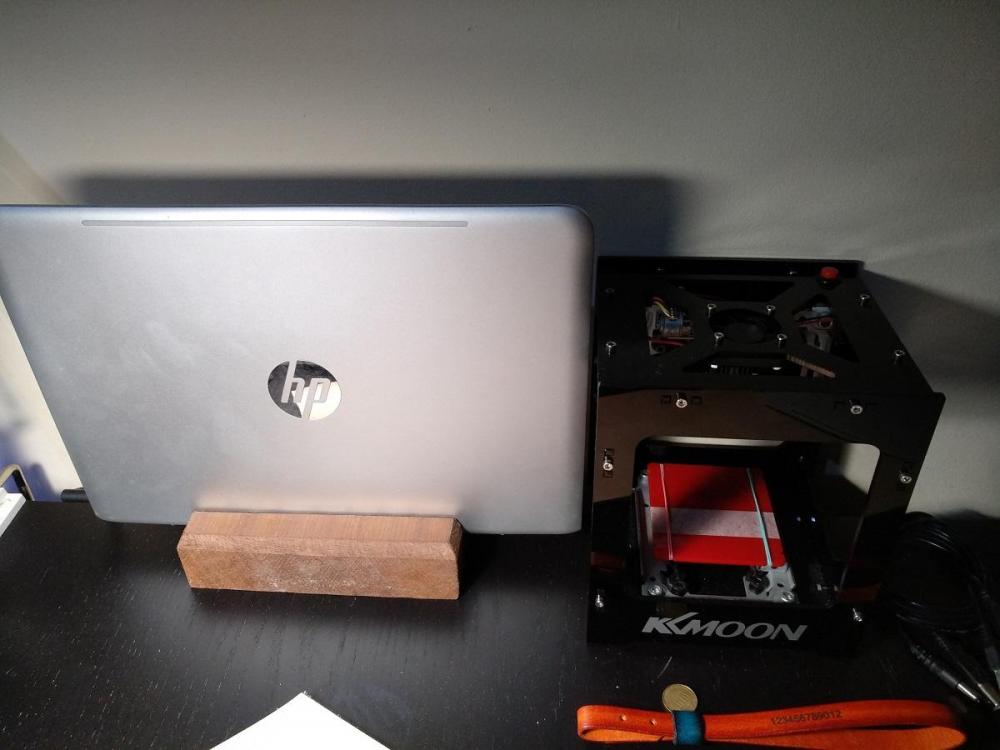
It's a Kkmoon, can engrave up to 3.5cm x 3,5cm, in that wrist strap for example, can engrave up to 12 letters in font size 52, big enough i think.
It was cheap, like 60 or 70 euros i think, here you can see it besides my laptop for size reference.
I plan to get a bigger one in the future, it's just something i can't afford right now
-
Later today i will do more tries... been using my very small laser engraver so i can personalize them, i think i have found the right position and setup to engrave these straps, so i will do a new one trying to improve it.
I have a skiving knife, and i did use it a bit on that strap, just not as much as i should have i think.
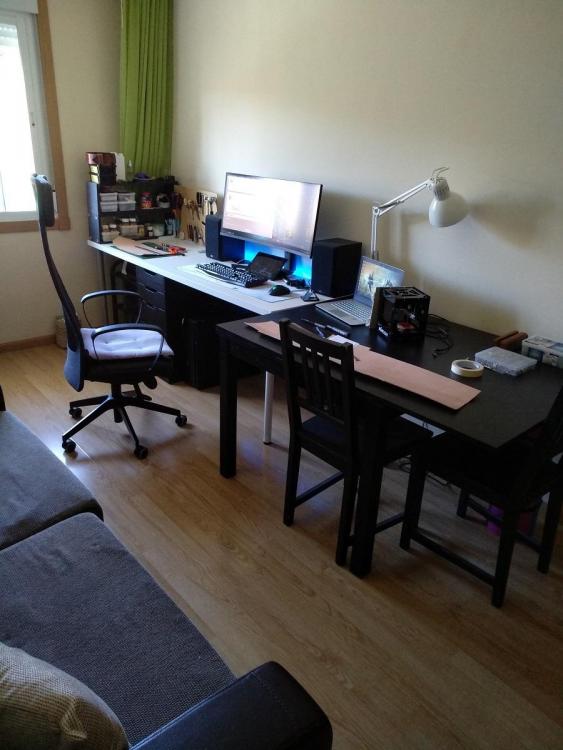
And... yeah, we don't have enough space on the appartment, so my leather space is shared with my work space, gaming space, dining space, etc.
I have some wood shafts that i put on the floor when i have to hammer down and just work there sitting on the floor then, far from ideal, but it's what i have for now.
But i don't complain
-
Thanks guys,
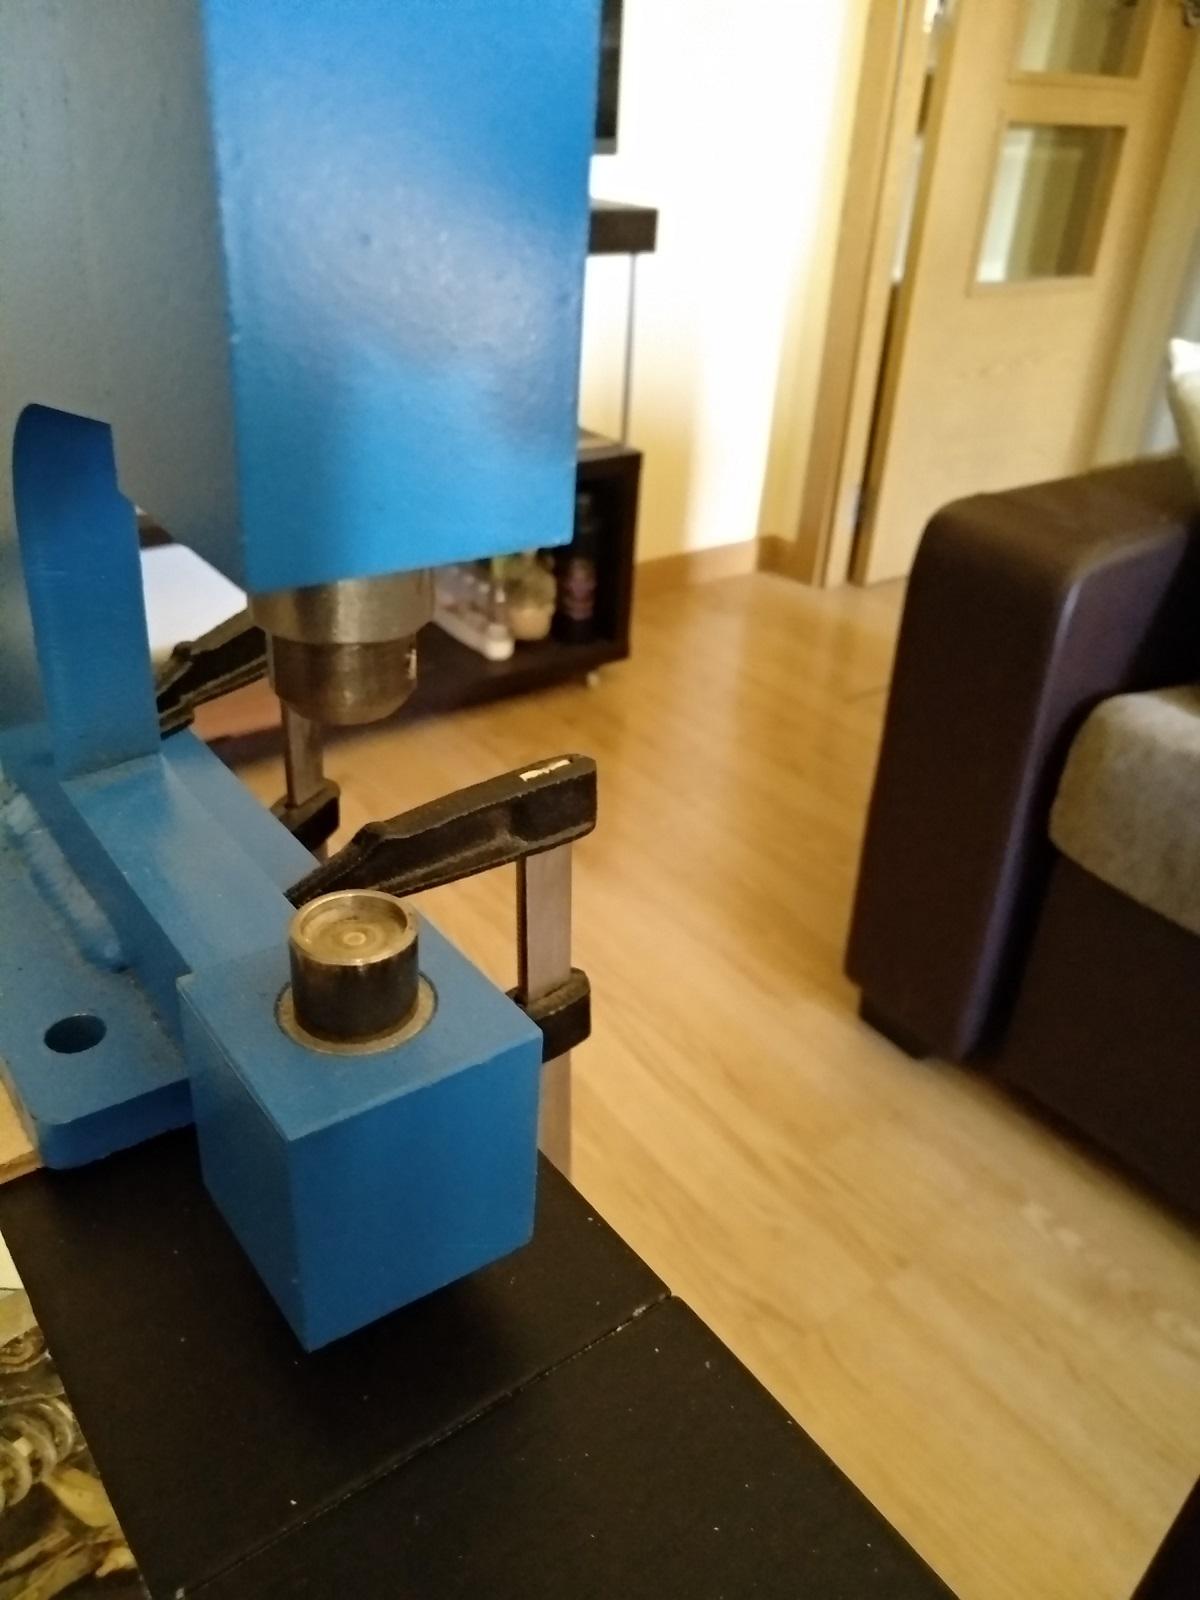
I have hand held-tools for the rivets, going to try them.
Regarding the punch, yeah, it's a swappable heads straight one, maybe used the wrong hammer...
Will see if i can bring down a bit the tickness of the leather and practice on some scraps first.
Cheers!
-
Hello guys,
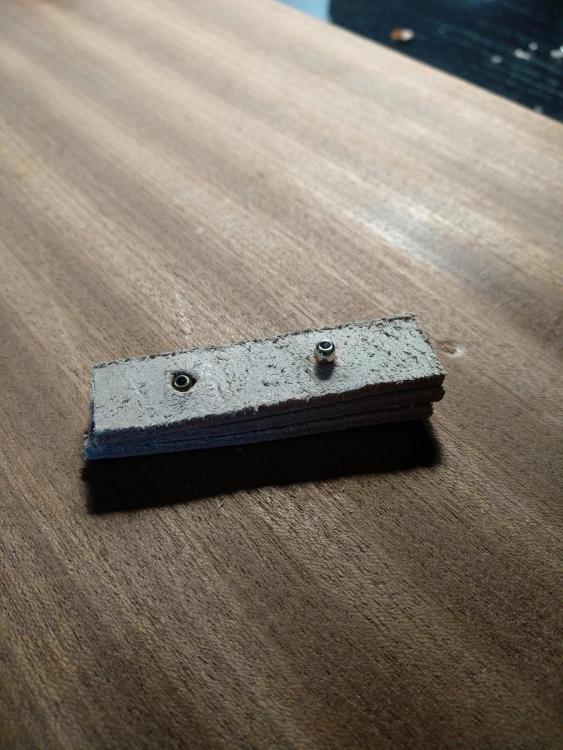
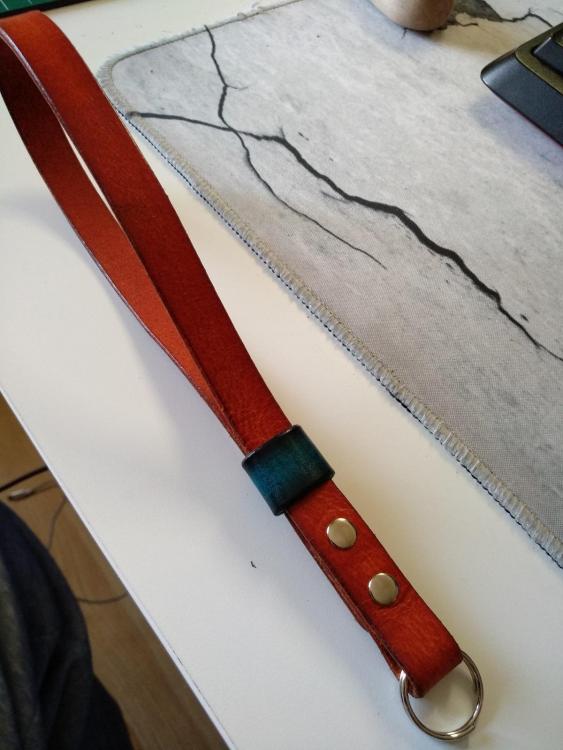
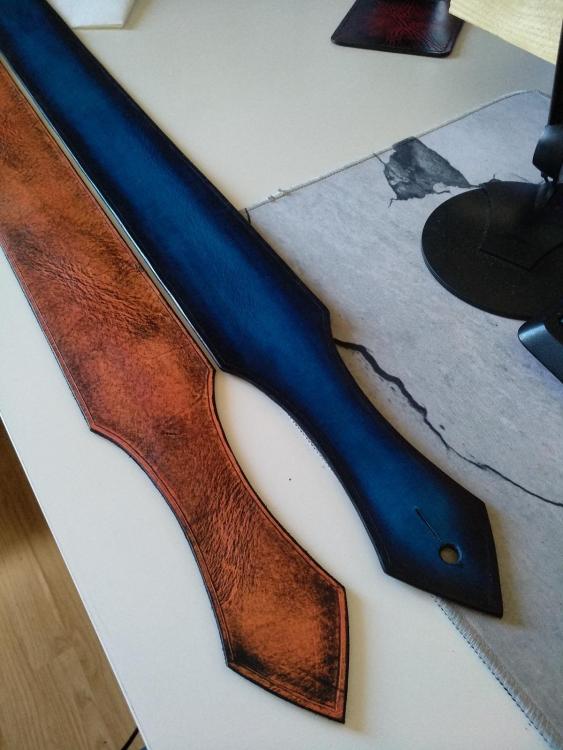
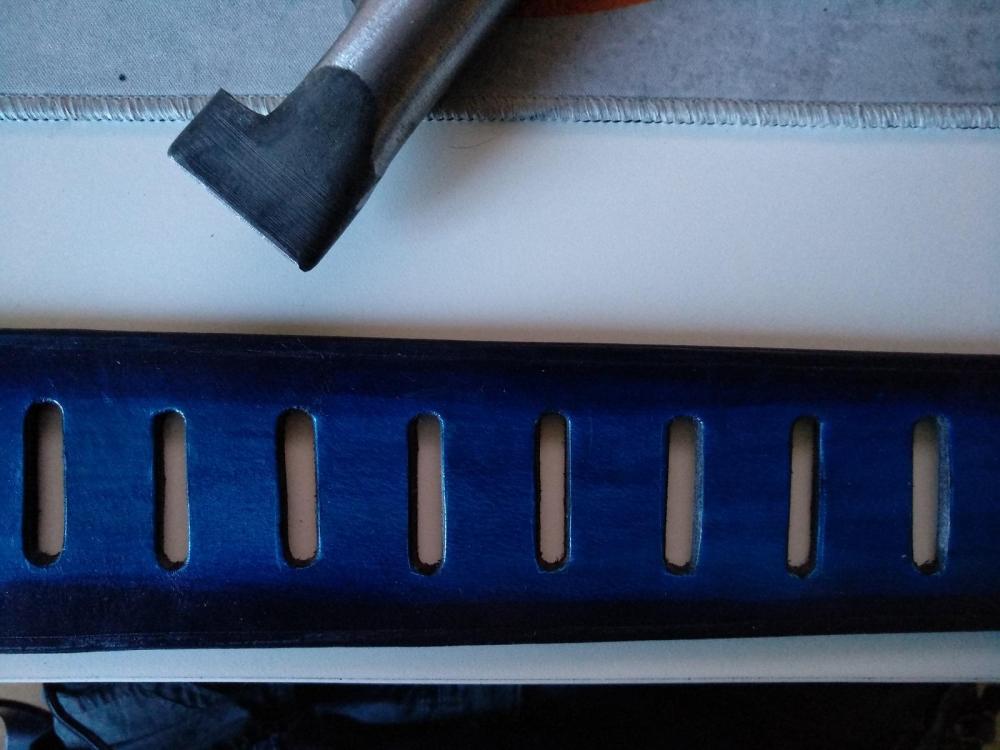
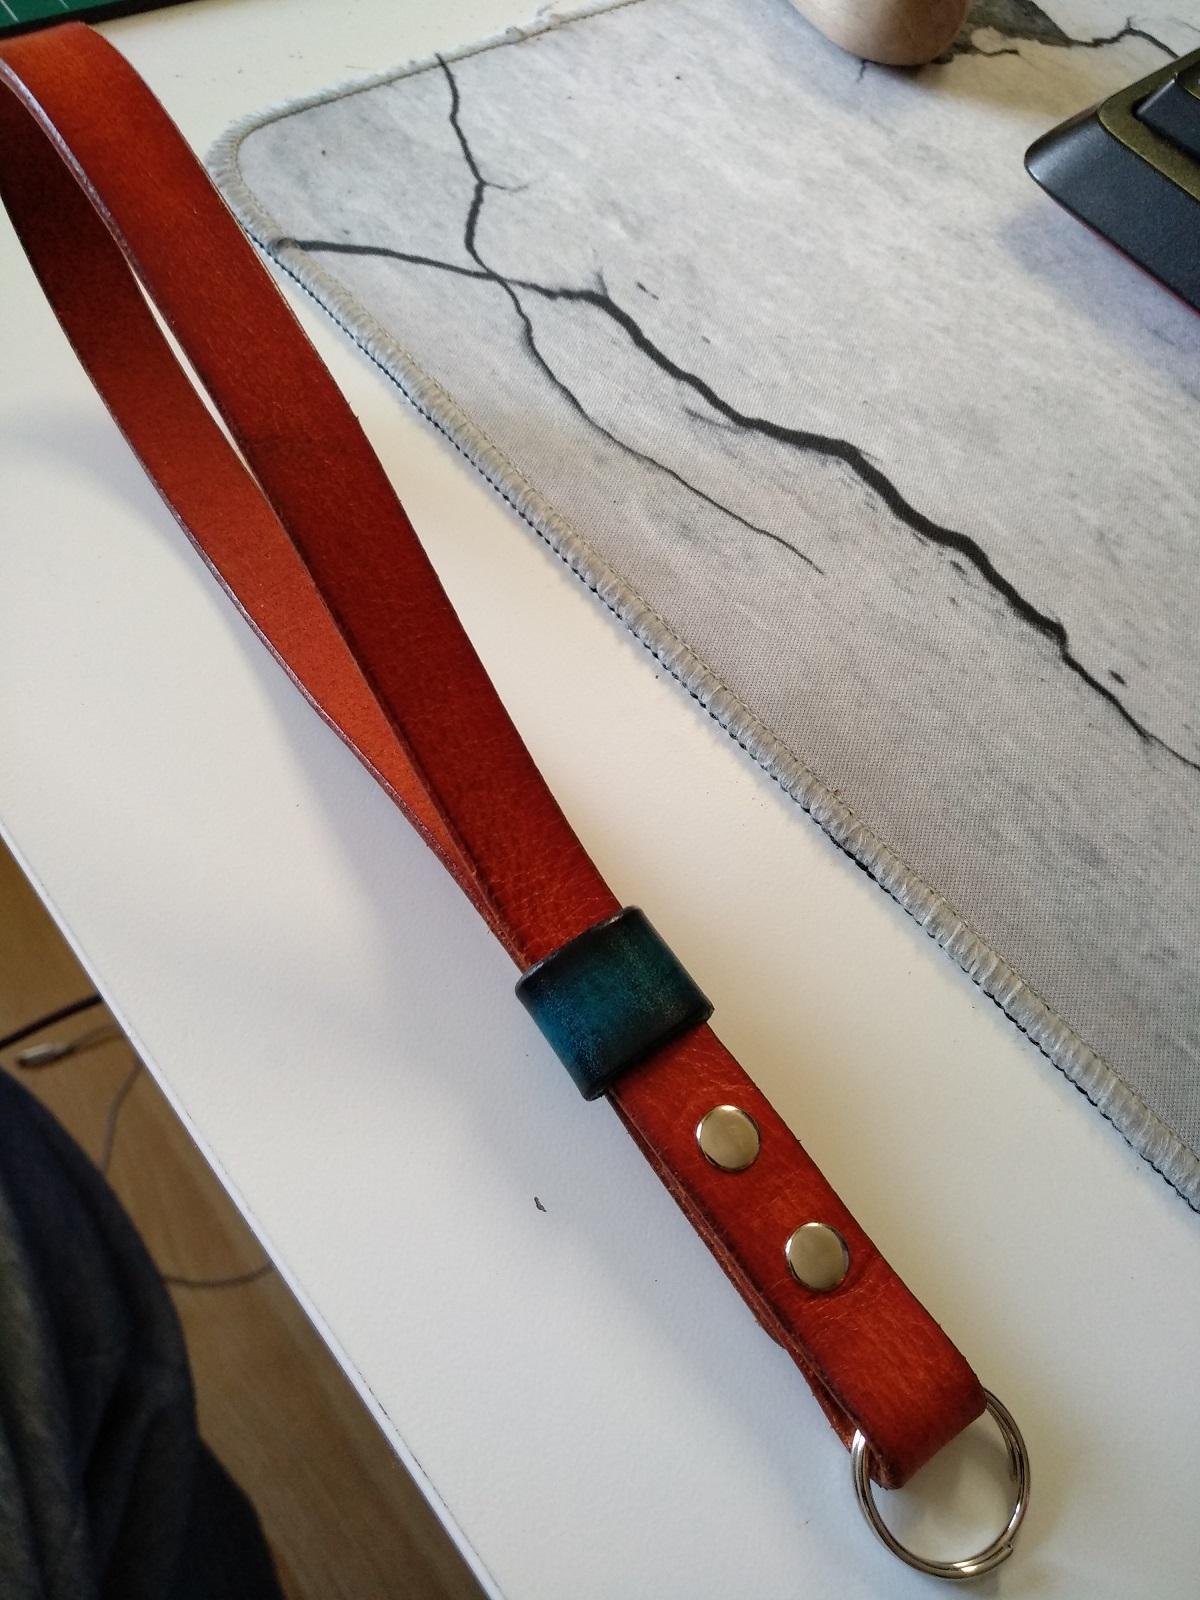
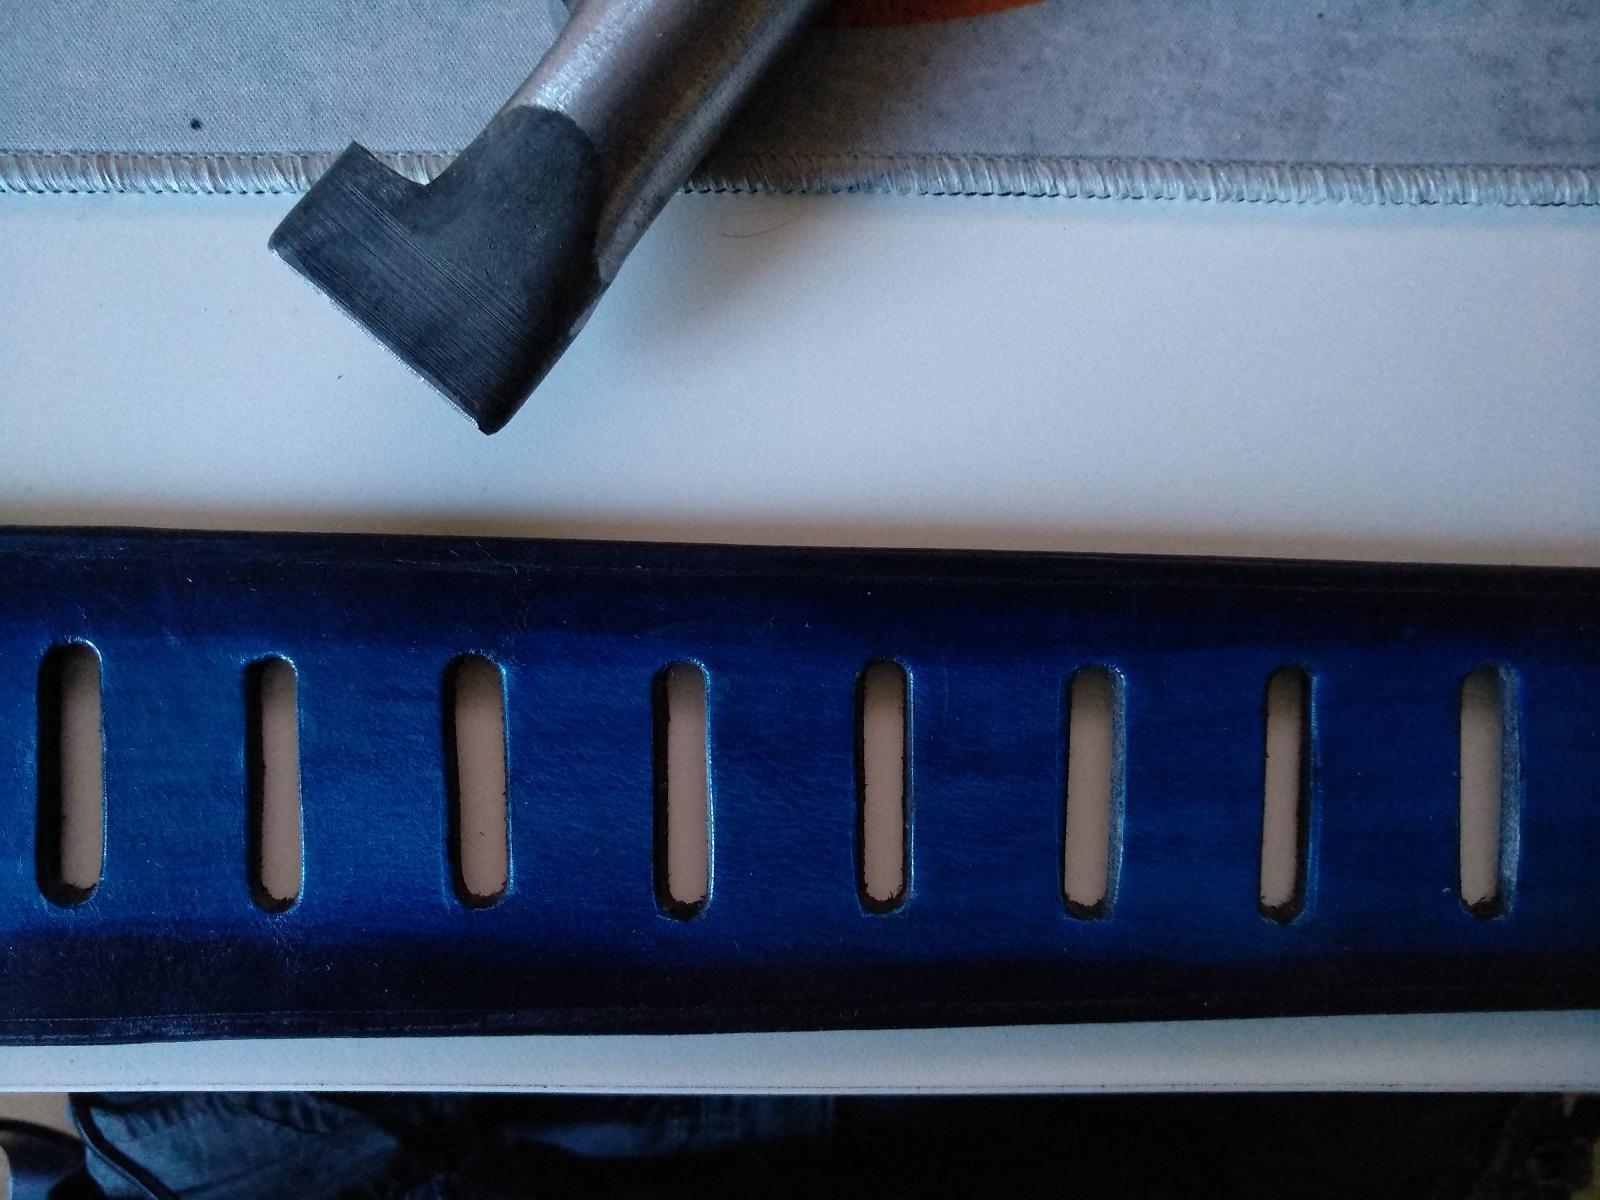
Did my first wrist strap for my camera, there are a few issues that i could use help with.
First, the leather is 2mm tick, and since it's folded 3 way, that make it 6mm, when punched the hole i tried to keep it as straight as possible, but as you can see in one of the pictures, the hole ended way out of the center, any tip to improve it? i was thinking about doing the holes separately in each layer, make the first hole, use that as reference to mark the next one and so on...
The other problem i have is that the tool i'm using to put the rivets (Blue one in the picture) leaves circular marks in the leather, i tried with a small circular suede piece with a hole in the center, to see if it could alleviate the pressure on the rims of the tool pieces, but didn't work.
Thanks!

-
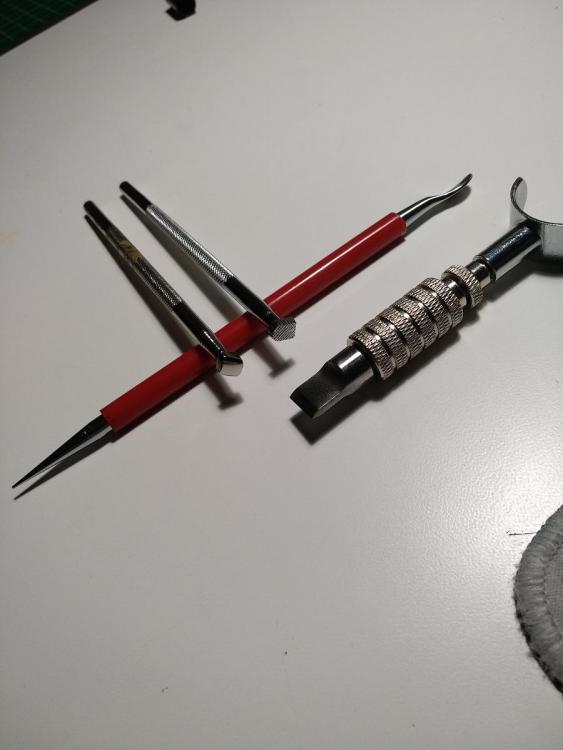
Sadly these are the only carving tools i have right now.
I think at the minimun 2 like those but smaller and with the pear shape would be good for working near the intersection of lines.
It's almost 11 pm here, not the best time to use the hammer, but tomorrow i will work on my background, as you said, see if i can get a smoother background.
Thanks!
-
Some orange and light brown dyes and turned out better than i was expecting...
I will try some black antique finish in a few areas while trying to keep the center untouched and then seal it.

-
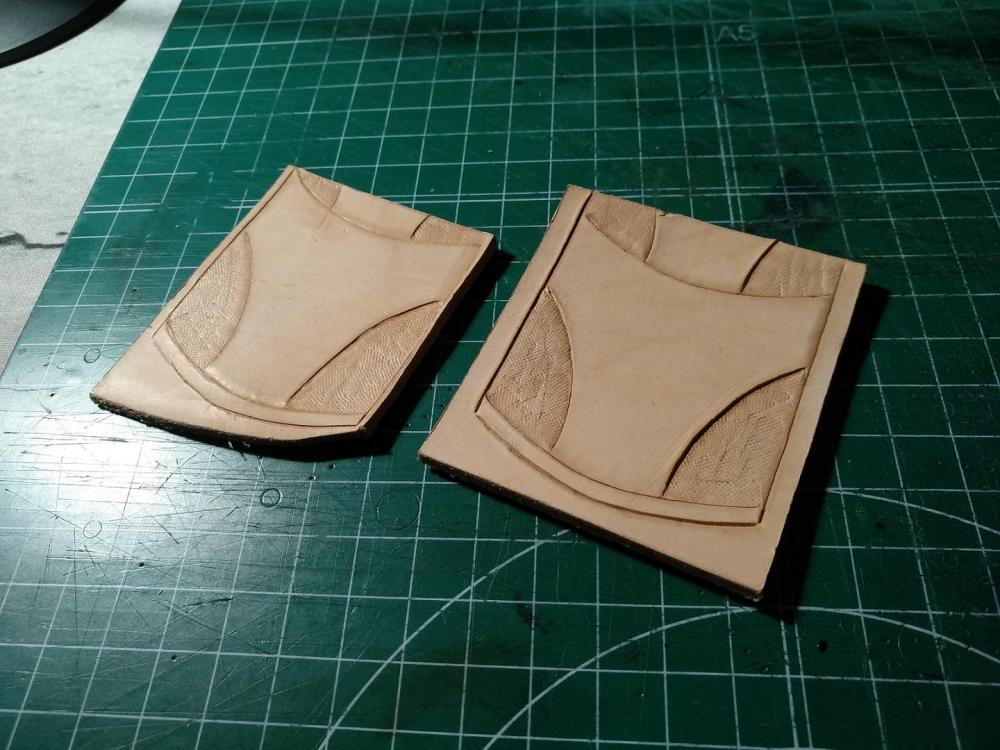
Deeper cuts improved it quite a bit... In the pic you can see the first and the second tries to compare,
Got a sharpening stone, will check how to sharp the swivel knife.
I will keep working at it, thanks guys!
Cheers.
-
Thank you!! going to do my next try right now.
Cheers!
-
Thanks for all the answers, after some tries, this is working good so far, i did a template with the wide of the strap with small holes 3 cm apart (The size of the punch) so i just line up the punch on one hole, then the other one and then put a very light pressure with my hand, then check if the position is right, fix if needed and then just punch it.
I will try to add some cuts in the template where the sidelines will go to see if i can align the punch better too.
Changing to a harder surface helped too, i got them right most of the time, just some straggler here and there... with more practice it could get better.
And yeah, i agree my punch is not great, i just can't get a better one right now, those are a bit expensive, but is on my list of things to buy.
Cheers!
-
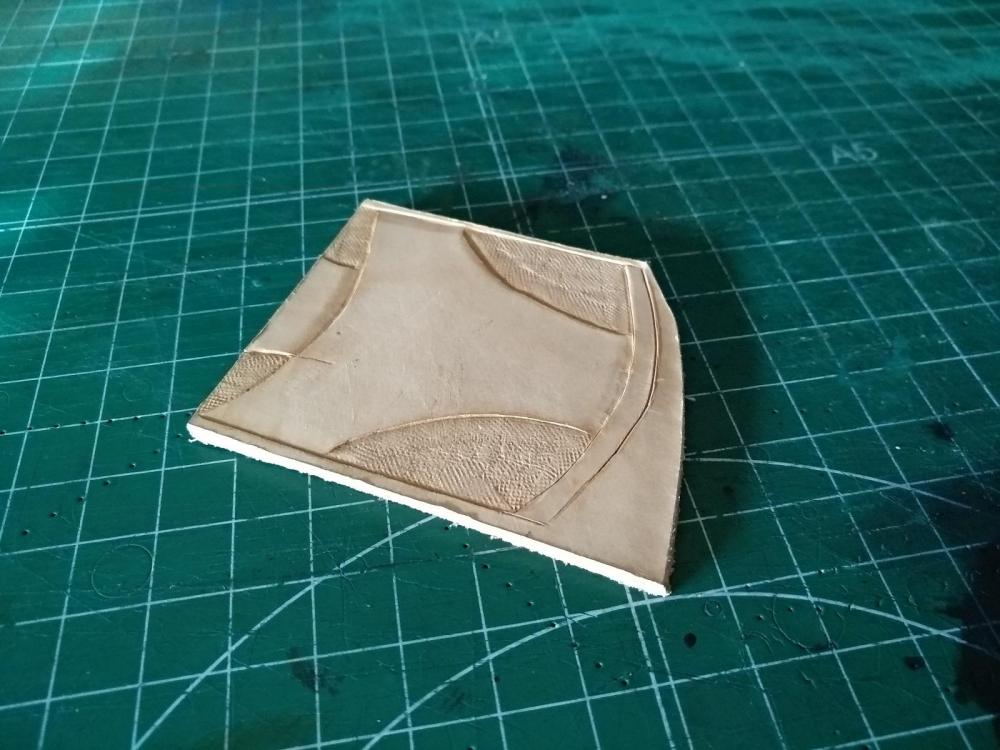
Hello,
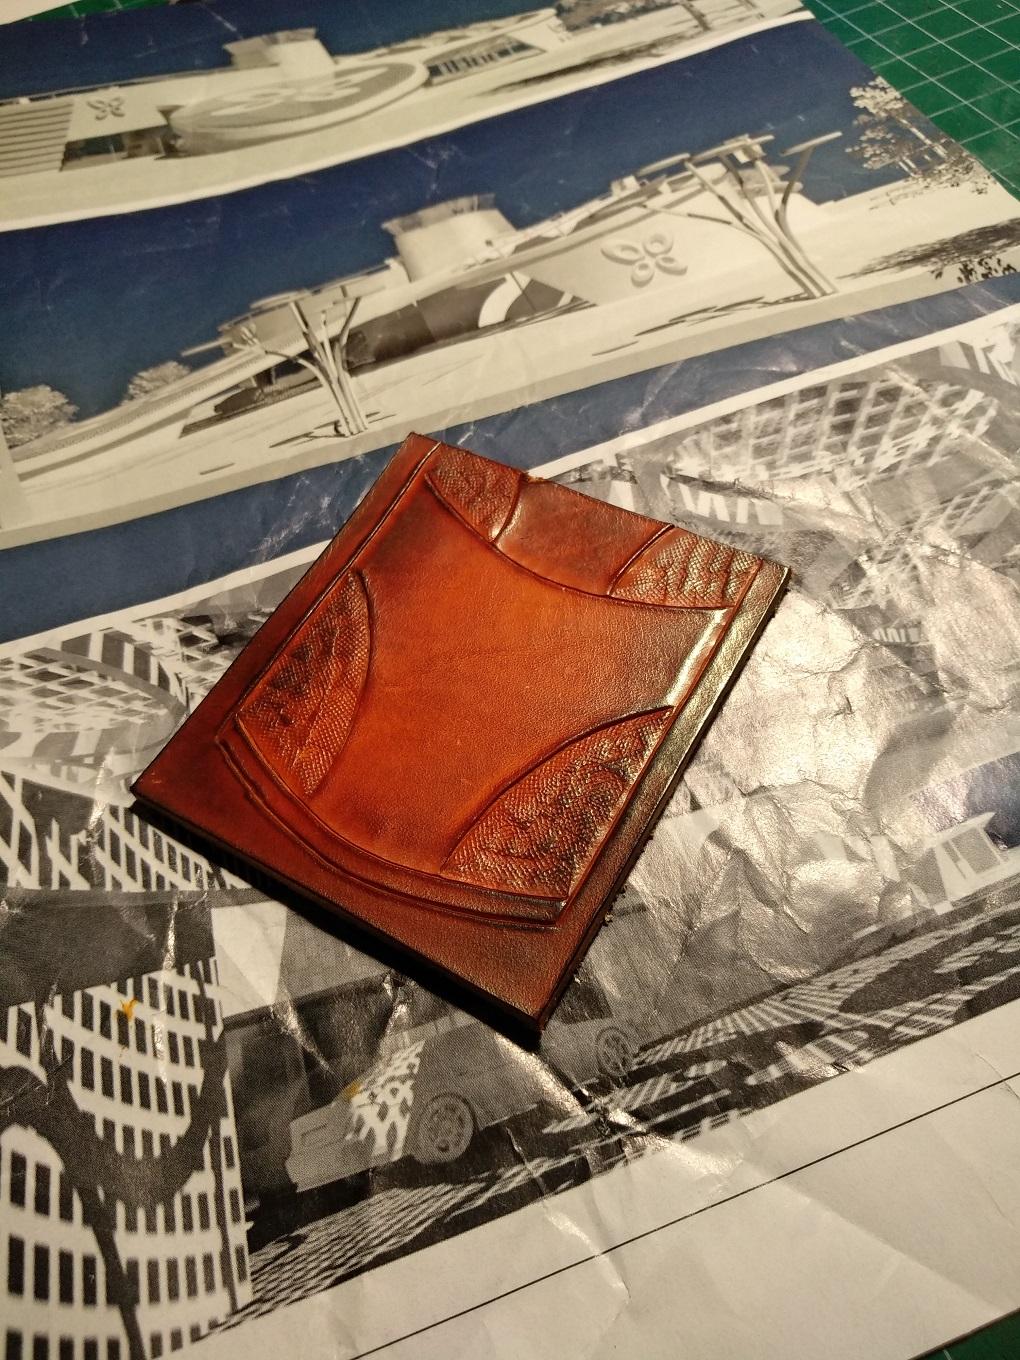
Yes, i know it looks pretty crappy, it's my first attemp at carving... and is not as easy as it looks like in youtube videos...
Anyway, that's part of a larger design i made, i choose that section to start learning to carve, i know much will be about having the right tools and lots of practice, but i can't figure how to make the background sink deeper, so the central part pops out more.
I tried with different amount of water, hitting a bit harder with the hammer, putting the piece on a hard surface, just not sure what else to try.
Thanks!
-
Thank you all guys,
Good advices to try!
@Handstitched Yes, i play guitar and bass, i'm trying to do different things with leather but focusing a bit more on the straps...
Struggling a bit with the edges now, after the gum tragacant they ended not as smooth to the touch as i would have liked, maybe will need a second hand.
-
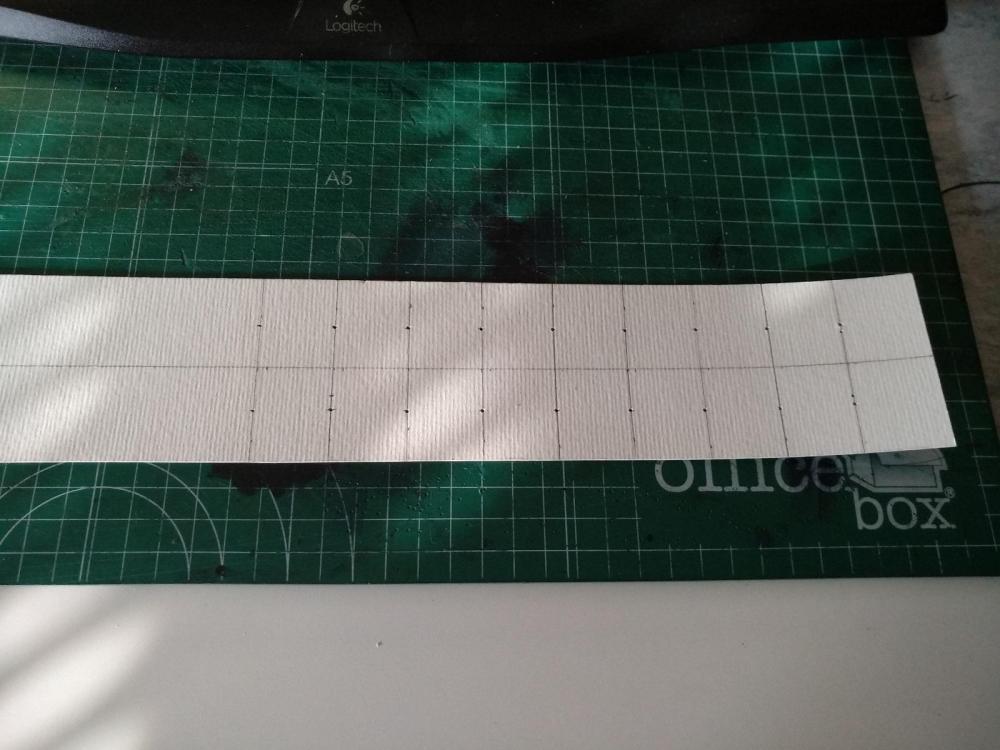
Hello guys,
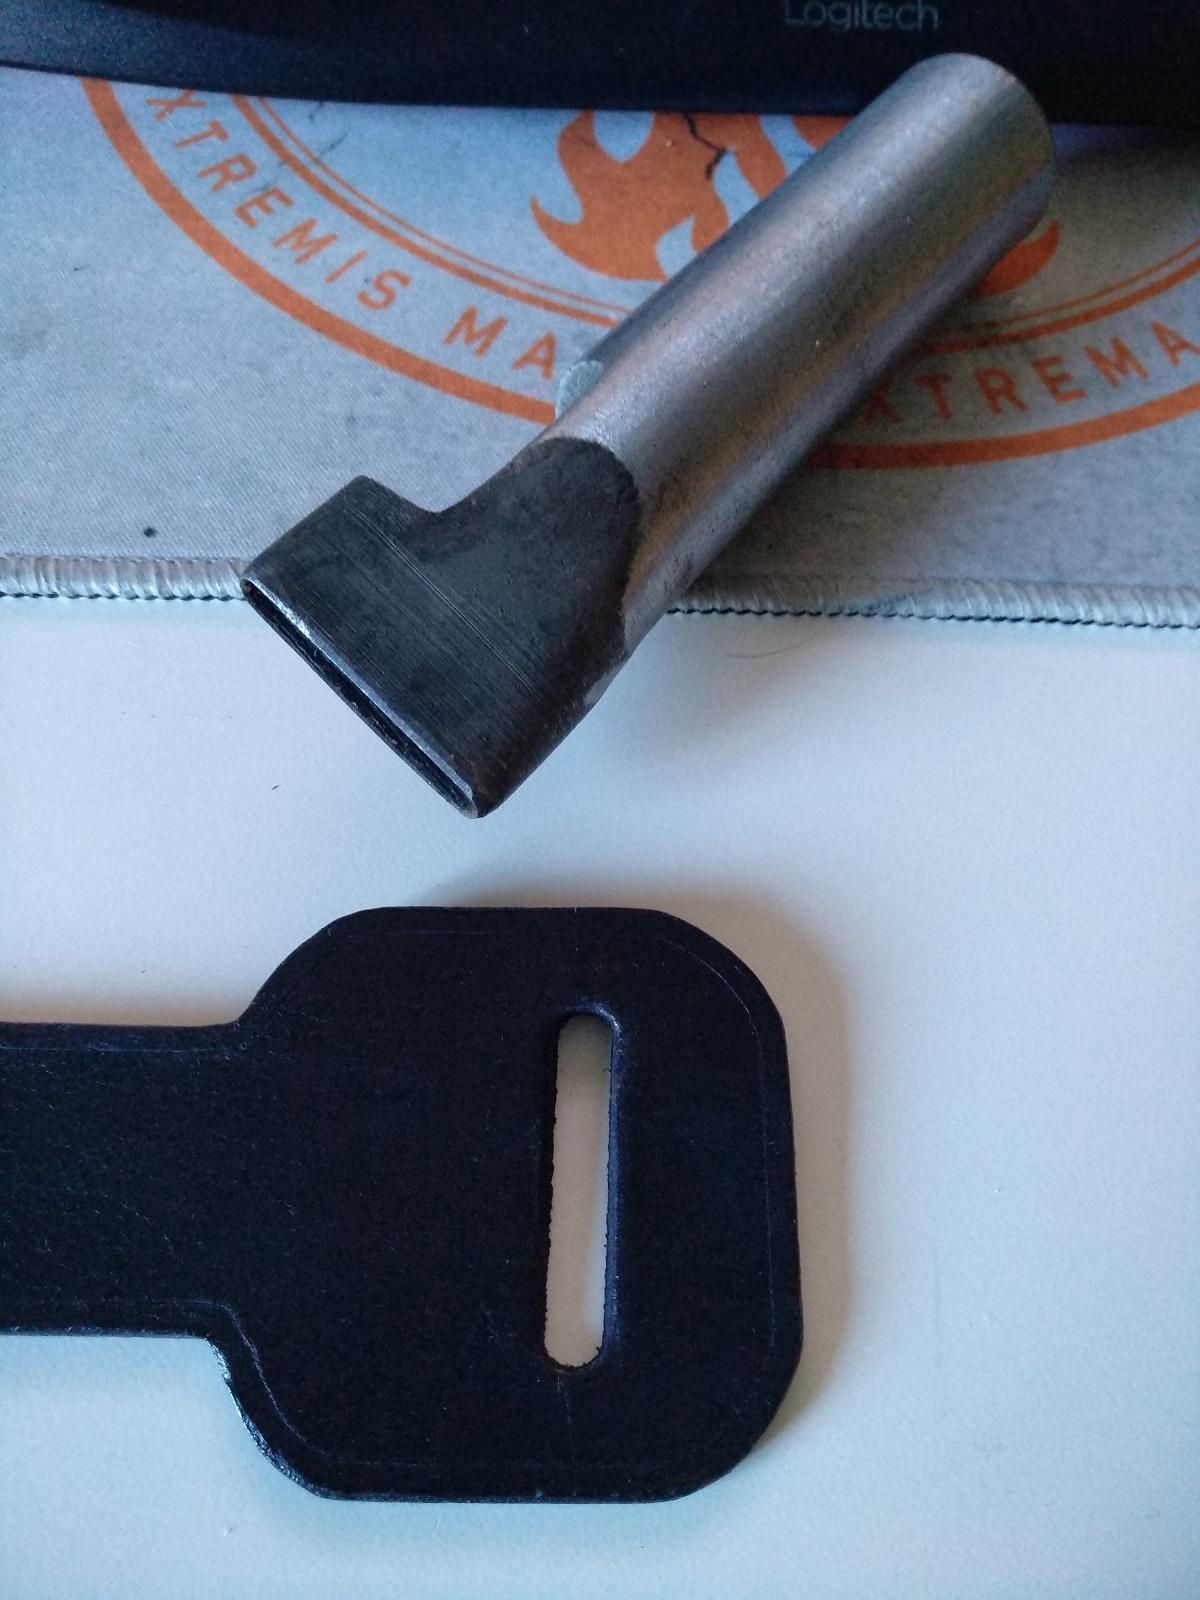
I been trying to punch some oblong holes and no matter what i do, some of them always ends wrong, misplaced a bit to one side, not straight, etc...
First i mark them with a pencil and then use the tool, then i tried marking the shape with mask tape and even with that it ended bad.
Maybe i just need more practice, or there is any tips or techniques that could help?

-
Hello guys,
I saw this made on youtube and i think it could go great with some light carving i'm trying on a piece.
Just not sure which kind of materials is he using, first some spray on the front and on the back (Just regular paint spray?) then not sure but might it be acrilyc paint for leather? or water based dye? It seems to me that the paint or dye have some consistency since he put it on paper and from there he stretch it with his fingers, i think an alcohol based dye would not allow to do this...
Thanks!
-
Thanks!!
I will try that today!!
-
Yes, i wiped the excess dye the day before, let it overnight since it was late already.
-
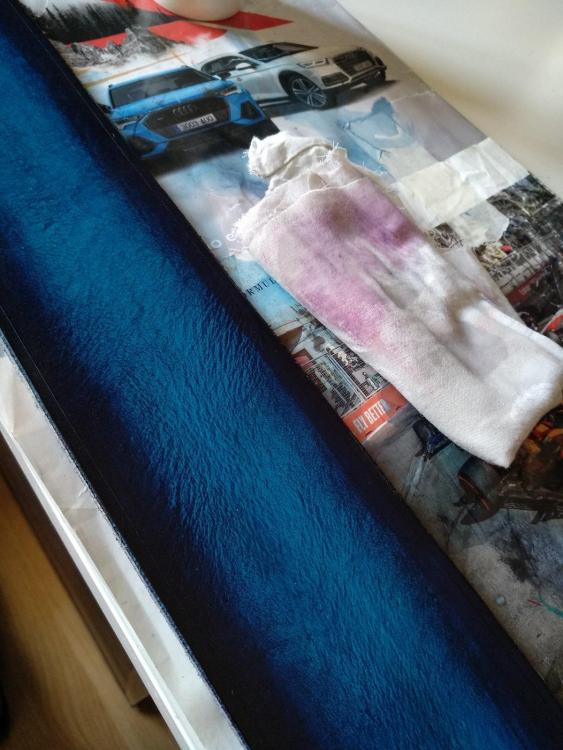
Hello guys,
I'm running into an issue, maybe i can get some solution here.
After dye i applied water based laquer, already gave it 5 light coats and it's still bleeding, so i thing there are 2 issues, first, it's not sealing as much as it should, so down the way it can affect things it get in contact with, also, each coat i gave, the mix of laquer and dye that results on the clot could be changing a bit the color of the piece, even if slightly...
I was thinking maybe to put the laquer in some spray dispersion pulverizer and use that instead of a clot
In the picture you can see the color on the piece and the color that ends on the clot i'm running the laquer with.
Thanks.
-
Haha, it's clear that nothing that i have atm will serve me on this, i will check that NFO stuff and where to get it.
Thanks!!
-
Just wondering, what about beeswax? i have lots of it that i had for a wood project
-
Thank you!! i will do some tries today that way and see if i can get that leather balm too.
-
Hello guys,
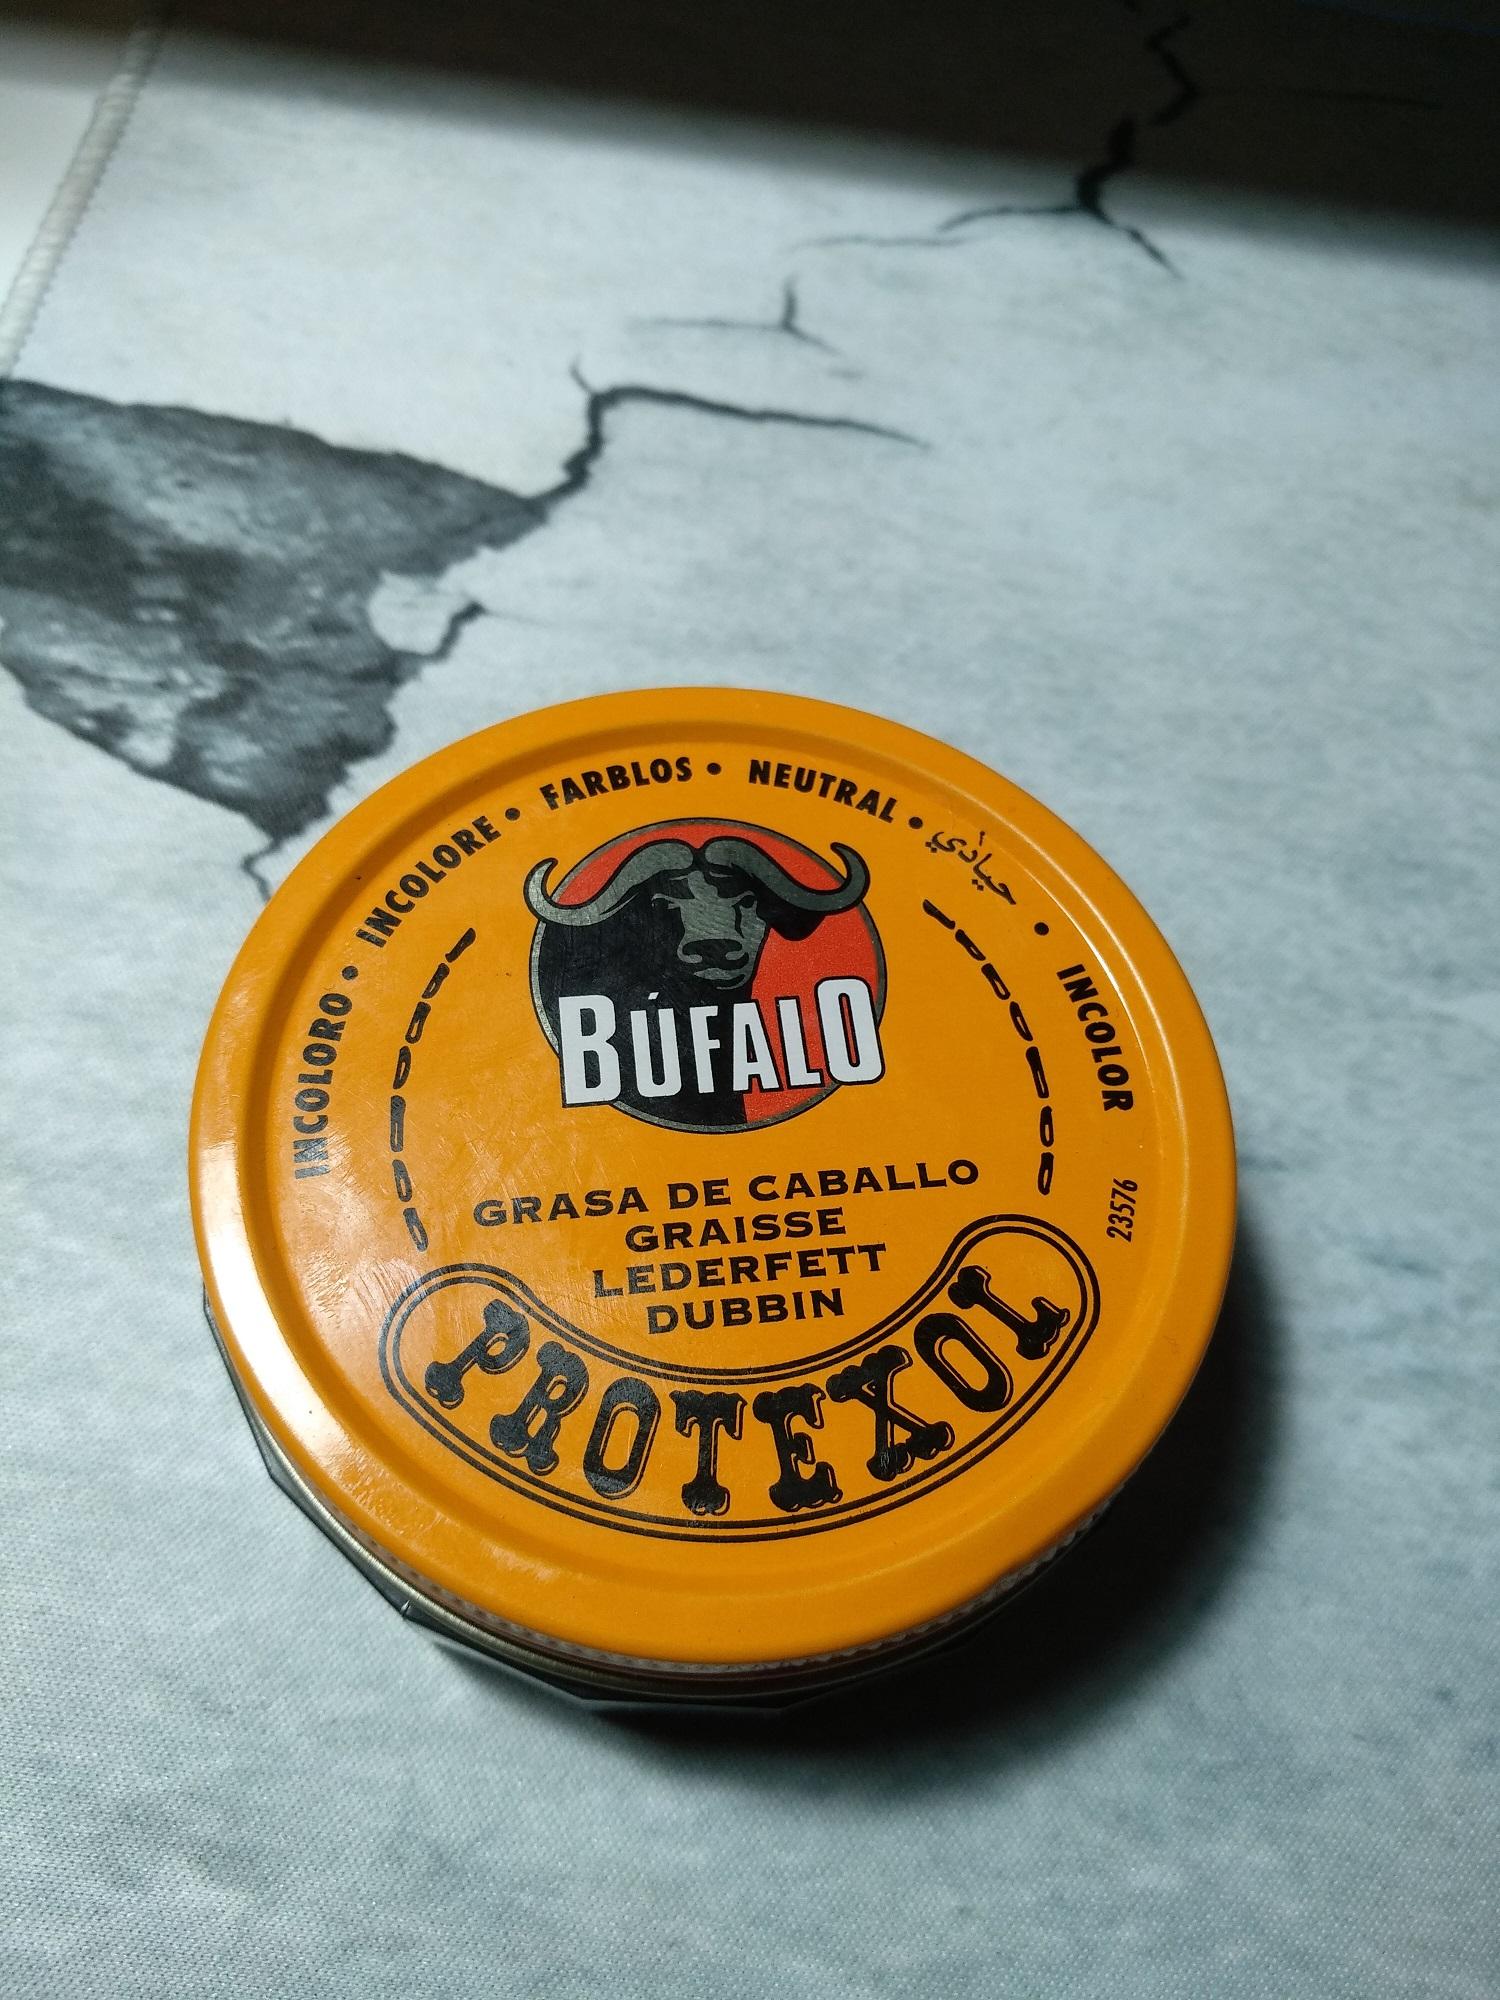
I'm experimenting a bit doing some guitar leather straps, using 4mm veg tan, the leather piece i got is not really hard, but i would like for it to be a bit more softer and malleable.
Been trying with coconut oil, vaseline and horse grease (At least that is the name in spanish, i will put a picture of it)
In my inexperienced hands all three seems to soften it a bit, i applied once in the front and once in the back, also vaseline is the one that darken the less the leather so i think is better for the next step.
After that i would apply some dye and then Tan Kote to seal it.
Am i going near the right direction? any tips? apply more than one hand for better results? how much to wait between the product and the dye?
Thanks in advance!

-
Thanks for the answer!
I been trying today, made a few advances but I'm far from satisfied with the results,
Got a piece that with some improvement I think I could apply it in the things I do, going to work a bit more on that direction.
Cheers!
-
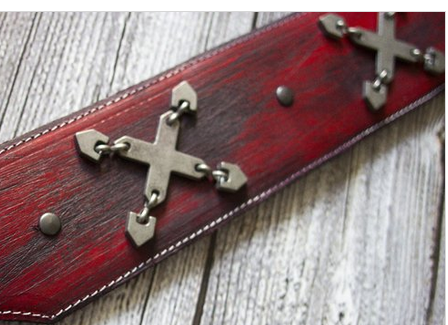
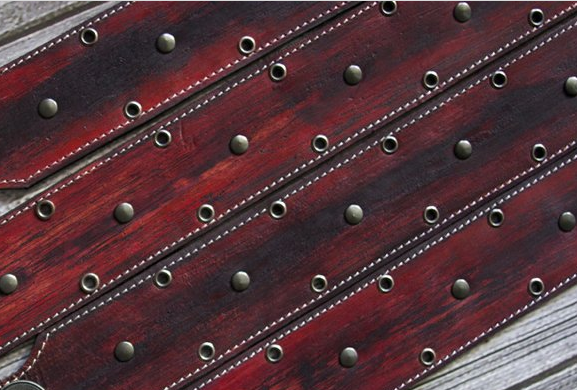
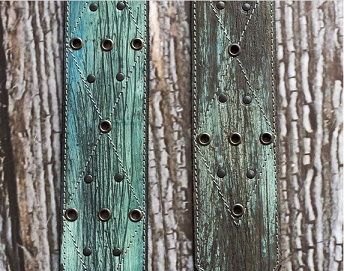
Hello guys, been away for quite a while... now trying to get into leather crafting again,
I came across these leather guitar straps, I really like the technique, it looks like relic wood,
Any idea on the process and materials that could be used to achieve a similar effect?
With my limited experience, it would look like no alcohol based dyes were used, maybe water based ones or acrylic paint? a base color, then another color on top of it an then some sanding?
Any help would be appreciated,
Thanks!!
-
Thanks for the answer guys!


Issue with holes for rivets on thick leather and markings when putting them
in How Do I Do That?
Posted · Report reply
Thanks!! going to do more tries today!