


caperseven
-
Content Count
22 -
Joined
-
Last visited
Posts posted by caperseven
-
-
it looks like the middle option is better one due to a straighter way/ less angle to needle bar
for the thread,
-
1 minute ago, Tim Schroeder said:Going thru the bottom eyelet before wrapping around disc 1 1/2 times creates upper thread tension you can't get rid of. I looked up every manufacturer I could find, and Cobra is the only one who goes thru the eyelet before going around the disc. It is OK on bigger thread and needles but will never let you loosen the top tension enough to sew on the lighter end capabilities of this machine. You don't need another piece of leather.
Don't go thru the bottom eyelet before going around the disc 1 1/2 times and tighten the bottom tension.
I would still move the last thread guide to the inside of the faceplate.
Ive just thought of that to, and just what you say i couldnt get rid of upper tension no matter what i did, loosen the knob so much i nearly come loose..
The lastthread guide is almost inside but you mean even further in?
Thanks for help, im going down to my workshop and test your tips.
-
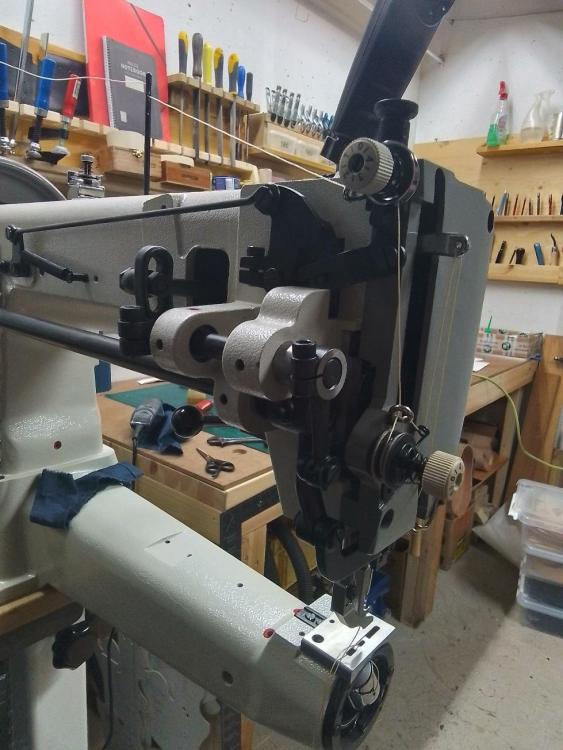
53 minutes ago, kgg said:Looking at your machine threading photo's:
i. The top tensioner is threaded like the Juki TSC-441 manual indicates, Section 12, page 6 of the attached manual.
ii. The lower tensioner appears to be thread incorrectly but that maybe just the angle of the photo. It appears you just loop around the disc rather then making a full turn around the disc before going through the take-up spring. Check to see if you have it threaded like the Juki TSC-441 manual indicates, Section 12, page 6 of the attached manual.
If the bobbin tension is too low and the bobbin thread is too close to the top of the material then you need to adjust the Bobbin tension, Section 14, page 7 of the attached manual. But, but....
i) the material needs to be thick enough to do this. Either double up the leather or try sewing two layers together.
ii) the thread combination needs to match the size of needle. A good thread to needle combination chart can be found curiosity of @CowboyBob at ( https://www.tolindsewmach.com/thread-chart.html )
iii) both the top thread and to bobbin thread should be the same size but sometimes there are reasons the bobbin thread is smaller then the top thread.
There is a topic on showing the different variations of threading the 441 class machines.
The lower tension is correct , a 1 1/2 turn then upp to takeup spring, the photo angle not showing full turn. I threaded as Juki TSC-441 manual indicates, Section 12, page 6 of the attached manual.
Im not sure how much tension there should be in bobbin,any tips how you measure that?
I suspect i have to little tension on bobbin and i just use a 8oz leather, it might be better as u say with 2 pieces.(thicker).
Im trying your tips tomorrov,updates follows.
-
2 hours ago, Wizcrafts said:The top disks are your primary tension adjusters. The lower roller adds or subtracts a little tension. This roller was more effective in the distant past when the leather stitchers had liquid or melted wax in pots that the top thread ran through. Nowadays, with lubricated, bonded thread, the bottom roller does very little until you get into very large sizes of thread. It adds friction, rather than pinching the thread, as the top disks do.
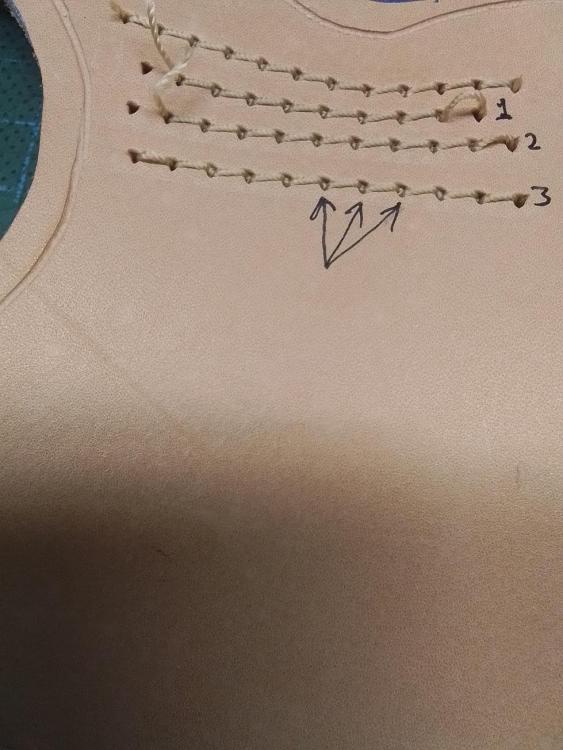
Those holes look way too big for the thread you are using. Try a size smaller needle. If the knots are still visible, add bobbin tension, or subtract top tension. If the knots are still a problem, move down one thread size in the bobbin.
The needle holes are round. Are you using round point needles? You should use leather point needles in veg-tan leather. Schmetz sells them in System 794, as "S" point. They have an inline slicing point that actually partially submerges the ends of the stitches.
I use #23 needle ,Diamond point leather needle by smetz and #207 bonded nylon thread both in bobbin and upper.
Just testing with 8oz leather, maby to thin.
-
The knots i close to top of leather, im not sure wich adjuster thats lower or rises it , the upper one or the low one?
What does the lower one do?
Manual is not clear about this.
Jb
-
2 hours ago, caperseven said:Looks like this
Now it looks better and everything is cleared and not touching anything.
Going to try sewing tomorrow so..
Thanks .
-
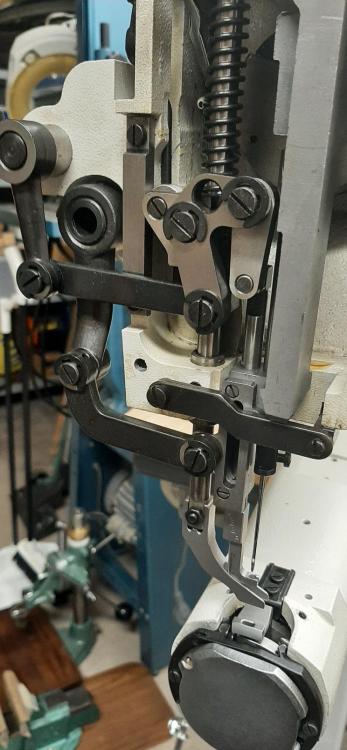
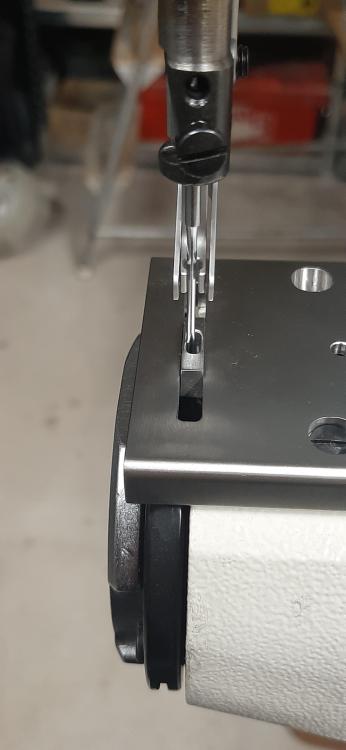
4 hours ago, Tim Schroeder said:Simple fix. The diagram is in the thread RockyAussie is quoting. When you loosen set screw #31 it allows you to push part #30 over either way if you needed to. Once you move the needle bar over you will be able to straighten up the center walking foot.
Looks like this
-
7 hours ago, RockyAussie said:Looks like the center walking foot and needle bar may be both be too far to the left. They are all in one block together and I am sure you can adjust the whole lot a little to the right. Look at the machine head in front of the needle bar and you will see a screw bolt that is slightly slotted and above that in a hole is a locking screw which needs to be undone first. I would take the side cover off and have a good look at the whole lot first. If the needle bar or its clamp were out of line it would show up pretty easy by loosening the needle bar and turning it around while watching the needle.
i take a look after work, updates follows.
11 hours ago, Wizcrafts said:Your machine was poorly constructed. Your only hope would be to move the entire needle bar and both presser bars to the right. It is doable, but not painless. I would think about returning, or selling it, and buying a Cowboy CB4500, or actual Juki TSC-441, if they are available in Sweden. But, keep the narrow plate and feed dog.
thanks for input.
juki441 costs 7000$ over here so...
-
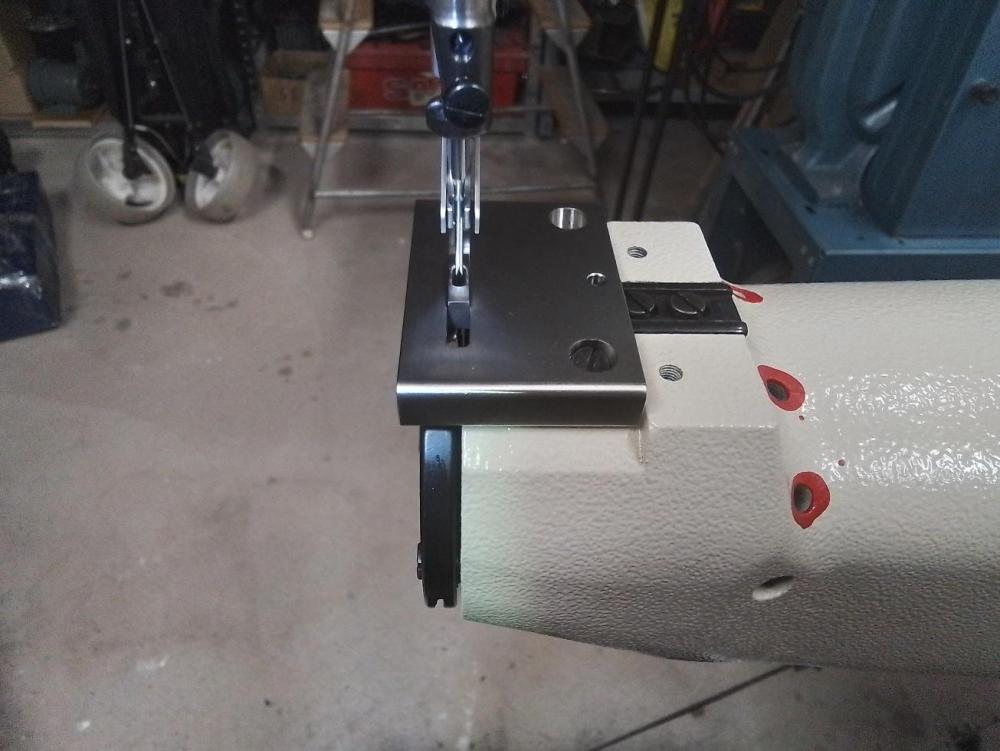
2 hours ago, Wizcrafts said:No, that alignment is not right. Was the needle centered with the original feed dog and throat plate?
What brand is the sewing machine?
FYI: I have this narrow feed dog on my Cowboy CB4500 and my needle goes dead center through the slot in the feed dog.
Original feeddog and throatplate plate was not exactly centered..
Its a brand new jianglong 441 clone.
I have a metal workshop and are able but i need advice about if its possible to
do anything about this problem.
-
Is this ok?
Have he&p kit and a new 23 cutting needle and not bent.
As you can se the needle is off to left and not centered.
Even the feet are a little bit off, the inner touches the outer one and i can adjust the dog a little bit with shims.
JB
-
but the fot only lifts about 10mm so..
Never tried it with bigger needle, mostly because the manual says the biggest neddle in this machine is 140.
But you may tried it before and it works?
-
-
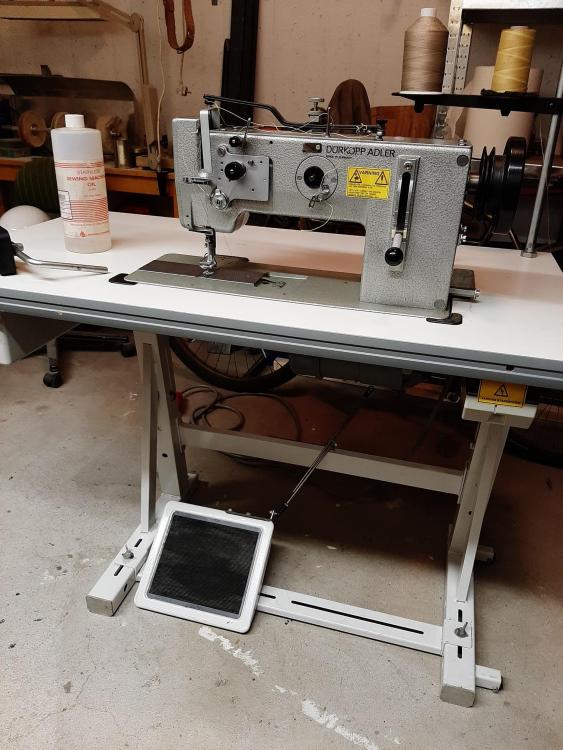
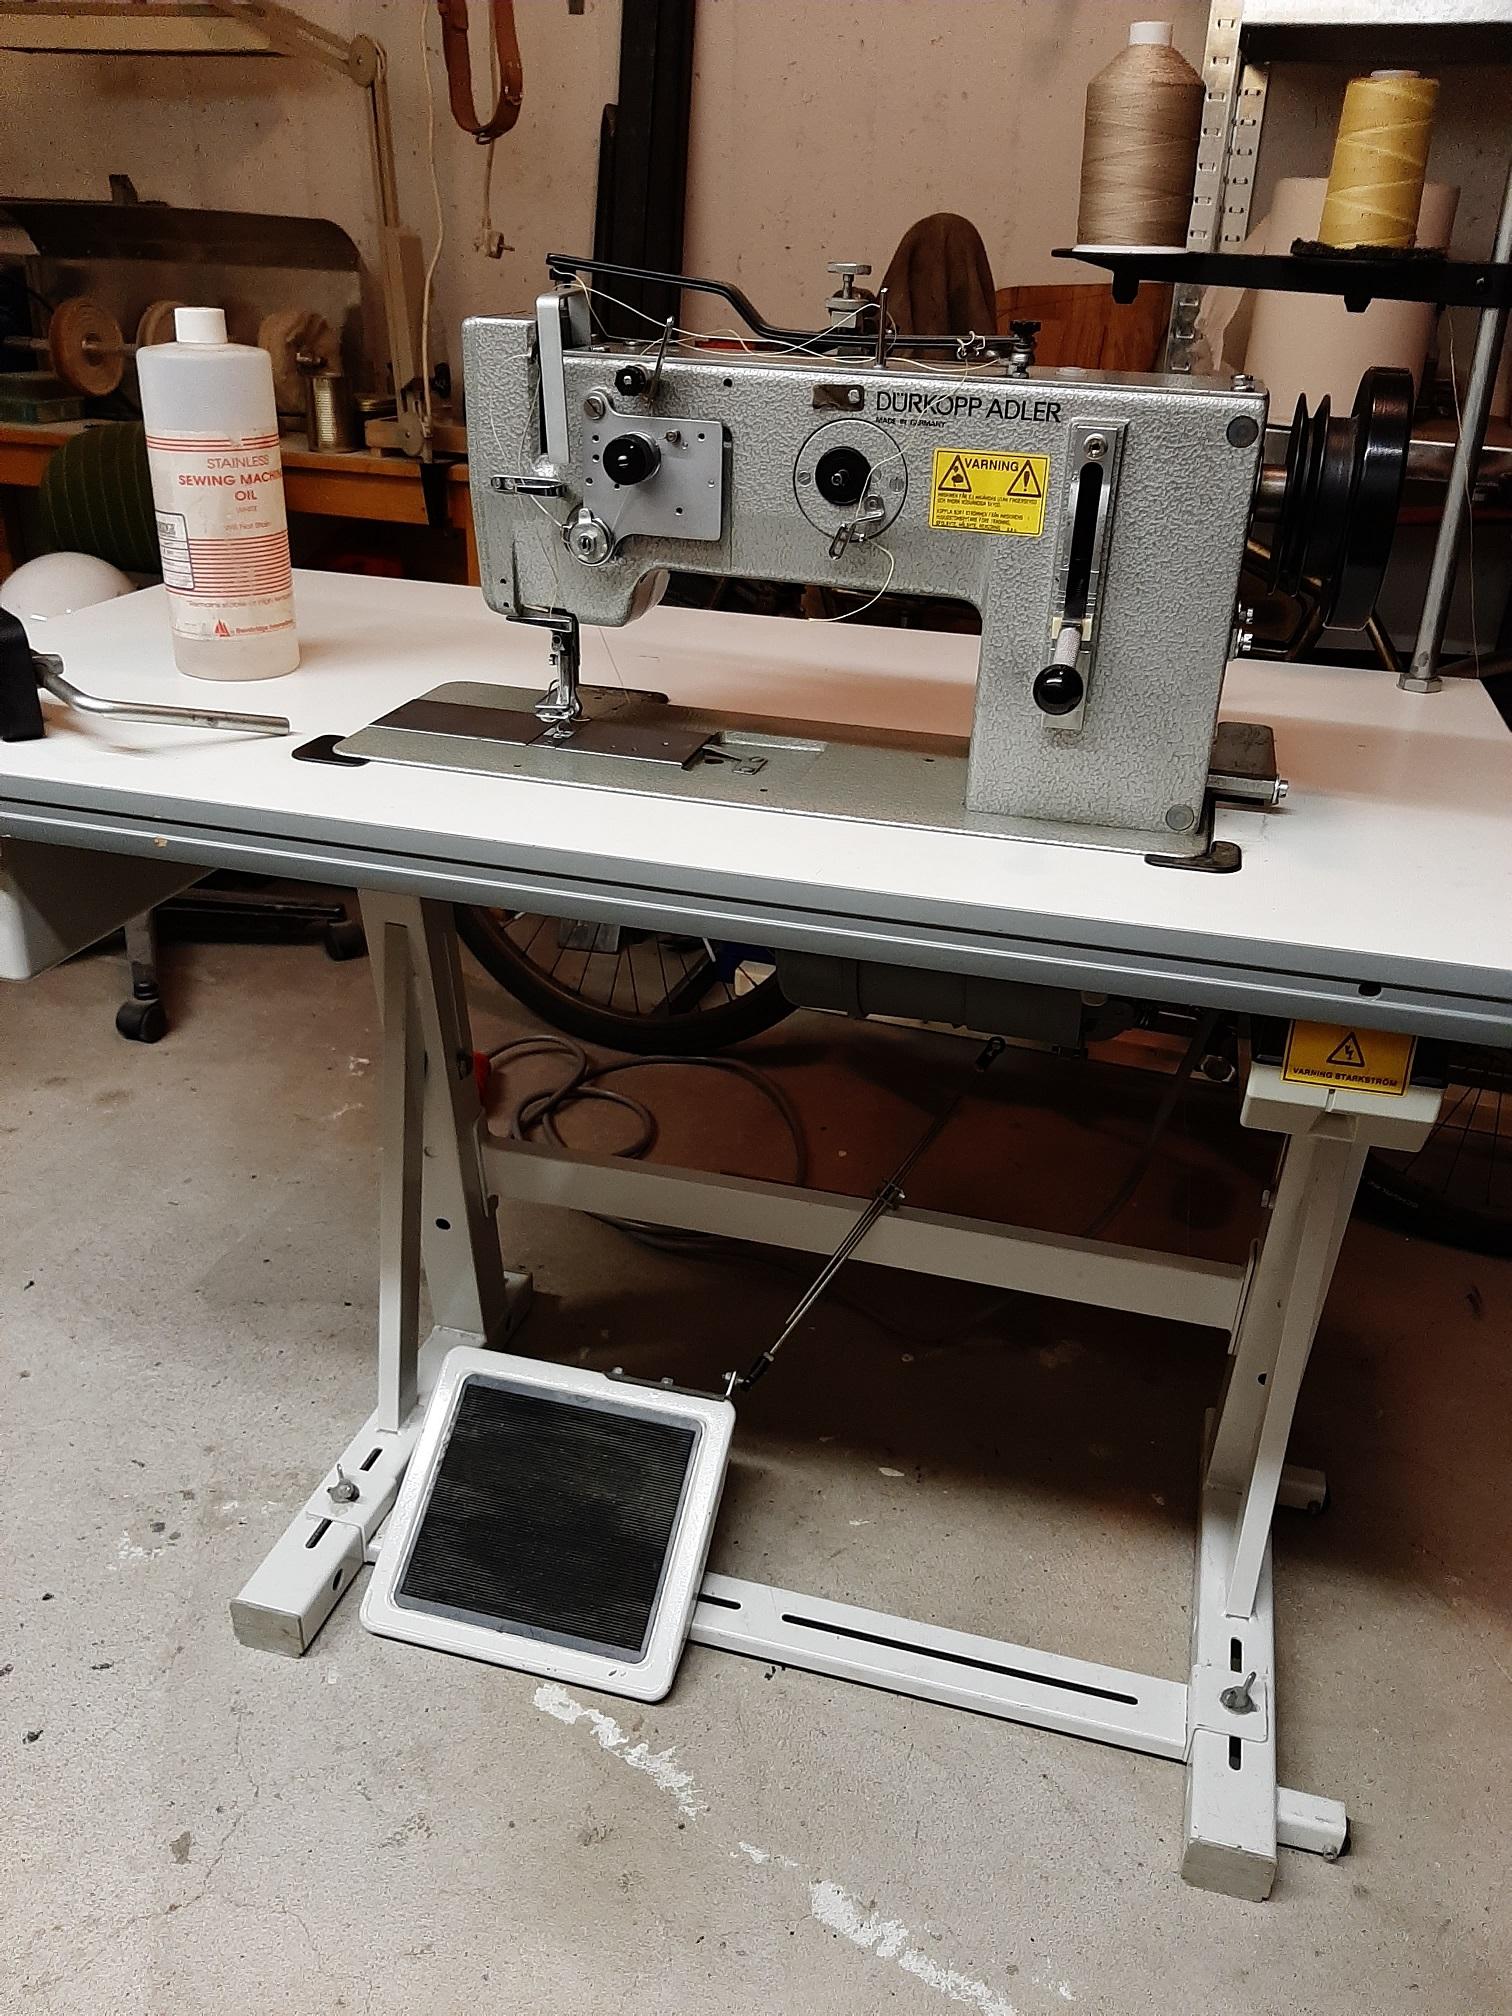
this is my adler.
And some jobs that ive done with it, i say that 8mm is the thickest leather it can do without trouble.
I use a 140nm neddle with 138 bonded polythread, works nice.


-
-
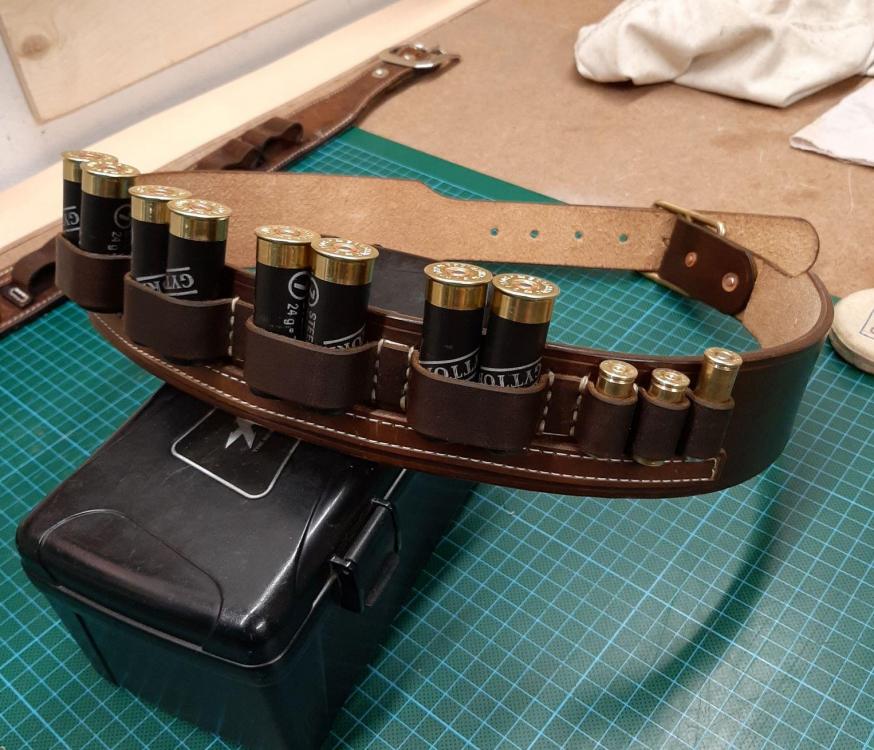
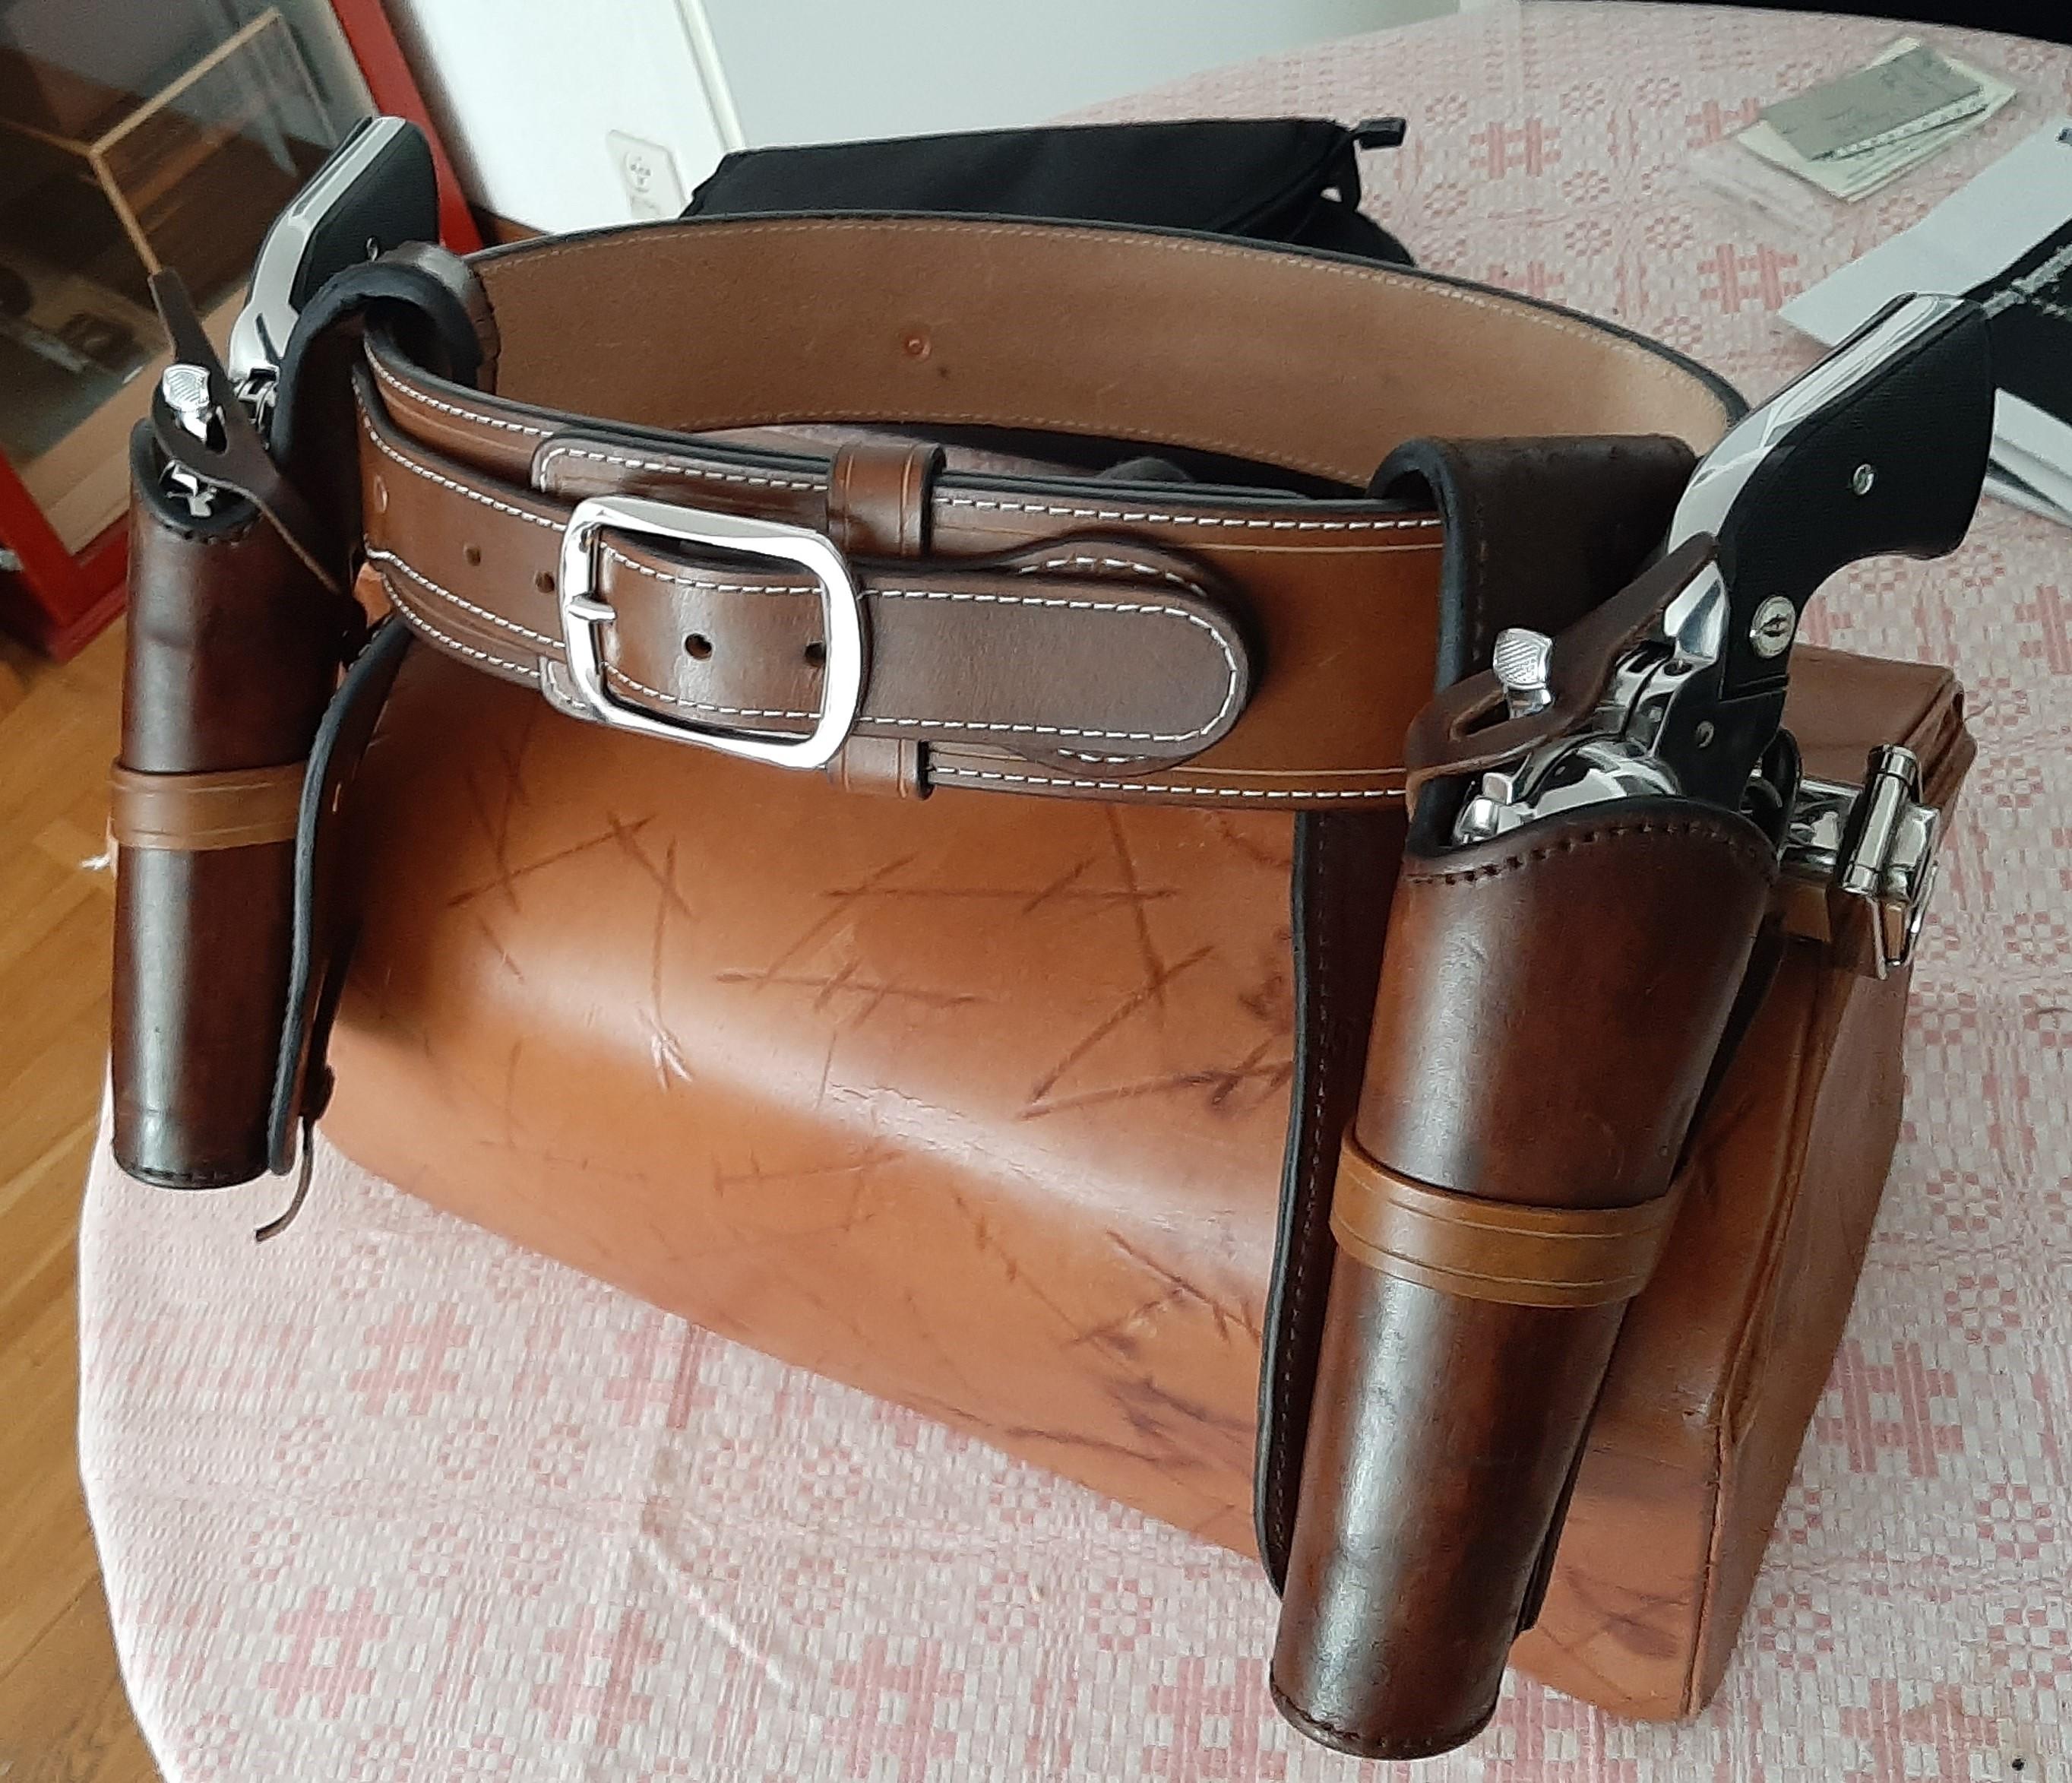
On 6/24/2020 at 5:27 AM, RemingtonSteel said:Nice job on the shell belt as well. I am sure your customer is going to love it. Is he/she left or right handed? Although I am right handed, I hold the revolver in my left hand and use my right hand for the reloads, as the loading gate in on the right side of the gun. So for me, I prefer the cartridges on the right side of the shotgun shells so that I have easy access with my right hand. Also in the future you might want to add another two to three cartridge loops. Not that you would have more than one or two reloads on a stage, but I have seen (and done it myself) quite a few times where shooters forget to replace the used reload cartridges at then end of a stage. Nothing worse than reaching for a reload only to find empty loops.

He is righthanded but he wanted them to left because he use to load the pistol with the left and rifle the same way
but if he wants i can ad loops to the right or build him a new
 .
.
Good tips of nr of loops ,in the future i may doing 5 as standard instead.
-
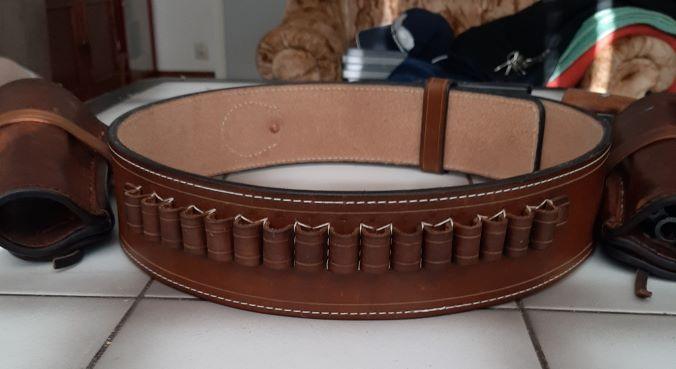
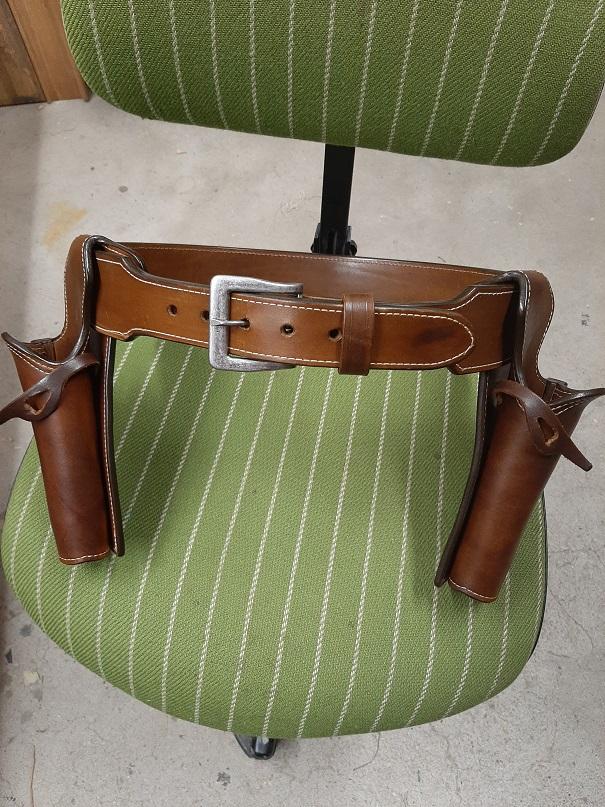
On 6/24/2020 at 5:14 AM, RemingtonSteel said:Great looking first rig to go with those matching Ruger SASS New Model Vaqueros! You should be proud of it. Very clean yet rugged looking. I can't tell from the photo, but are the holsters lined?
I agree, much prefer a separate shotgun shell belt, that I can have sit a little higher than my gun belt. Plus I don't like wearing a gun belt backwards to have quick access to the shells and cartridges. Looking forward to seeing your shotgun belt when you finish that.
Tanks, and im very satified with the vaqueros ,built lika a tank and now i have fired about 5000 round in 2 seasons.
Only the belt its lined but ive glued a 10 oz and a 5oz with rawside towards me.
Holsters are glued rawside together.
Next pair of holster is going to be a crossdraw rigg for CAS, this one i made is for 5 1/2 and i have 4 3/4 .
-
On 6/22/2020 at 4:56 AM, blue62 said:Good looking rig, for cas I'd leave the bullet loops off, so there would be room for a shotgun slide with a couple loops for a on the clock reload.
i like to have my shotgunbelt but i understand what you mean, ive thought about to do without loops but i think its
looks better with loops
.
I will do another belt with some stamping on it soon.
On 6/22/2020 at 4:56 AM, blue62 said: -
in sweden there is about 150-200 and the norwegians also use to compete with us.
Its my third year now and its fun.
Ray Heartless is from here and he is over the pond to compete with you most winters and he is fast, try to be in his posse so i can learn from him.
-
Thanks ,learn more all the time.
-
Made this for a customer that going to use it for CAS , 12 g and some bulletloops for .45 LC
-
Made my first Rigg for CAS , cal .38sp loops.


441 clone
in Leather Sewing Machines
Posted · Report reply
ok, going to look at my machine and move it in a minute.