


bgillespie
-
Content Count
10 -
Joined
-
Last visited
Posts posted by bgillespie
-
-
Kevin Lee tools has basic diamond and French irons that are really affordable ($30 for a set of diamond pricking irons - 1,2,4 and 6 teeth) and he does have 5 spi. According to the website, they're low cost, no frills so people can try out new tools without breaking the bank. I got some of the French pricking irons from him a while ago, and they are great tools at a great price. Teeth are polished, too, so they don't stick. They're made in and ship from China, which I know you aren't crazy about, but they're a great deal if you don't mind the wait...and China.
My diamond chisels are from Weaver, and the biggest one in the set sticks pretty bad, especially in thick leather. They're not bad tools, but they're also not made in the USA, I don't believe. Good luck with the search!
As far as using them goes, getting them to come out evenly on the other side takes a little practice. My lines still wander more than I'd like Also, I find it's harder to keep the backside line from wondering any time the shape of your piece prevents you from having the stitch line lay flat. Also, with really thick leather the chisels won't punch all the way through. Prongs are too short. You can drive them as deep as possible and follow up with an awl, but taking them all the way down can mark the face of your project, and if the teeth aren't polished you spend a lot of time trying to get those things free of the leather.
-
Sorry for being so slow to respond! The leather wasn't too expensive, but mostly because I got it on sale from Maverick. Like battlemunky's experience, this was chrome tan and edge work was tough. The grain was firm in some places and really soft in others, so the beveled edges on the strap are pretty rough. The flesh side was really fuzzy in some places, but I figure that will wear down with use. It's supple and seems really sturdy so far. Unfortunately, due to all the coronavirus shutdowns I haven't had much chance to use it, yet!
-
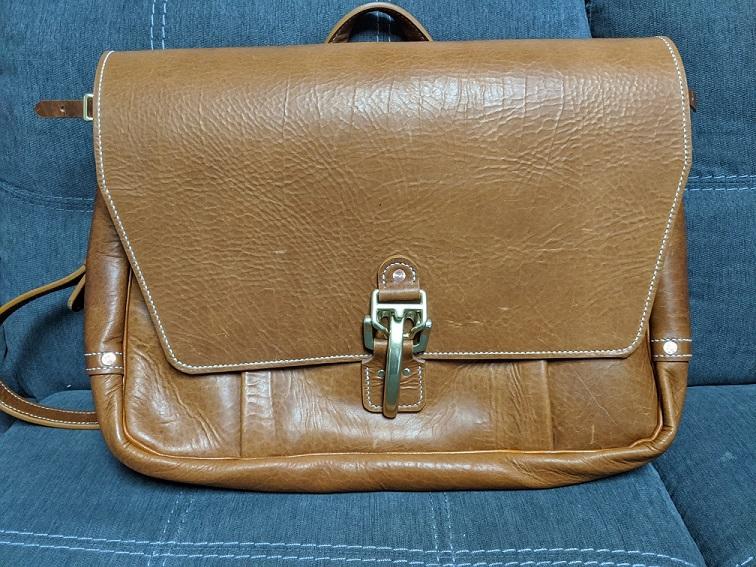
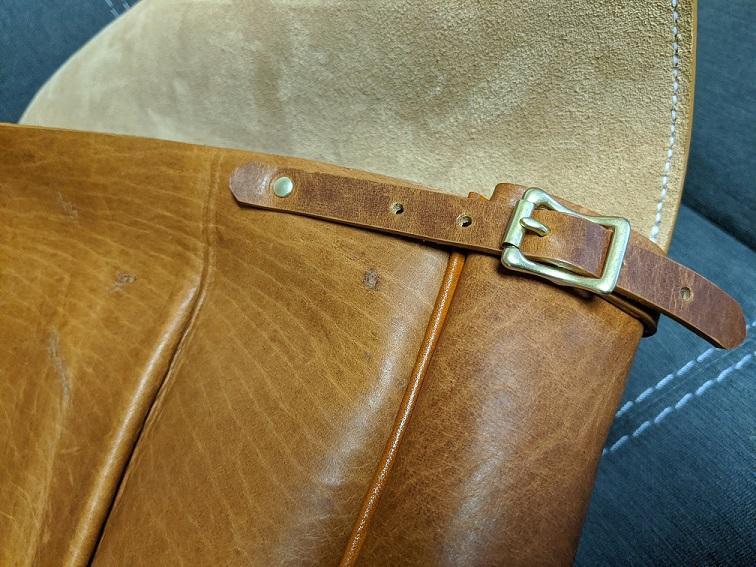
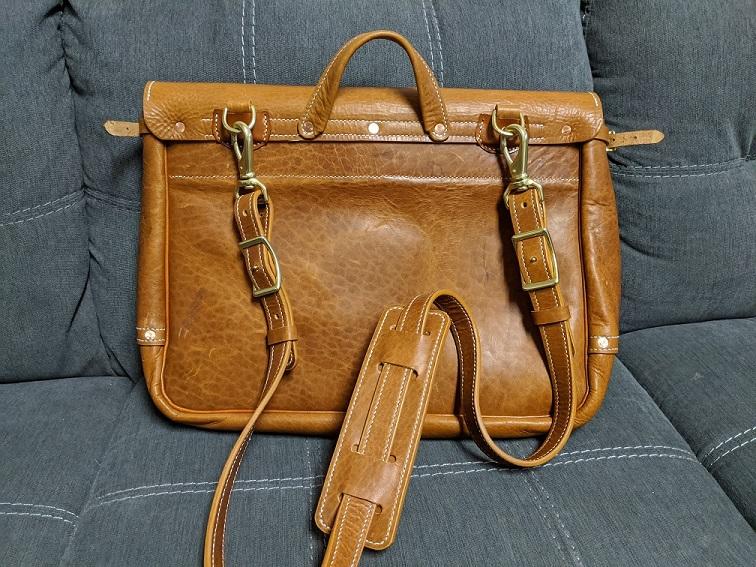
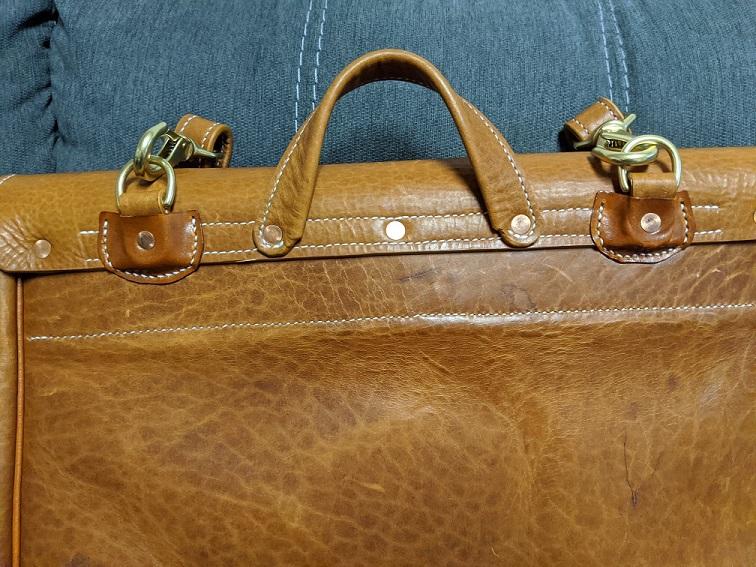
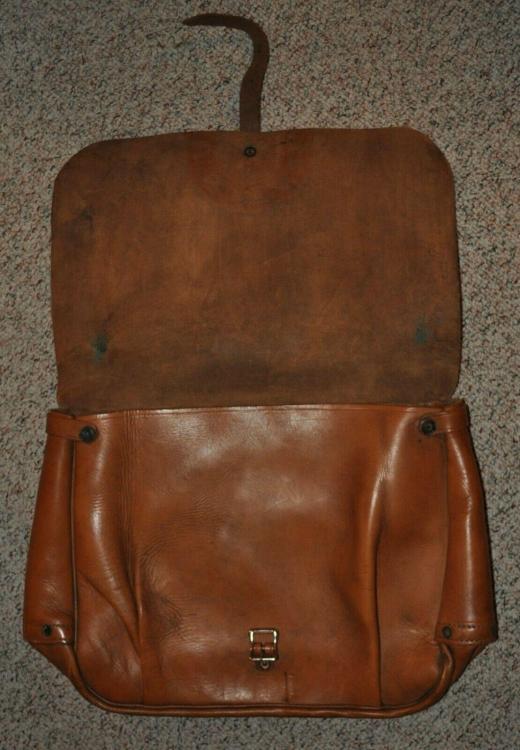
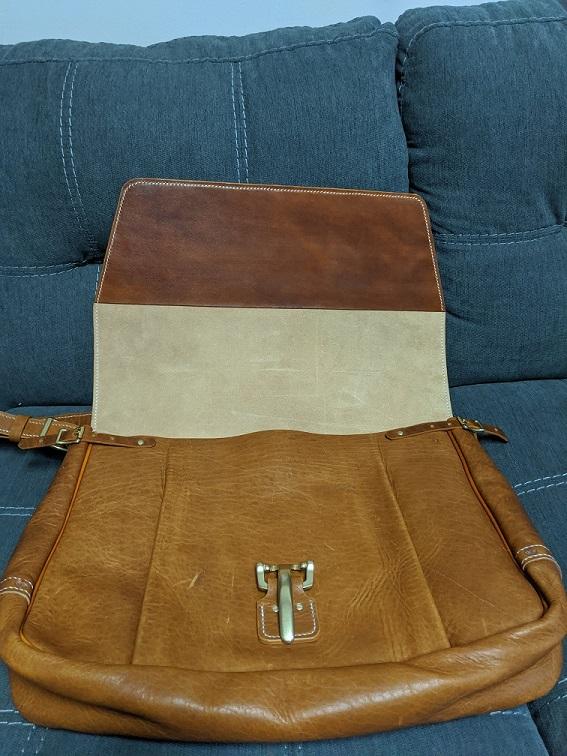
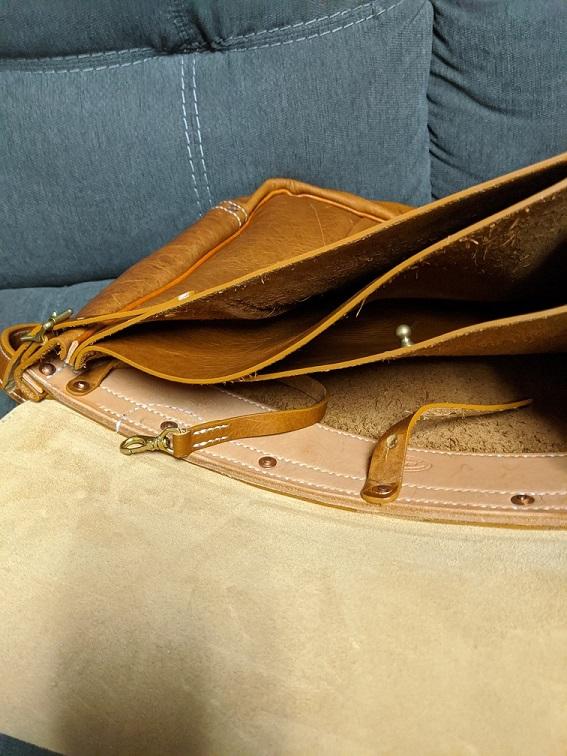
It took a while, but I finally finished my mailbag - with pleats! Thanks to everyone who provided advice on how to form the pleats. I think I'll definitely nail it next time. Modified a pattern from leatherbagpattern.com and used some of the techniques from the Andersen Leather mailbag that is in another thread here. Also pulled the side strap detail from the old drawing possumbreath posted a few years ago. This is by far the biggest project I've ever done. Feel like it turned out fairly well.
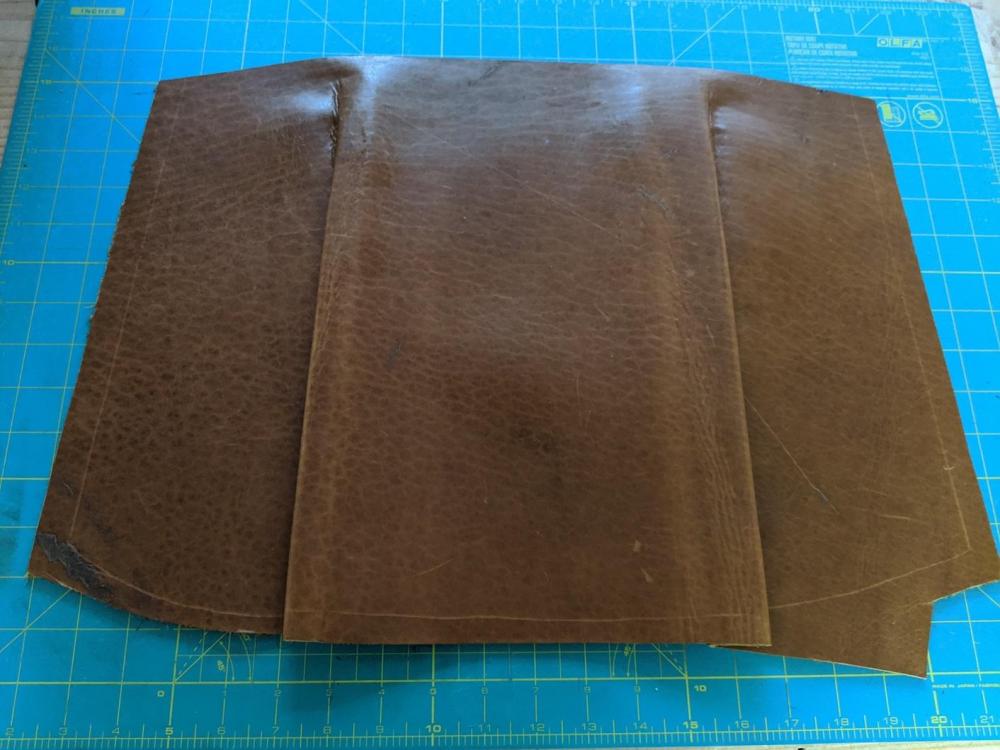
The majority of the bag is bison. Used 2-3 oz veg tan to line the loops for the D rings, for the loop covers, as well as for the welt between the gusset and front/back panels. Storm flap lined with suede and end has 2-3 veg tan to cover the rivet (and then some) of the latch. Decided to add a pocket in the back with a strap for a laptop or whatever. Also threw in a lanyard for keys. Seemed like a good idea. Spine is super heavy veg tan - it's actually a stirrup strap. Copper rivets, brass hardware. All kinds of fun stuff. It's a beast of a bag, but I think it should hold up.
Feedback and recommendations for improvement appreciated. I really enjoy working with leather, and I definitely want to improve.


-
Thanks for the clarification. I'll try it again. It gets a little easier each time. I'll wet it again and see if I can ease the top out a little. I'll get there eventually!
-
Well, I gave it a shot again. Got things to look more symmetrical, but the top still bows up a lot. The piece is oversize so i can always trim. The bottom is fairly on the mark, though.
-
Buzzardbait and johnv474 thank you both so much! This is a huge help. I have been overthinking this one for a while, it seems. Johnv474, thanks for all the detail. It definitely helps clarify the process. Time to get to work and see how it goes!
-
I'm trying to make a bag that is similar to one of the old leather USPS satchels. I'd like the front pocket to have the pleat, but I can't figure out how to do it. Every time it try to fold it into place it just doesn't look right. The bottom of the piece is oversized by 2 inches and a bit on each side for 1 inch pleats. I've noticed the top piece curves up, so maybe I need the top to have a slight downward curve to compensate for that. Otherwise, the biggest thing is I can't figure out how to fold the things to look semi-symmetrical. Maybe I'm overthinking it, though Also, should I skive out some thickness in the pleat to help with folding, or is that a bad idea?
Any thoughts greatly appreciated!
-
Thanks, Rohn. It seems sturdy so far. The first one was a real beast - basically a quarter inch thick!
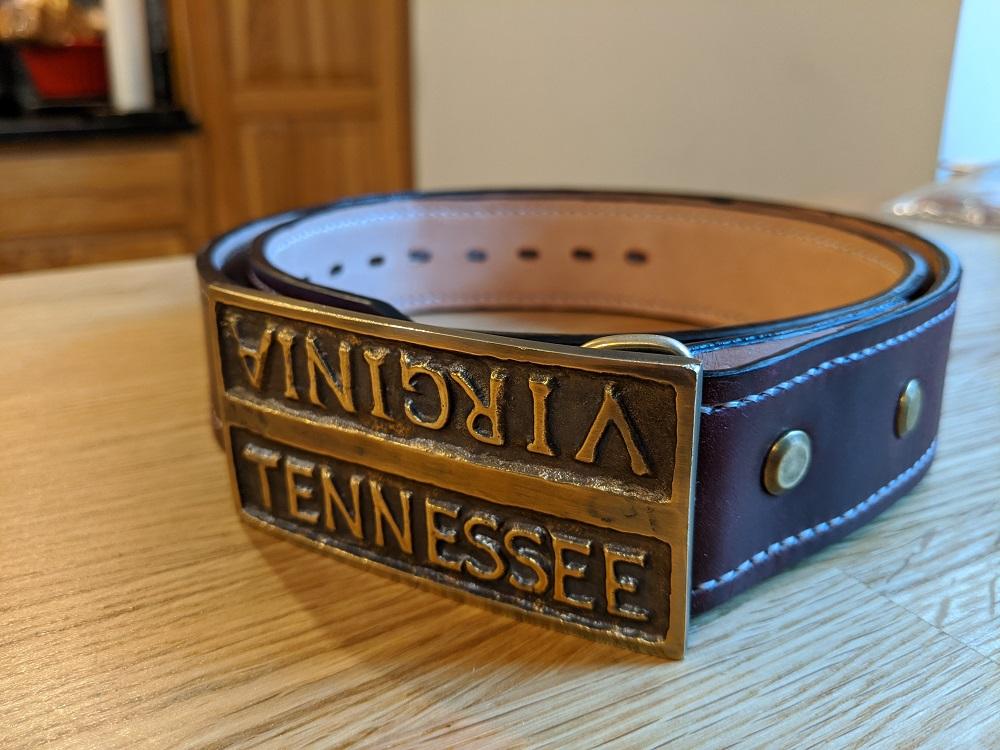
FLand49 I used 6/7 for the chromexcel belt and 2/3 for the veg tan lining. Used .6 Ritza Tiger thread to stitch it all together. Hope all is well in Blount County!
-
Several years ago I bought some Alden boots made with chromexcel. Finally decided to make a matching belt. I read chromexcel was a little too stretchy for belts and decided to do a veg tan liner. I made the belt too thick the first time. It's gorgeous leather, but just won't fit through the belt loops. I'm sure I can find a way to reuse it eventually. Anyway, here's take two.
I've still got some things to improve with my work. Stitching with diamond chisels always looks great on one side and flat on the other. I may need to cast the stitches on one side or something. When I use French style pricking irons it always works out fine. Go figure. Also need to work on my backstitching. Luckily no one will ever see those when I wear the belt. The oval belt holes are a little wonky, but I'll eventually get them lined up better. Hope the closer spacing doesn't cause problems, but I like the extra flexibility. Edge paint is tricky. I bought two 1.5" straps and lined them up as well as I could. Probably would have worked better to get and oversized liner and trim after glue up. One of the things I did better this time was skiving the turnback. In order to keep the veg tan strength, I skived the turnback on the chromexcel before I glued the two straps together. Also got a better impression with my maker's mark than usual. Who knew that thing could be so finicky!
My hometown, Bristol, is on the Tennessee/Virginia border. On State Street, between the center lines on the street are bronze markers that look just like the buckle. The artist who made the buckle is originally from Bristol but now lives and works in California.


Mailbag-inspired satchel
in Purses, Wallets, Belts and Miscellaneous Pocket Items
Posted · Report reply
Thanks, everyone!