yaklady Report post Posted February 20, 2010 Gisela, you're so funny! Hiding all those wonderful tools from yourself! That sounds like something I would do. Those tools will help you a lot in doing the horse. As far as the propetal, I think you figured out your own problem. You do need to cut deep with the swivel knife to begin with. Then pound down the inside of the nostril, first with a smooth beveller, then with a smooth matting tool or pear shader, or both. Point that propetal at about a 45 degree angle so that you are cutting deep into the horse's nose. You have the right leather, so with practice, you will get it. Gosh, I did that Doodle Page a long time ago! That was before my Bob tools and my Peter modeling tool. I've had a lot of practice since then, and have learned lots more. I met Jim several years ago, and have looked forward to seeing him ever since. I only get to see him 2 or 3 times a year. I feel privileged to be able to visit with him like I do. But he never lets me pay for lunch! Kathy Quote Share this post Link to post Share on other sites
bex DK Report post Posted February 21, 2010 Kathy, would you mind giving some advice on what you consider the most essential figure carving tools for doing horses? My budget is limited so I have to select carefully. I got the Figure Carving Finesse book for xmas and that left me feeling like my tool box is pitiful and wanting everything, but I have to prioritize. I figure the hair blade or tool is a definite must, but what else is most essential? I am sure I need some figure carving bevelers, but I don't know what sizes are most essential. I will probably mostly be working with heads and whole or partial horses on wallets and notebooks--so a pretty moderate size. I worry about going too small as well, because it seems like a smaller tool is harder to hide tool marks on a larger area. But maybe you or someone else can advise on a few that would work well together? From looking at the catalog, I was guessing that I might do okay with F891 and F896 for starters, but it is so ahrd to know! I have been experimenting with using F902 as a pointed beveler. It seems to work for the smooth stuff. Any idea of a pointed beveler that can match the texture of B702? I've fiddled with using F902 but I can't get the texture into the small areas and it does seem noticeable. That is better than nothing however. The local shop only has a few tools on hand and it will be cheaper for me to order directly from Tandy in the UK when they need to be ordered anyway. So I can't just go down to a local shop and look at them. :-( Advice would be greatly appreciated. And no, I won't blame anyone else if the suggestions end up not working for me. I know some preference is very personal, but I have to start somewhere and an experienced person is probably a better bet than guessing from the catalog. Quote Share this post Link to post Share on other sites
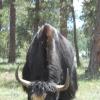
techniques Report post Posted February 21, 2010 Hi Kathy, I'm ready with the Palomino Horsehead. I used a little bit thinner leather. It is 3,23 mm thick, that's about 8 ounces. I had the nostril done before I read your advice and it seems as if the leather has a little bit broken on the edge. I used the F 902 for the forehead and mane, but I'm not completely satisfied. The Modeling tool is the one from Peter Main. I have also noted that I have hold the Figure Beveler at the first horsehead carving wrong. As I made the muscles on the horse I used the toe and leaned it against the leather. I have later tried to smooth it out, but I have hit the tool too hard. For the Palomino horse I used the Figure Beveler sparingly and leaned it against the heel. In some place I used a smooth Pear Shader, but the most work is done with Peter Main's Modeling Tool. I find this carving looks much better as the first, but I have yet to try a lot to become better. I will try some eyes, nostrils and of course foreheads. Thank you again for the forehead tutorial and please take again a hard look on the Palomini Horse. I hope you are not bored with looking on all my tries. The scan with the name GB_Palomino-Horsehead_1_web is again a scan with 300dpi. The others are made with a Camera. Greetings Gisela Quote Share this post Link to post Share on other sites
ClayB Report post Posted February 21, 2010 I'll be interested in hearing what Kathy recommends too. If I could only have a handful of figure carving tools here's what I'd pick. Figure bevelers F890, 891 and 895. I think you're going to use the smaller ones more often than the really large one. Pointed beveler F902. If it's not got a really sharp point, file it down with a file. A figure matting tool F898 or 899. And a good modeling tool. The modeling tools Tandy is carrying now aren't too bad. If you could only afford to get one, I'd get the 8039-02. At some point in time you're going to want to get Peter Main's modeling tool. For most people that have them, it's the one they use the most. The pointed beveler F976 has a checkered pattern that should be similar to the B702. There are lots of other "specialty" tools to make different textures, tree effects and things like that. I was like you when you got a new book and thought I NEEDED them all, but there are some I've never used. When you get to the point where you want to do things like grass and trees and other background scene stuff, you'll probably want to add a few more tools. Kathy, would you mind giving some advice on what you consider the most essential figure carving tools for doing horses? My budget is limited so I have to select carefully. I got the Figure Carving Finesse book for xmas and that left me feeling like my tool box is pitiful and wanting everything, but I have to prioritize. I figure the hair blade or tool is a definite must, but what else is most essential? I am sure I need some figure carving bevelers, but I don't know what sizes are most essential. I will probably mostly be working with heads and whole or partial horses on wallets and notebooks--so a pretty moderate size. I worry about going too small as well, because it seems like a smaller tool is harder to hide tool marks on a larger area. But maybe you or someone else can advise on a few that would work well together? From looking at the catalog, I was guessing that I might do okay with F891 and F896 for starters, but it is so ahrd to know! I have been experimenting with using F902 as a pointed beveler. It seems to work for the smooth stuff. Any idea of a pointed beveler that can match the texture of B702? I've fiddled with using F902 but I can't get the texture into the small areas and it does seem noticeable. That is better than nothing however. The local shop only has a few tools on hand and it will be cheaper for me to order directly from Tandy in the UK when they need to be ordered anyway. So I can't just go down to a local shop and look at them. :-( Advice would be greatly appreciated. And no, I won't blame anyone else if the suggestions end up not working for me. I know some preference is very personal, but I have to start somewhere and an experienced person is probably a better bet than guessing from the catalog. Quote Share this post Link to post Share on other sites
yaklady Report post Posted February 22, 2010 Clay, I think you would have every tool that was ever made if you could! You're pretty close, now. bex, if you are tooling horses to go on wallets, they are pretty small, so you would want to stay with small tools, naturally. To be honest with you, I rarely use my tiny figure bevellers any more. I use my F895 a lot, but when it comes to small, I just use my modeling spoon. There is no worry of choppy beveling or inconsistent depth that way. That's for the INSIDE of the horse, I still use a regular beveller around the permiter. When using the spoon on muscles, I push hard to get the depth I want, then smooth it out to where it looks realistic. I stay away from F896. The beveling edge is too sharp, and it's such a weird shape, it's hard to use. That's too big for wallet horses, anyway. F902 is an essential tool, as well. Like Clay said, you may have to cut back the edges if it's too round, which the new ones are. It works best if it's nicely pointed. When I use this tool on the outer edges, where chechering is required, I go into the points with my A104. It's time consuming, but it works. If you were to grind down F976 to a sharp point, I'm sure it would work to do both at once. The matting tools that Clay suggests are good. I have F898 and 900. The smaller one works well in small areas, the bigger one evens out the larger areas. Clay also mentioned Peter Main's modeling tool. That's the only one I use. I try to use the ones my 4-H kids bring to meetings, but they just aren't the same. You can do the eyes, ears, nose, and all the muscling with this one tool, then round out the rough edges and do the mane and tail. If you're serious about tooling a lot, think about getting one. You can only get it from Peter. It cost $35 last I knew, but that may be less than all the figure bevellers. I hope this helps. Clay would be happy to help you spend your money on lots of pictorial carving tools. When you get to that point, he can give you a long list! Quote Share this post Link to post Share on other sites
yaklady Report post Posted February 22, 2010 Hey Gisela! You've got it now! The muscling is perfect! Isn't Peter's modeling tool amazing? I can't do without it. You do need to practice with that pro petal. Cut deep on the top of the nostril. You could even under cut it a bit, toward the inside of the nostril, if that helps you. Then bevel the inside down real well before you stick that thing in there. Hold the handle up so you can cut deep, and try to avoid cutting the edge of the nostril. You can stick the modeling spoon in to lift it afterward. The other thing that could use improvement is the hair in the ears. You've got the right idea, just put in a lot more impressions with the pointy beveller. I hold the F902 above the leather and move it while hitting it with the mallet. The impressions all run together, making it look like hair. I'm so impressed with the progress you've made in so little time! Why can't all my students be like you? Good job! Kathy Quote Share this post Link to post Share on other sites
bex DK Report post Posted February 22, 2010 Thank you very much! I already have F902, F899, and A104. I didn't think A104 matched that beveler very well. The problem for me with ordering the Peter Main modeling tool is that I owuld have to pay customs and fees as well as the purchase price and shipping. That can easily end up far more than the tool costs. So I think I will make do with the Tandy ones for now. I have one, but it annoys me sometimes. I feel like it scratches the leather. It probably needs to be stropped but I won't have rouge until I make this order anyway. Both of you recommend F895, so I will go with that one as a good middle tool but probably the spoon, although it isn't the best tool, for the remaining modeling. I already use the spoon to smooth and round, so I am pretty comfortable using it. I think my F902 is a newer one, but it seems pretty well pointed on the one end. Otherwise it mostly resembles a tiny pear shader. But it seems to work pretty well in the corners when I tip it a little. I played with it working on a floral pattern on spur straps yesterday. I think the modeling tool I have (stylus and spoon) is an older style.. the spoon is pretty big. That makes me wonder whether I might do better adding 8039-01 for the smaller ends instead of 8039-02, but it is so hard to know when I can't play with them. :-( Do you use mainly a regular swivel knife blade or an angled one? I only have a reg one but I am wondering if I might find the angled one easier to manage for the smaller details. Thanks for the advice!! Quote Share this post Link to post Share on other sites
yaklady Report post Posted February 22, 2010 Those F902's do come looking like a pear shader. That's what I don't like about them. If you file down the sides to take away the roundness, it would work much better for you. I haven't played much with the new modeling spoons and don't know what they're like. The -01 does look like it would go with the size of horse you will be doing. You already have a larger one, so I suggest you go with the smaller one. Yes, your spoon does need buffing to get rid of those spurs. You don't want scratches, that is annoying! I use the 1/4" angle blade, and I believe Clay does too. It's the only way I can get the tiny detail, which I do a lot of. Those ceramic blades are pretty nice, and don't need sharpening, usually. I hope my advice works for you! Kathy Quote Share this post Link to post Share on other sites
bex DK Report post Posted February 22, 2010 Thanks! Now I just need to convince the husband of the value of the investment in all these tools. ;-) Quote Share this post Link to post Share on other sites
Northmount Report post Posted March 18, 2012 (edited) Kathy ... This is a great tutorial. I combed through it and copied all stuff in context into a PDF file so I could use it for my reference, and thought others might like to have it too. So here it is. Edited, combined both files into one. Carving Horses.pdf Enjoy CTG Edited Friday at 04:00 PM by Northmount Combined the original 2 fies into 1, so only 1 download required now Quote Share this post Link to post Share on other sites
Bluesman Report post Posted March 18, 2012 Thanks for the Tutorial and thanks fo the PDF. you folks are Great :You_Rock_Emoticon: Quote Share this post Link to post Share on other sites
yaklady Report post Posted March 18, 2012 That's exactly what I was hoping someone would do with this information. I hope it helps you. Kathy Quote Share this post Link to post Share on other sites
LNLeather Report post Posted March 23, 2013 I am reviving an old thread here with Tons of really Grrrreat information and many tutorials on * How to carve a horse * How to carve a horse eye *How to carve a horse mane Thank You Kathy... Your work is Phenomenal! Attn Admin. - This should be Pinned Quote Share this post Link to post Share on other sites
yaklady Report post Posted March 24, 2013 Thank you, Cheryl. If I am able to help even one person, my goal here has been met. Kathy Quote Share this post Link to post Share on other sites
Harley Corns Report post Posted June 17, 2013 This tutorial is outstanding Yak Lady. Your easy to follow-step by step instructions are helping me grow and expand my leather skills into figure carving....plus you have helped me feel like a true artist. Thank you for taking the time and for your willingness to share your expertise (and at no charge, is like icing on the cake). And a tip of the hat to northmount as well, for making the PDF's available. PS I agree wholeheartedly with Cheryl......This tutorial deserves to be pinned. Quote Share this post Link to post Share on other sites
WScott Report post Posted June 18, 2013 Yep, marking this for future reference Thanks! Quote Share this post Link to post Share on other sites
keplerts Report post Posted June 8, 2014 Ok, at the risk of sounding stupid..... what does "Bump" mean?? I have seen it used many other times but was too embarrased to ask what it means. Thanks! Tom Quote Share this post Link to post Share on other sites
LNLeather Report post Posted June 8, 2014 (edited) When you 'Bump' a post that action brought the post up to the top of the list of posts where it would be viewed or found easily... not down on page 10, or what ever. The last post on this topic was on June 17 2013 so it was not so easy to find or see.... This is Such a Good Topic, it really should be 'Pinned" so it is always up at the top of the list of posts - along with the other 'Pinned' Really Good and Helpful topics... Edited June 8, 2014 by LNLeather Quote Share this post Link to post Share on other sites
Harley Corns Report post Posted June 8, 2014 A "bump" brings a thread that hasn't been commented on in a while back to the top....and this particular thread is definitely worthy of such a deed. Thanks northmount ! Quote Share this post Link to post Share on other sites
Harley Corns Report post Posted June 8, 2014 I'm with you Cheryl. This tutorial is very deserving of being pinned. Quote Share this post Link to post Share on other sites
keplerts Report post Posted June 8, 2014 Thanks for the clairification! But let me get this straight: It is not the word "Bump" that moves the topic up; but merely the fact that a "new" comment has be added? Thanks! Tom Quote Share this post Link to post Share on other sites
oltoot Report post Posted June 8, 2014 You have done a great job and its only because of the great detail in your work that detailed observations can be made. That said, most mouths appear mixed with top teeth and bottom teeth appearing to be of different ages. It is switched too with some showing youngest on top oldest on bottom and some vice versa. The young teeth are 4-5 yr old while the older ones appear to be 10+. Quote Share this post Link to post Share on other sites
LNLeather Report post Posted June 8, 2014 The "new" comment bumps the topic up to the top... northmount simply chose the 'Bump Smiley" to put in the reply as it was the most relevant smiley to use... there are about 110 smiley's for all kinds of occasions.... He could have chosen to add a comment... this was just a fun, fast and easy way to accomplish the bump Quote Share this post Link to post Share on other sites
FDRAKE44 Report post Posted February 4, 2016 Hello, I'm the little newly registered French. I read all topics and I say a big thank you Kathy. This is the first time I find so much detail explained. On the French forums, people also do not explain at length and photos dating from before 2014 can no longer be seen. A big thank you for all that pedagogy. (I myself used a translation program and I hope it is). I'm just a beginner in leather work, but I'll buy the tools and with such good advice I start well. Again, congratulations and thank you Kathy. Quote Share this post Link to post Share on other sites