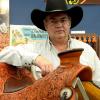
kseidel Report post Posted February 12, 2011 I have had these pics on a cd for months and finally got some into the computer. This saddle won first place in the tooled saddle category at the 2010 "World Leather Debut" in Sheridan Wy. It was not published in the Leather Crafters And Saddlers Journal, so I thought I would post some pics on here. It is a 16" modified association 14" wide, 4"high X 13"wide cantle with 1 3/4" cheyenne roll. #4 Post dally horn with 3 1/4" cap. Fully tooled with a wyoming wild rose pattern with smooth leather under riders legs. The saddle features an inlaid padded seat, is fully lined and machine stitched @ 8 stitches per inch. Color is two tone chestnut. Note the seat is inset into the swell for a flush fit. Keith Gertsch made the tree, and Rob Schaelein made the sterling silver conchos. Thanks for looking. Keith Seidel Quote Share this post Link to post Share on other sites
Billy H Report post Posted February 12, 2011 Keith, It is truley beautiful in every aspect. ( I am blown away and just shaking my head ) Thanks, Billy Quote Share this post Link to post Share on other sites
dirtclod Report post Posted February 12, 2011 It is a piece of work to be proud of without a doubt ! Nice job !! Quote Share this post Link to post Share on other sites
BondoBobCustomSaddles Report post Posted February 12, 2011 Without question, made with the pride and attention fo detail that all your work exhibits. Absolutely top notch! Bob Quote Share this post Link to post Share on other sites
GrampaJoel Report post Posted February 12, 2011 Mr. Seidel, To comment on the beauty of this saddle would be superfluous. As a want to be saddle builder, I don't have the words anyway. Just looking at all the work, and skill that went into making a saddle such as this is almost more than I can comprehend. Especially knowing (from first hand experience), how one slip of the tool can destroy a piece of work. May I ask of you Mr. Seidel,( or anyone that knows) is this saddle an in-skirt rigging design? If so, what is the line of stitching going up at the back billet for? Thanks . Joel Quote Share this post Link to post Share on other sites
gtwister09 Report post Posted February 12, 2011 Keith, As ALWAYS!!!! Absolutely great work. Two tone chestnut sure looks nice. Wonderful attention to detail as always even in the smallest details. Hats off! Regards, Ben Quote Share this post Link to post Share on other sites
kseidel Report post Posted February 12, 2011 Thank you all for the compliments. I'm glad you like it. I know that I sure appreciate seeing work that others post, I just don't take the time to post many pics. May I ask of you Mr. Seidel,( or anyone that knows) is this saddle an in-skirt rigging design? If so, what is the line of stitching going up at the back billet for? That is an in-skirt rigging and the stitchline you see behind the rear billet is the back edge of the rigging plate. The rigging plate is a single piece overlay that covers the front of the skirt and extends to behind the slot which makes up the rear rigging. It extends up to the tree and creates a housing for the back bar. I feel the rear rigging is better supported by ending the rigging in this way and having the stitching to add rigidity. You can see the shape as demonstrated by the attach diagram. Quote Share this post Link to post Share on other sites
TroyWest Report post Posted February 12, 2011 Hahaha, I laughed when I saw the title. We appreciate your shameless self promotion. Not enough saddle pics posted these days. Excellent work. Beautiful in every aspect. Great job on the swell, great job on the seat, on the inlay, on the roll, stitching, edges, color, really immaculate work. A pleasure to look at. Thanks for sharing it with us. Troy Quote Share this post Link to post Share on other sites
JHayek Report post Posted February 13, 2011 Looks good Kieth. Who made the silver rivet caps? Jon Looks good Kieth. Who made the silver rivet caps? Jon never mind, i just read all the words on your post... i know nothing has changed right.? Quote Share this post Link to post Share on other sites
kseidel Report post Posted February 13, 2011 Hahaha, I laughed when I saw the title. We appreciate your shameless self promotion. Not enough saddle pics posted these days. Excellent work. Beautiful in every aspect. Great job on the swell, great job on the seat, on the inlay, on the roll, stitching, edges, color, really immaculate work. A pleasure to look at. Thanks for sharing it with us. Troy Thanks Troy. I titled this just for you! And you are right, there fewer saddle pics posted lately. Guess we all betterpost some of our work more regularly. Keith Quote Share this post Link to post Share on other sites
jbird Report post Posted March 1, 2011 First let me say how amazing your work is ! May I pose a question or two? On my last padded seat the thought entered my mind. What is a proper space between the cantle edge and the padded seat? How tight is to tight? How much material do you need to maintain proper integrity on the seat? also if you would tell me about your finish process I would be very pleased Thanks Josh Quote Share this post Link to post Share on other sites
mulefool Report post Posted March 2, 2011 Sure is a thing of beauty. I really like the shape of the inlaid seat. I always kind of wonder about what Josh asked, too. Chris Tornow Quote Share this post Link to post Share on other sites
kseidel Report post Posted March 3, 2011 First let me say how amazing your work is ! May I pose a question or two? On my last padded seat the thought entered my mind. What is a proper space between the cantle edge and the padded seat? How tight is to tight? How much material do you need to maintain proper integrity on the seat? also if you would tell me about your finish process I would be very pleased Thanks Josh Sorry to take so long to get back here... just been too busy to check the computer. Good question on the inlaid seat. I try to make the cut out as wide as possible to prevent the rider from feeling the edge. This can get quite close to the corner of the cantle. I make a "pillow" for my inlaid seats using a piece of firm 3-4 oz tooling leather for the bottom under the rubber. This gives the seat support from side to side allowing me to get closer to the corner without sacrificing integrity of shape. I am more concerned with comfort and then aesthetics at this point. I calculate the cutout to correspond to the lines of the cantle binding and the tooling borders of the dish and ears of the seat. There is usually about an inch to 1 1/4" from the ear cut of the seat. Your next question about my finishing process is a much bigger question. What specifically would you like to know about? And in how much detail? The basics... Color is a custom mixed color to be a rich chestnut, oiled to depth with olive oil. Antiqued finish is lacquer, Fiebings mahogany antique paste, and another lacquer. Background is dyed with chocolate dye. The real color is achieved with the oil. It takes several coats and several days to balance the color prior to final finish. Thanks for the compliments. Keith Quote Share this post Link to post Share on other sites
compound Report post Posted March 3, 2011 Yes, clear work with incredible produce. I thought is impossible produce this work on earth These pics are truly inspirational Thanks for your pics Martin Quote Share this post Link to post Share on other sites
Hilly Report post Posted March 4, 2011 Keith, I have admired your work since I came here to L.W. I would like to be a fly on the wall in your saddle shop so I could watch you work, and learn all your saddle making secrets! Hilly Quote Share this post Link to post Share on other sites
AndyKnight Report post Posted March 6, 2011 Keith Thanks for your shameless self promotion!! It is inspirational to see work and craftmanship of this quality. Keep sharing Andy Quote Share this post Link to post Share on other sites
ct701996 Report post Posted March 8, 2011 amazing cantle binding, beautiful tooling! Quote Share this post Link to post Share on other sites