Matt S Report post Posted August 19, 2013 Spud is also a sort of scraping/prying chisel on a long handle for removing tree bark. Quote Share this post Link to post Share on other sites
Murf Report post Posted August 22, 2013 Like to see a pic of that tool holder log, Murf Just to see how you organize things into it Scott Hope you werent expecting anything amazing or fancy (although amazing and fancy was the original plan) Had to get my 2 new Leather Wrangler Sk-3s in there =) Quote Share this post Link to post Share on other sites
Murf Report post Posted August 22, 2013 My new Project is this little baby i found at a garage sale for 2$. 1/4 HP runs great, the arbor was bent and it came with a 6" grinding wheel. Picked up a new arbor for 4$, a cloth buffing wheel for 3$ (still waiting for that to come in the mail). Rewiring it with a variable speed foot pedal and got an old VFD (variable frequency drive) from work so it doesnt over amp. in all im going to be about 14$ deep on a sweet little buffing setup and then ill take my pinstriping brushes to it for alittle class! =) Quote Share this post Link to post Share on other sites
WScott Report post Posted August 22, 2013 Both of those are great projects Murf You are one resourceful dude! Quote Share this post Link to post Share on other sites
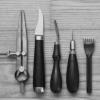
WScott Report post Posted August 23, 2013 Use a kitchen fork to mark the spacing in your stitching line....easier to keep in a gouged line than a wheel Quote Share this post Link to post Share on other sites
Schpacko Report post Posted September 17, 2013 Use a kitchen fork to mark the spacing in your stitching line....easier to keep in a gouged line than a wheel Haha, i like that one Quote Share this post Link to post Share on other sites
KandB Report post Posted September 29, 2013 Here we go - hopefully these are useful to someone - excuse the random order, it's as they come. Use scraps of veg tan and paint a small piece with each of your dyes, then stamp a hole in the scrap and tie it to the neck of the corresponding dye bottle - just in case you can't remember the difference between saddle tan, canyon tan, and all the zillion other types of tan. Same goes for finishes (tan kote, saddle lac, etc - they all come out differently, this makes it easier to check before you start dying Get all your templates cut out of acrylic. We used to have them in hardboard but found we'd be taking chunks of the board off (thus changing the template shape) whenever we weren't careful enough with the knife - so we took the templates to an acrylic manufacturer and they cut all our templates in clear acrylic - making it easier to see the leather underneath for placement, as well as a lot harder to slice pieces off. Use the black knife exacto knife blades - not the silver ones. Home Depot has them, as does all hardware stores, and once you try them you'll notice the incredible difference - they slide through leather like butter. attach rubber or cork to the bottom of your rules to keep them from sliding. After hammering letters into leather (specifically oil tanned), fill the letters in with an inky pen (roller ball gel ink style), then go back and lightly hammer the letter in the same place again. It makes a huge difference and adds dimension without the risk of painting with leather dye and having it spill out of the edges Don't have a walking foot sewing machine and having trouble getting your leather to slide through easily? place a strip of masking tape where you are sewing and sew over that - then peel it off (carefully, or you'll have to spend some more time removing the little pieces that broke). Stick labels with colour coding on your rivet press dies so you know which set goes together easily - my line 24 male pair are highlighted in orange, with the words "LINE 24" and the female are in purple - quick to find them. Burning threads and cleaning up edges is a lot faster with a little blowtorch (the kind for making creme brulee) than a lighter, plus you don't have to hold the ignition down with your thumb the whole time - which leads to no cramping. Hold it just beside the thread, not directly on it, to melt the edges. Then, instead of rubbing it down with your fingers (ouch!) use your bone creaser or wooden burnisher. The best glue I've found for leather onto leather (specifically suede-side to suede-side, since gluing the flesh side of oil tanned leather is pretty darn hard) is the E6000. Buy the larger cannisters that load into caulking guns and use the gun to place your glue where you want it - then smooth down with a popscicle stick. Much less mess. The dollar store sells hardware clips that have rubber tips on them - they are invaluable for holding leather together when sewing, gluing, patterning, what have you. I wouldn't function without those things. The adjustable C clamps you can get at a hardware store are amazing for holding glued things in place - you squeeze them to as tight as they'll go and they stay in place. But the absolute best way I've found to glue things and make sure it's even is to apply the glue, then sandwich the two pieces of leather with two pieces of wood or hardboard, and then clamp that down - it means evenly distributed pressure, not just on the spaces where the C clamps are in contact with the leather. Quote Share this post Link to post Share on other sites
WScott Report post Posted September 29, 2013 Wow, that was awesome!!!! Quote Share this post Link to post Share on other sites
AfroCrafter Report post Posted February 10, 2014 excellent tips, thank you Quote Share this post Link to post Share on other sites
cardinal leather Report post Posted February 11, 2014 I worked on the road for many years. The first thing that I did after getting to my motel room was set up the ironing board. Set the computer and printer up on one end and files on the other. In the leather shop I found a vintage wood one at a local auction for 12 bucks, added a few new bolts and screws, works great if you are working in restricted space and is a great stand to layout straps for dying and finishing. Cut a piece of heavy cardboard for the protection. It can stick out both ends and a little over on the sides giving a portable workspace of about 16 x 66-72 depending on size of iron board. Plus it is at can adjust to counter top level or your chair level. Also folds up and can be stored out of the way when not in use freeing up the space again. Quote Share this post Link to post Share on other sites
WScott Report post Posted February 11, 2014 For old eyes like mine in a less than perfect garage shop, I wear a LED headlamp especially when stitching. It puts bright light right where you need it Quote Share this post Link to post Share on other sites
JDTagish Report post Posted February 11, 2014 As a relative newbie (Definitely to this forum for sure, about a year into leathercrafting) I've discovered how expensive a hobby this is. I'm on a budget, like most people, and there are things that I've found in the cheap to free category that work well for me. Leather Storage: The triangular Fed-Ex shipping containers cut into sections and formed into an octagon, makes great storage for smaller rolled leather. Those fit into the kneehole of the cheap desk I found at the re-use it store where they're accessible, but also out of the way until I need them. Stamp Organization: I have a habit of picking up the foam inserts (or saving the ones I get with cases) that are inside iPad or laptop cases. They come in handy for multiple projects. On this one, I used a black foam insert (about 1/4 of an inch) and marked out all the holes, then punched the holes with my leather punches. Then, I stacked up a slightly larger (1/2 inch) piece of the same foam and punched the holes through the larger piece, using the holes I had already done on the first piece as the template. Then I did it one more time with a third piece the same size as the second piece. Some double sided tape through the solid areas and black duct tape on the outside edges keep everything together. Then, I fit it into a tin I already had on hand. All the stamps can be removed from the upright positions and laid on top of the foam and the lid put on top if I'm traveling anywhere that I would take along the stamps. ***I posted some photos of some vintage stamps that I'd like help to get more info on in the Leather History section - please check that out if you know anything about vintage stamps.*** Pounding Surfaces: I found some older floring tiles of the "peel and stick" variety that are vinyl. Those work fairly well with more firm foam on the sticky side as a softer yet firm (like poundo board, but a bit gentler) for crystal rivets and the like. The black is the foam, the "brick" is the vinyl floor tile. The middle is a hard vintage floor file, like a 50's industrial style. It makes a good surface when I'm tracing. I got those before I had gotten big quartz & granite pieces that cover nearly the whole desk surface. Leather Sources: Being new to leatherworking, leather is the single most expensive part of the hobby. And, I screw up more things than I'm happy with. It made me afraid to even try some things because I was afraid to waste the leather I have been able to buy. So, I decided to call nearly every upholstery place in a 25 mile radius (fortunately for me, there are a few around me) and asked if they would be willing to sell their scrap leather. Not many would, but a few were willing. I spent about $70 total, and wound up with about 75 pounds of decent sized pieces. Black and grey were the most common, especially from the auto places, but a couple of the furniture places had some nice colors. (All the rolls in my Fed-Ex boxes came from this "mission.") It's not like using veg tan, but it's letting me work on some wallets and other pieces that I was afriad to try before. I even made my wife a purse out of some purple leather I picked up. General: Other more general things, I got multiple sized dowels and cut them into smaller pieces, then sharpened them in a pencil sharpener. They work great for burnishing or widening holes punched into leather. I also rounded some down and use those to burnish larger areas of flat leather. I also use black wire mesh pencil cups from the dollar store with more of the foam in the bottom of them to hold awls and other pointy things. Or, the cups without the foam for edge bevelers and other larger items. And, my favorite tip - I used pens or pencils to do all my marking on leather until recently. But often, I'd wind up needing to change a line, and sometimes that pen or pencil mark wound up visible in a place I didn't want it to be. So now I only mark on leather with white chalk. You can get it at any office store or Walmart for under $1, and I sharpen it to a point in a hand held pencil sharpener made for those big crayons. Now, if I made a mistake with a line, I can just brush off the chalk and start over again. Quote Share this post Link to post Share on other sites
jl60280 Report post Posted March 12, 2014 Hi, This is my first post. I do not think that it had been mentioned before... For every sharp tool I use a piece of cork wine..... Quote Share this post Link to post Share on other sites
Chief31794 Report post Posted March 12, 2014 Great tips, I didn't see it anywhere but one of my things is I buy large rolls of 24" wide butcher paper (brown craft) from the home improvement stores, I roll out enough to cover the width of my dye bench, then I dye on it on both sides front and back by turning it over and spinning it around. 1 piece normally lasts over a week and I'm pretty busy in the shop, then dyes, glues, etc get on the paper and not on the bench itself and when I get too much dye or glue on both sides, I simply fold it up, put it in the trash and roll out a new piece. Keeps the dye table much less messy. Chief Quote Share this post Link to post Share on other sites
humperdingle Report post Posted March 12, 2014 I keep tiny shards of veg tan in a tin for smearing glue into those little nooks and crannies... Then just chuck the sticky bits. Guaranteed I won't have cleaned the applicator :D Quote Share this post Link to post Share on other sites
Ajlopez81 Report post Posted March 17, 2014 This thread is awesome. I just started working with leather and discovered this site. The things I have learned just from here is great. I don't have any correct tools yet but some of the tricks here are great. Thank you guys. Once I discover some tricks I'll have to add them. Quote Share this post Link to post Share on other sites
BAD HIDE Report post Posted March 17, 2014 Great tips, I didn't see it anywhere but one of my things is I buy large rolls of 24" wide butcher paper (brown craft) from the home improvement stores, I roll out enough to cover the width of my dye bench, then I dye on it on both sides front and back by turning it over and spinning it around. 1 piece normally lasts over a week and I'm pretty busy in the shop, then dyes, glues, etc get on the paper and not on the bench itself and when I get too much dye or glue on both sides, I simply fold it up, put it in the trash and roll out a new piece. Keeps the dye table much less messy. Chief I do pretty much the same thing. I have a 36" roll of red rosin (left over from a building project) that I've been using for almost a year now, and the best thing is it's only like $12. I took all my dyes, put them in clear 8 & 16oz squeeze bottles, and diluted them down. So now I just twist the cap, put the tip in a scrap of rag, fill 'er up, and rub it on, much less mess. And here's one thing I just started doing. Making a dozen or so card holders? Why cut them apart until you have to? Lay out a bunch of parts - enough so you have all the pieces for 6 of them in one section, then cut that square from the hide. Much easier and more uniform to dye and finish a single big piece of leather than as 12 or more individual parts all over the bench. I even do mild stamping and put my makers mark on parts while like this. Quote Share this post Link to post Share on other sites
Toolingaround Report post Posted March 17, 2014 Great tips everyone! Here is one from me, if you only have a teensy weensy work space like I do, I save the liners from cereal and cracker boxes to cover my stone when I am dyeing things. Free, wipes clean with alcohol and waterproof. I am now the proud owner of some angelus dye which I love!!! I discovered that the plastic "drawer organizer 12 in X 4 in X 3 in" from the dollar store exactly fits 10 boxes of Angelus dye to I can store them on my shelf with ease or bring the whole lot to the work bench to play with. Cheers, Toolingaround Quote Share this post Link to post Share on other sites
WScott Report post Posted March 18, 2014 This is one of my favourite threads Great tips everyone!! Quote Share this post Link to post Share on other sites
Feraud Report post Posted March 19, 2014 I work in NYC and there are two free daily newspapers available. When I'm going to dye a piece I save the newspapers and line my table with it. The paper is free and disposable and ends up being more useful than the news stories! Quote Share this post Link to post Share on other sites
humperdingle Report post Posted March 19, 2014 I work in NYC and there are two free daily newspapers available. When I'm going to dye a piece I save the newspapers and line my table with it. The paper is free and disposable and ends up being more useful than the news stories! My workplace gets stuff delivered on pallets. Very often, layers of stock are separated by thin card/thick paper sheets of 4ft x 3ft. Ideal for the same reasons you use the newspapers. I have rolls of the stuff :D Quote Share this post Link to post Share on other sites
Bob Blea Report post Posted March 19, 2014 I've got another I can add. I recently was in a class and didn't have a weight to hold my leather down. I found out that the silicon case on my iPod touch did an excellent job holding the small piece of leather I was tooling in place. It wasn't that it was heavy (it isn't) but the silicon did such a good job sticking to both my tooling stone and my leather that it didn't move. It was better than the small shot bag I normally use. Quote Share this post Link to post Share on other sites
wanabe Report post Posted March 20, 2014 A few things I picked up that helps me. I hope you find them useful. I had a Dremel tool which was getting a little worn so I bought a new one. While I was at it, I bought a Dremel 220 workstation (sort of like a miniature drill press for the tool). I have sharpened a skiver, a couple of groovers, an awl and fabricated a couple of small tools I needed. After marking stitching, I chucked a very small drill bit (slightly larger than a needle) and drilled very small holes where needed. Makes things a lot faster and easier. I also bought some soft carbon pencils. I can lightly mark leather and see the marks well but the white drafting pencil erasure removes every hint of the marks. Being extremely soft the drafting erasure does not mark the leather. One last thing. I made a strop for my cutting tools with a 2 1/2" X 18" piece of leather. I worked fine automotive rubbing compound into the rough side and it works well. Hope this helps a little A few things I picked up that helps me. I hope you find them useful. I had a Dremel tool which was getting a little worn so I bought a new one. While I was at it, I bought a Dremel 220 workstation (sort of like a miniature drill press for the tool). I have sharpened a skiver, a couple of groovers, an awl and fabricated a couple of small tools I needed. After marking stitching, I chucked a very small drill bit (slightly larger than a needle) and drilled very small holes where needed. Makes things a lot faster and easier. I also bought some soft carbon pencils. I can lightly mark leather and see the marks well but the white drafting pencil erasure removes every hint of the marks. Being extremely soft the drafting erasure does not mark the leather. One last thing. I made a strop for my cutting tools with a 2 1/2" X 18" piece of leather. I worked fine automotive rubbing compound into the rough side and it works well. Hope this helps a little Quote Share this post Link to post Share on other sites
Nukjoc Report post Posted January 15, 2016 I needed a lightweight free/cheap portable stamp holder for at least eight stamps that would keep things clean and protected. I didn't want to use a roll-up tool holder, though I may make one in the future. So I saved the plastic French's Original French Fried Onions 6 Oz Can from our annual Thanksgiving green bean casserole. I had some leftover pieces of 3" thick soft foam -- memory foam type stuff from a dog bed project, I think. I cut a hunk of foam about 3x2x4" and trimmed corners so it would fit in the French's container. The foam was soft enough that I could squish it down and punch eight holes through it using the largest punch on my rotary punch. So far so good, except that the foam was so soft it squished down too much when I tried to insert stamps. And the lid on the container was too easy to lose. Duct tape fixed all that. I used strips of duct tape to cover all of the foam piece except the top end of the punched holes, using sticky side out for the first layer over the bottom end of the holes and being very careful not to compress the foam. I also used several layers of white duct tape to make a hinge for the lid. Now stamps can be inserted and removed easily and there's a bit of space left at one end where I could fit other small items - for now I just have a filler piece of taped foam in there. It's solid enough to turn upside down and shake without having anything shift, but to be extra safe I'm going to tape a thin piece of foam inside the top of the lid (as soon as I find where a relative put the double-sided tape!). It's not fancy and would have been easier to make with stiffer foam and a squarer container with a better lid...but it works great. And I didn't have to spend a cent! Quote Share this post Link to post Share on other sites
club49 Report post Posted January 21, 2016 I love that suction handle idea. I am going to try one on my 6 foot ruler that I use to make my first stright cut on a side.Thanks for all the great tips. Jim Quote Share this post Link to post Share on other sites