Josh Ashman Report post Posted September 4, 2014 I just built this for a new customer and he wanted to see the progress along the way so I figured I'd share how I build these. This is 10/11 HO craftsman, Fiebings liquid black antique and M&G cut 50/50 with water for the final finish. #1 Draw your pattern, Stohlman's holster book gives the details better than I'll ever type up. Tip - I use vellum printer paper for my new patterns. It's heavy enough to use a few times and you can see through it which is pretty nice for making things symmetrical. Tip #2 - I will lightly shade along an edge making the line as wide as needed to look good then erase the portion until I have a clean line to use. #2 Cut the pattern. I use a head knife but to each their own. #3 Cut border lines and stamp (or don't, whatever you like). Once the moisture is about out of it I'll edge everywhere but the main seam. #4 Oil, I use 100% neatsfoot oil. Let it soak in overnight. #5 Slick the edges. I use water and a piece of cordura. #6 Dye and let dry. #7 Assemble, make sure you don't block yourself off. I hand sewed the snap piece on then machine sewed the belt loop then machine sewed the main seam and lastly I installed the other end of the snap after making sure it would fit as needed. #8 Sand the main seam then edge, dye and slick it. #9 Apply your final finish and touch up all of the edges. And your done! Quote Share this post Link to post Share on other sites
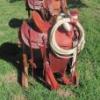
Josh Ashman Report post Posted September 4, 2014 Here are a few more pics of the finished holster. Quote Share this post Link to post Share on other sites
Steve75 Report post Posted September 4, 2014 Nicely executed! Quote Share this post Link to post Share on other sites
DuaneS Report post Posted September 4, 2014 Nicely executed! Ditto!!! Quote Share this post Link to post Share on other sites
Josh Ashman Report post Posted September 4, 2014 Thanks Steve and Duane! Quote Share this post Link to post Share on other sites
Eaglestroker Report post Posted September 4, 2014 Josh, you have a way with leather Great looking rig! Quote Share this post Link to post Share on other sites
camano ridge Report post Posted September 4, 2014 Josh, I really like that flap holster and nice job on the WIP Quote Share this post Link to post Share on other sites
Haystacker Report post Posted September 5, 2014 Awesome! Quote Share this post Link to post Share on other sites
Treed Report post Posted September 5, 2014 Great Job Quote Share this post Link to post Share on other sites
Josh Ashman Report post Posted September 5, 2014 Thanks Robert, Camano, Haystacker and Bobby! Have a great Friday and weekend guys! Quote Share this post Link to post Share on other sites
4wheeler4 Report post Posted September 15, 2014 Josh, You know I love that pattern as I "borrowed" it from you last year, It was the first one that I did, and hangs proudly on my side. Thanks again for sharing and being an inspiration to us beginners!!!! Quote Share this post Link to post Share on other sites
Red Cent Report post Posted September 15, 2014 Patience and expertise. Heck of a combination. Very nice work. Quote Share this post Link to post Share on other sites
Josh Ashman Report post Posted September 15, 2014 Thanks Red & 4 Wheeler! Best regards, Josh Quote Share this post Link to post Share on other sites
MonicaJacobson Report post Posted September 15, 2014 It looks great, and I really enjoyed the step by step. Thanks! Quote Share this post Link to post Share on other sites
Josh Ashman Report post Posted September 16, 2014 You're welcome and thank you Monica! Quote Share this post Link to post Share on other sites