Jump to content
Sign in to follow this  
esantoro

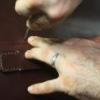
Corners on Swaine Adeney Brigg Bag

Recommended Posts

I like the shape of the flap on the SAB bag. To me, it looks that the corners are symmetrically rounded, meaning that a round object of the proper size, such as a dinner plate, could be used. Or does it seem that the vertical and horizontal cuts begin at different lengths from the edge of a squared flap?

I put a ruler up to the image on my laptop screen. It appears in the image that the cuts on both the vertical and horizontal axes begin at 12mm from a squared edge. I'll try to open the image up in photoshop and use the ruler grid there to be more scientific.

Ed

sabflapcorners.jpg

post-853-1229280294_thumb.jpg

Edited by esantoro

Share this post


Link to post
Share on other sites

Hey Ed!

It may just be an optical illusion on my screen, but it appears that there is a changing radius from the center of the arc getting tighter as it reaches the edge. By that I mean, if you started in the center of the arc and went either to the side edge or the bottom edge, it starts out at about a 4" radius and tightens to about a 2" radius. Does that make any sense?

Mike

Share this post


Link to post
Share on other sites
Hey Ed!

It may just be an optical illusion on my screen, but it appears that there is a changing radius from the center of the arc getting tighter as it reaches the edge. By that I mean, if you started in the center of the arc and went either to the side edge or the bottom edge, it starts out at about a 4" radius and tightens to about a 2" radius. Does that make any sense?

Mike

It does make sense, but that would mean that the horizontal and vertical points would have to begin at different lengths from a squared edge. Right? Am I correct in thinking that if the arcs begin at the same distance then the arc is symmetrical all the way around?

Ed

Share this post


Link to post
Share on other sites

No, I just mean that the curve of the arc gets tighter as it approaches the straight side, not that different radii were drawn from the same point. It's like they drew that curve the way Carlos and I would have in the shop, by tracing the bottom of a large can in the corner and then a smaller can near the intersection with the straight edge, and filling in between them with a French Curve template. Does that make any more sense?

Mike

Share this post


Link to post
Share on other sites

I tried out two cuts with some vinyl cloth. One with a 27cm diameter, the other with a 19.5cm diameter.

Ed

19_5cm.jpg

27cm1.jpg

sabflapcorners.jpg

post-853-1229362641_thumb.jpg

post-853-1229362650_thumb.jpg

post-853-1229362659_thumb.jpg

Share this post


Link to post
Share on other sites

Years ago I read an article in a model railroading book about using some formula to calculate the increase and/or decrease in the radius of a curve. That flap does look like the radius changes just before intersecting the straight portions. Your sample in the middle looks to be the closest.

Share this post


Link to post
Share on other sites
Years ago I read an article in a model railroading book about using some formula to calculate the increase and/or decrease in the radius of a curve. That flap does look like the radius changes just before intersecting the straight portions. Your sample in the middle looks to be the closest.

I thought there might be some mathematical formula to figure these things out, and a while ago someone did post such a formula, though I think it got lost in the crash.

I used a dinner plate with a 27cm diameter to shape the flap in the middle picture.

Ed

Share this post


Link to post
Share on other sites

I used the measuring tool in Adobe Acrobat to get a better idea of where exactly the arcs begin on the X and Y axes.

It appears that the arc on the Y axis begins approximately .93" inches from the bottom edge of the flap and the arc on the X axis begins approximately 1.08" from the right edge of the flap.

I'll now get some poster board and my french curve and see if I can make a pattern.

Ed

sabcrmeasure.pdf

sabcrmeasure.pdf

Share this post


Link to post
Share on other sites

OK, I'm going to try to explain what I mean one more time. I re-read my last two, and it's no wonder it's not working...I didn't even understand it. I looks to me that the corner was made by drawing the arc with a radius slightly larger than the center point is from the edges. In other words, lets just say they chose a 4" radius, but the center point was an equal 3 1/2" from each edge. The arc would shoot by the straight edges rather than blend in with the straight edges as it would if the center point was 4" from each edge. So far?

Now those two non-blending intersections were blended with an arc from a 2" circle, or something like that. :dunno:

Well, that's my guess.

Mike

Share this post


Link to post
Share on other sites

Mike,

Thank you for taking the time to explain this. I've taken what you've said and tried to simplify it acoording to my understanding.

Here is what I've now done:

Based on the measurements from the picture, I rounded the ratio to 1:.90. The arc on the Y axis begins 90 percent of the distance between where the X axis arc begins and the right edge of the flap.

I marked off these distances for the arc to begin on both the Y and X axes: X axis arc begins at 12.7 cm from right edge of flap; Y axis arc begins at 11.4 cm (roughly 90 percent of 12.7 cm) from bottom edge of flap.

I moved into position the 27cm dia. dinner plate to meet up with the x-axis 12.7cm mark and the y-axis 11.4cm mark, and then drew my curve.

Here is what I got.

Thanks again for taking the time to explain the geometry.

Ed

sab90_1.jpg

sab90flap.jpg

post-853-1229371300_thumb.jpg

post-853-1229371311_thumb.jpg

Share this post


Link to post
Share on other sites

Ed,

Allowing for distortion on the computer screen, yours looks pretty close to the original. I'm sorry I'm not more computer literate, or I'd have drawn something in one of those sexy design programs...except I don't have any of those programs.

Mike

Share this post


Link to post
Share on other sites

Just got back from the $.99 store , where I bought various sized plastic plates to use as templates... Ahhh! The insanity has never been better.

Ed

Share this post


Link to post
Share on other sites

I bet they did something silly like I do

when confronted with such problems.

I just take a piece of paper of appropriate

size and draw a corner till it looks

right to me. Then I make a pattern

from the paper onto some poster board.

I know this is a simple solution for the

tech savy crowd. Sometimes the simple

way is the easiest way. Least wise it

has always served me well.

WINDY

Share this post


Link to post
Share on other sites

Ok, I'm ready to carve the flap on the next bag. I've labeled the photos in the bottom left corner.

Which cut do you like the best?

Thanks,

Ed

mavr17_1.jpg

rmav2.jpg

19_5cmann.jpg

sab90flapann.jpg

27cm1ann.jpg

post-853-1229493591_thumb.jpg

post-853-1229493623_thumb.jpg

post-853-1229493759.jpg

post-853-1229493809.jpg

post-853-1229494067.jpg

Edited by esantoro

Share this post


Link to post
Share on other sites

I think 90 looks about right, the others don't seem like they will look right with the straps. Just my visual opinion.

Share this post


Link to post
Share on other sites

Hey Ed,

I agree with Jordan. I think 90 is excellent!

Mike

Share this post


Link to post
Share on other sites

I agree with Windy and Mike...

I think there are two different radius'. I also think they just winged it by making a paper patter starting the vertical and the horizontal with one radius and filling in the two with a different radius. I made a quick paper pattern and used two different radius'... one was a cork stopper for where the curves first start, the other was the bottom of my RM Williams conditioner can (is there anything RM Williams isn't good for?). You can see how the two have been blended together. The other line is how a single radius would have wound up had I only used the RM Williams can.

Darc

DSCF2541.jpg

DSCF2542.jpg

Share this post


Link to post
Share on other sites
I agree with Windy and Mike...

I think there are two different radius'. I also think they just winged it by making a paper patter starting the vertical and the horizontal with one radius and filling in the two with a different radius. I made a quick paper pattern and used two different radius'... one was a cork stopper for where the curves first start, the other was the bottom of my RM Williams conditioner can (is there anything RM Williams isn't good for?). You can see how the two have been blended together. The other line is how a single radius would have wound up had I only used the RM Williams can.

Darc

DSCF2541.jpg

DSCF2542.jpg

Thanks Darc. Now I understand what Mike was saying. After all this, we now have three methods for cutting these curves.

1. Freehand. Art and Windy told me about this a year or two ago, and is the method for how I've been shaping my flaps.

2. Find a picture of the curve you like, get a rough estimate of the ratio of where the arcs begin on the x and y , axes , position a plate or saucer of similar diameter, etch your curve, and cut.

3. Use the two radii blended together.

Ed

Share this post


Link to post
Share on other sites

I finally got around to shaping a more aggressive flap.

ed

sabflap2.jpg

sabflap1.jpg

post-853-1238720679_thumb.jpg

post-853-1238720700_thumb.jpg

Share this post


Link to post
Share on other sites

Join the conversation

You can post now and register later. If you have an account, sign in now to post with your account.
Note: Your post will require moderator approval before it will be visible.

Guest
Reply to this topic...

×   Pasted as rich text.   Paste as plain text instead

  Only 75 emoji are allowed.

×   Your link has been automatically embedded.   Display as a link instead

×   Your previous content has been restored.   Clear editor

×   You cannot paste images directly. Upload or insert images from URL.

Sign in to follow this  

×
×
  • Create New...