SLP Report post Posted September 22, 2016 This one just might be my favorite one to date. It was not heavily tooled, but more of an understated classic. I really enjoyed the challenge; and, it was a challenge. I had a great time with it, though. Thanks to Jim Simmons for the awesome tutorial. Anyway, to the meat. Ruger Super Blackhawk 44 mag. 5.5" 6/7oz. lined with 4/5oz. Fiebing's Leather Dye British Tan Border was Fiebing's Professional Oil Dye 2:1 (Light Brown:Chocolate) Thumb Break from Will Ghormely's Hand of God Rig (boy that blood knot was a pain) Designed the pattern and built the holster using the Bunkhouse Tools mold, then borrowed the actual gun for some photos. (The Bunkhouse Tools mold was the 7.5"; you have no idea how nervous I was the first time I slipped the actual gun into the holster for the first time...in front of the client.) It fit perfectly, almost like it was made for it... Hand stitched with #415 Bonded Nylon (Coyote) from The Thread Exchange (Thanks to Nigel Armitage and Ian Atkinson on YouTube for the stitching tips) I'm not elated with the stitching, but it's the best I've managed to date, so I'll take it. I like the holster so much, I may have to go out and get me a Super Blackhawk just to make one for myself. Ha, yeah, like I have time to make stuff for myself. I have a couple more orders for 7.5" models on the list, so please let me have it. As always, I appreciate the criticism, so keep it coming. I've learned a ton from the great constructive criticism here. You guys are the best. Thank you, Steve Quote Share this post Link to post Share on other sites
BHPshooter Report post Posted September 22, 2016 Oh man... That looks awesome! Quote Share this post Link to post Share on other sites
sideforce Report post Posted September 22, 2016 Nicely done! Looks like a grand project to take on, and you did a great job. Quote Share this post Link to post Share on other sites
bikermutt07 Report post Posted September 22, 2016 That's a real beauty. Very classy. Quote Share this post Link to post Share on other sites
dikman Report post Posted September 22, 2016 (edited) Now that is very nice! The sort of thing that appeals to me, dressy, but not enough to detract from the understated simplicity of the design. I note, though, that when I used British Tan it came out redder. Edited September 22, 2016 by dikman Quote Share this post Link to post Share on other sites
Dwight Report post Posted September 22, 2016 Edges look real good, . . . stitches too. Overall design is excellent, . . . as well as the staining, . . . and the edge treatment of darker color and the tooling really adds to the overall effort. One "criticism" so to speak: put your female screw parts between the two layers of leather. The way you have them now, . . . they will rub the garment the wearer has and will in time harm the trousers. John Bianchi was very adamant in his teachings to hide the screws and rivets as much as possible, . . . and it is especially easy in a two layer rig, . . . makes it overall a tad cleaner looking, . . . and does not subject the owner to metal rubbing on the accompanying clothing. This is especially important to those who go cheap and use plated steel rivets / chicago screws. Two, three, or four good sweat soakings and the plating can peel, . . . rust follows, . . . and it can be real ugly. The only other critical thought may not be applicable, . . . but it looked as though the holes for the hammer thong were a bit large, . . . making the thong dependent on length. I like to make mine so the friction in the holes is the "holding factor" and can be adjusted for length if another weapon is inserted. BUT, . . . again, . . . let me emphasize that the overall holster is excellent. May God bless, Dwight Quote Share this post Link to post Share on other sites
SLP Report post Posted September 22, 2016 (edited) 2 hours ago, dikman said: Now that is very nice! The sort of thing that appeals to me, dressy, but not enough to detract from the understated simplicity of the design. I note, though, that when I used British Tan it came out redder. Thank you dikman. Yeah. When I did a test it came out quite red. I forgot to mention that I diluted the dye approximately 7:1 (denatured alcohol:dye), then applied liberally in several directions. I found that the regular dye, in contrast with the professional dye, did not dye evenly without very liberal application in several directions. Edited September 22, 2016 by SLP Quote Share this post Link to post Share on other sites
SLP Report post Posted September 22, 2016 2 hours ago, Dwight said: One "criticism" so to speak: put your female screw parts between the two layers of leather. The way you have them now, . . . they will rub the garment the wearer has and will in time harm the trousers. Thank you Dwight! Generally speaking, I prefer to bury stitching and hardware between the layers; however, I chose to follow Jim's tutorial rather strictly. Since it was the first holster of this type I've done, I didn't want to add any variations yet. My wife always criticizes me for the same habit I have with cooking recipes. First I do it like the recipe, then the second time I make my own adjustments. The hardware is solid brass. I would like to bury the hardware between the two layers, but it would take some serious thought and consideration. Essentially, I would need to know the precise location of all the screws from the get-go, and I'm not quite that confident in myself yet, so I will likely attempt it in the future. Quote Share this post Link to post Share on other sites
SLP Report post Posted September 22, 2016 3 hours ago, Dwight said: The only other critical thought may not be applicable, . . . but it looked as though the holes for the hammer thong were a bit large, . . . making the thong dependent on length. I like to make mine so the friction in the holes is the "holding factor" and can be adjusted for length if another weapon is inserted. I know, I know. I ask for criticism, then I make a bunch of excuses. Well, I have no excuse for this one. I got that feeling in my gut as soon as I punch the holes, that they were going to be too big. This was the first time I ever braided leather, and I had no idea what diameter the braid was going to turn out to be, but I was fairly certain that it would not fill those giant holes. I didn't even have the lace that I would use to braid the strap when I punch the holes. Dumb mistake, but lesson learned. Quote Share this post Link to post Share on other sites
rickdroid Report post Posted September 22, 2016 That is a beautiful piece. If I had made that I would be very proud of it. Very nice work. rick Quote Share this post Link to post Share on other sites
JLSleather Report post Posted September 22, 2016 Yeah, ther's a cupple details that coulda been a bit smoother, it's true. But that's still a nice lookin' rig ya got there. Stamping is decorative but not excessive, colors work, stitchin' looks good (including the thread color). I even like the waya got the gun linin' up on the inside stitch and the 'bag' of the holster linin' up on the skirt stitchin'... great detail that adds to the piece, if'n a fella wazta ask me If I wazta offer just one 'whatif'.. I'd say maybe recess yer stitch a bit on the INSIDE with thread that heavy. I dont' think it's goin' anywhere, but just to keep from hangin' up on it. Quote Share this post Link to post Share on other sites
SLP Report post Posted September 23, 2016 First, let me say thank you to everyone for your positive comments. As a budding holster maker, it really means a lot to me. 21 hours ago, JLSleather said: If I wazta offer just one 'whatif'.. I'd say maybe recess yer stitch a bit on the INSIDE with thread that heavy. I dont' think it's goin' anywhere, but just to keep from hangin' up on it. Thank you JLSleather, I really appreciate the positive feedback and criticism. That's a good idea to recess the stitching. I was trying to get away from using the stitching groover on the parts that show so that the slant on the stitches is not forced flat; however, on the inside, I think that the integrity of the holster would be well served by the recessed stitching. I am partial to the thicker thread (rope). On my first couple of holsters I used #554, but downsized because the gun was rubbing on the inside stitching at the trigger guard and I could not groove deep enough to protect the stitches. The rubbing was partially due to back-stitching near the trigger guard, which I have since moved to the other side of the mouth. I have not done a holster without a lining yet, and would prefer to continue making fully lined holsters. Quote Share this post Link to post Share on other sites
JLSleather Report post Posted September 23, 2016 I like to use a [relatively] heavy 'outty' layer, so I can carve deep, then make the 'inny' a bit thinner. For geometric stamping like yours, you could get away with a double layer of 5/6... which would give you a little more leeway in grooving the innards, and you'd only have to stock one weight. 6 or half dozen. Yer ahead o' me on the thread experiments, though. I generally use 277, but i don't mind some 346. I have never used 554, but it sounds like something aguycould maybe tow a vehicle with? Quote Share this post Link to post Share on other sites
SLP Report post Posted September 23, 2016 It's heavy stuff, but I like the way the heavy stuff looks with 5 stitches per inch. I did #207 at 5spi, but it did look a bit weird, as was pointed out to me. After looking again, I'd have to say that I agree. The thinner thread needs at least 6spi. Quote Share this post Link to post Share on other sites
plinkercases Report post Posted September 24, 2016 Very slick looking and you think you could afford yourself perhaps a little elation over-all. Looking forward to the next "off recipy" version. Quote Share this post Link to post Share on other sites
Forester Report post Posted September 25, 2016 Beautiful holster, might try and make one. Quote Share this post Link to post Share on other sites
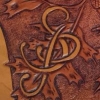
supercub Report post Posted September 25, 2016 I've looked at your holster a number of times, and the more I look, the more envious and depressed I get - especially when I compare it to my holsters. No matter how careful I am, I have never been able to get close to the high quality of this holster. Great Job! How did you dye the contrasting border so evenly? Airbrush? Q-tip? Artists brush? Quote Share this post Link to post Share on other sites
dikman Report post Posted September 26, 2016 15 hours ago, supercub said: How did you dye the contrasting border so evenly? Airbrush? Q-tip? Artists brush? I was wondering that myself..... Quote Share this post Link to post Share on other sites
SLP Report post Posted September 26, 2016 (edited) On 9/25/2016 at 8:43 AM, supercub said: I've looked at your holster a number of times, and the more I look, the more envious and depressed I get - especially when I compare it to my holsters. No matter how careful I am, I have never been able to get close to the high quality of this holster. Great Job! How did you dye the contrasting border so evenly? Airbrush? Q-tip? Artists brush? artist brush, two coats. and thank you very much for the flattering comments. Edited September 26, 2016 by SLP Quote Share this post Link to post Share on other sites
SLP Report post Posted September 26, 2016 As a side note to the dying of the edges, the Chocolate/Light Brown dye of the border was applied after the entire thing was dyed with British Tan. I was going for a very chocolaty color, but on some test pieces I did, the Chocolate dye was too dark, hence the 2:1 (Light Brown:Chocolate) over the British Tan. Quote Share this post Link to post Share on other sites