Pintodeluxe Report post Posted October 15, 2017 Just wondering why my Consew 226 needs so much upper tension to sew a balanced stitch? I just finished dialing in my other walking foot, a Consew 206 RB-1, and it needs very little upper tension to sew well. The 226 on the other hand, must be cranked down pretty good to sew well. The adjustment knob on the upper tension mechanism is nearly maxed out by the time the bottom side of the leather looks good. The threaded, split rod on the tension mechanism was splayed a little. I noticed that the nut would jump a thread on the split rod occasionally. In other words when I tighten the tension knob, sometimes the nut will strip on the threaded rod. So I ordered a new tension assembly and installed it today. The spring on this Chinese made tension assembly seemed very weak. I gradually increased tension and checked the stitch quality, but no dice. The tension was maxed out and the bottom stitches were still showing a bit of the upper thread. Not big loops or anything like that, just not a pretty and balanced stitch. With the tension maxed out on the new assembly, the tension discs were still pretty easy to move. So I put the original tension assembly back on, and it works, but the tension is really cranked up. Here are some additional details... 1. Bobbin thread pulls freely, with no significant tension. 2. I'm using #138 nylon thread. 3. #22 Schmetz leather point needle. 4. Sewing samples are two layers of 2oz. goat leather. It is soft and supple leather. 5. Tension releases normally with either presser foot lift or knee lift. So... any ideas why my 226 needs so much upper tension? Should I buy a quality Japanese made tension assembly or? Thanks Quote Share this post Link to post Share on other sites
Constabulary Report post Posted October 15, 2017 (edited) I´d try a heavier tension spring #14 in the tension unit. Or you probably have a minimal permanent top tension release. If so probably have to shorten the pin #11 a little bit (maybe 1/2mm) or adjust the center bar of the release disc #13 a tiny bit (tap the center small bar a tiny bit from the inside). Just a guess w/o sitting in front of your machine. See picture Edited October 15, 2017 by Constabulary Quote Share this post Link to post Share on other sites
Pintodeluxe Report post Posted October 15, 2017 Yes, I like the idea of a heavier spring for the tension assembly. I'll have to find a source for that. Thanks for chiming in, it's much appreciated. Quote Share this post Link to post Share on other sites
Pintodeluxe Report post Posted October 15, 2017 Constabulary's post also made me realize a couple things... 1. The knee lift wasn't swinging freely, so I checked the adjustment. Turns out the knee lift linkage was contacting the undercarriage a little early. This, combined with my tendency to ride the lift with my knee a little while I sew seemed to contribute to the issue. 2. I was judging the tension adjustment by the amount of threads sticking out beyond the tension nut. Well, I looked closely at both my machines tonight, and the 206rb has a wider knob. This "double wide nut" (see #16 in diagram above) shows less threads even when the position is similar with both machines. The 226 has a single threaded nut and shows a longer length of threads. Maybe that's why it looked so unusual to me. 3. I don't have part #15 on my tension mechanism. Maybe that's why the threaded rod looks bent or distorted. I'll try to post pics tomorrow. Thanks again. Quote Share this post Link to post Share on other sites
Constabulary Report post Posted October 15, 2017 (edited) #15 is a part that not all tension units have - sometimes #15 has a toothed surface and so is the thumb screw so you have a "ratchet" effect but I don´t have this on my Singer 111 so it´s not really a part that has a an effect on the tension. Its just for holding the thumb screw in place. - OR - You have the part #15 when your tension spring DOES NOT have a small tab across the narrow end of the spring - see picture below - I think you know what I mean. Edited October 15, 2017 by Constabulary Quote Share this post Link to post Share on other sites
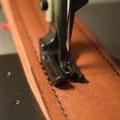
Pintodeluxe Report post Posted October 15, 2017 Yeah, mine have the springs with tabs. The 226 knob is the top picture. The split rod looks terrible. The bottom picture is the 206rb. Nice and neat. Quote Share this post Link to post Share on other sites
Uwe Report post Posted October 15, 2017 (edited) 15 hours ago, Pintodeluxe said: my tendency to ride the lift with my knee a little while I sew seemed to contribute to the issue. That's a habit you should discontinue. It's like resting your left foot on the clutch (or the brake) while you drive - nothing good can come from it. Your foot lift thread tension release mechanism may be engaging too early or not releasing properly. The pin (no. 20) that pushes from the back of the machine against the plate behind the tension unit should have a little bit of play during normal sewing. Perhaps this mechanism is gummed up or sticky and never really lets go properly, thereby always working against the tension spring. One way to check this is to remove the pin 20 altogether for testing. To do this remove the tension unit, pull out pin 20, and the reinstall the tension unit. This will disable the foot lift activated thread tension release mechanism and lets you verify if the thread tension unit itself is working properly. If the machine sews fine without pin 20, then the problem is in your foot lift thread tension release mechanism. If you still cannot adjust thread tension properly, then it's time to carefully check how the thread gets wrapped around the hook. It may snag somewhere or your bobbin case opener may not work properly. Edited October 15, 2017 by Uwe Quote Share this post Link to post Share on other sites
Pintodeluxe Report post Posted October 16, 2017 Thanks Uwe, I'll see if I can differentiate between the release mechanism and the tension assembly. Much appreciated. Quote Share this post Link to post Share on other sites
Pintodeluxe Report post Posted October 16, 2017 (edited) Ok, I took out pin 20 and tested it again. The tension assembly behaves the same without the pin. That is to say it sews well, but it needs a lot of tension. I reinstalled the pin and oiled it. The discs seem to release normally with the knee lift or foot lift lever. Maybe I'm just worried about nothing, but at minimum the threaded rod is bent, and may work better with a heavier spring and double-wide tension nut. I'll shop for a better quality tension assembly. Thanks for all the replies, I really do appreciate the help. Edited October 16, 2017 by Pintodeluxe Quote Share this post Link to post Share on other sites
Uwe Report post Posted October 16, 2017 One other thing to check is to make sure your top and bottom shafts are synchronized properly. The thread take-up lever needs to be in the very bottom position precisely when the thread is being wrapped around the farthest point around the hook. It's an easy visual check, just remove the hook cover plate and turn the machine slowly by hand. If the take-up lever timing is late due to incorrect timing belt position it will not provide enough slack and more top thread will be pulled from the spool as the thread gets forced around the hook. In this case the thread take-up lever will never get a chance to pull the knot tight, regardless of thread tension settings. Quote Share this post Link to post Share on other sites
Pintodeluxe Report post Posted October 16, 2017 Great, I will check that as well. Thanks! Quote Share this post Link to post Share on other sites
Pintodeluxe Report post Posted December 8, 2017 I just wanted to circle back to this post. It turned out to be grooves worn in the tension discs. I swapped tension discs from another machine, and that fixed the problem right away. That proved to me that the worn discs were the source of the problem, so I ordered a nice replacement tension unit, made in Japan. It's working normally now. Thanks to all who chimed in, it's much appreciated. Quote Share this post Link to post Share on other sites