Mountain Lion

This piece is one piece of a multi-piece composite. The jagged pattern outline is the final cutout size of the leather. Making sure the carving pattern is composed where I want it within the pattern outline, it can then be traced.

The pattern outline is removed and the pattern is traced. Keep your tooling depth in mind as you trace. There are some places where the tooling burnish isn't very dark and may not cover a heavily traced line. It's best to trace those areas lightly.

Everything is cut except for the eyes and the nose. I prefer to leave these alone until I'm almost done tooling.

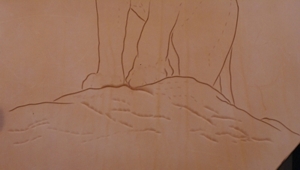
The rocks are roughed in with a beveler. It's pretty tough to screw these up. Notice, no great care was taken to create a smooth bevel in the rock definition. Also notice that the rocks have been extended beyond the original pattern. Since there is no real rule to creating rocks, extending them to the sides is not a difficult thing to do.

The rocks are done. Not a lot of effort has gone into these rocks, primarily because they will be partially obscured, but also because I'm not interested in emphasizing them (an approach I decided to try on this piece). For most beveling work, I use three sizes of figure bevelers in succession so that I eliminate the halo. Also notice the use of pear shaders. I've been surprised at the number of people who had never heard of using pear shaders in figure carving. It works so well in certain places I can't imagine working without them. One of the biggest advantages is the softer shading and lack of hard bevel. Don't forget to use a modeling spoon on the swivel knife cuts to round them. At this point, about 45 minutes has elapsed since I started the piece.

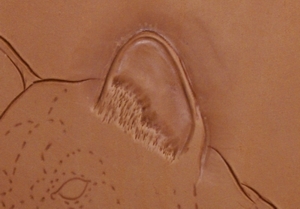
The ear is next. I just beveled this one for now (most forward object on the head)
and I'll work some additional detail in later. The hair in the ear is done with a pointed beveler.

The mouth is next. Just round both top and bottom with a modeling spoon.
Don't over-work it...just round it.

This is one of the fun parts. All the "beveling" on the head is done with pear shaders.
The head has just been roughed out at this point. Some cleaning up needs to be done. Be careful here.
While it looks like a lot of depth may exist, what you see may actually be more burnish than depth.
Some places can use the depth. It would be unnatural in others.
You'll also want to play with the pear shader to see how how it bevels...tip it on its edge, on its toe, on its heel, turn it as you walk it, turn it in a circle, etc.

Here's the head cleaned up. This is mostly done with a modeling spoon.

The back ear gets finished up and the head is done (for now).
Total time, so far, is about 1-1/2 hours.

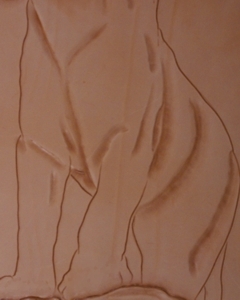
Shading in the body is roughed in. Most of the work is done with pear shaders.
A few areas require figure bevelers.

The beveling is finished up on the body and cleaned up. Actually, the feet should be finished
first since the toes are in front, but I think I can make it work. Total time now is 2-1/2 hours

And another 15 minutes gets the feet done.

Some backgrounding has been applied and the eyes and nose are finished
before applying the hair. Now at just over 3-1/2 hours.

Now the work starts...hair. The muzzle hair is put in place with a multi-blade knife...

...and the rest is done with a needle. Actually, I used two needles.
One is a glover's needle, and the other is a sharpened harness needle.

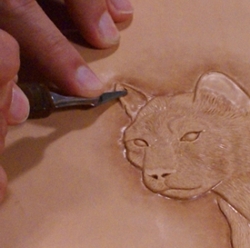
A scalpel is used to give the ear hair a little more definition.
I didn't separate it too much since this piece needs to travel.

After about 6-1/4 hours (total time), we're done.
