Einherj
-
Posts
20 -
Joined
-
Last visited
Content Type
Profiles
Forums
Events
Blogs
Gallery
Store
Everything posted by Einherj
-
Unknown Chinese servo motor controller manual needed
Einherj replied to Einherj's topic in Leather Sewing Machines
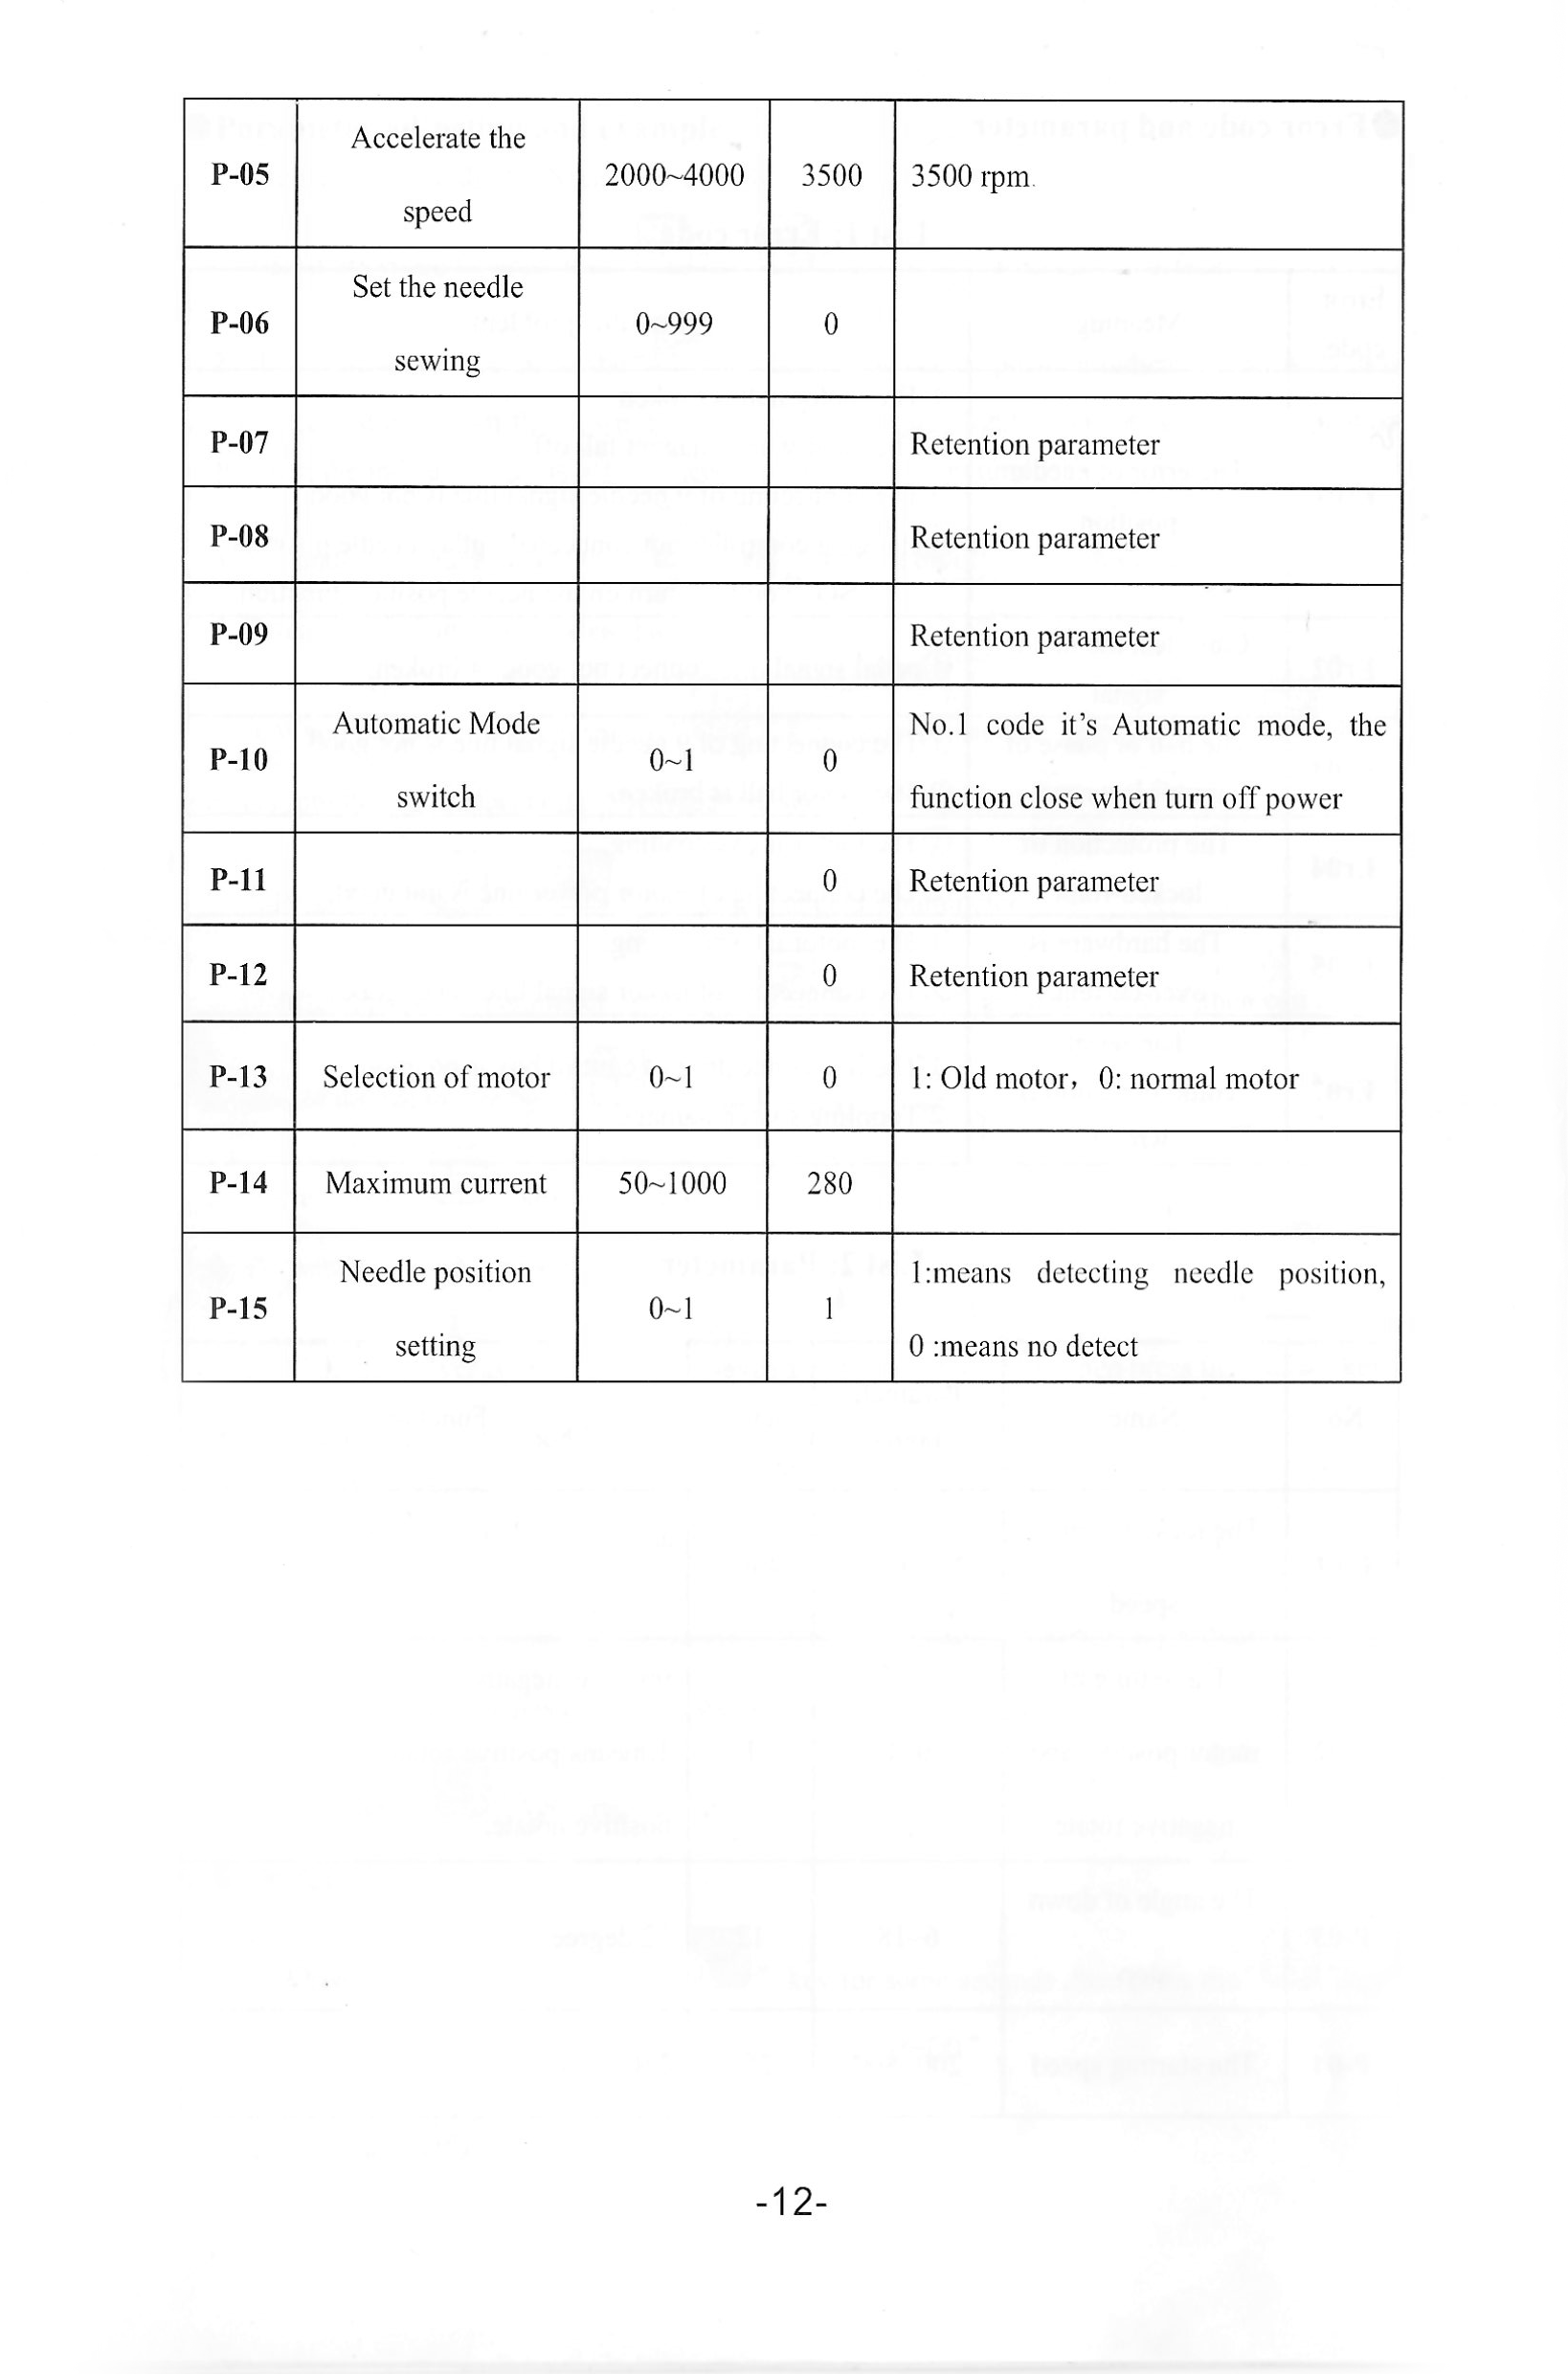
I know. I didn't have a small enough tool handy at the time, but I had a soldering station. I was testing the P-06 some more, and it seems it is actually a limiter for the maximum number of stitches the machine sews while holding down the pedal. If I set it to 1 the machine does one stitch, if I set it to 4 the machine does four stitches, etc, no matter how long you push the pedal, that's the maximum number of stitches it does. You have to lift the pedal to do another round. This setting requires a needle position sensor, of course. When the setting is at 0, there is no limit. -
Unknown Chinese servo motor controller manual needed
Einherj replied to Einherj's topic in Leather Sewing Machines
I also ran the original Chinese parameter table through chatGPT and it clarified that P-06 is most likely the number of automatic lock stitches at the start and end of sewing. This is desirable when doing bar tacking, etc. -
Unknown Chinese servo motor controller manual needed
Einherj replied to Einherj's topic in Leather Sewing Machines
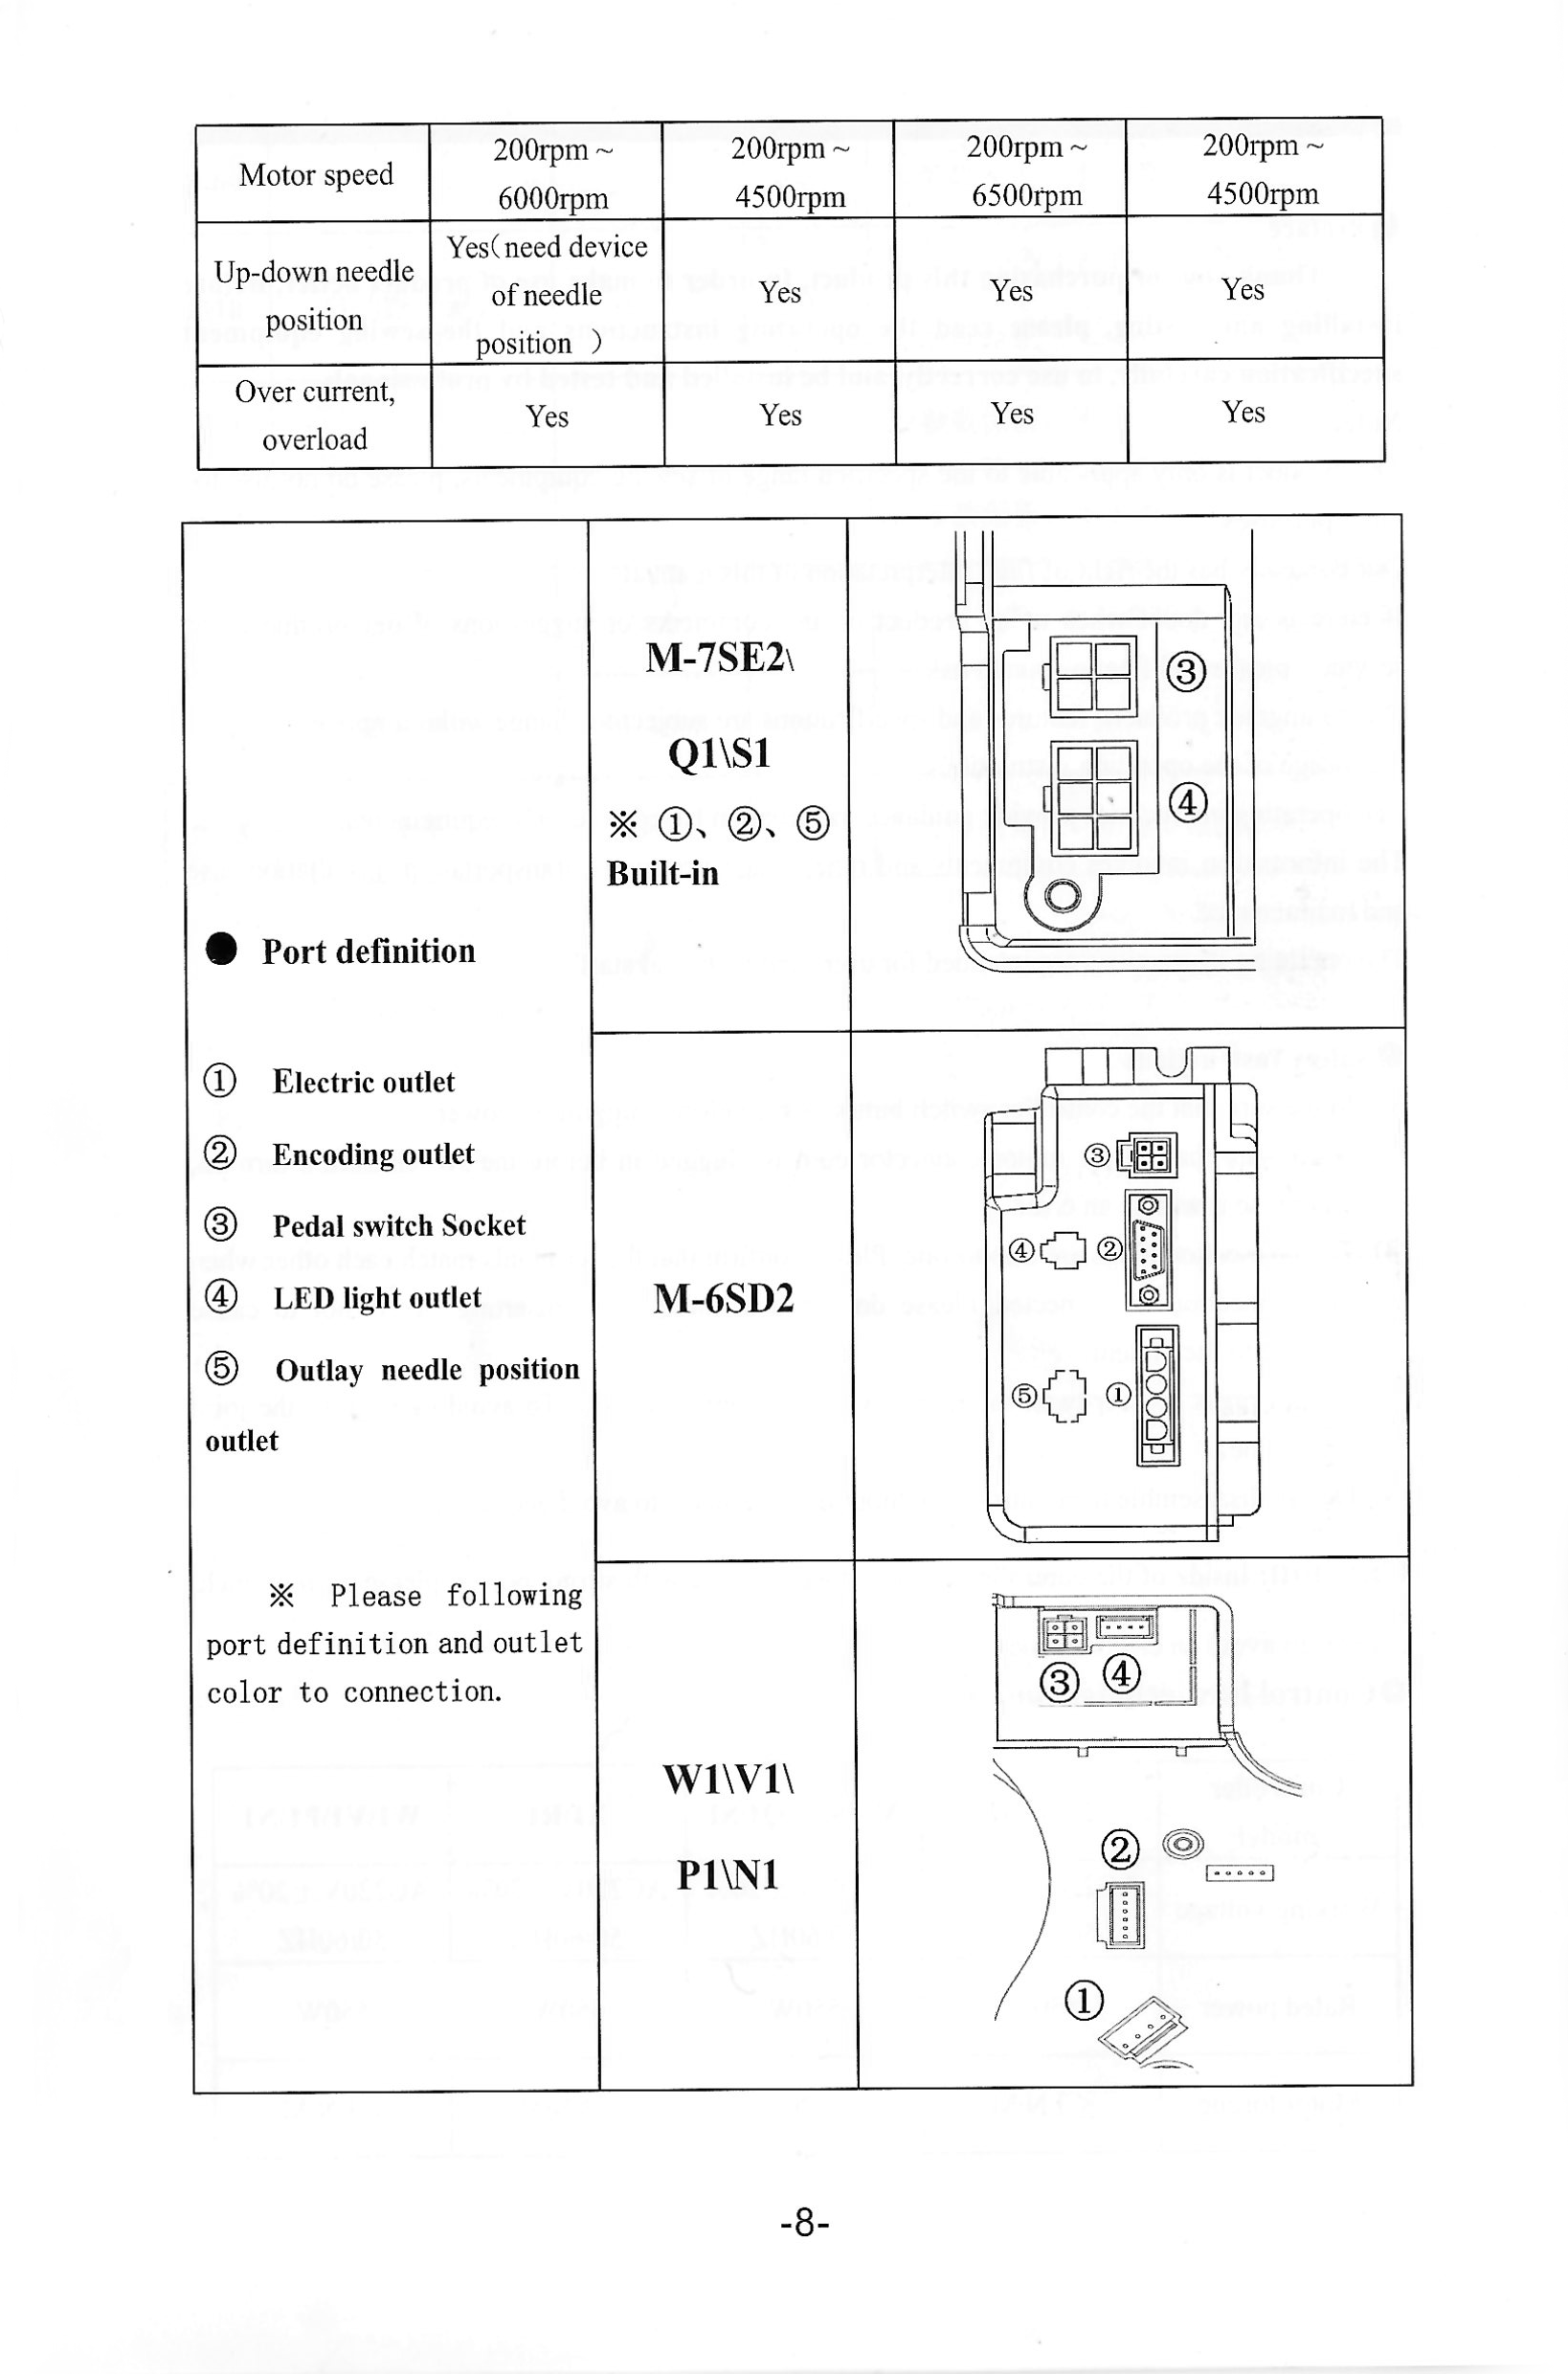
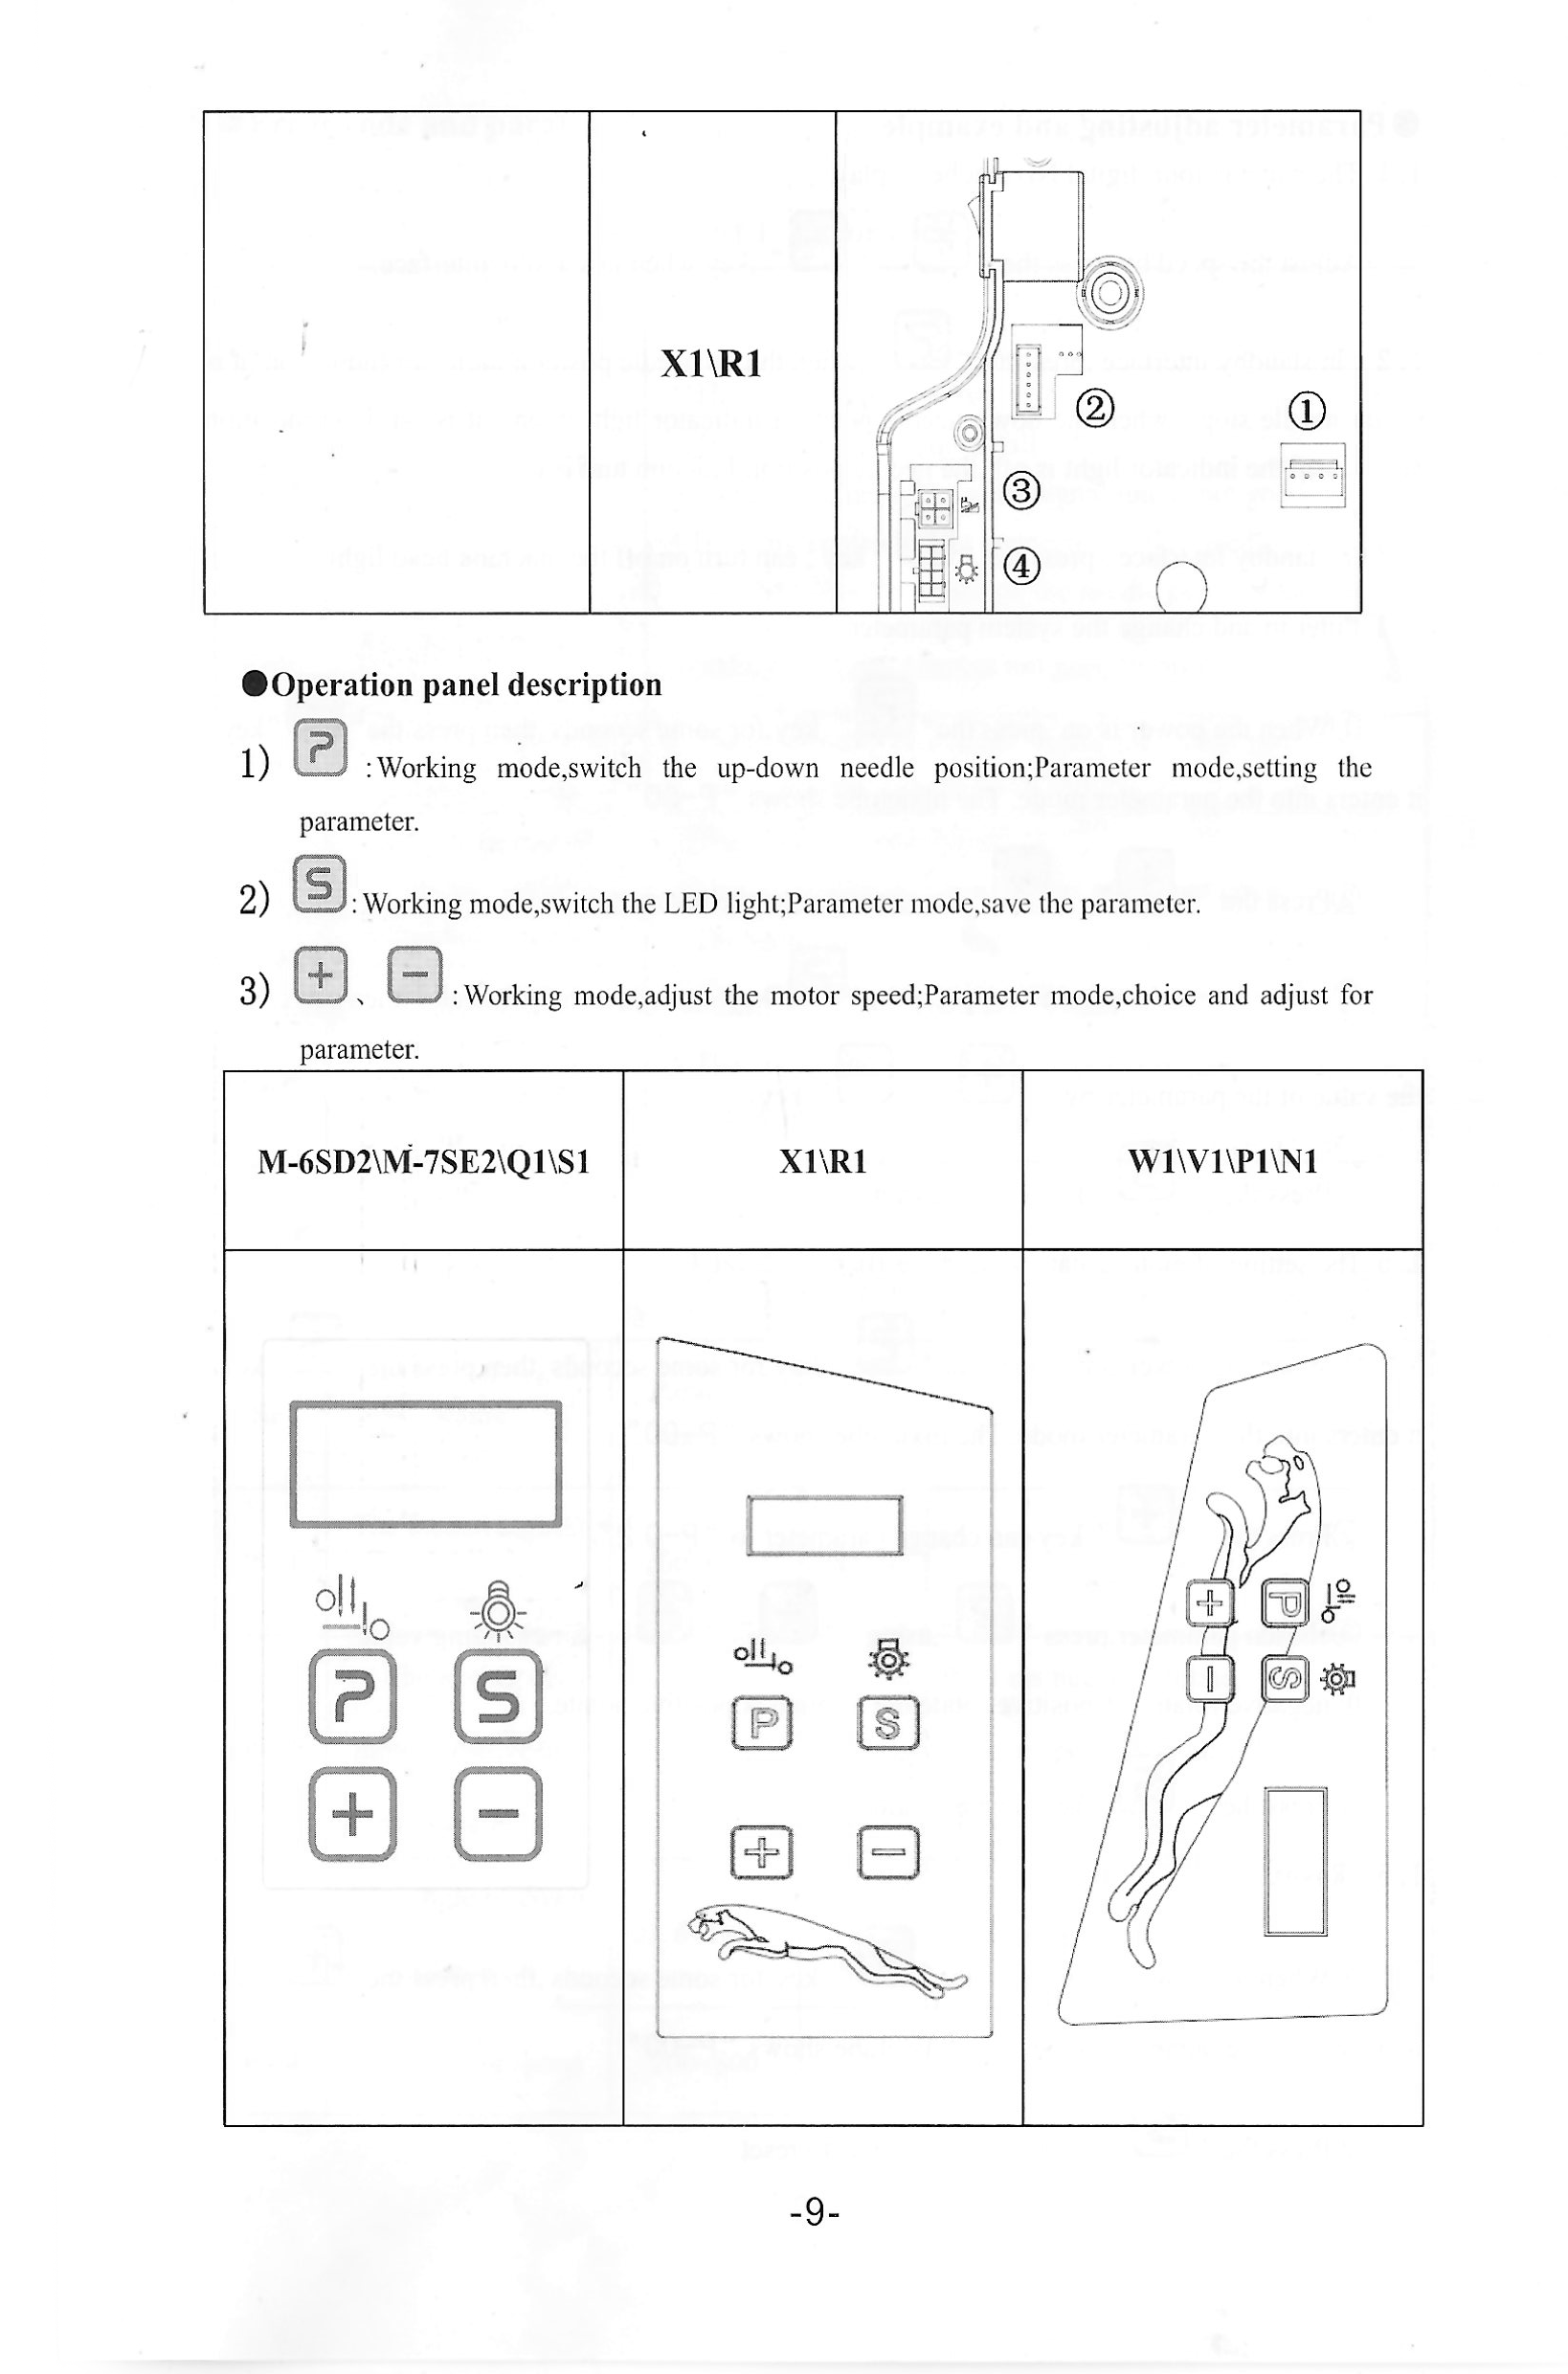
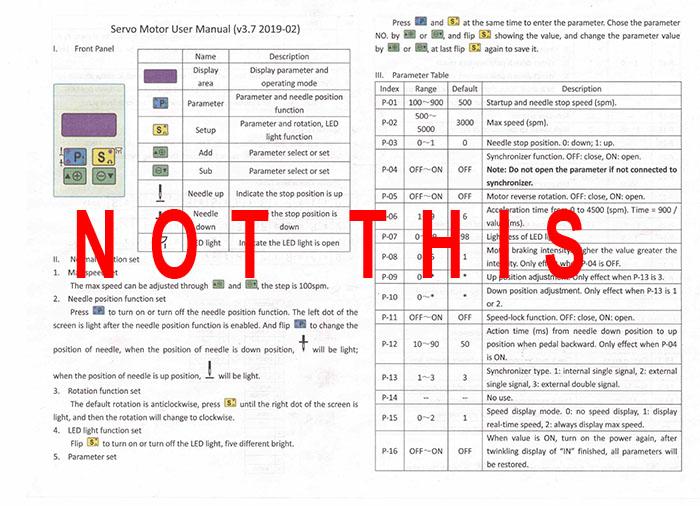
I found the manual. Turns out, my controller model name is M-6SD2. There are other controllers listed in the same manual. I was going through my document drawers and it was there, under the pile. I scanned the English translated pages for future reference. I can't edit my first post, but I will attach the scanned files here.

-
Unknown Chinese servo motor controller manual needed
Einherj replied to Einherj's topic in Leather Sewing Machines
I tested the synchro on my other machine that has the same controller, but no speed reducer, and it worked fine. I've seen other controllers with some type of "belt scale" setting, where you can compensate for the difference in motor pulley size and machine pulley size. -
Unknown Chinese servo motor controller manual needed
Einherj replied to Einherj's topic in Leather Sewing Machines
Thank you very much. Gotta go and troubleshoot some more. I have a speed reducer between the motor and the machine, so it might be that the motor spins a full rotation and doesn't find the needle position since the machine (where the synchro is) hasn't done a full rotation yet. -
Unknown Chinese servo motor controller manual needed
Einherj replied to Einherj's topic in Leather Sewing Machines
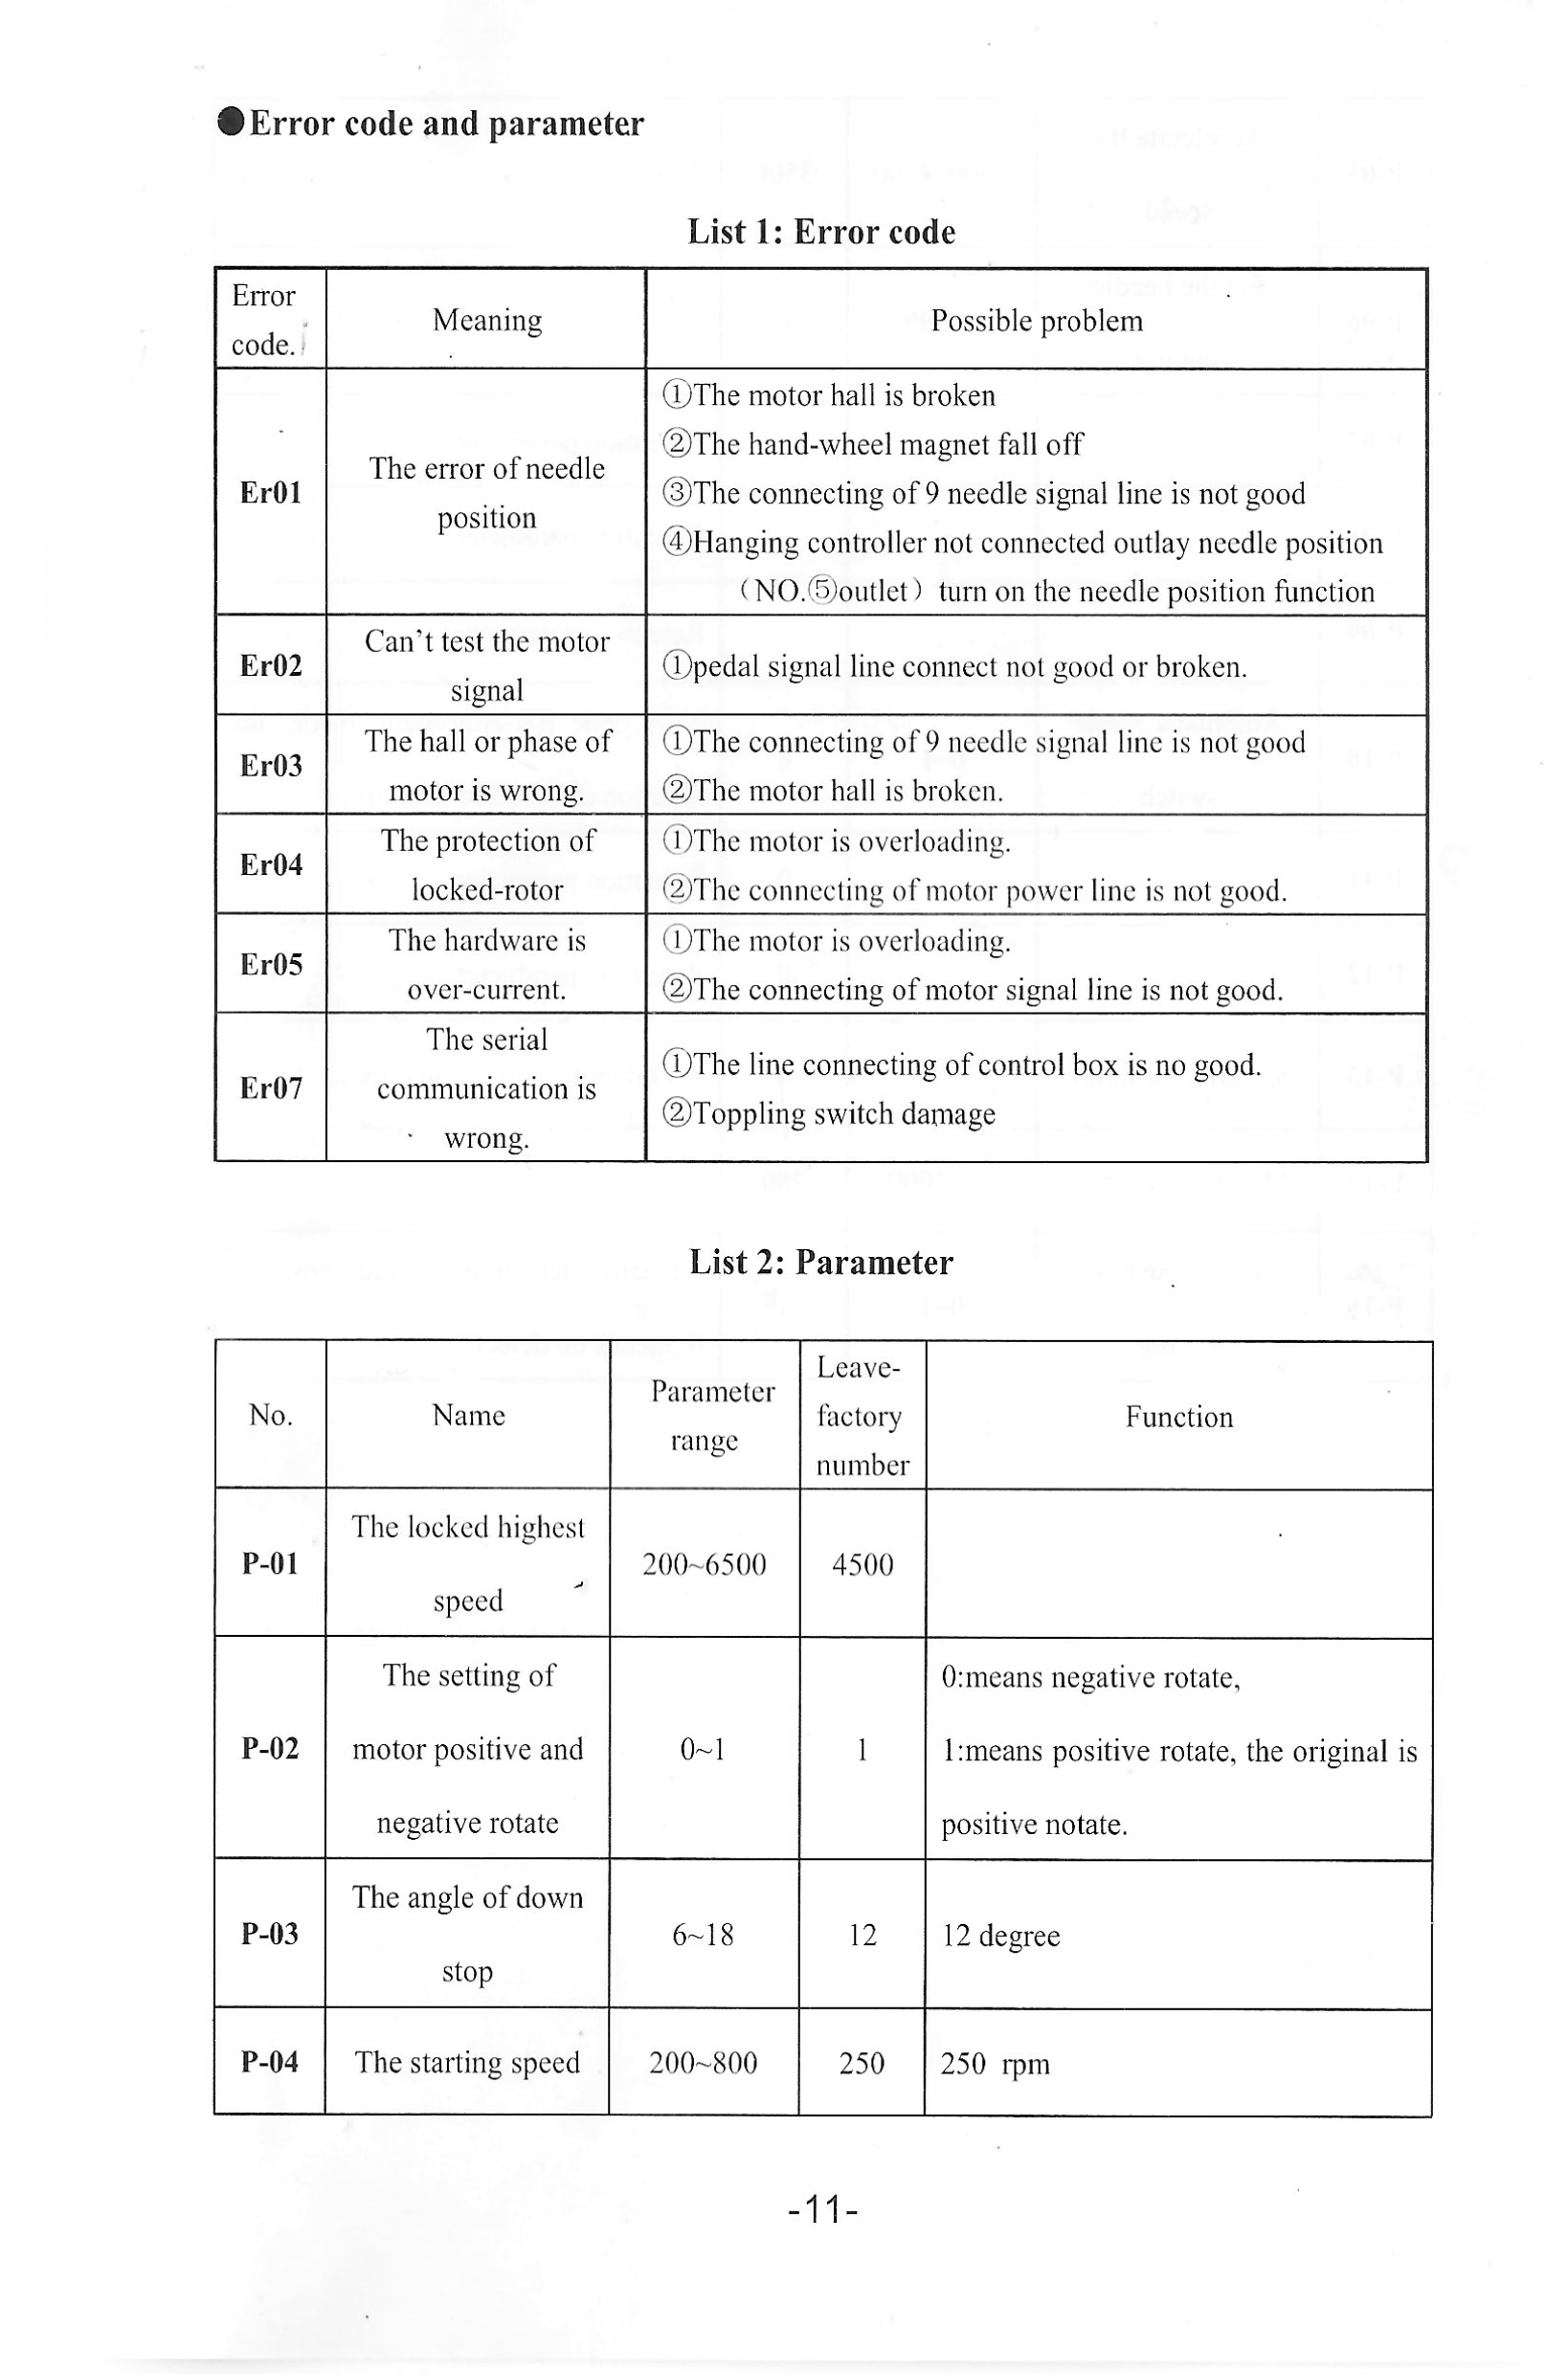
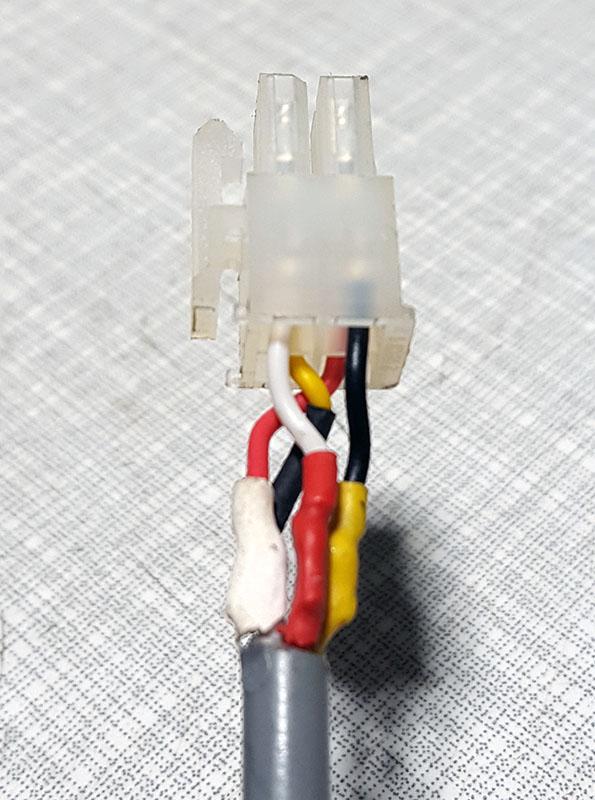
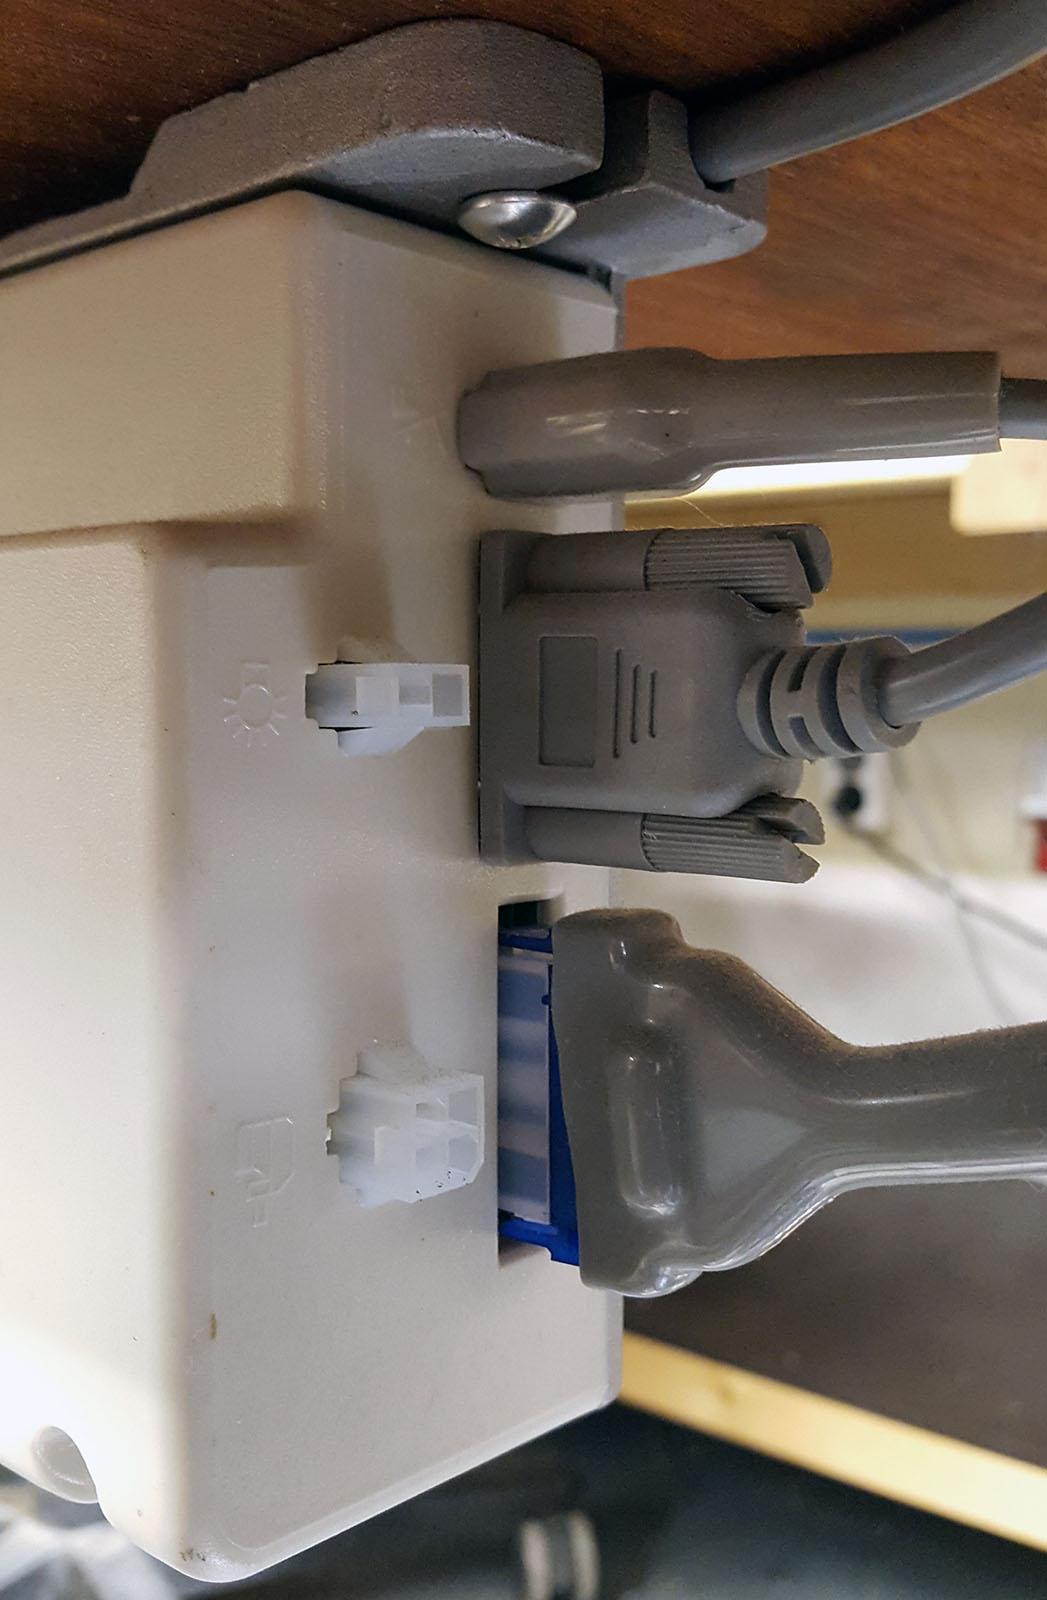
Thank you very much for this. It helped a lot. Seems like my controller has the same parameters. I found out, though, that P-15 on my controller actually is correctly defined: 1 = needle detection, 0 = no needle detection. Then I ran into an issue with the synchronizer I bought from eBay: The wiring is different from my controller. The synchro red LED was very dim and on at all times no matter the synchro position. I measured the voltage from the controller pins, and it seems the pins layout is rotated 180 degrees on my controlled compared to the synchro. Looking at the back of the controller, the measured socket pinout is: Top left = 5v Top right = signal 1 Bottom left = ground Bottom right = signal 2 The synchro plug pinout is: Top left = signal 2 (white wire) Top right = ground (black wire) Bottom left = signal 1 (yellow wire) Bottom right = 5v (red wire) I rewired the synchro to match the controller, and now the red LED on the synchro is bright at a certain point on the rotation, which I guess is the intended result. I had no idea which way the signal wires were supposed to be, but I tried both ways, and the other way the red LED on the synchro never came on. Now, I have another problem: When I press the pedal, the machine runs maybe a half a rotation and then the controller gives an error: Er01 After letting go of the pedal, sometimes it still tries to get to the needle up position, and sometimes it just stops. Any idea what Er01 might be?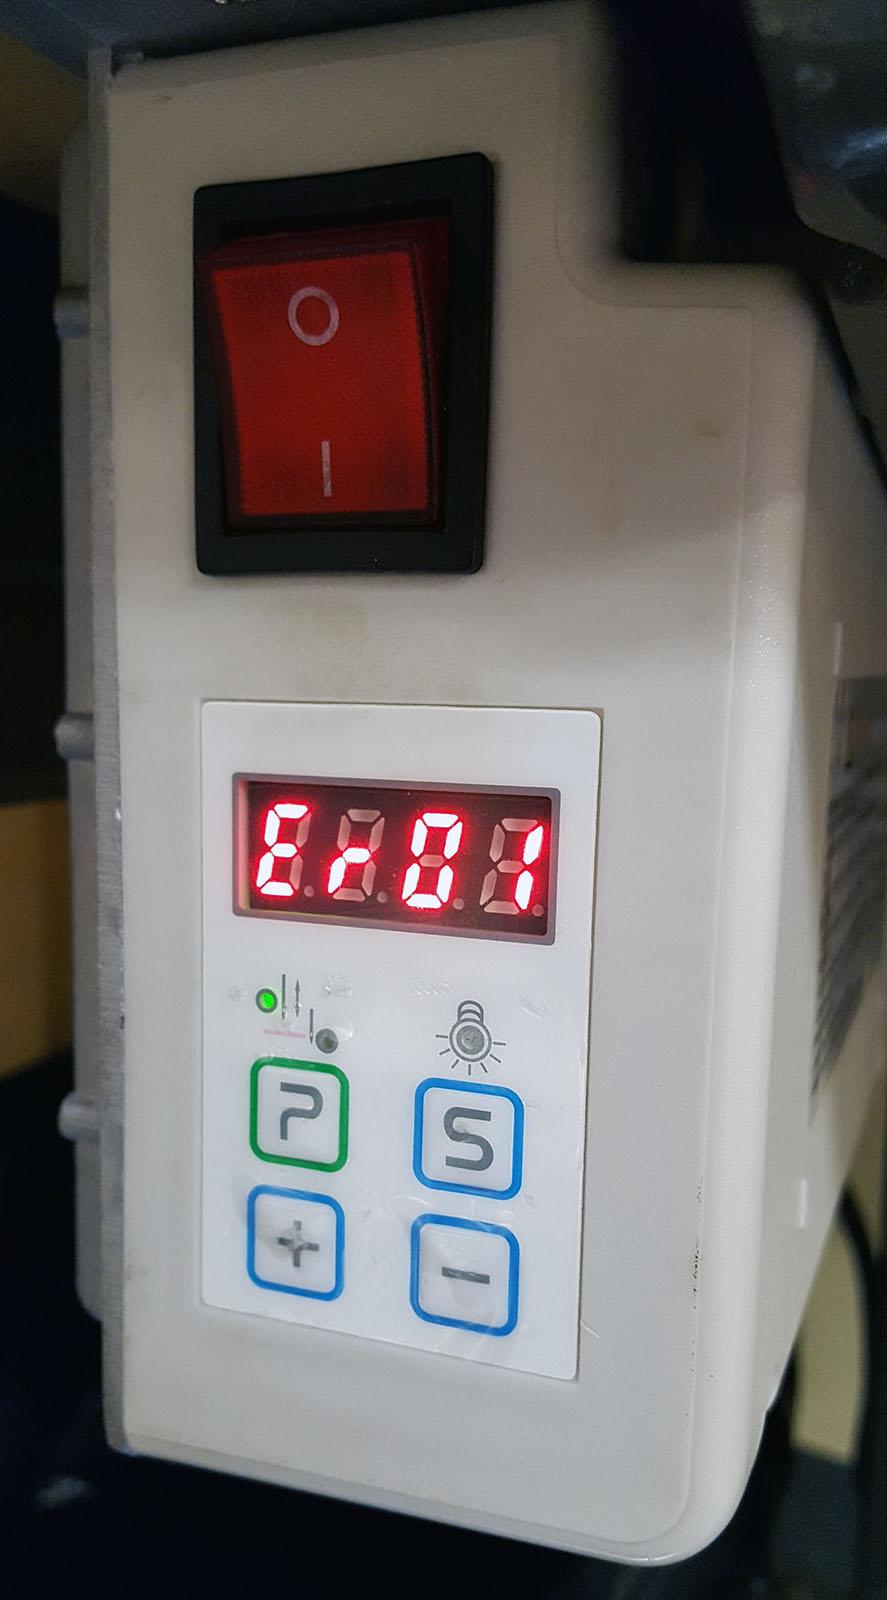

-
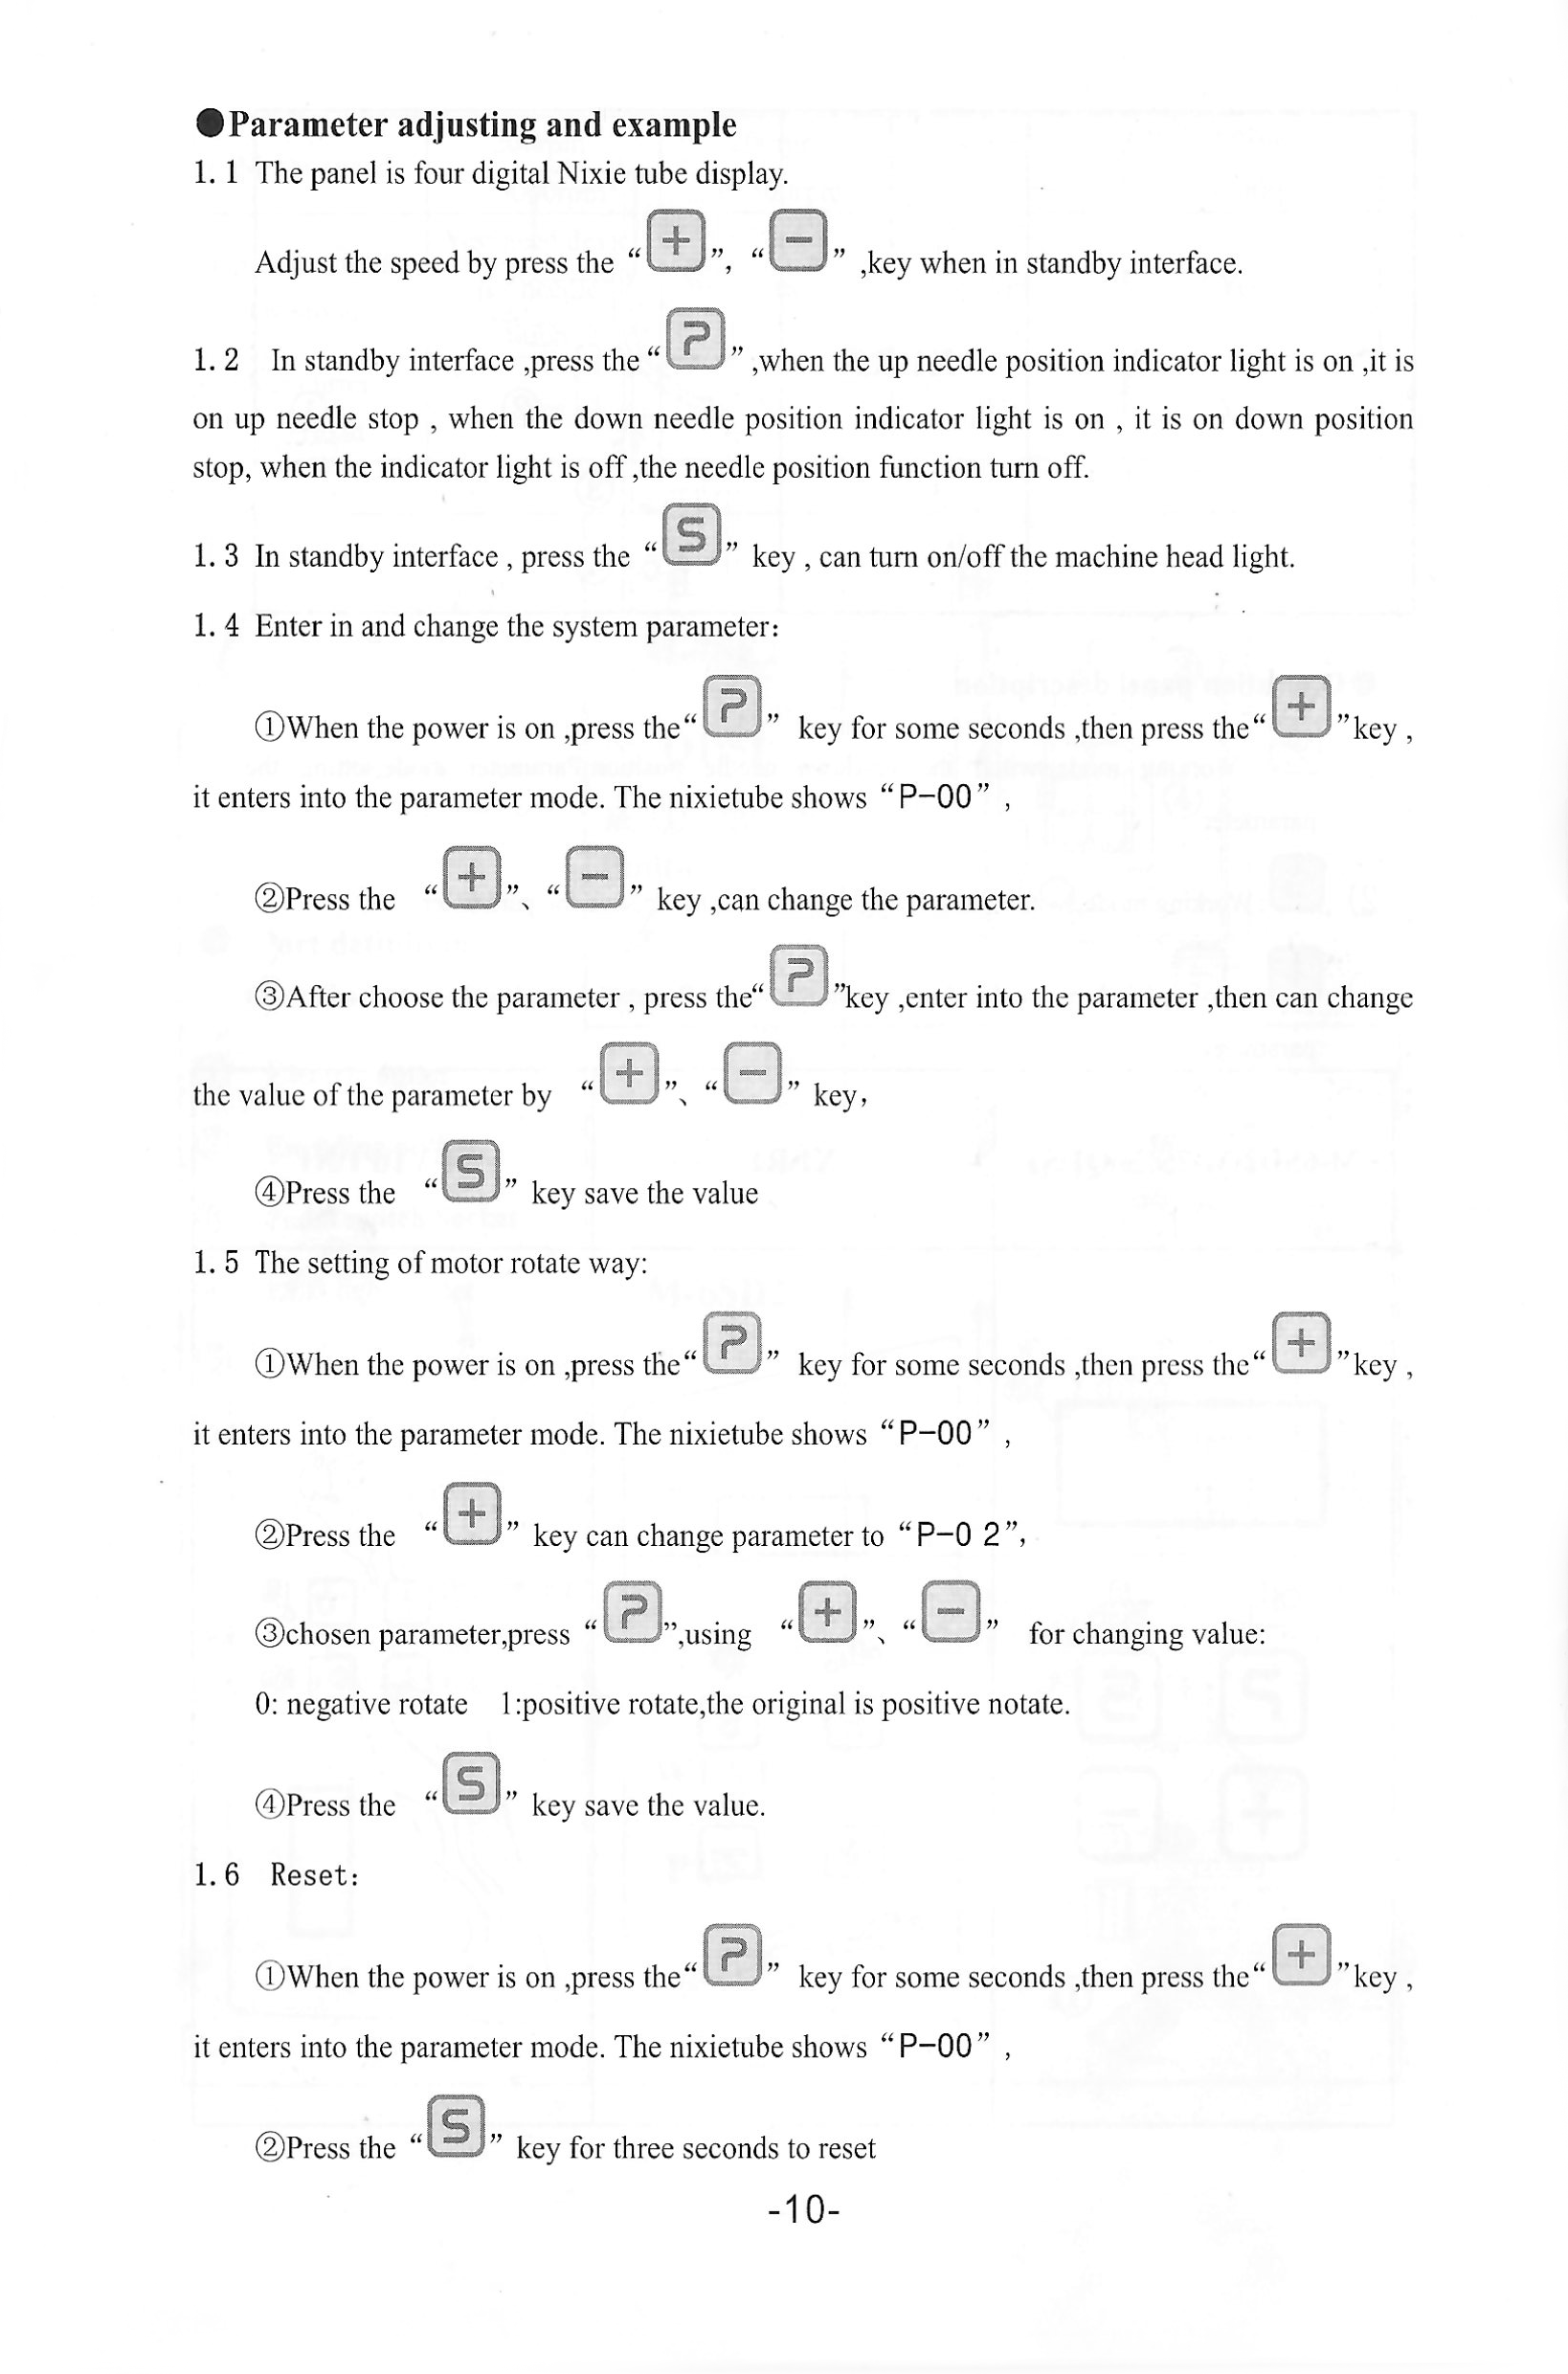
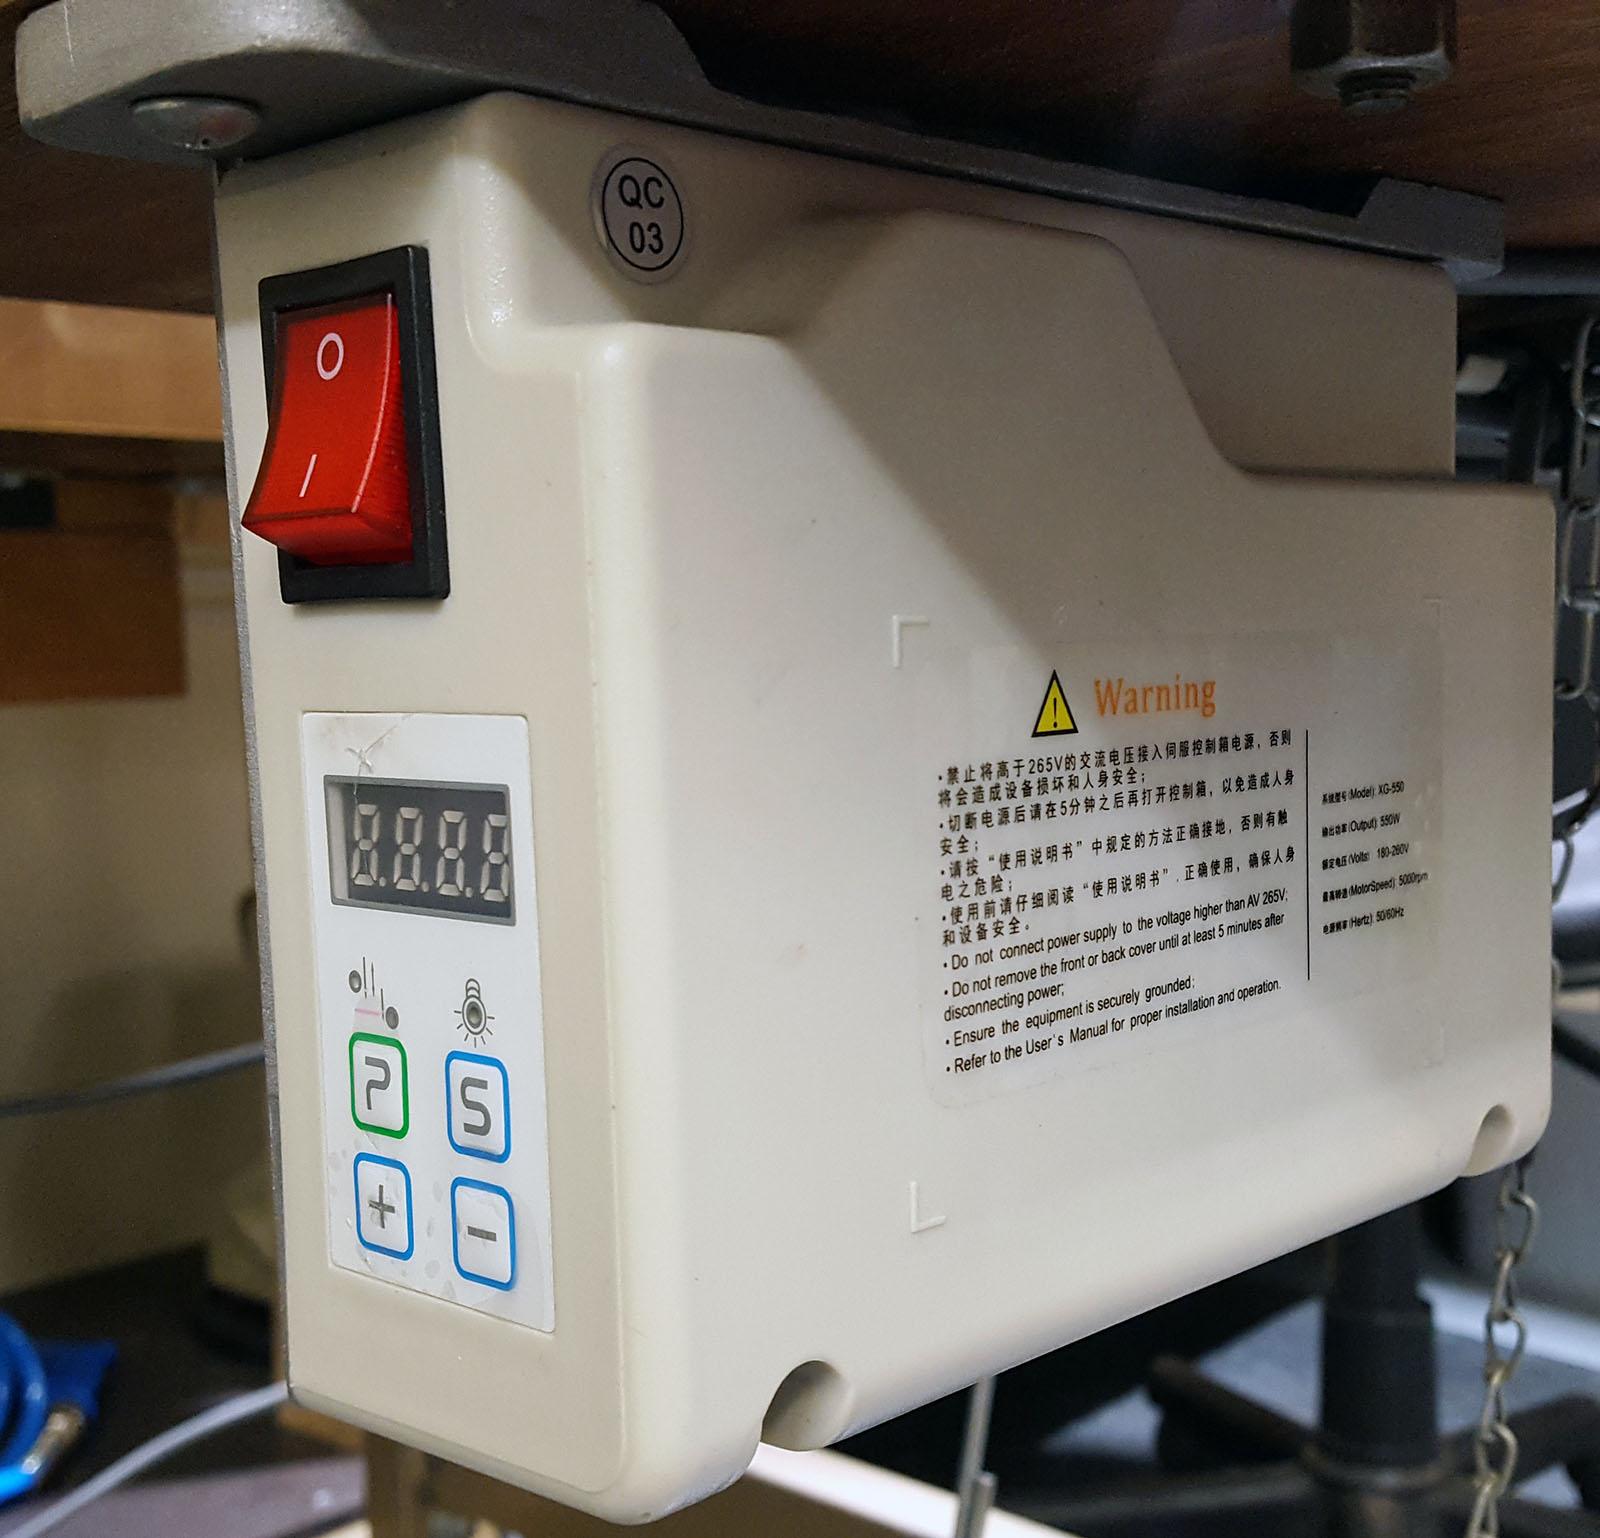
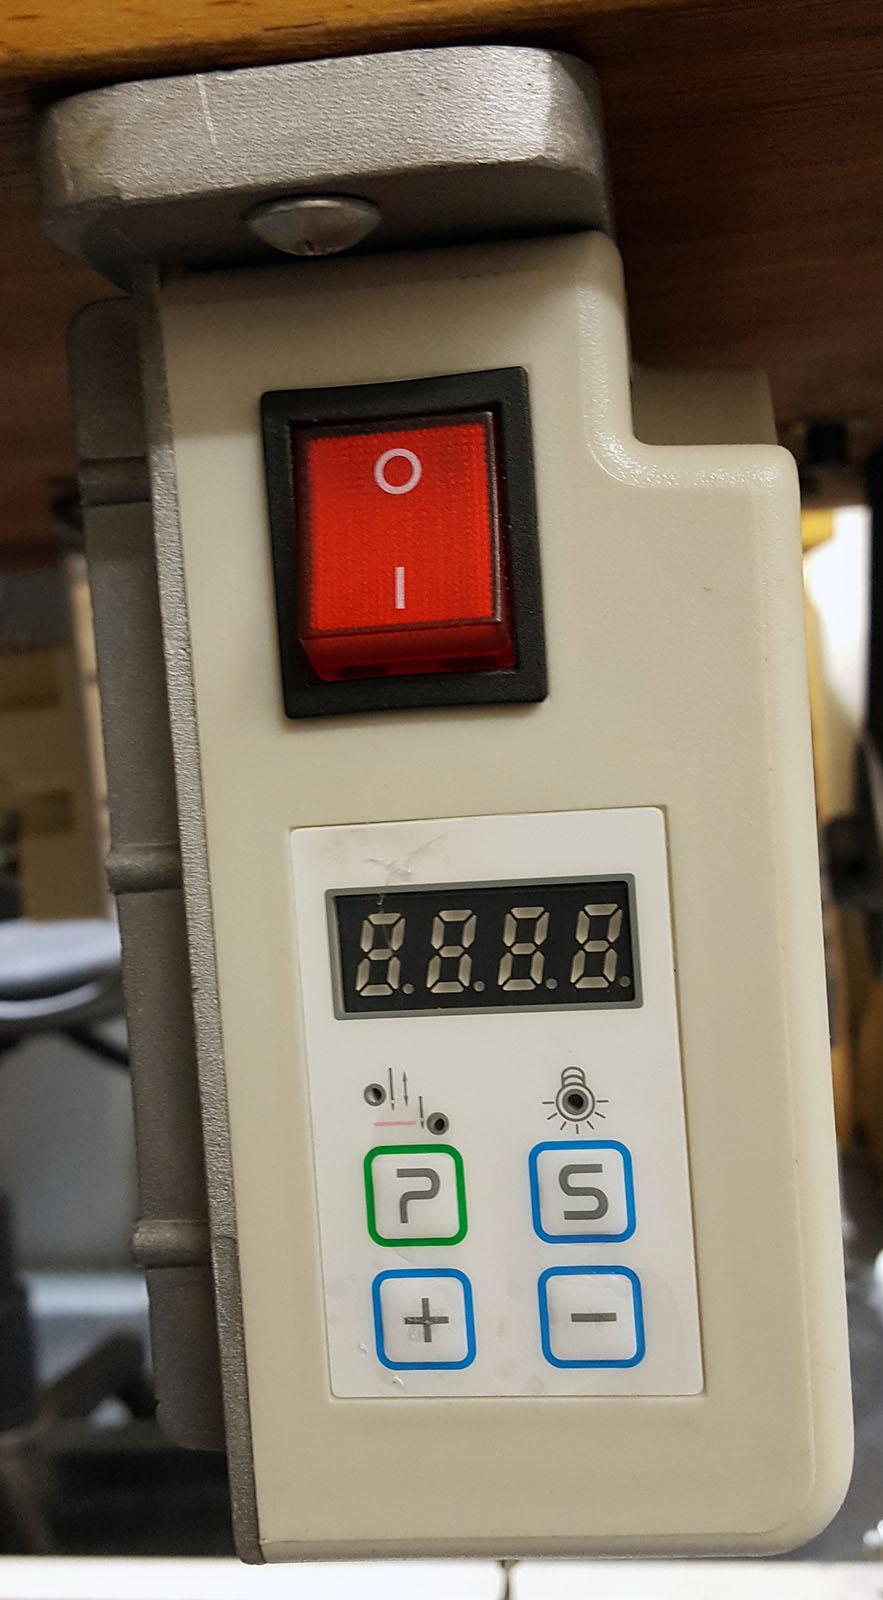
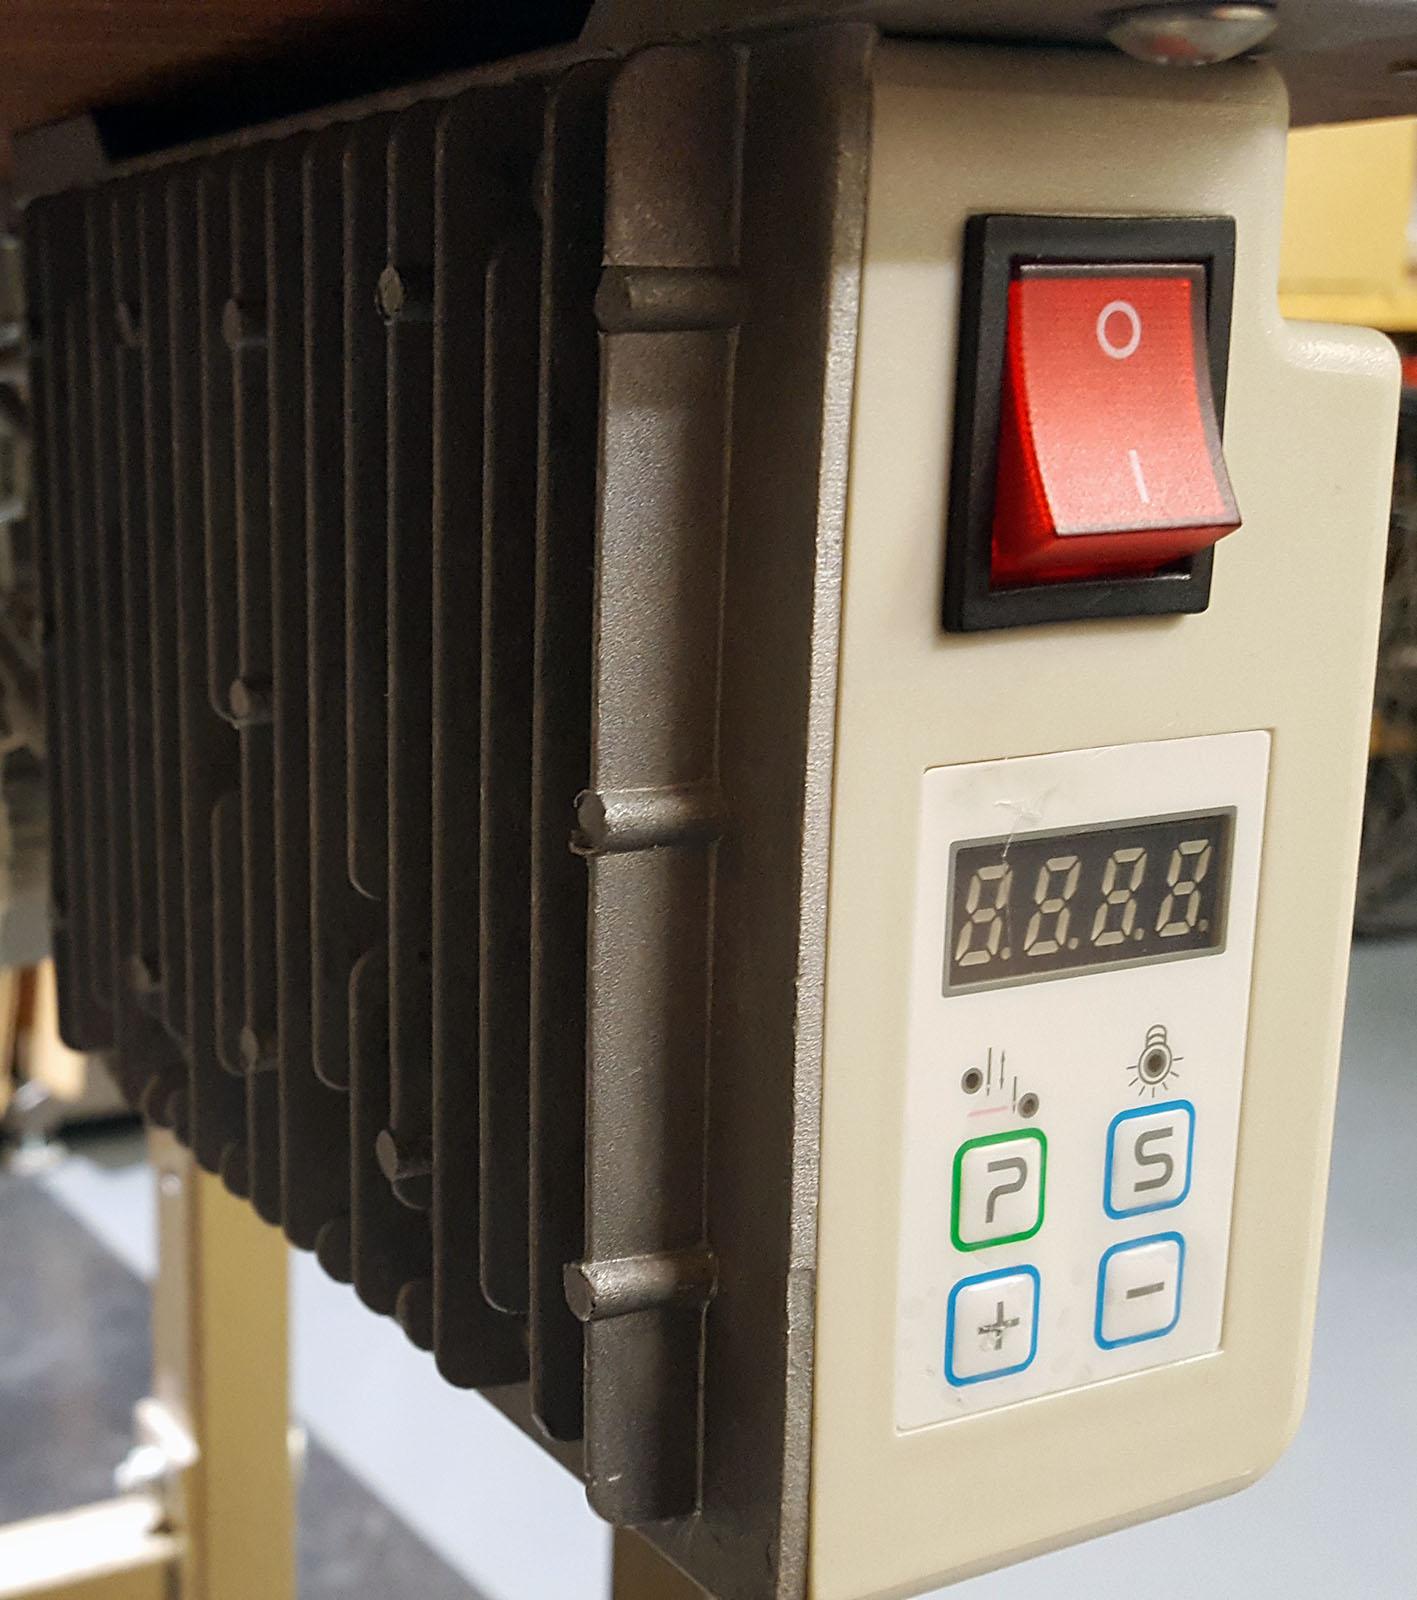
I am looking for the manual for this Chinese servo motor controller. I want to install a syncronizer, but the parameters on the controller do not match the ones on the manuals I have found online. I couldn't find any model number on the controller to do a proper search either. Here's what I found about the parameters by testing: You enter the parameters menu by pressing the P and + buttons at the same time. You browse the parameters list by + and - buttons. You enter into a specific parameter by pressing the P button. You increase or decrease the parameter with + and - buttons. You exit the menu with the S button. P-02: range = 0 - 1, Reverses the motor direction P-03: range = 06 - 18, increments by 1, current setting 12 P-04: range = 200 - 800, increments by 50, current setting 200 P-05: range = 0500 - 4000, increments by 50, current setting 2000 P-06: range = 000 - 999, increments by 1, current setting 000 P-07: range = 0800 - 2000, increments by 100, current setting 1100 P-08: range = 0 - 1, current setting 0 P-09: range = 0 - 1, current setting 0 P-10: range = 0 - 1, current setting 0, if set to 1 it seems to be some auto sew setting where the machine runs for about 6 seconds, then pauses for a while and repeats. P-11: range = 0000 - 9999?, increments by 1, current setting 0000, I only tested that it goes over 1000, but since it increments by 1 it would have taken forever to go to 9999 P-12: range = 001 - 120, increments by 1, current setting 005 P-15: range = 0 - 1, current setting 0 P-16: range = 0200 - 4500, increments by 100, current setting 1000 Let me know if you need more info or photos. Thank you.
-
Pedersen 309 Bobbin case wires question
Einherj replied to Einherj's topic in Leather Sewing Machines
Thank you. I always take a lot of photos when I'm pulling a machine apart. I don't trust my memory at all. I can post more photos when I get further with it, no problem. My aim is to make sure it's running smooth and also looks decent, but not an overall rebuild. I run a small leather goods business, so I have my own workshop to stink up, don't have to worry about the Mrs. I don't even know what that is. They clean machines with dry ice? -
Pedersen 309 Bobbin case wires question
Einherj replied to Einherj's topic in Leather Sewing Machines
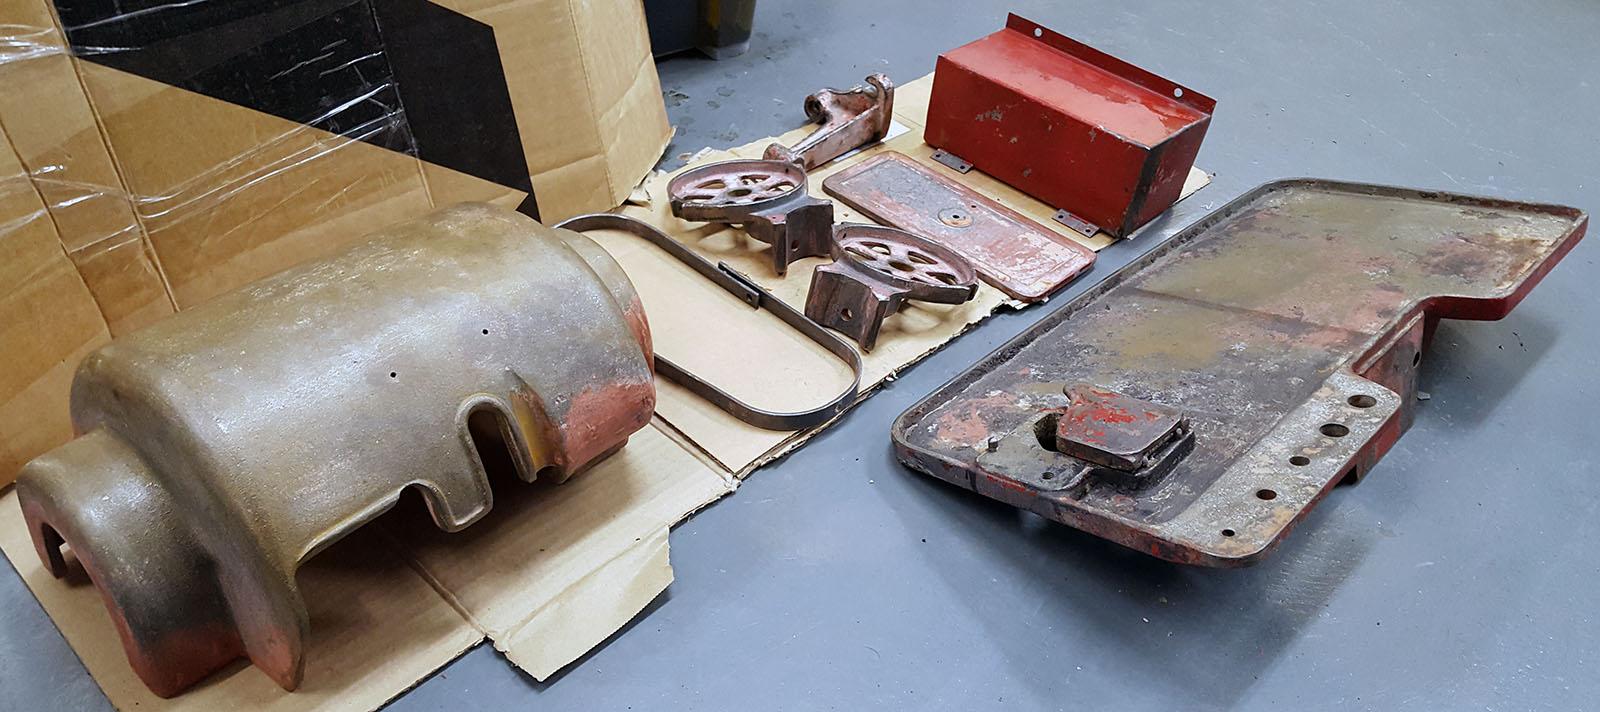
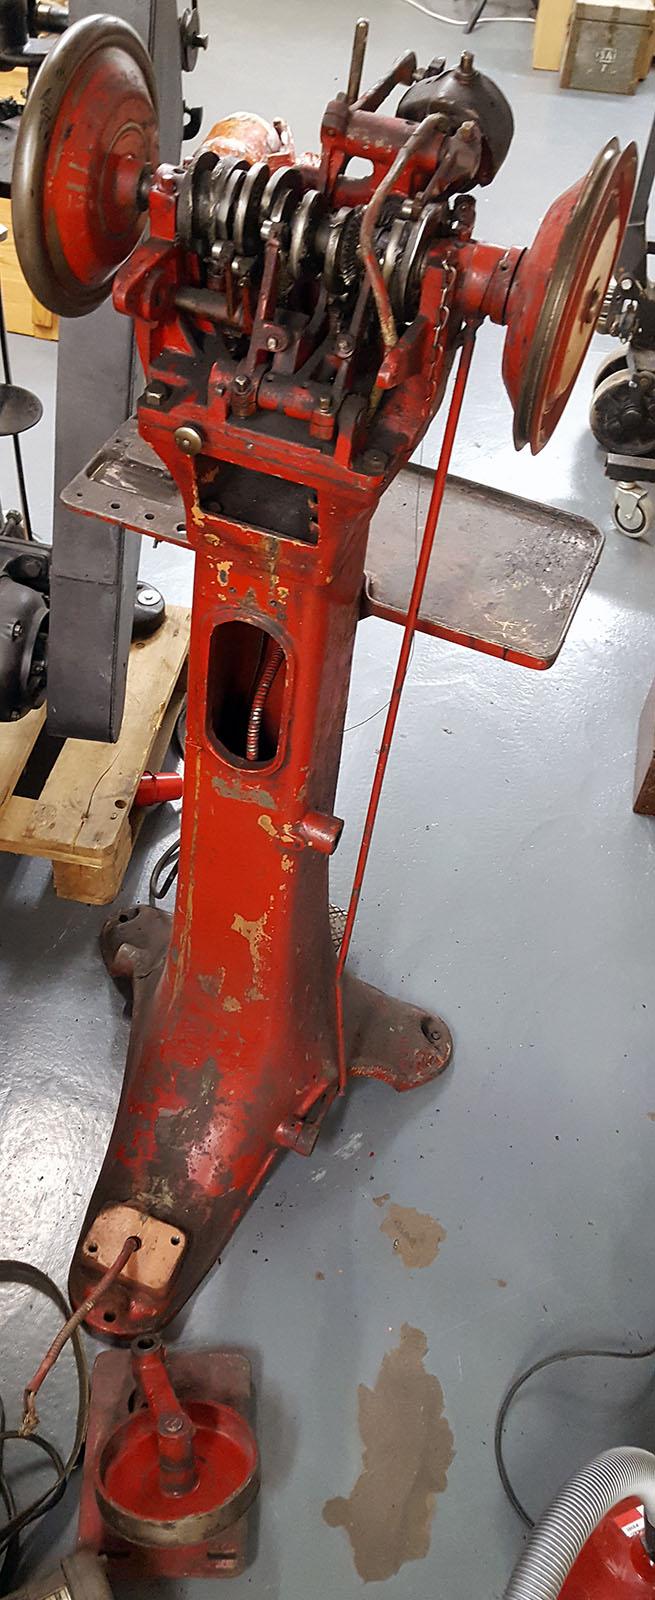
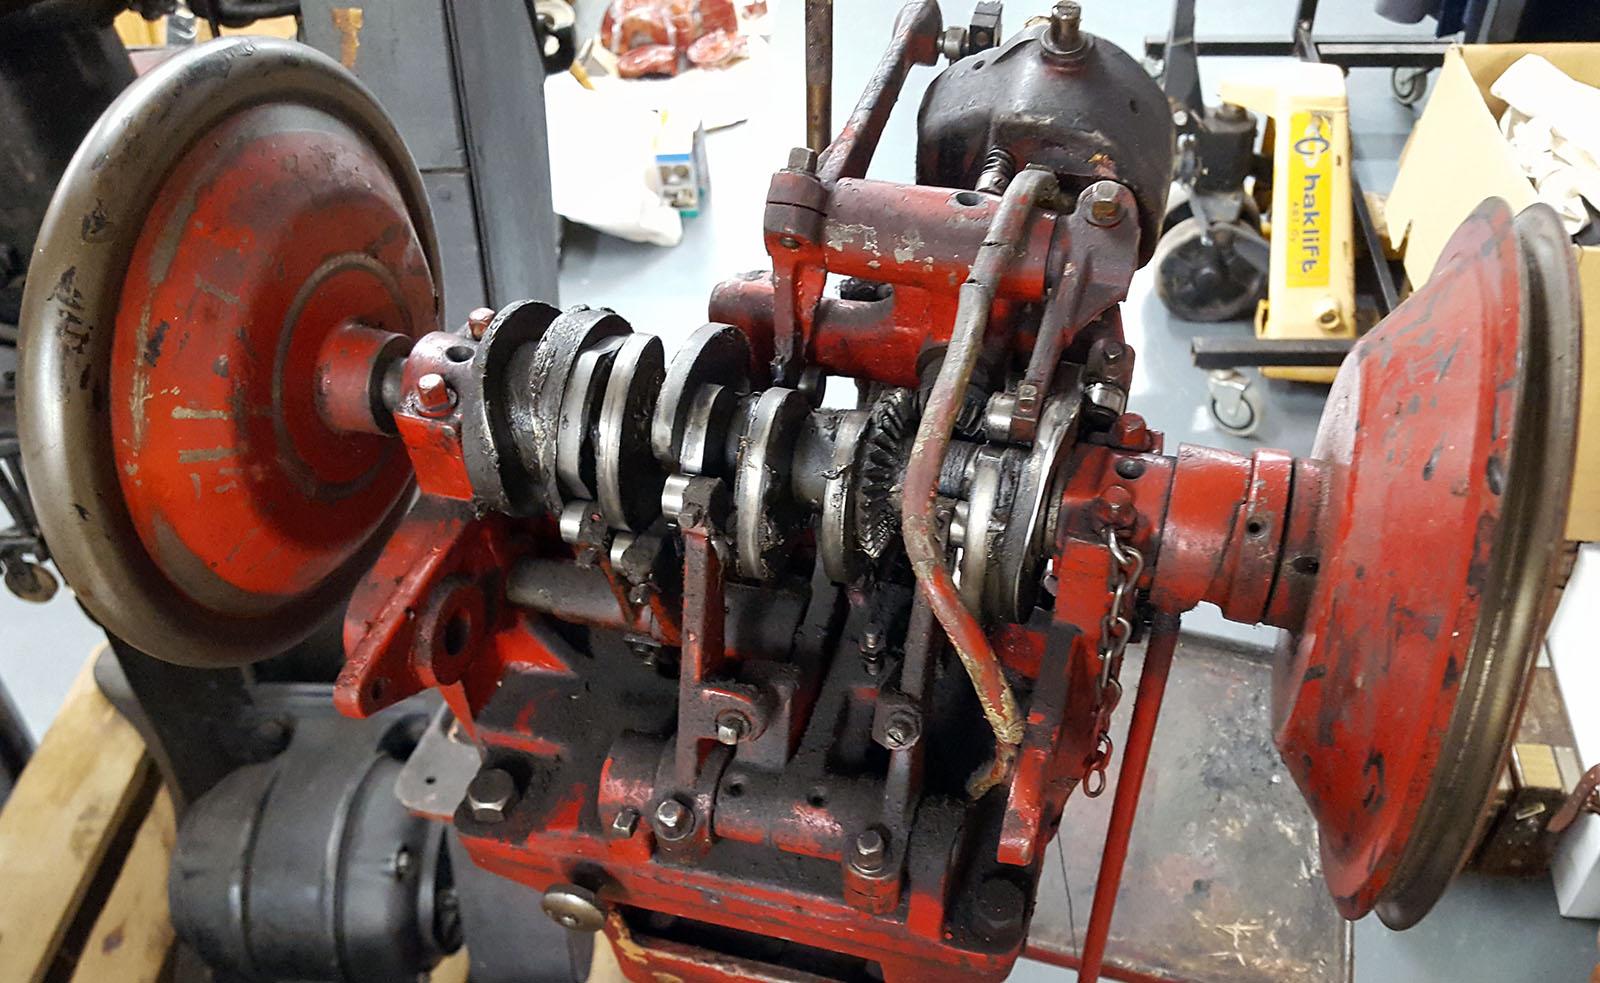
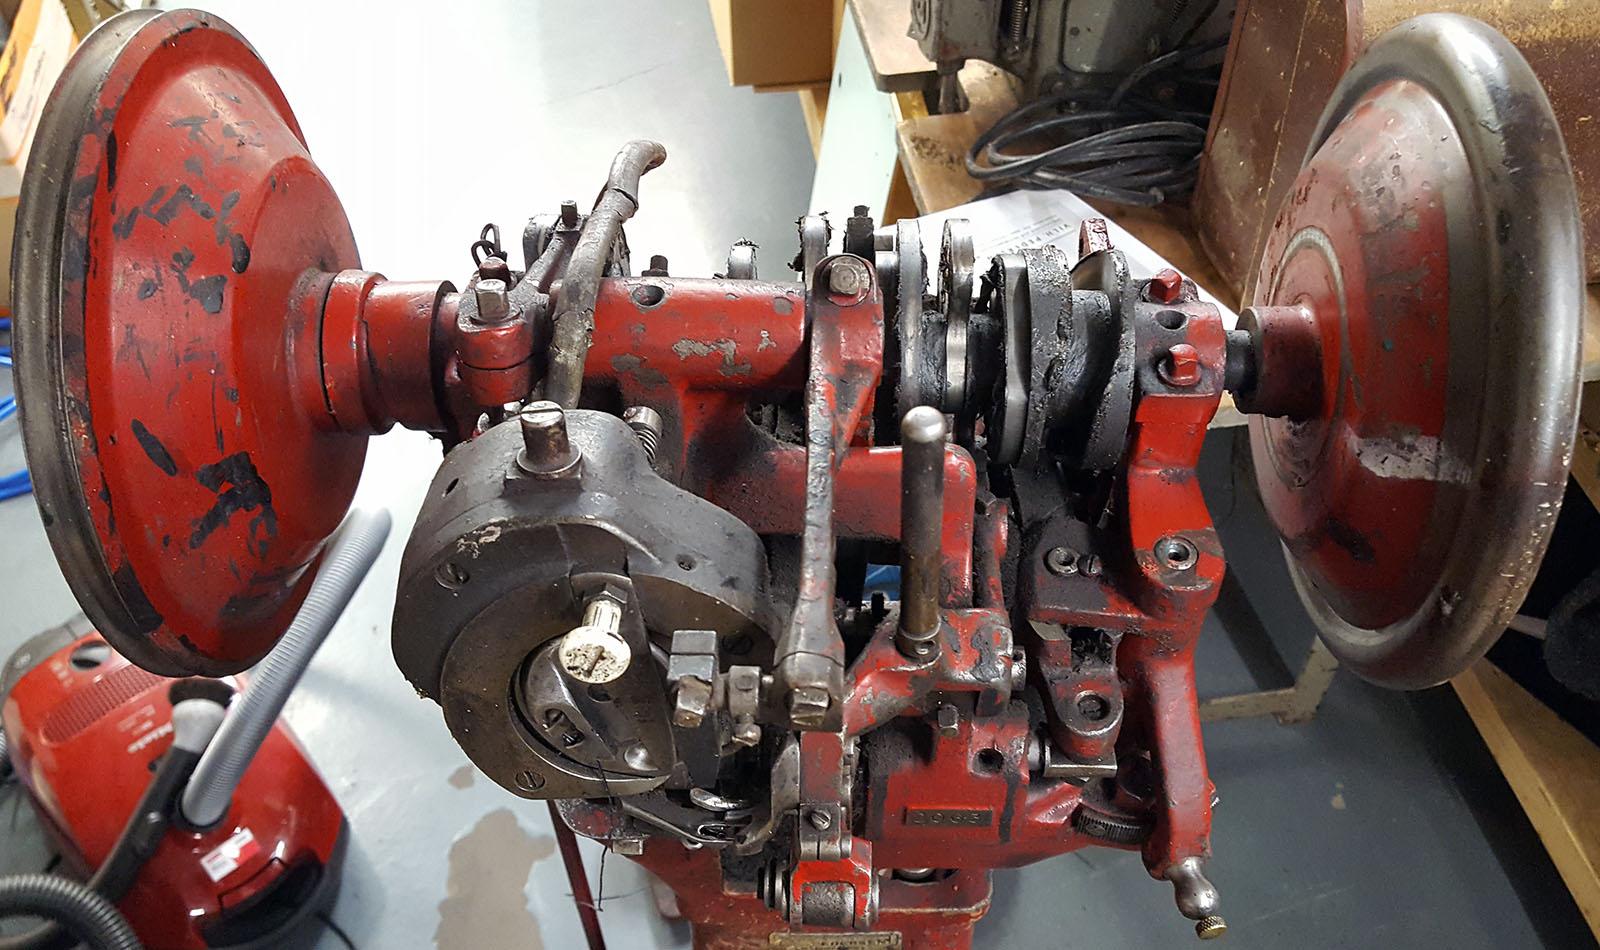
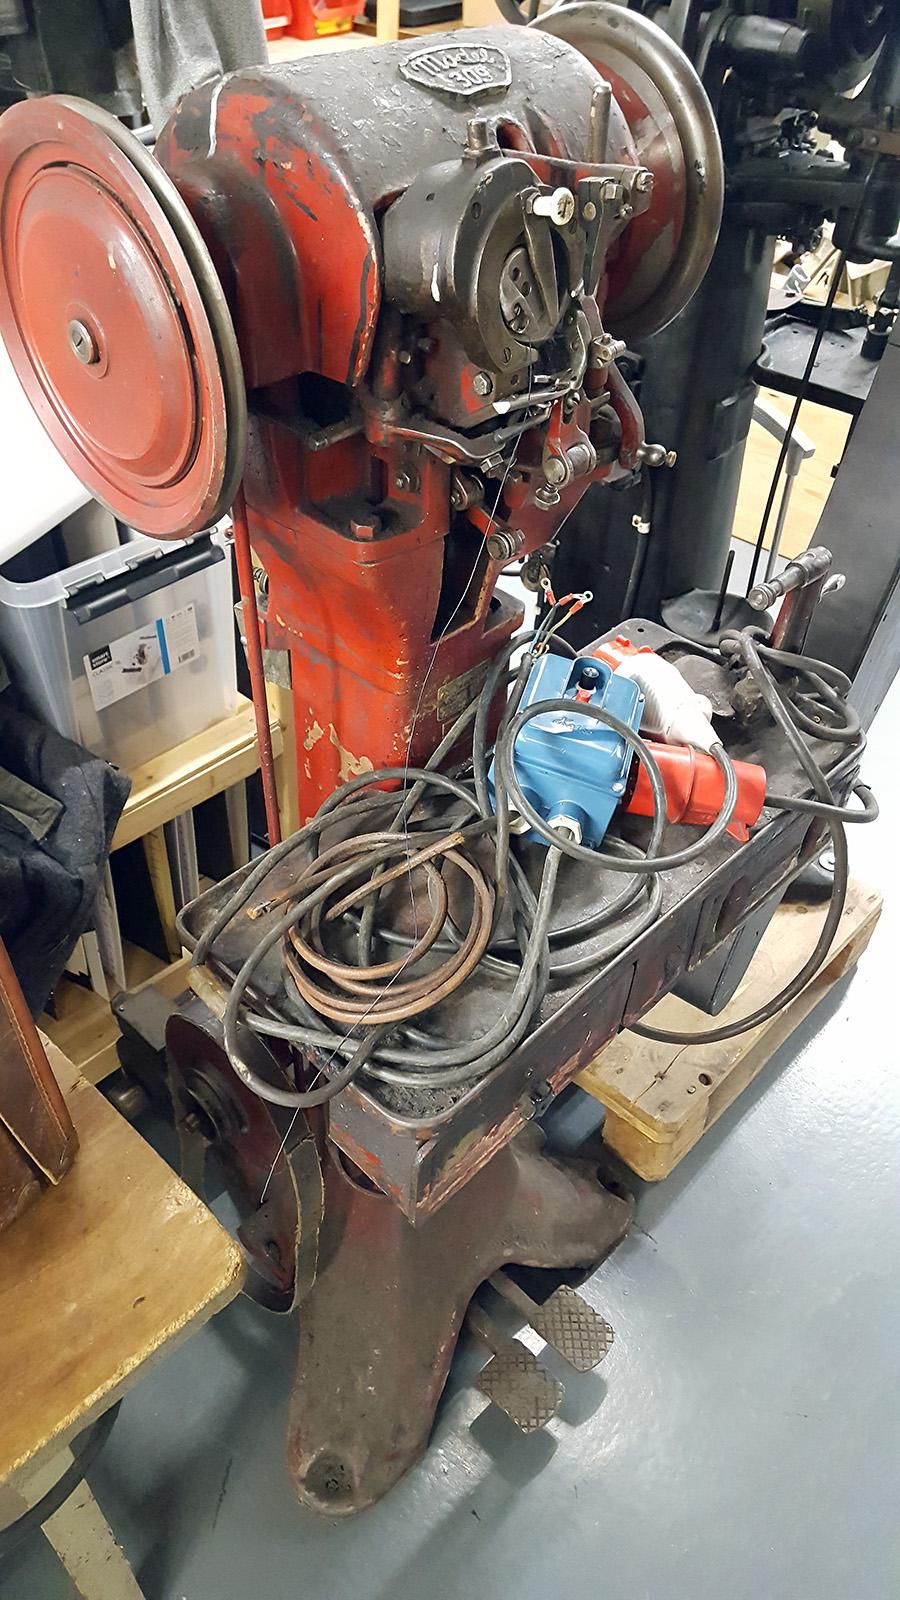
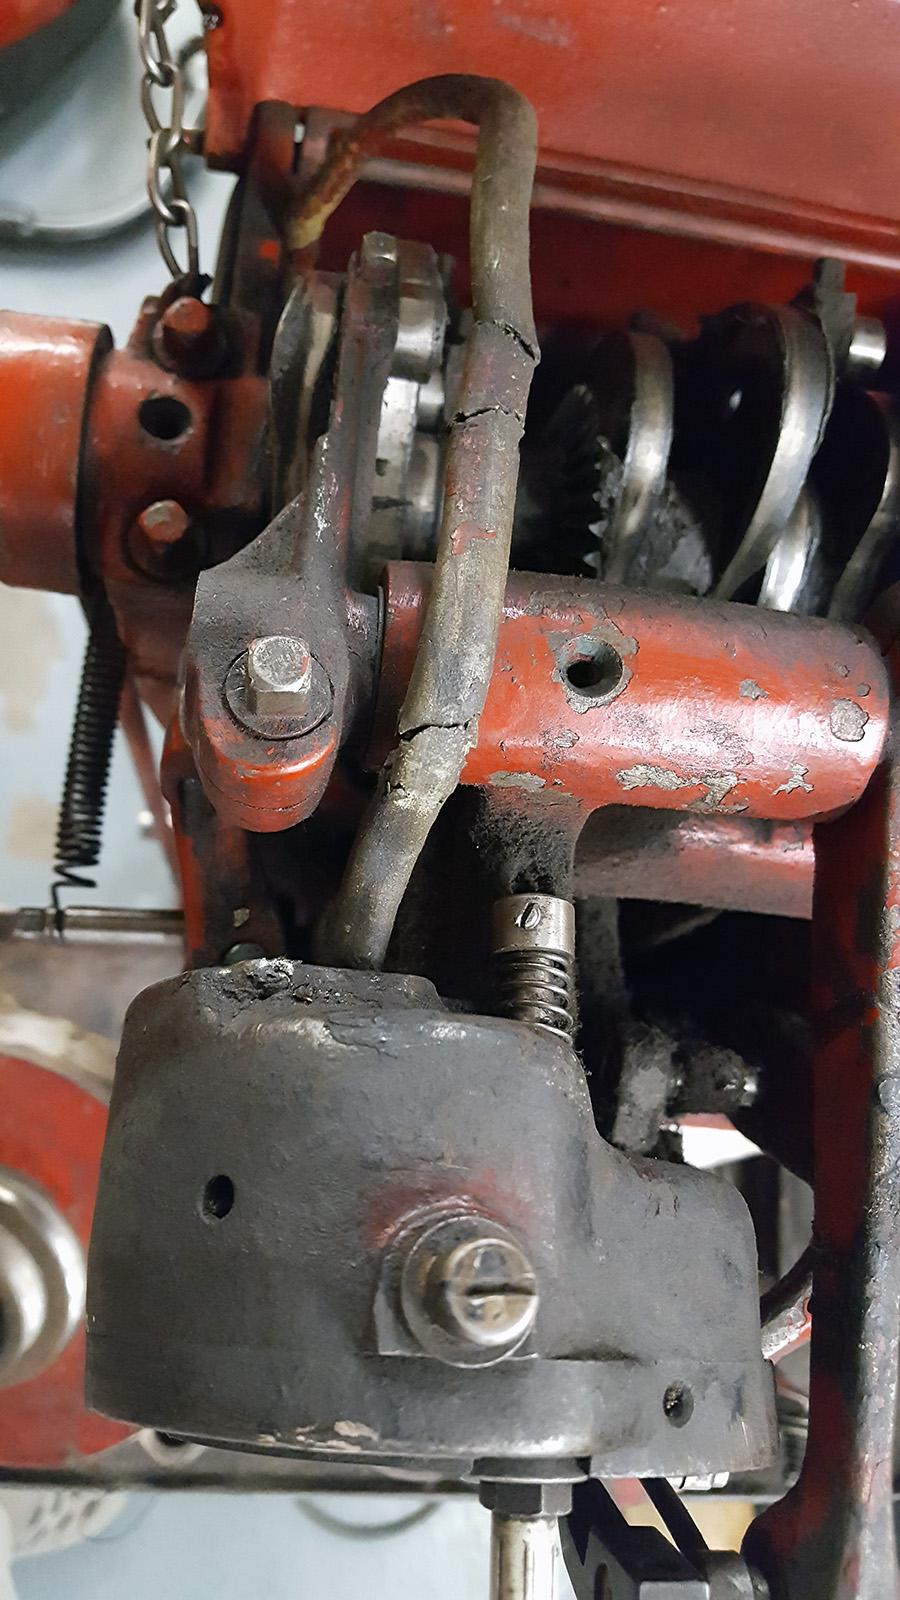
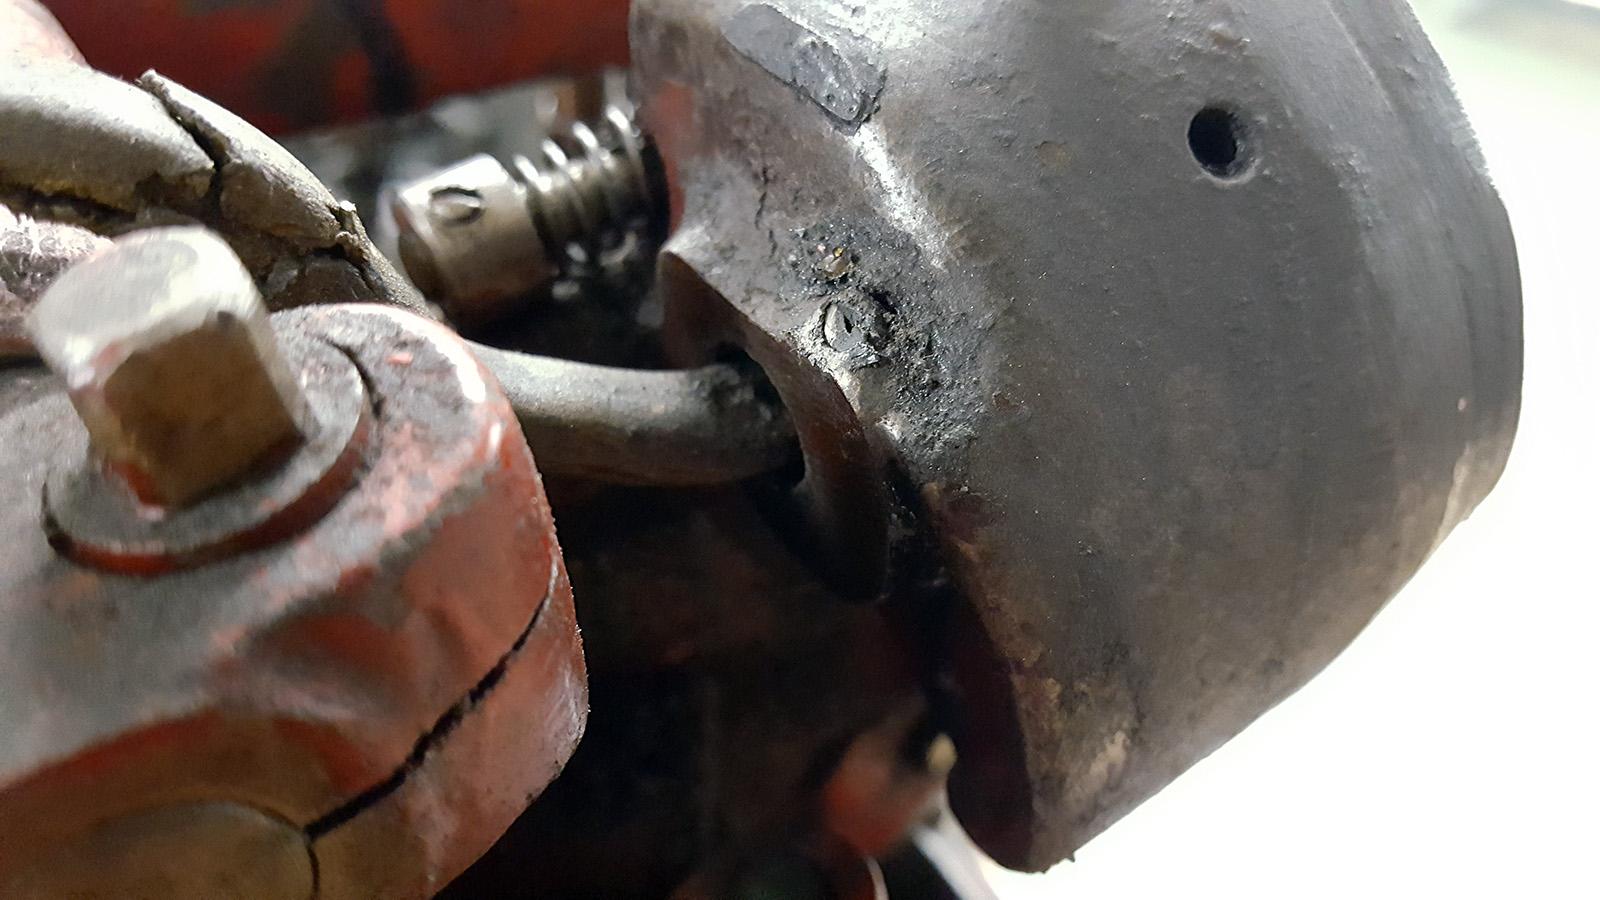
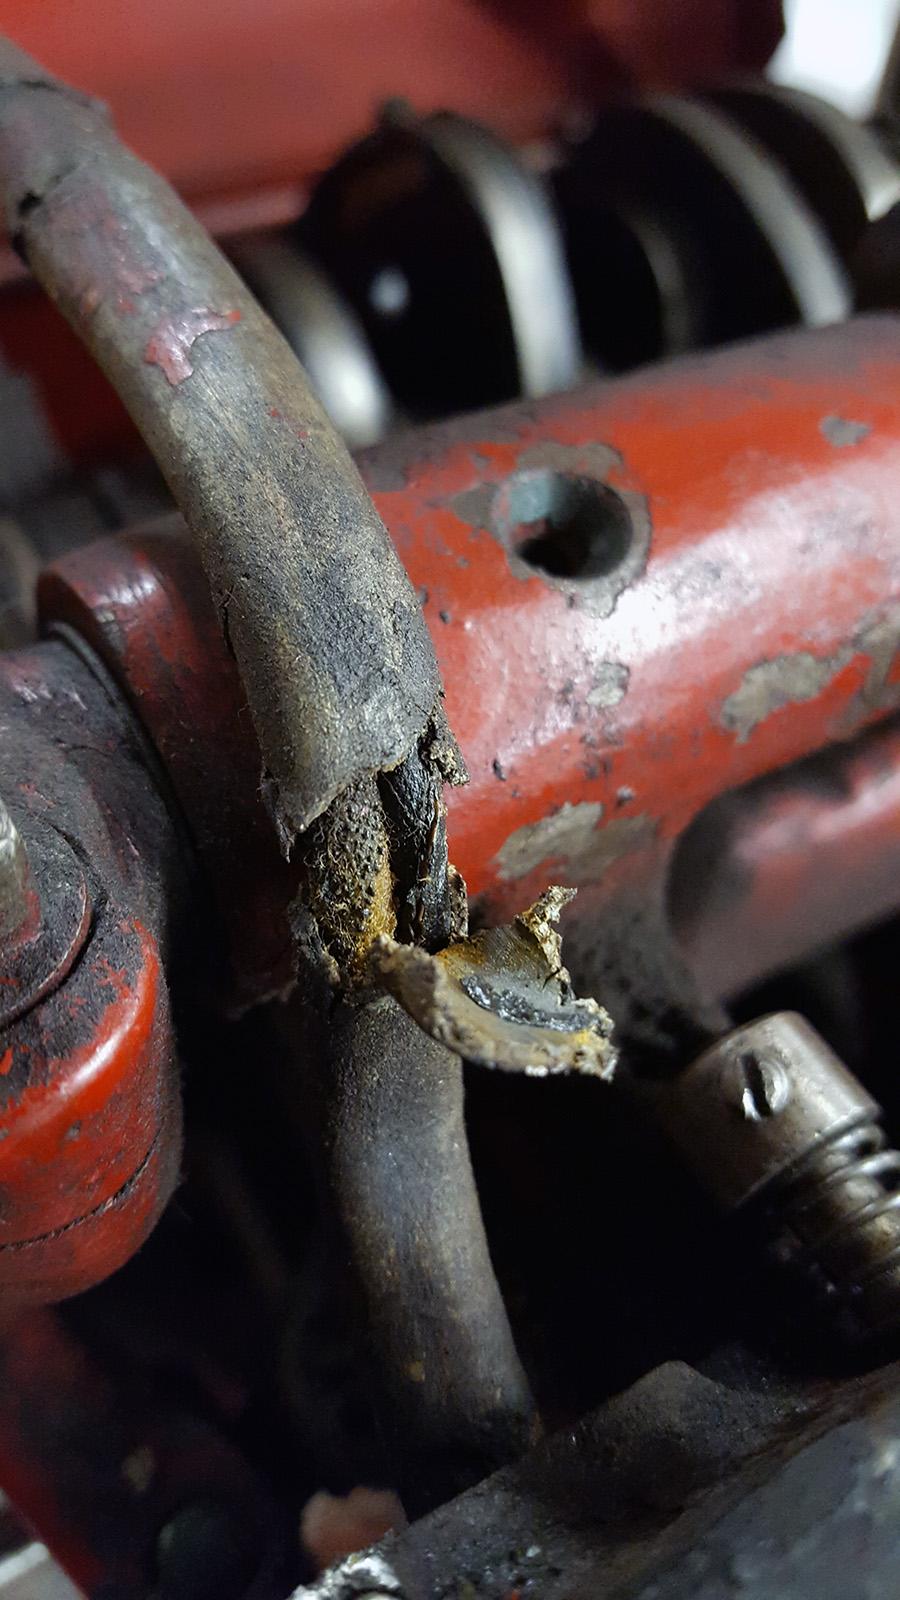
Thank you very much for these insights. So there is a wax box built around the bobbin case? Is the screw on top the filler cap? I am actually on my way to stripping all the paint from the major parts as there seemed to be some paint spillage or similar all over the machine, and the original paint is chipping too. I will wire wheel all the major parts to bare metal and repaint them. Luckily the insides are in good condition. I will not disassemble the main mechanism, but I will clean it up good with solvents and regrease and oil where needed. I will most likely be using pre-waxed threads, so I will disconnect all the heater wires. I will also be converting this machine to a modern servo motor, so there are a lot of parts I can leave out from the reassembly, like the power switch, heater switches, motor mount, power transfer wheel, etc.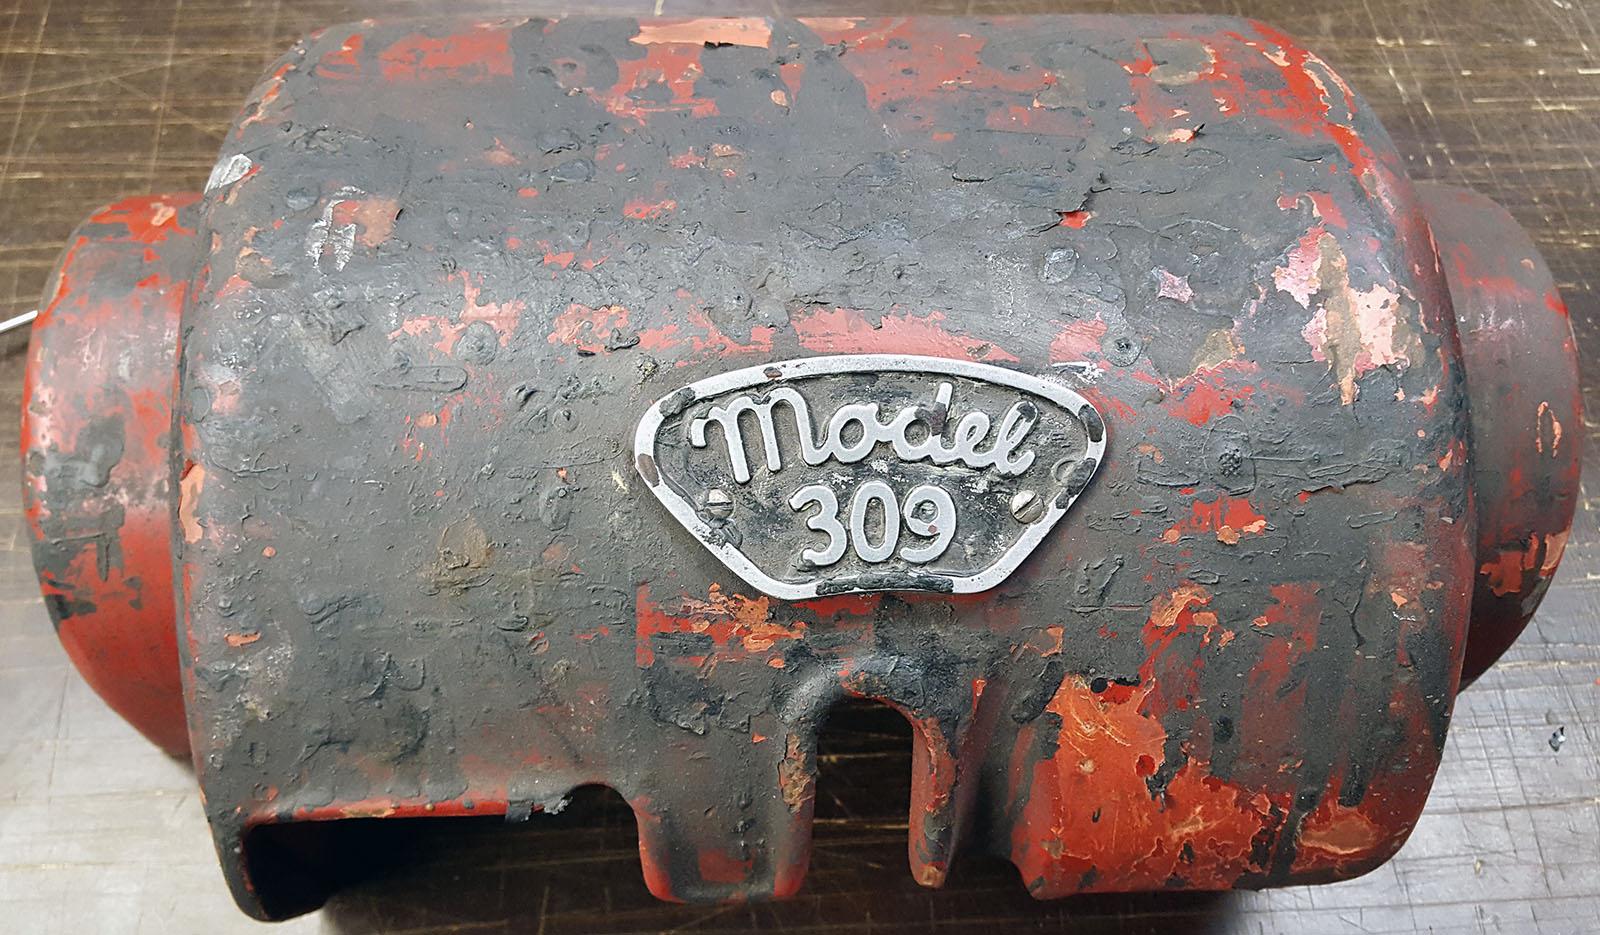

-
Pedersen 309 Bobbin case wires question
Einherj replied to Einherj's topic in Leather Sewing Machines
Thank you. I'm fairly sure it's for a heater then. -
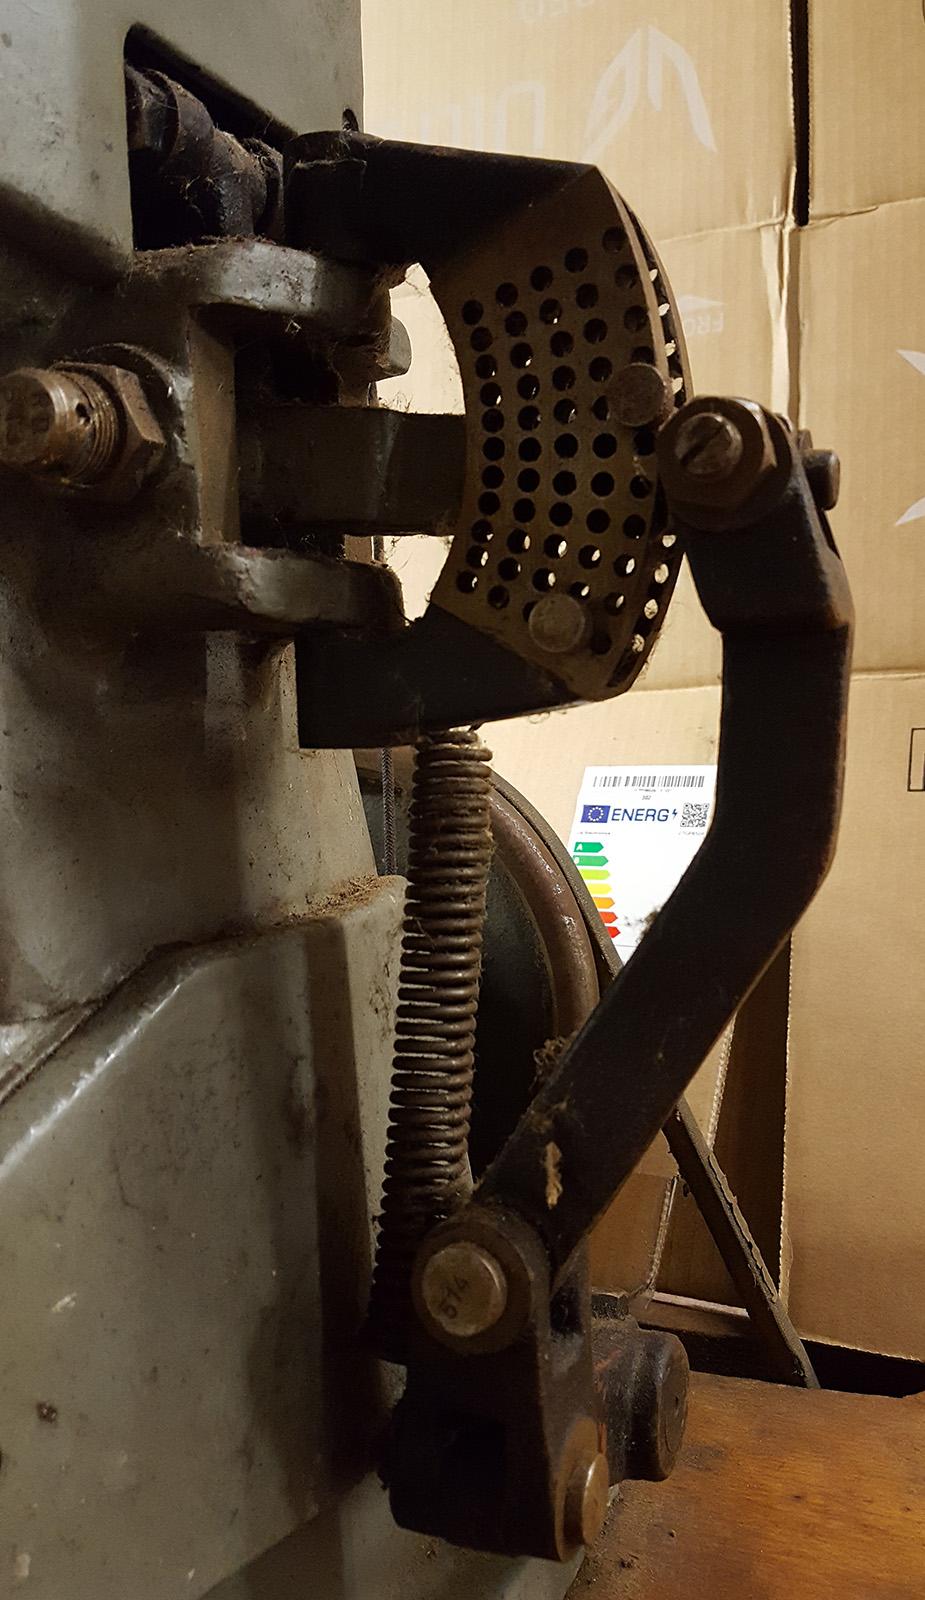
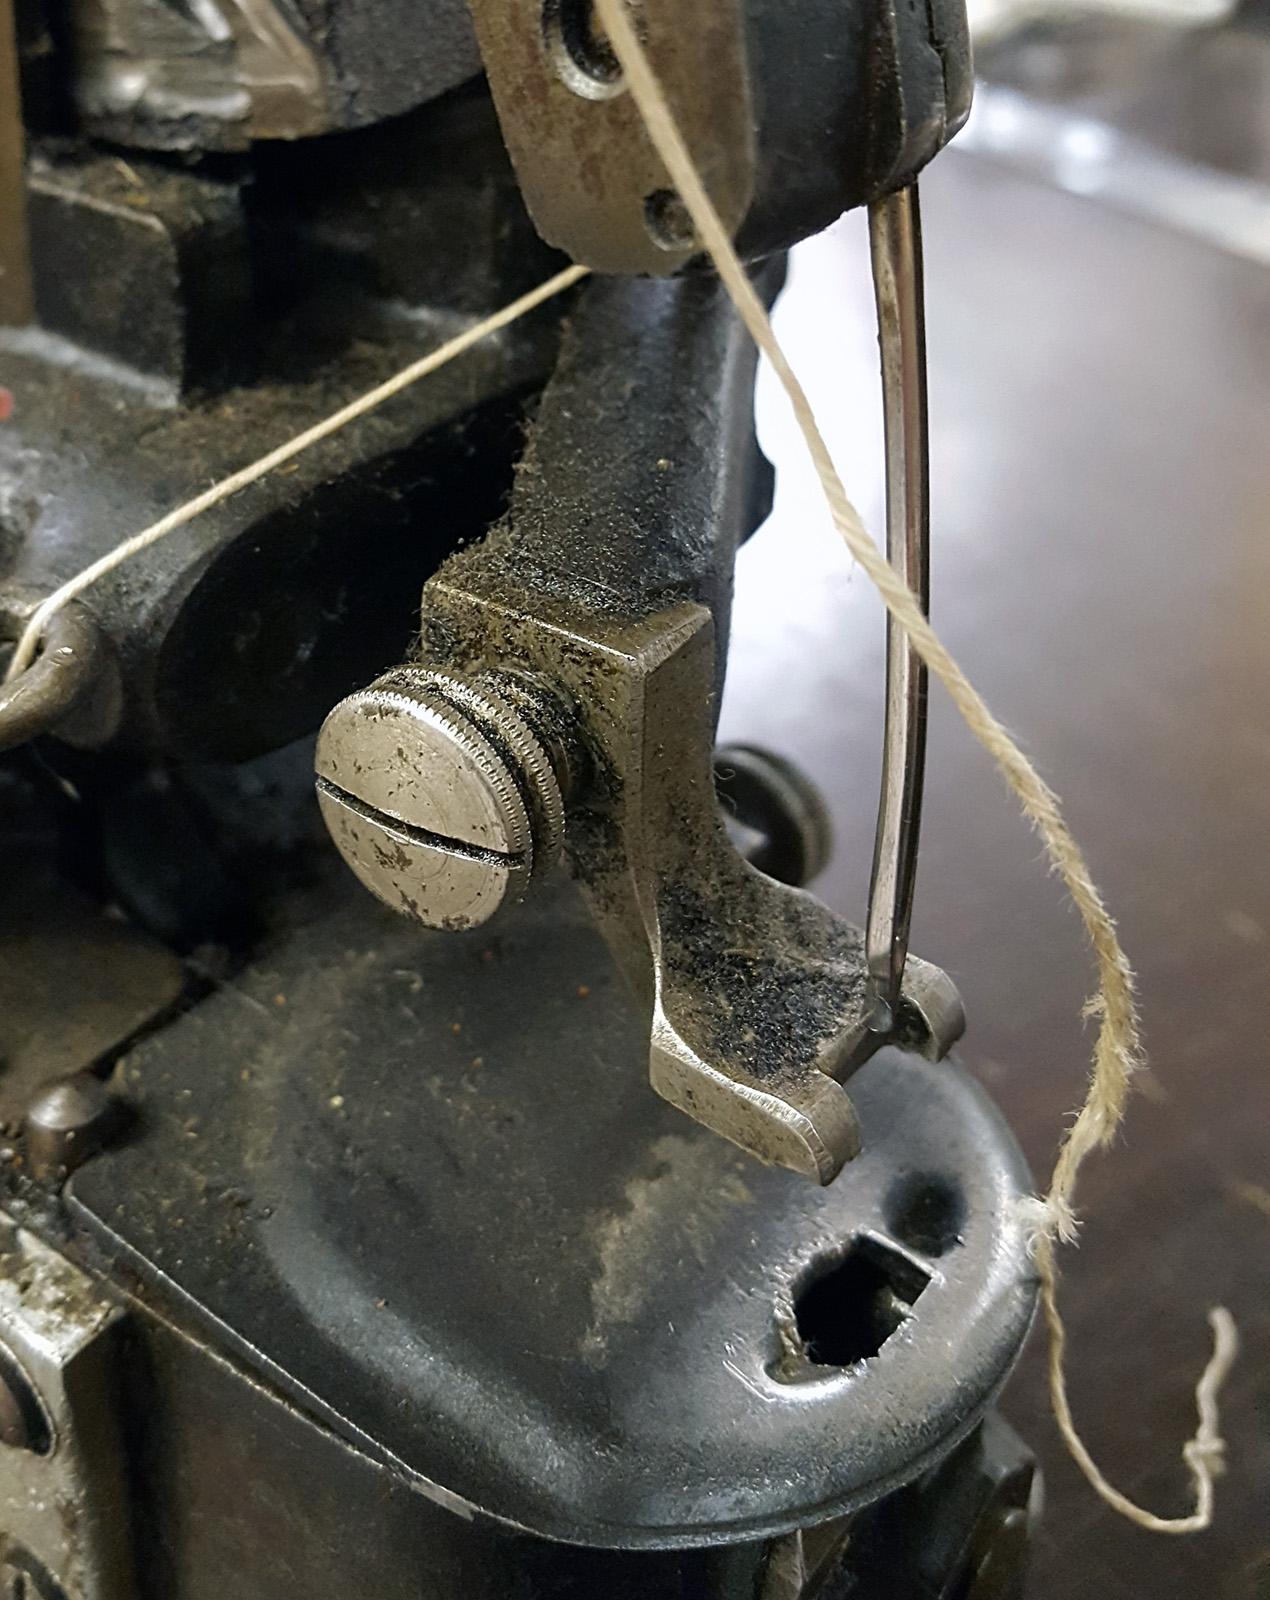
I am doing some heavy maintenance on this Pedersen 309 outsole stitcher I got for cheap. What are these wires going into the bobbin case? Are they for some kind of heater for the bobbin thread wax, or am I way off? Thank you for your assistance.
-
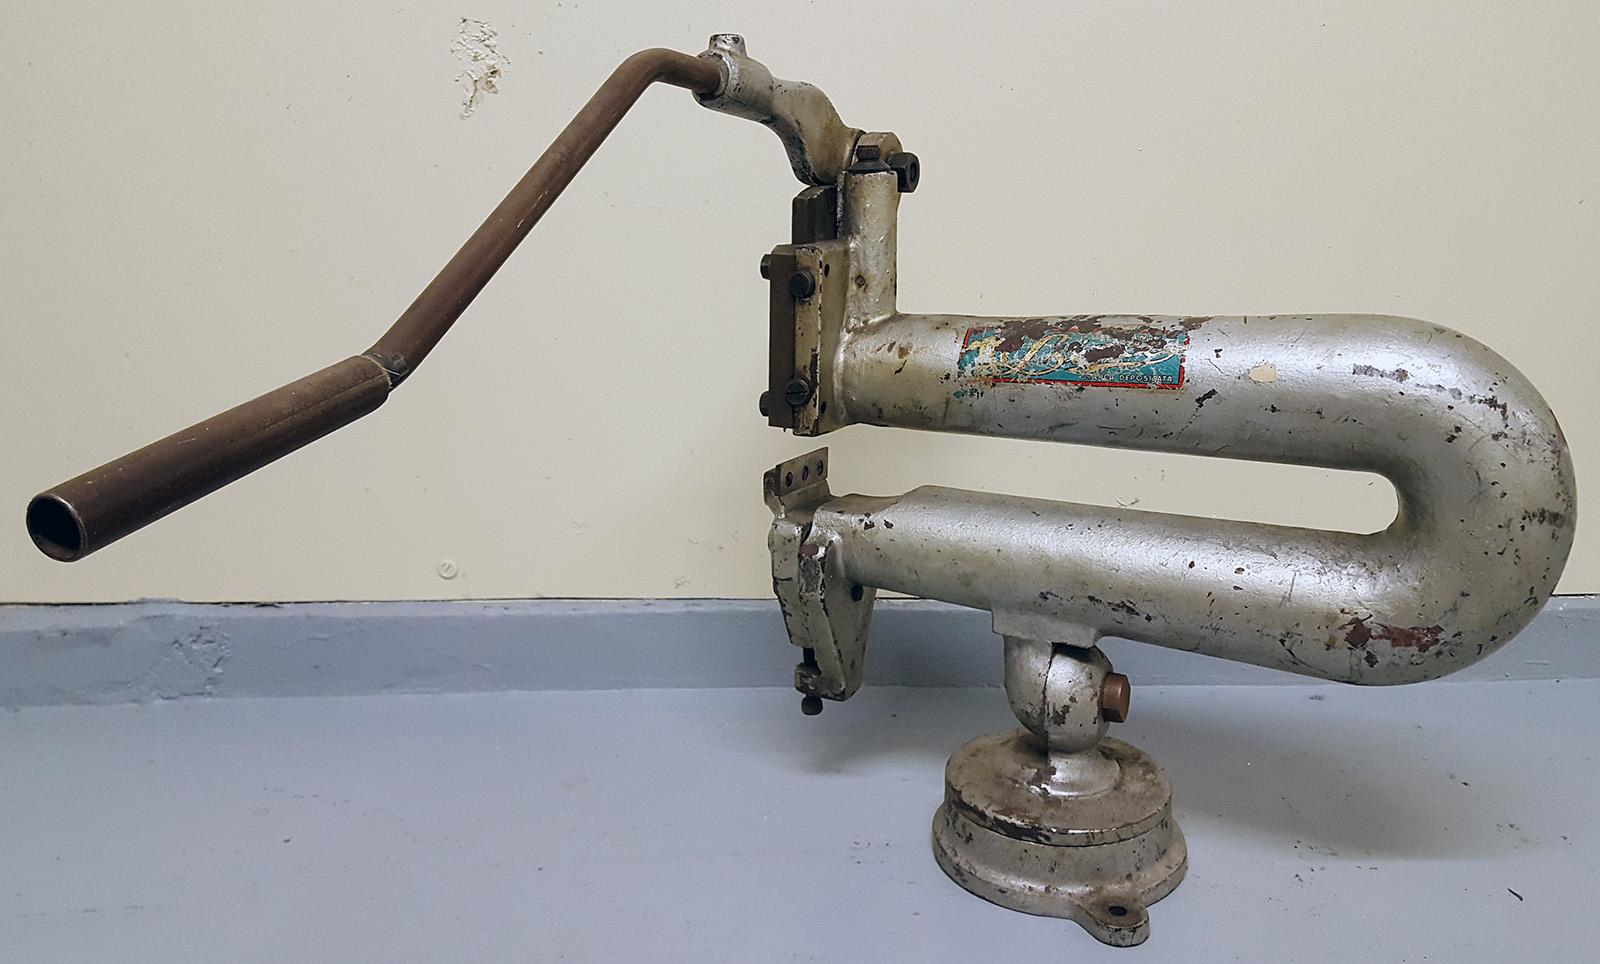
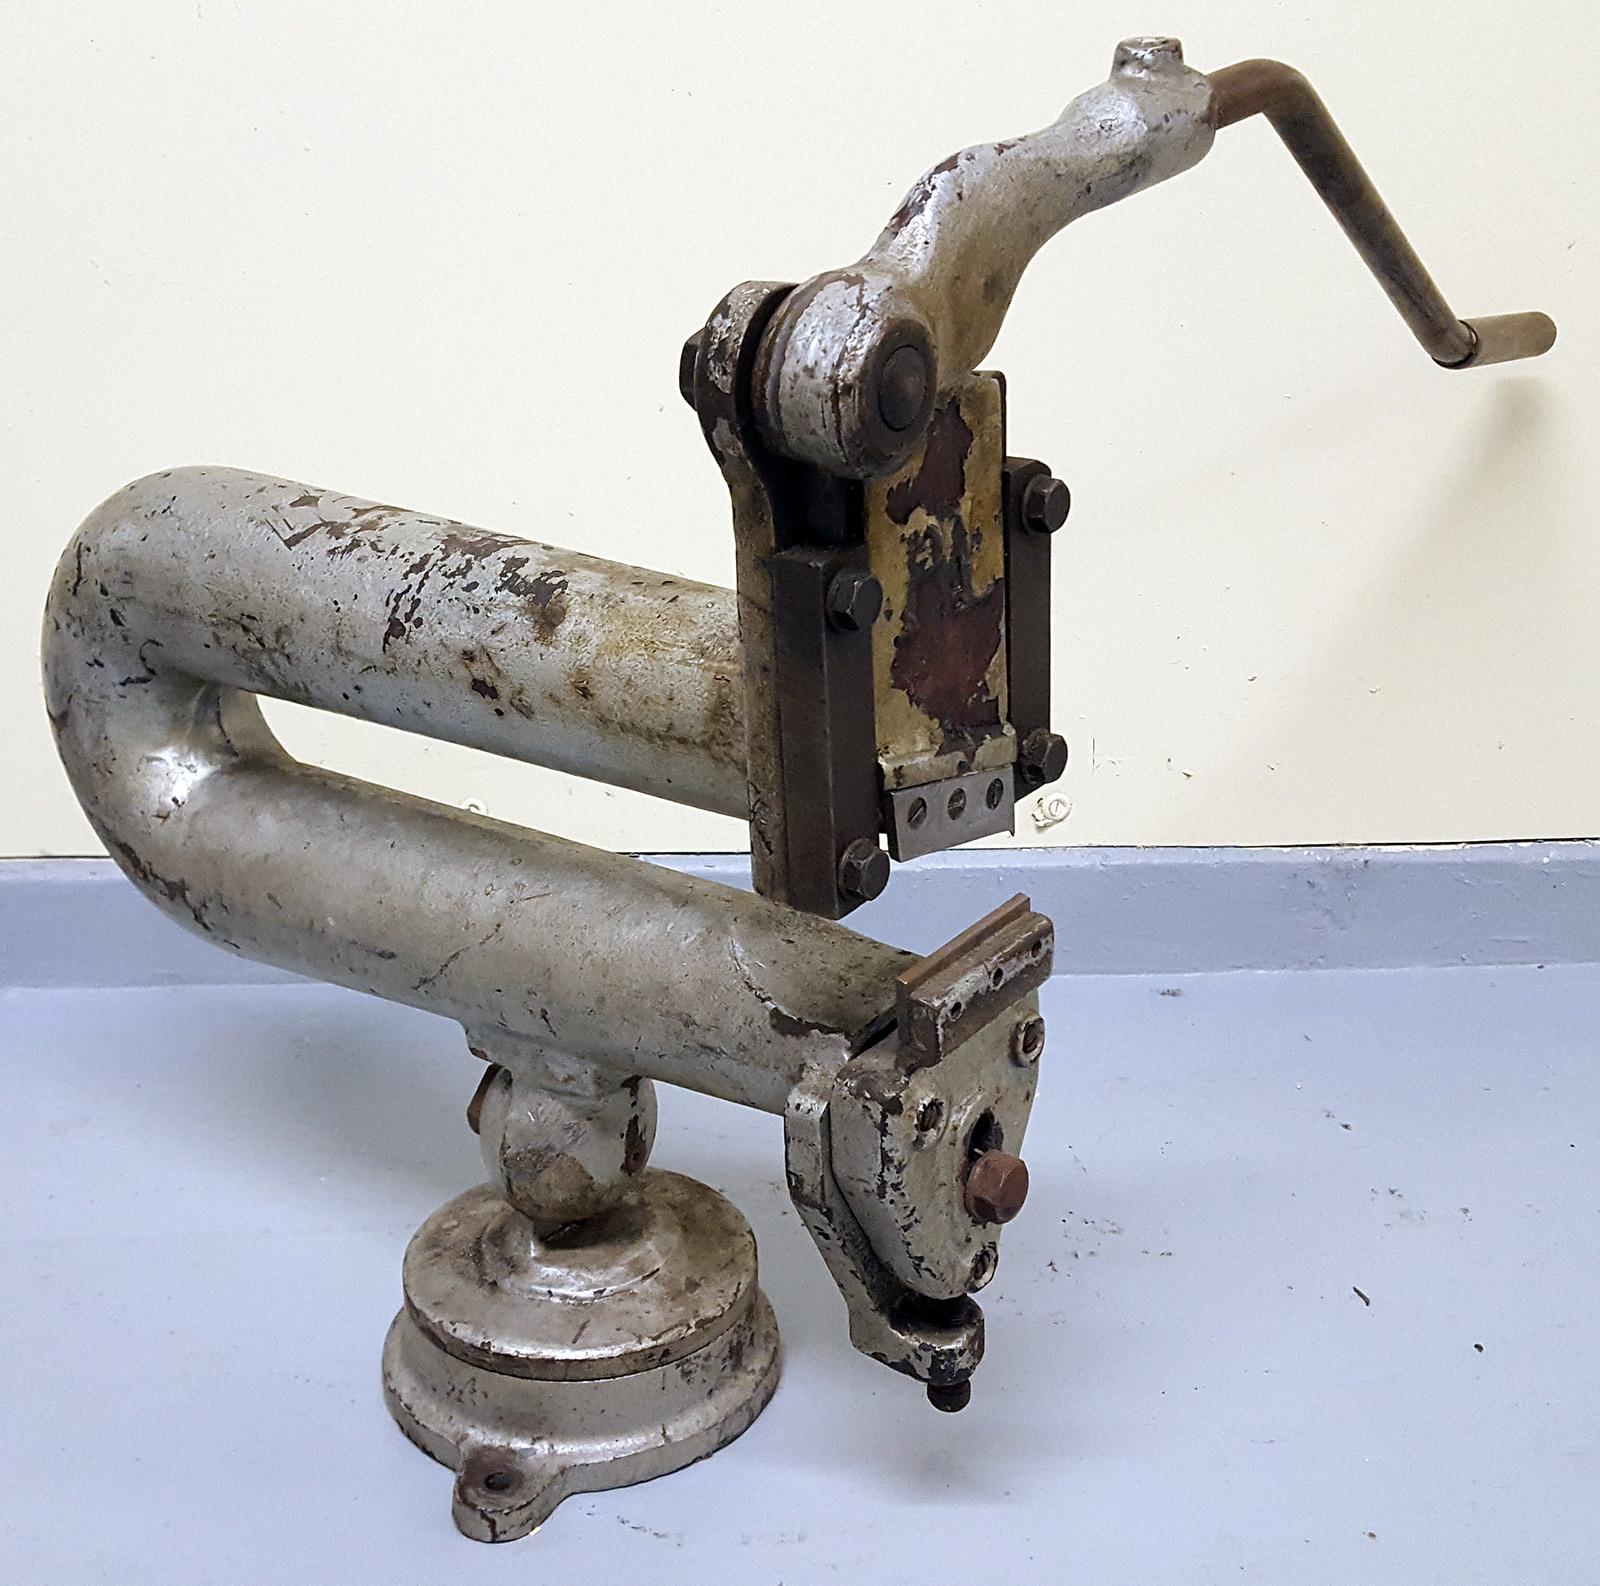
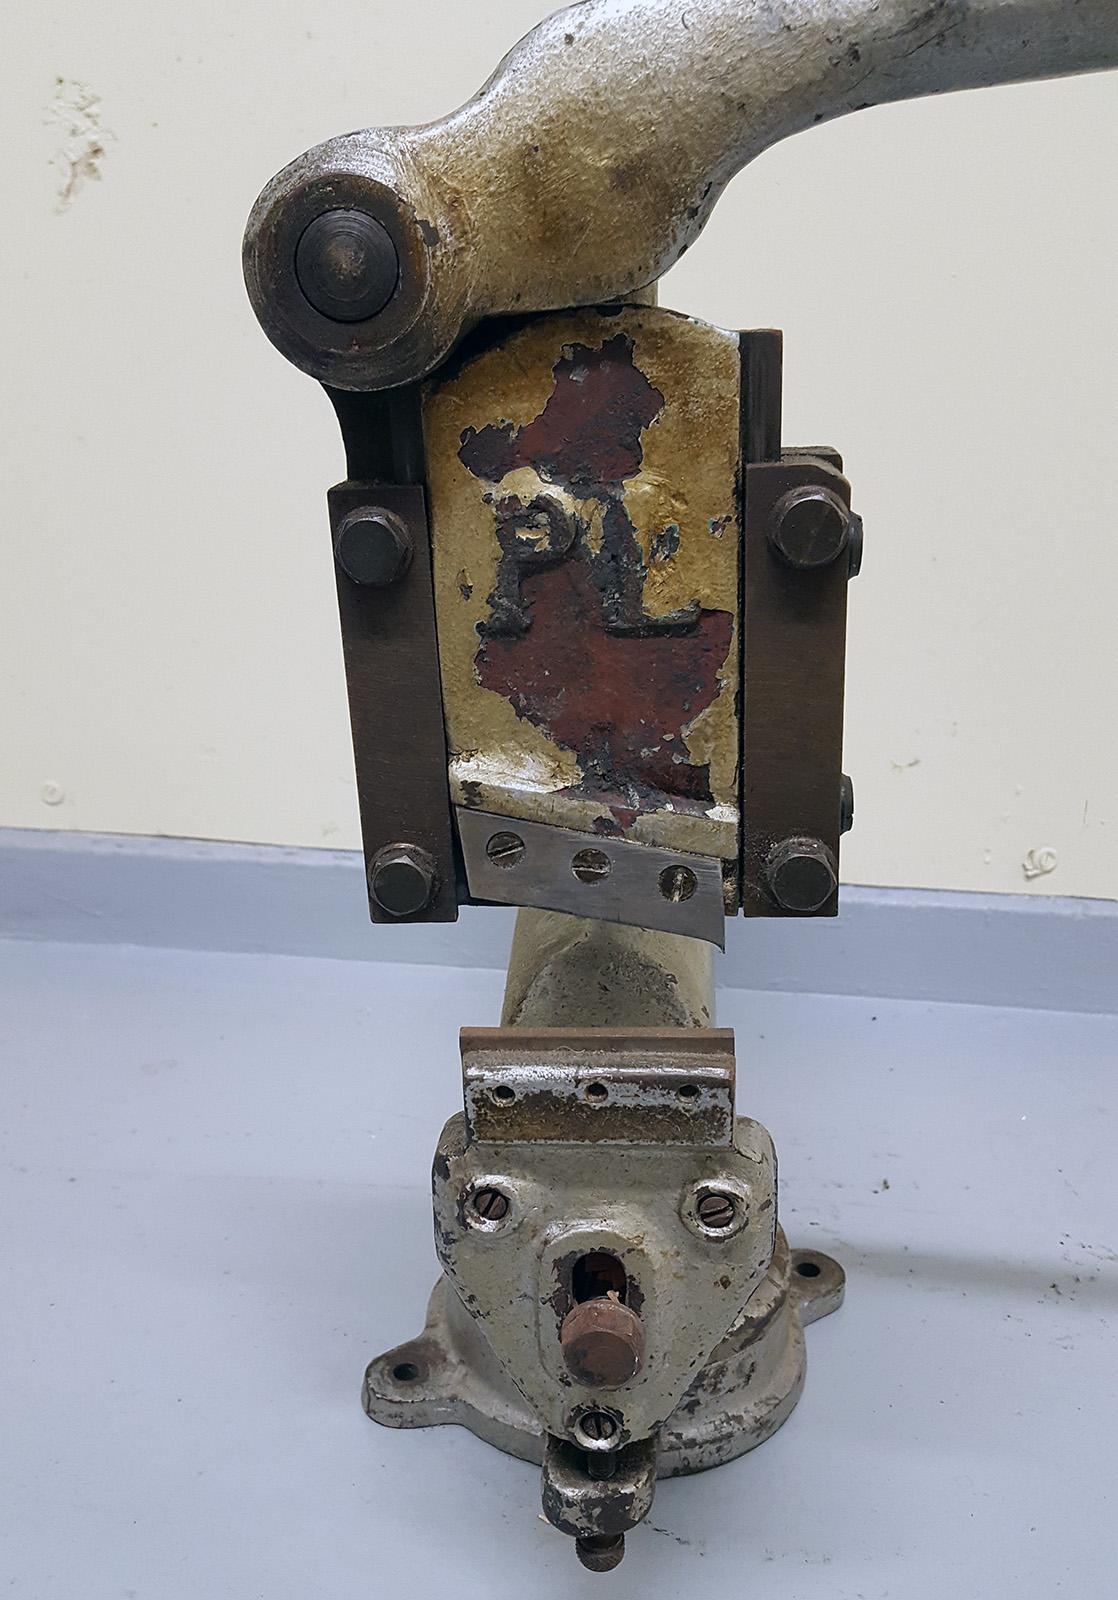
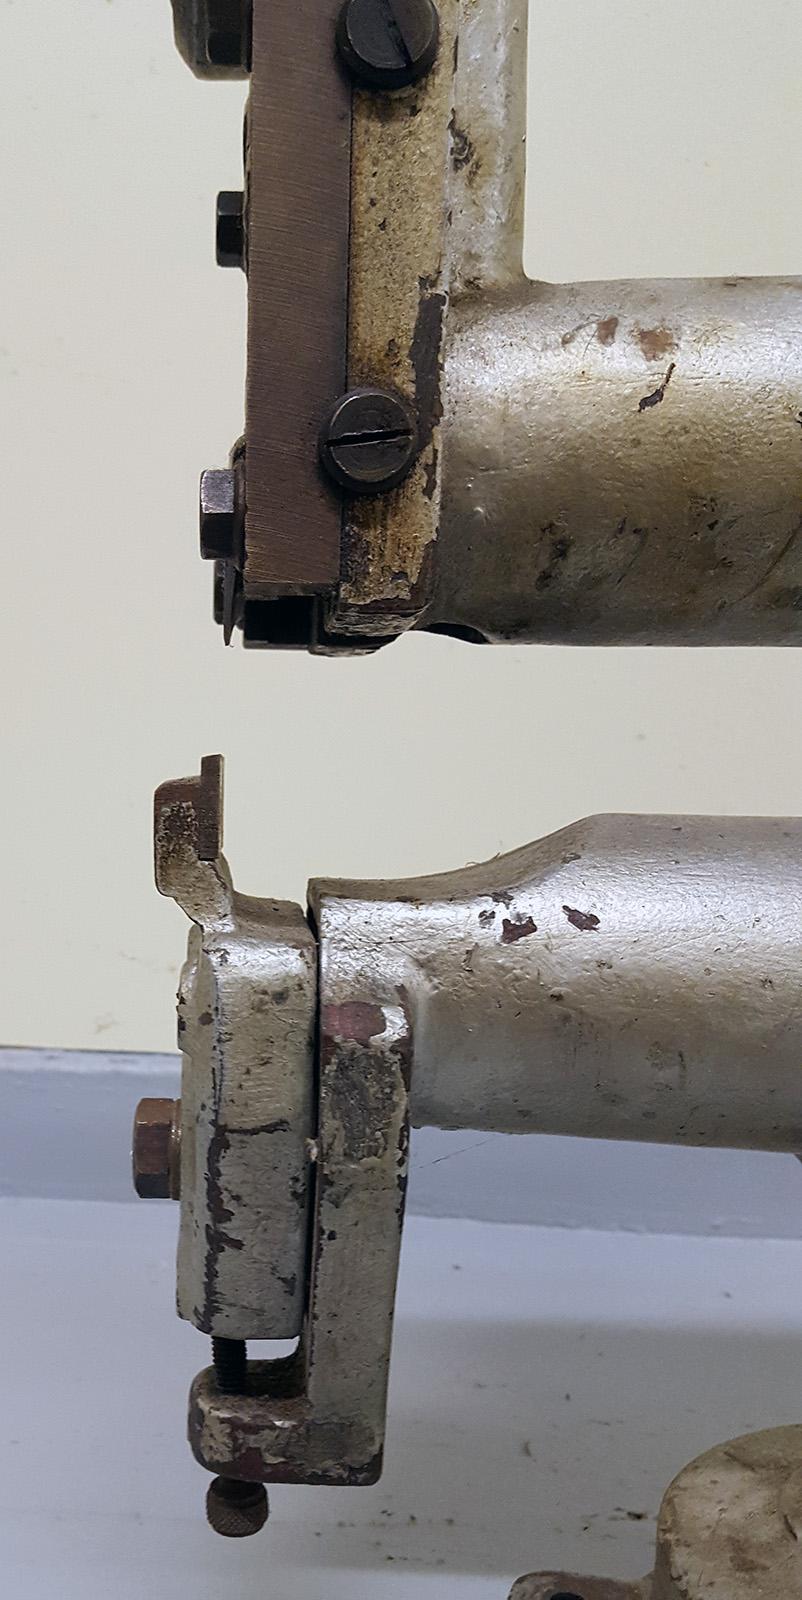
Could be related to sheet metal cutting, but don't those usually have thicker blades? The top blade is only a couple mm thick and has that pointy bend at the front. Also, 20 mm throw seems a lot if cutting 1 mm or so thick sheet metal.
-
Thank you very much for doing research. Very good points, might indeed be a sole trimmer. The large throat is throwing me off, why so much space. Seems like it would be for cutting deep into a large piece, like a saddle or something.
-
OK. It might have a very specific use then. Thank you for taking a look. I will try to google more with this information.
-
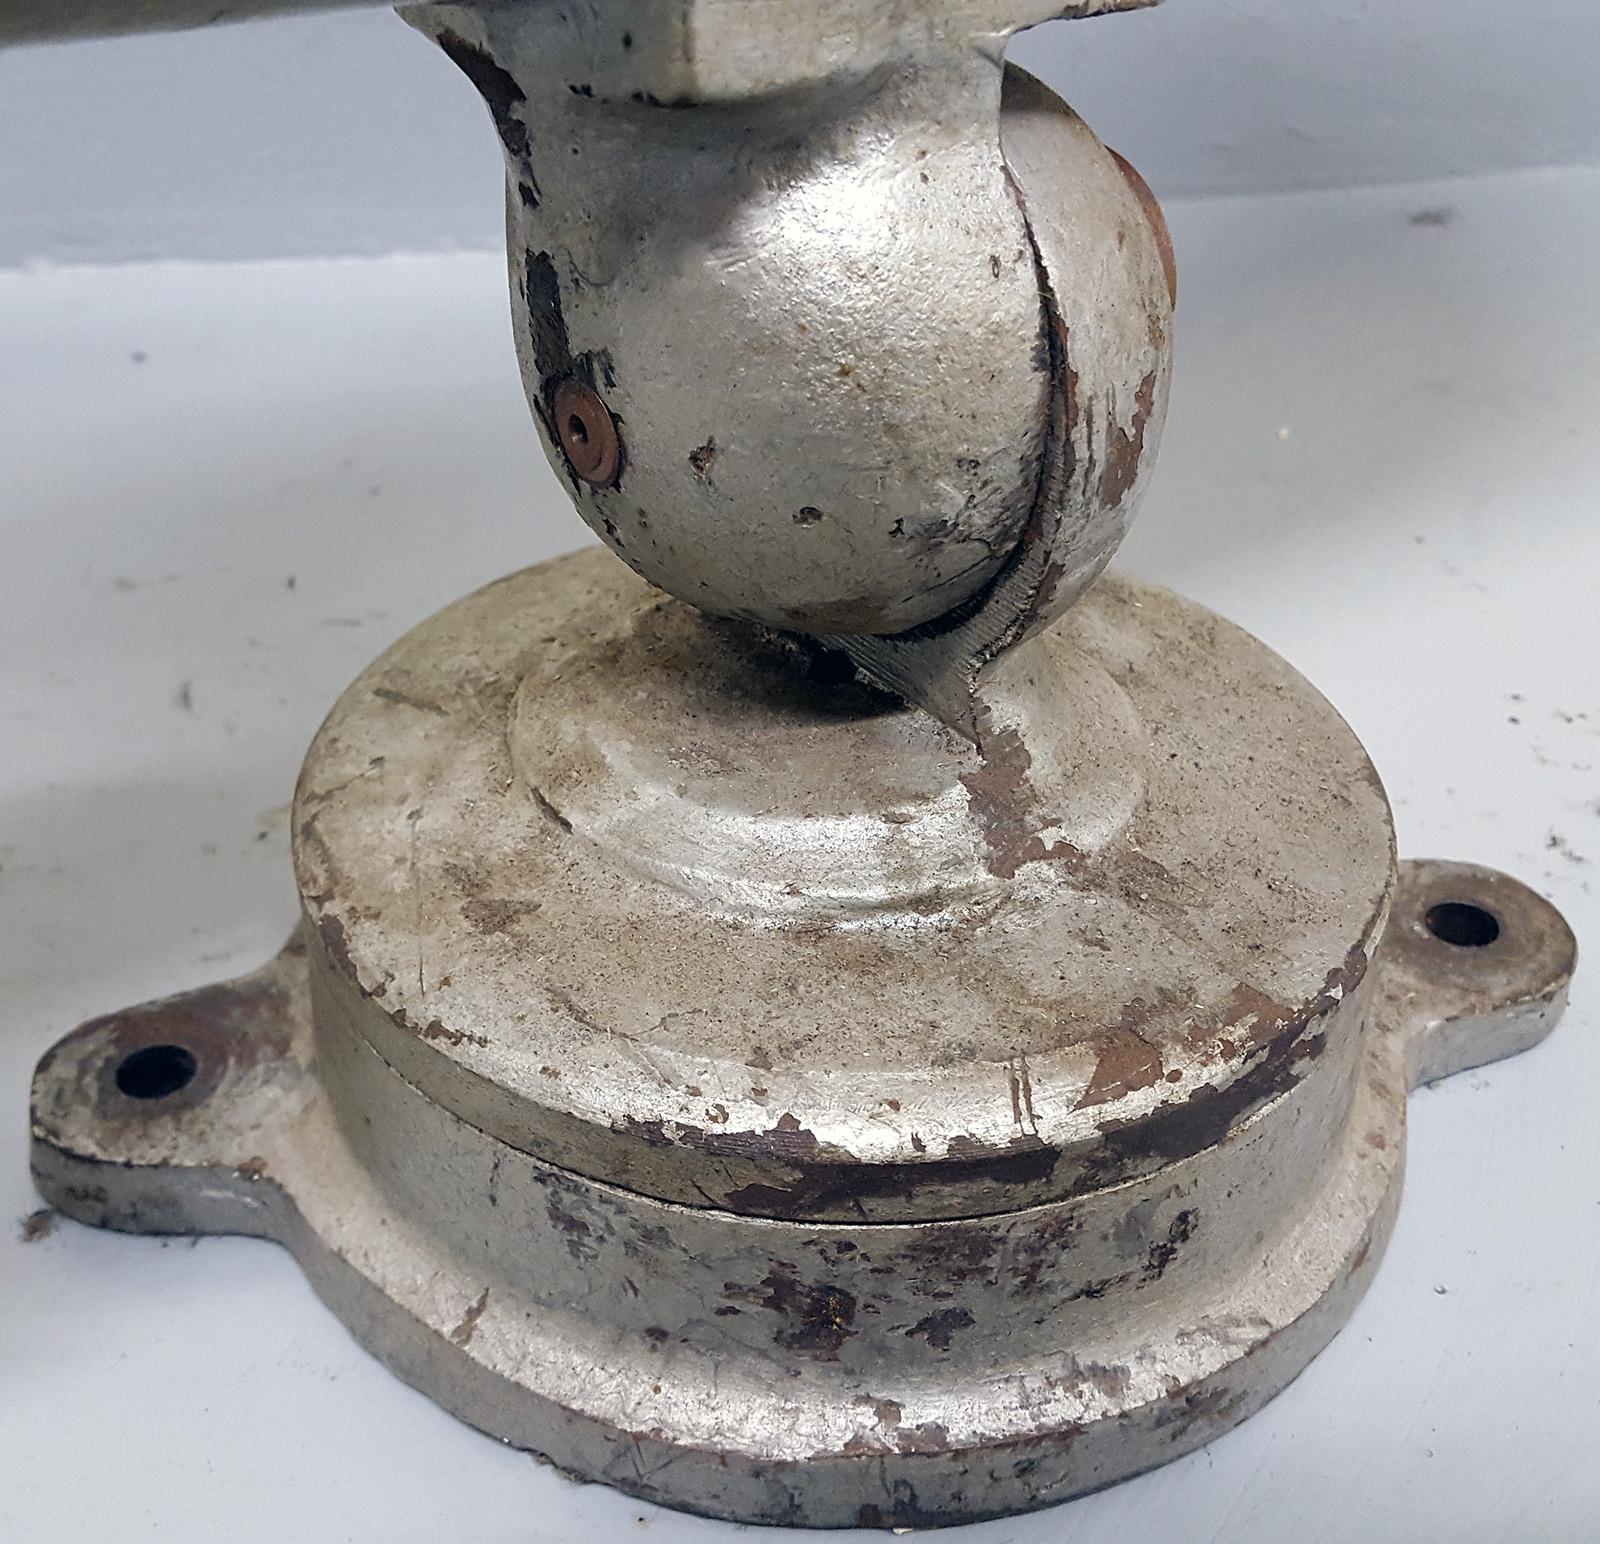
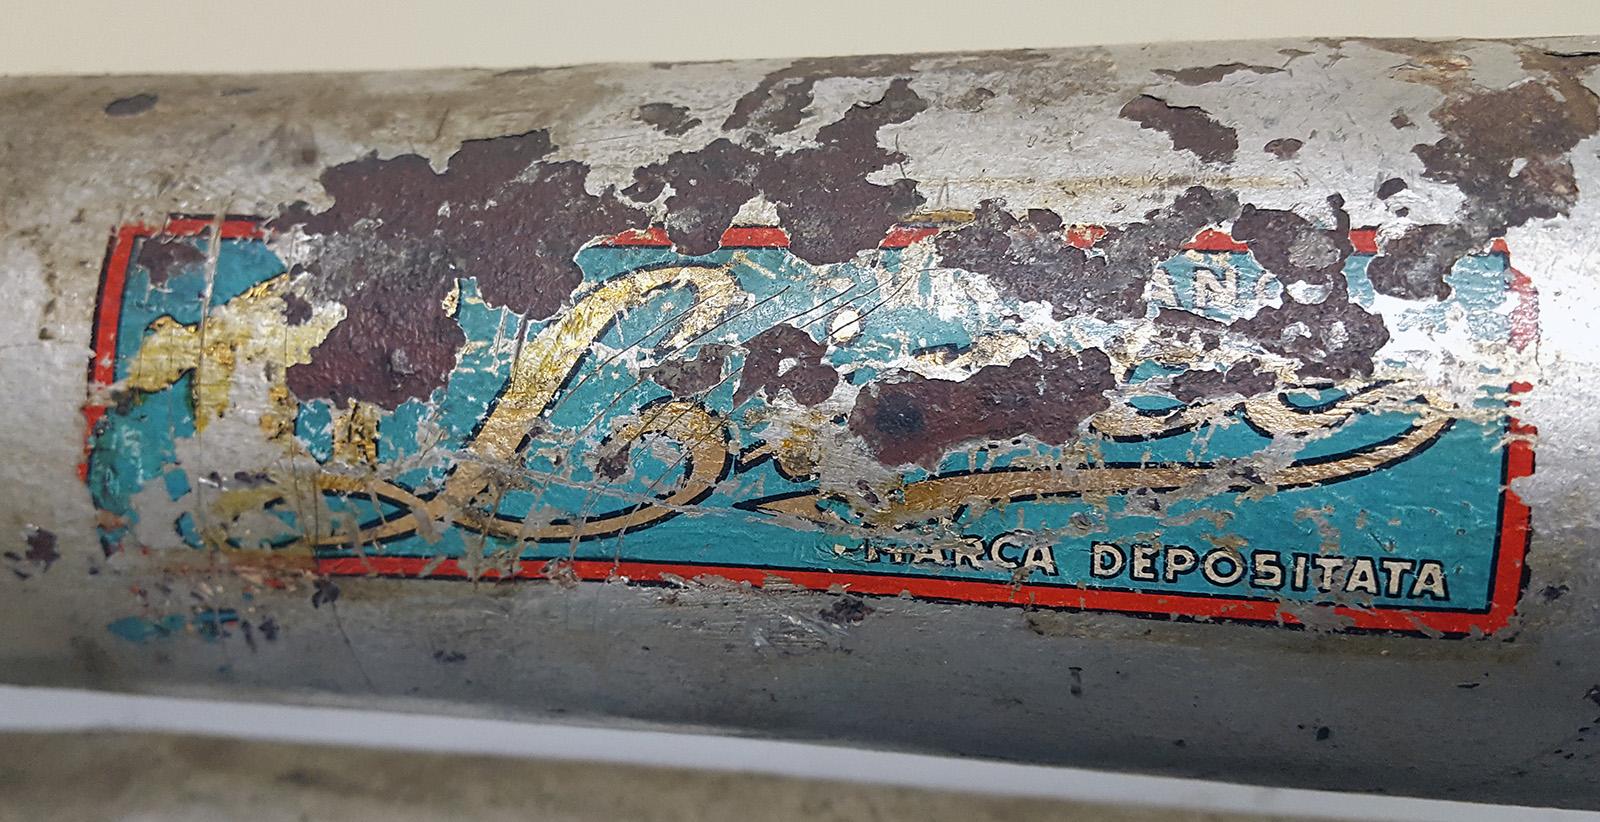
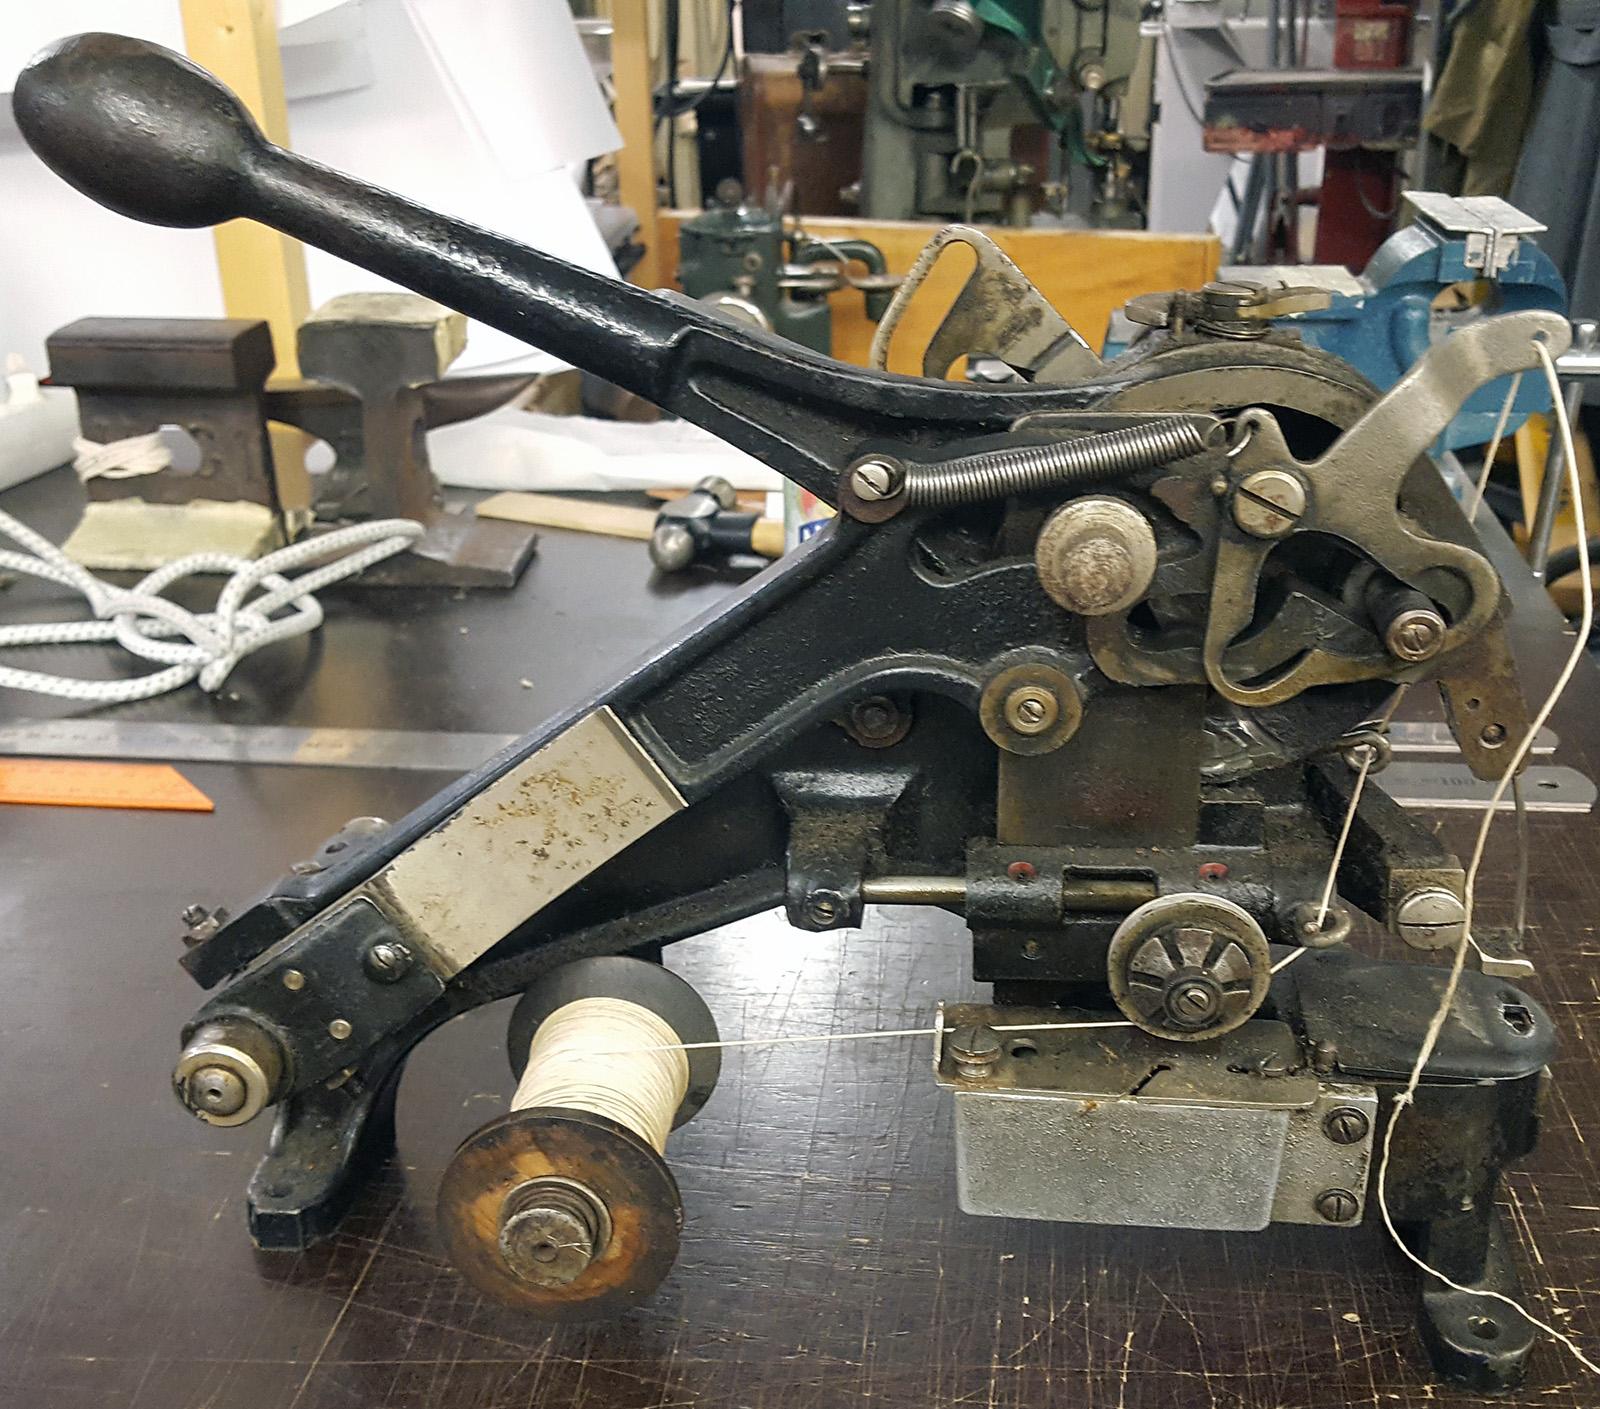
I'm looking for information on this leather cutter I bought from an old cobbler's estate sale. Is there a special use for it? It has an approximately 34 cm deep throat and 20 mm gap on the jaws. There is a long handle, so it can deliver a lot of cutting force. It has a swivel base that can rotate 360 degrees around and pivot 90 degrees forward or back. The maker logo is so worn I can't make out the name. All info appreciated. Thank you.
-
I bought this Pedersen 308 (identical to Junker & Ruh SD 28) leather stitching machine, but there is an issue: The needle hits somehow too far back, it hits the foot and the edge of the needle plate. I was thinking the needle has bent too much somehow, so I tried with 3 different needles, same issue. The plate has some damage, so it seems like the previous owner has had the same problem. I can't see a way to adjust the needle position forward. It would need to shift about 5 millimeters to not hit anything and clear the bobbin case too. Any ideas?
-
Thank you, looks like Sieck has very similar model machines. I will try to contact them.
-
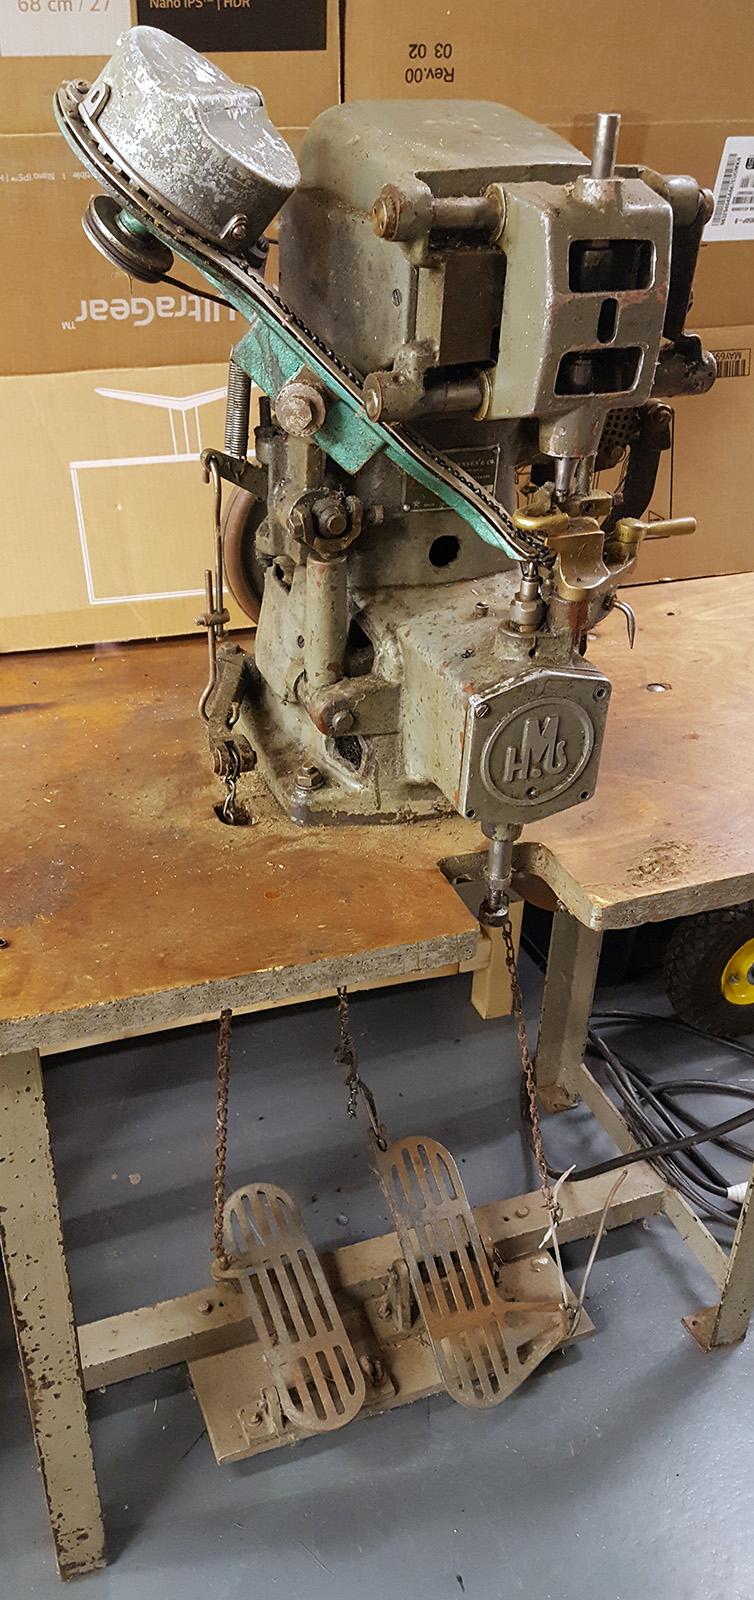
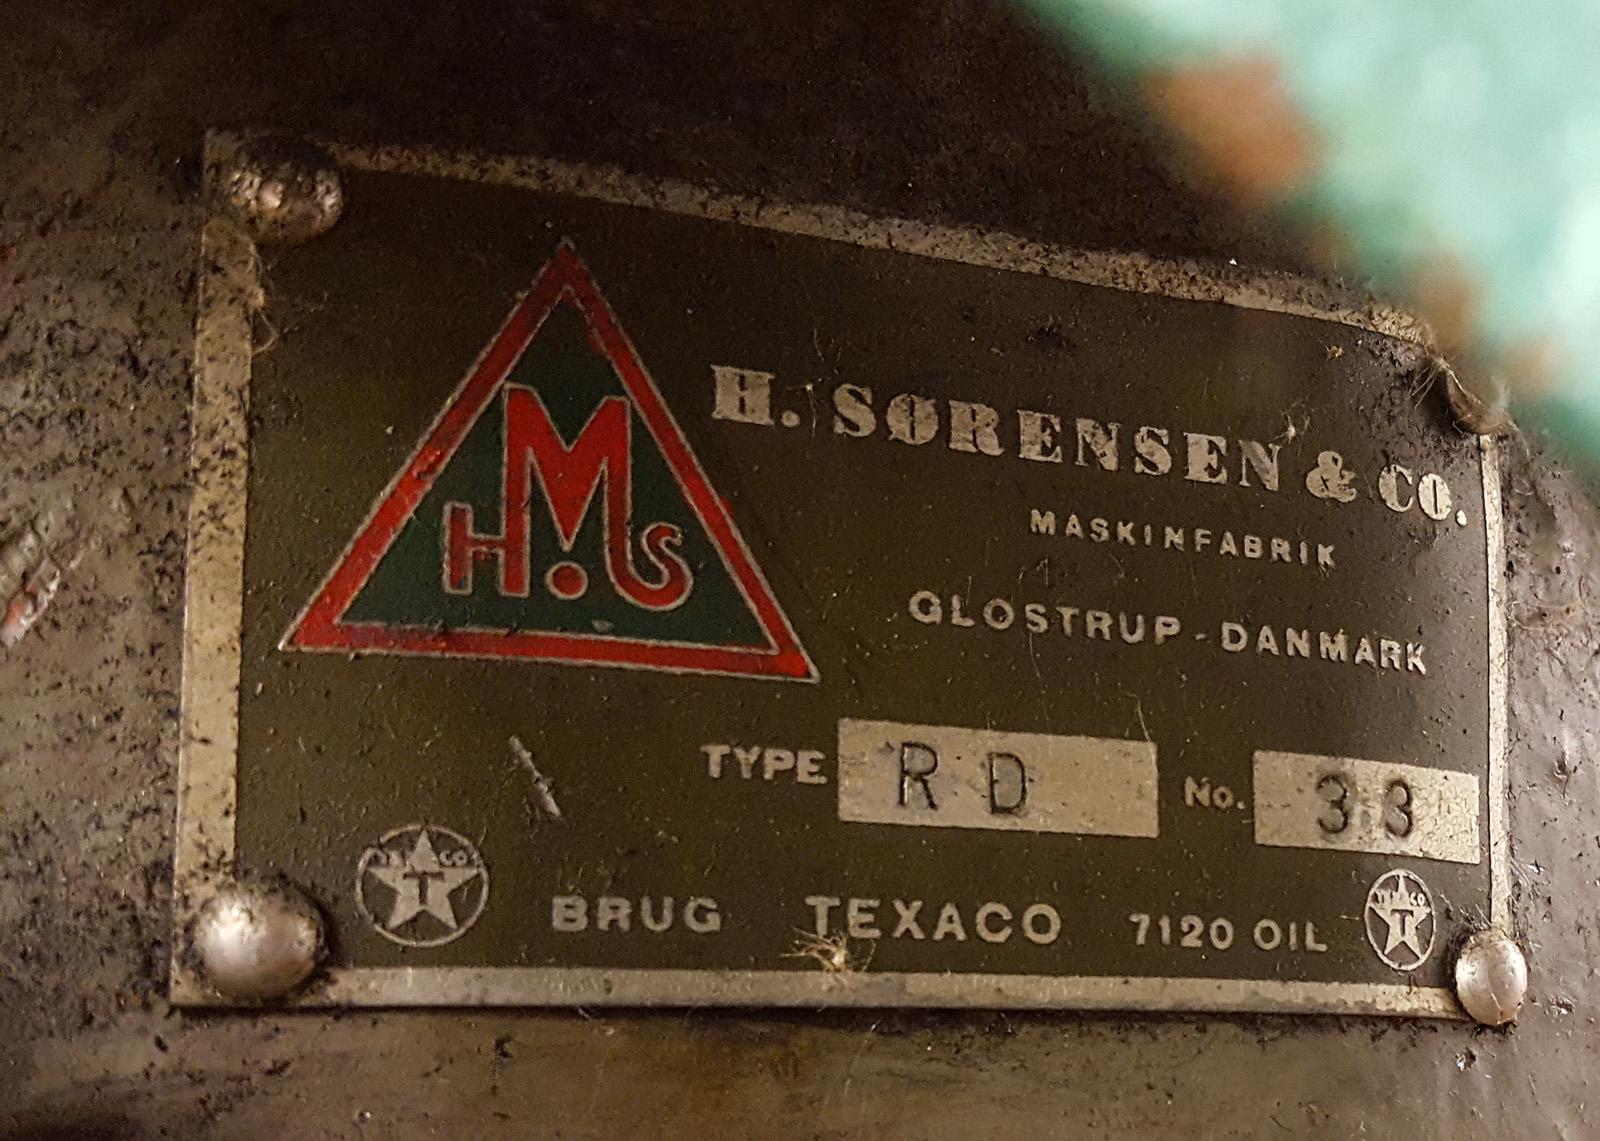
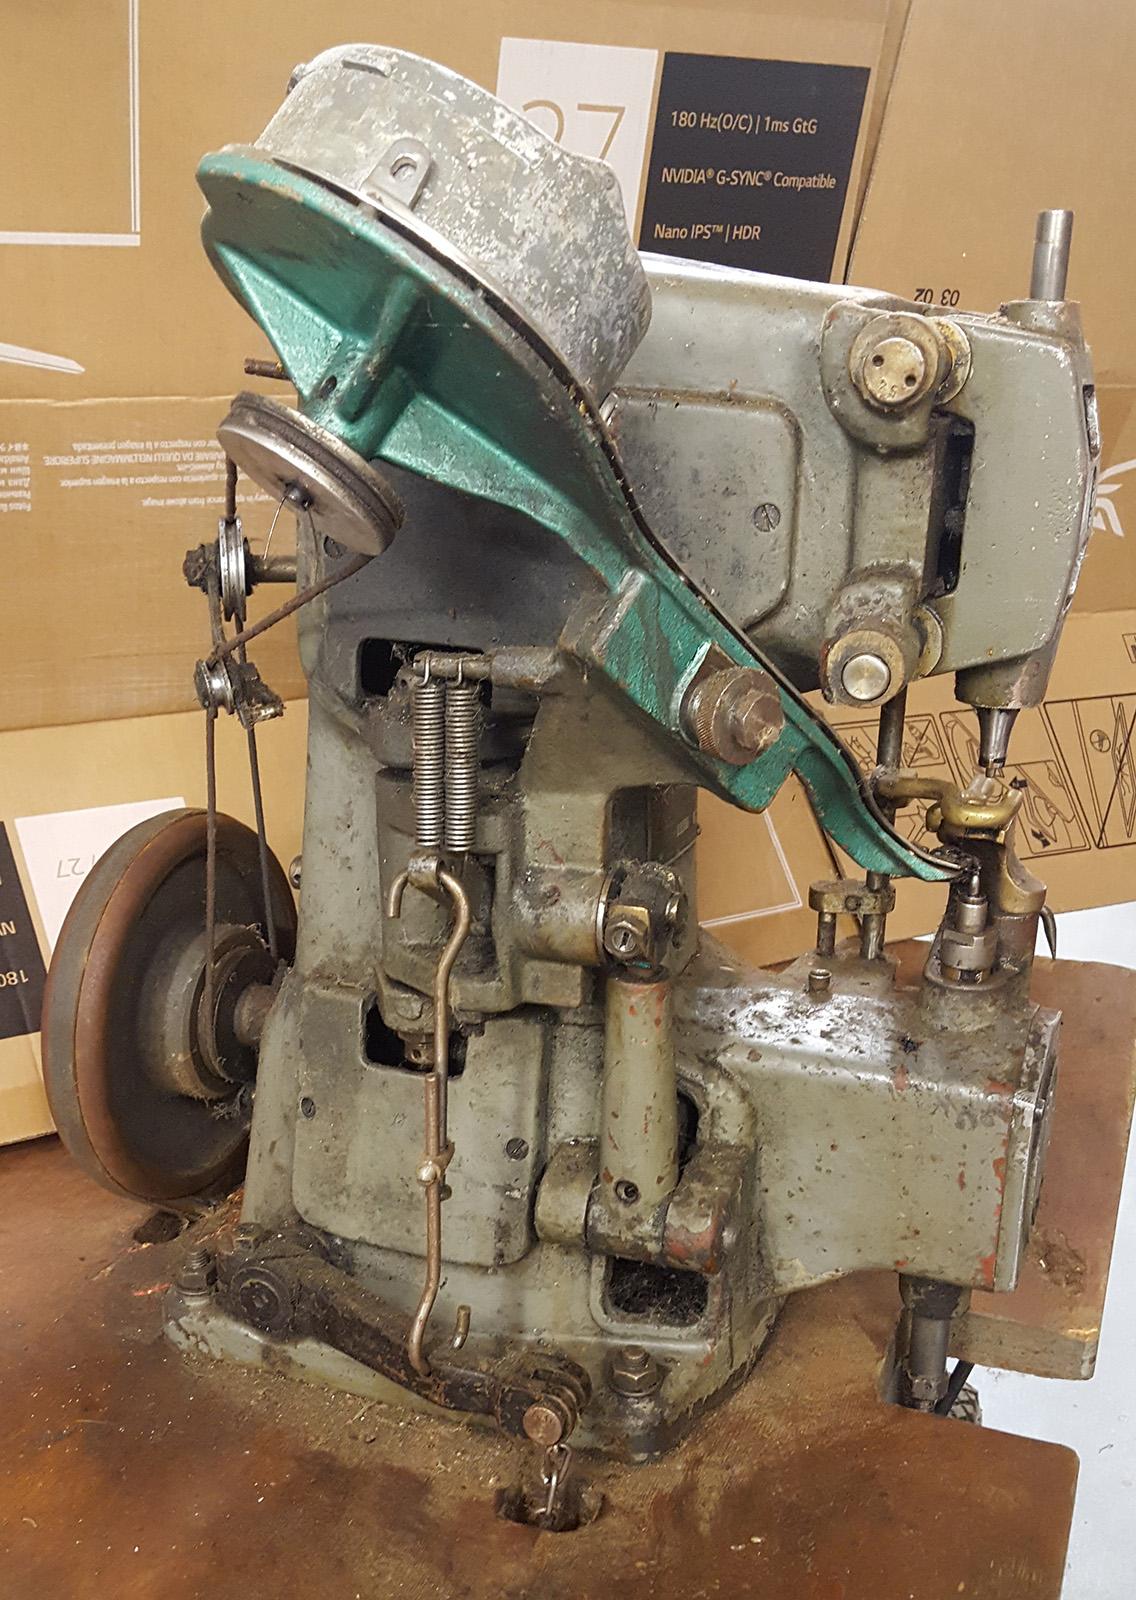
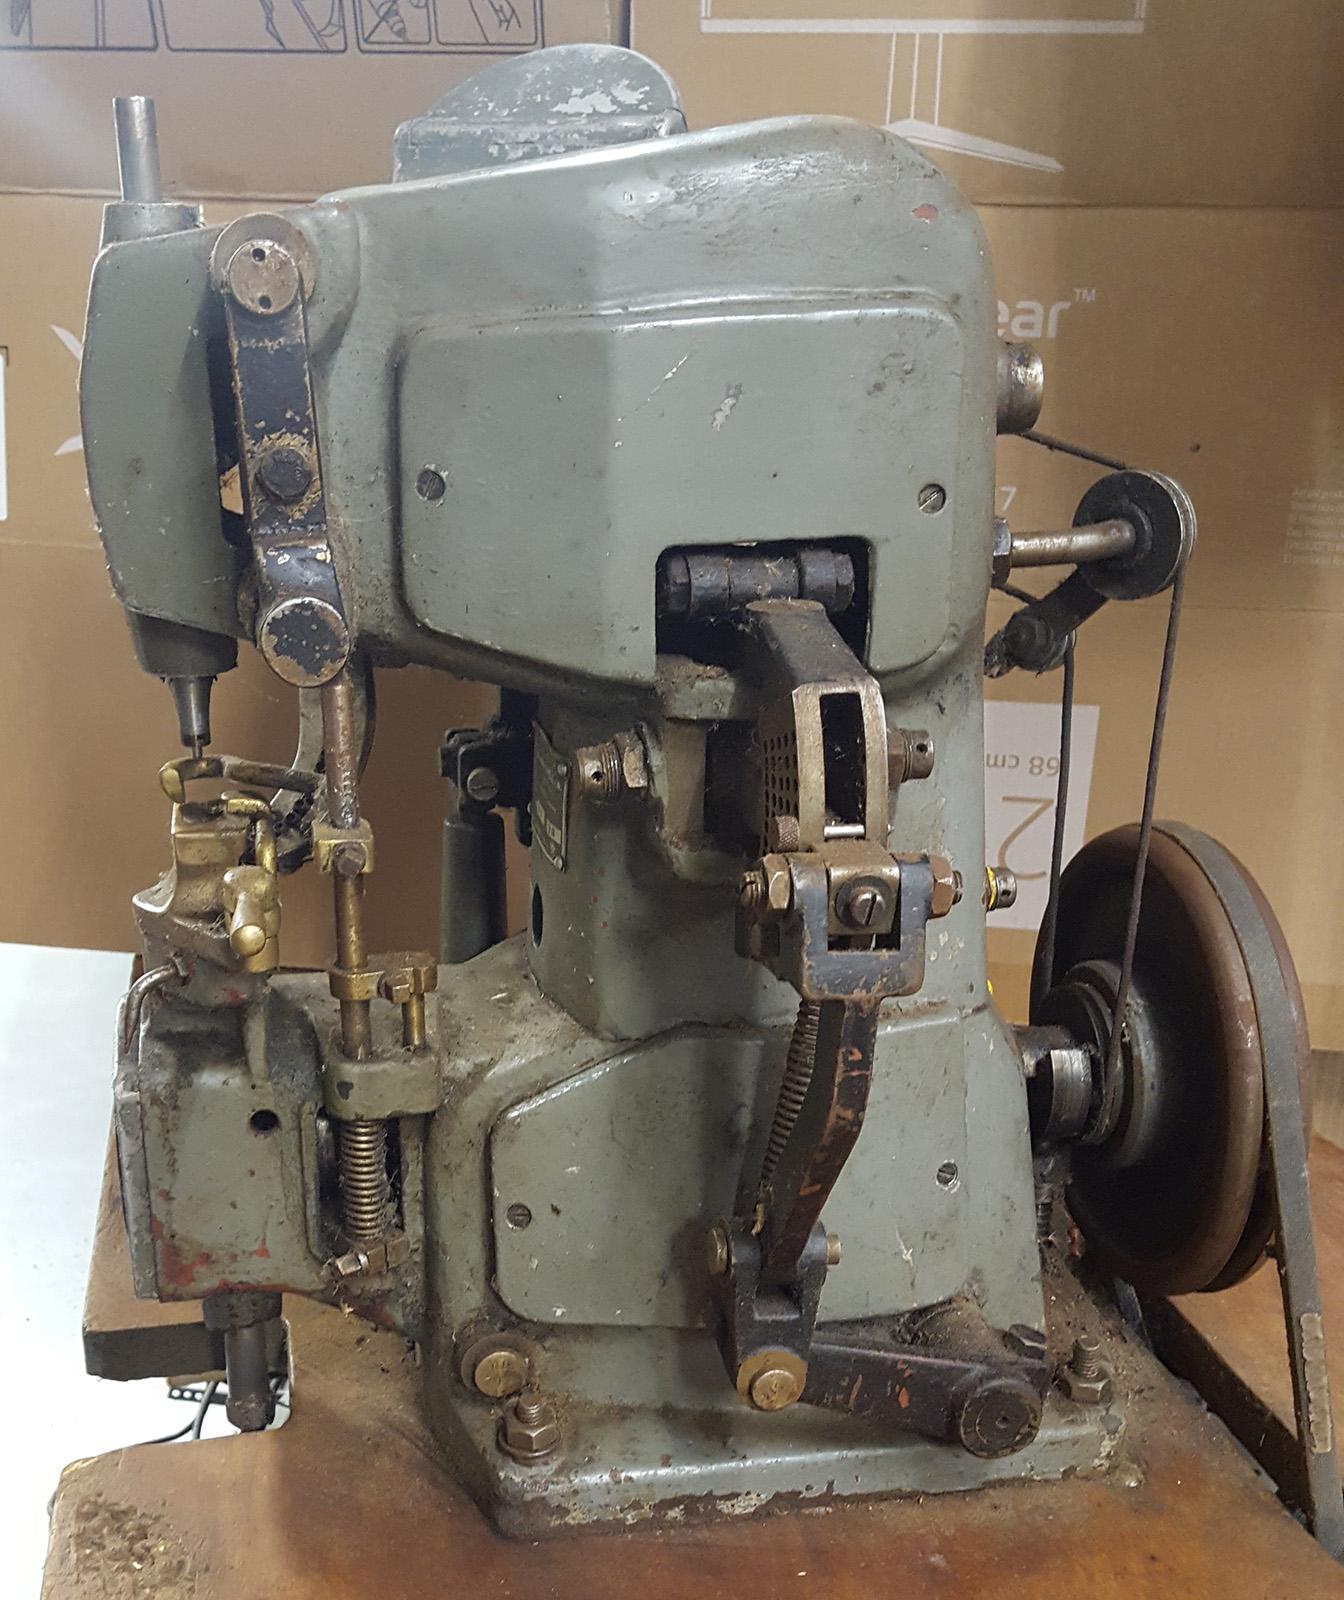
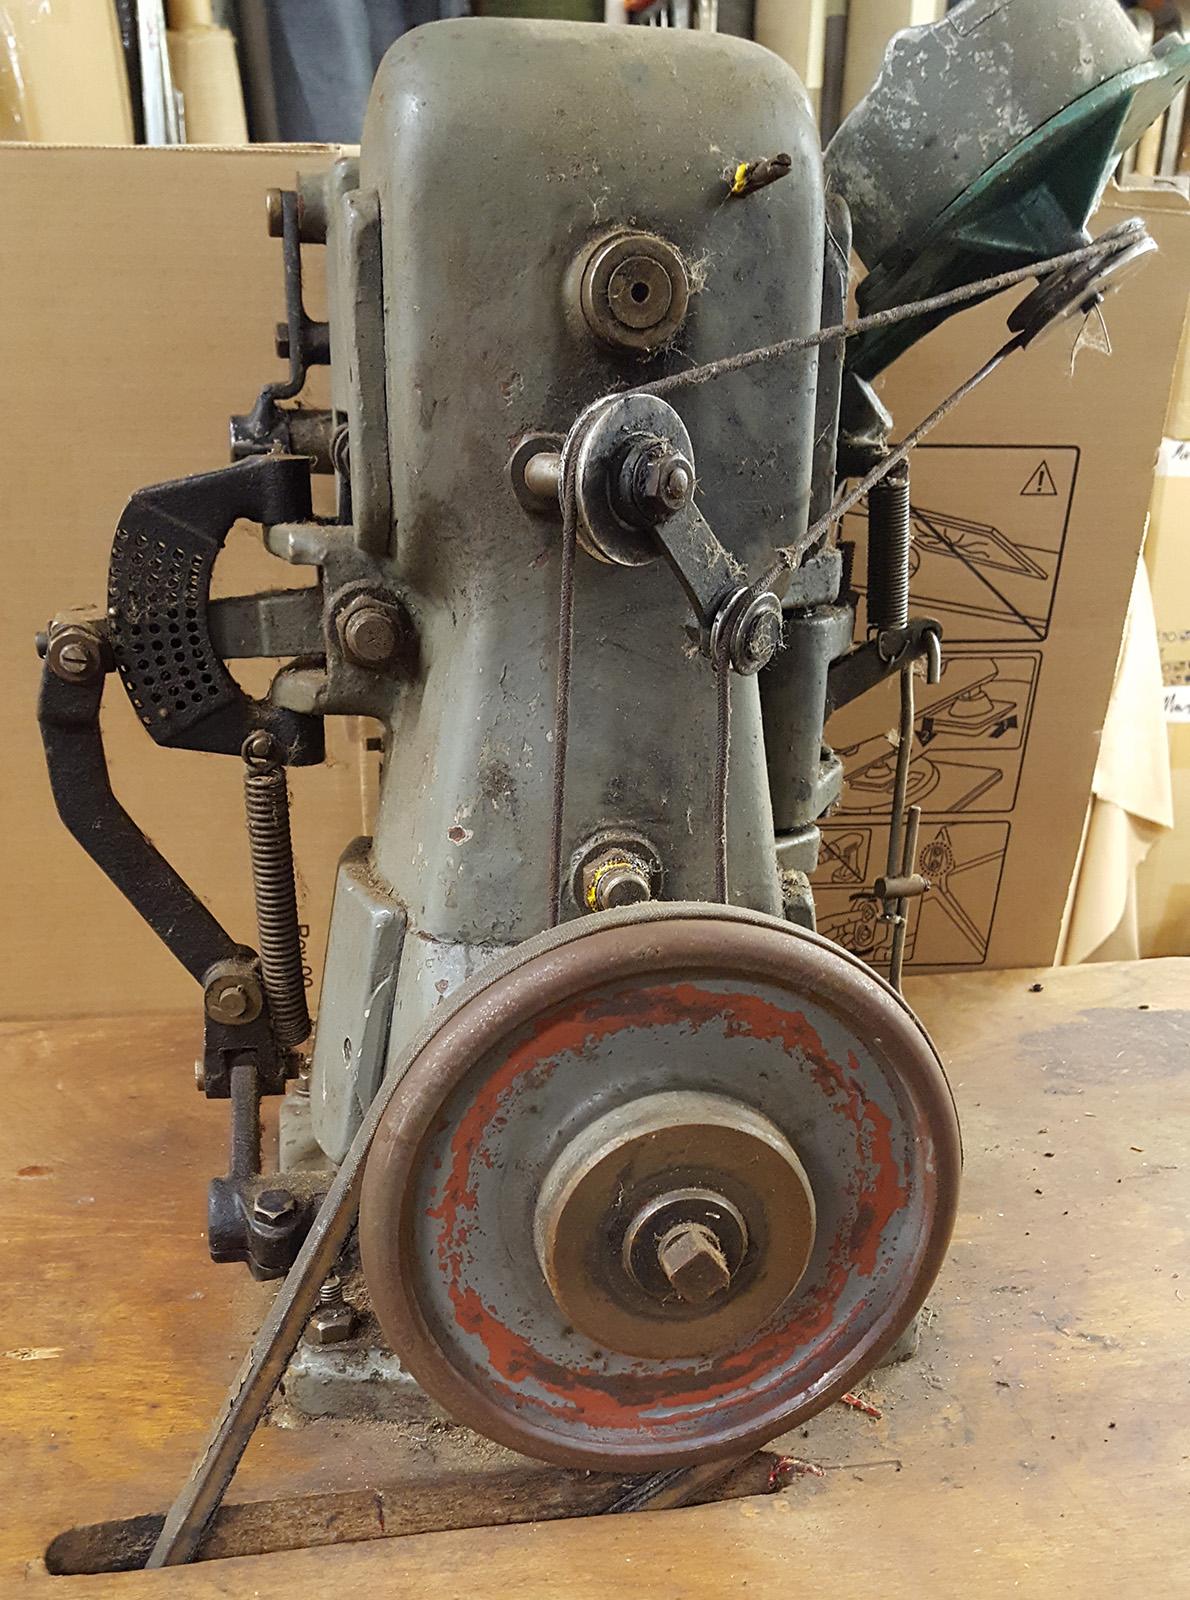
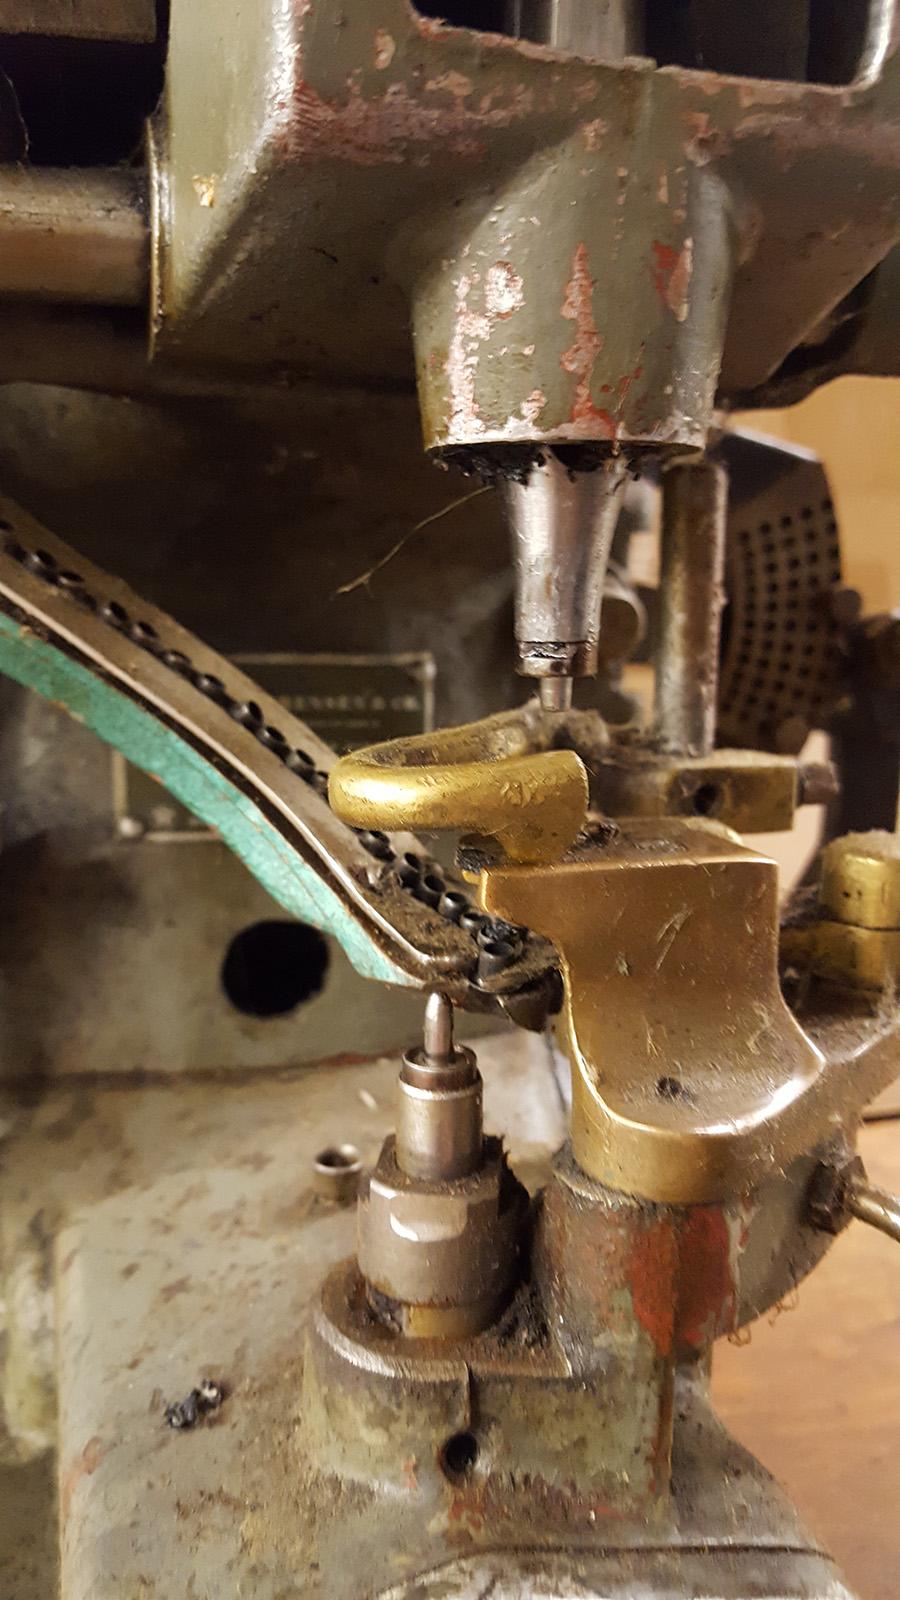
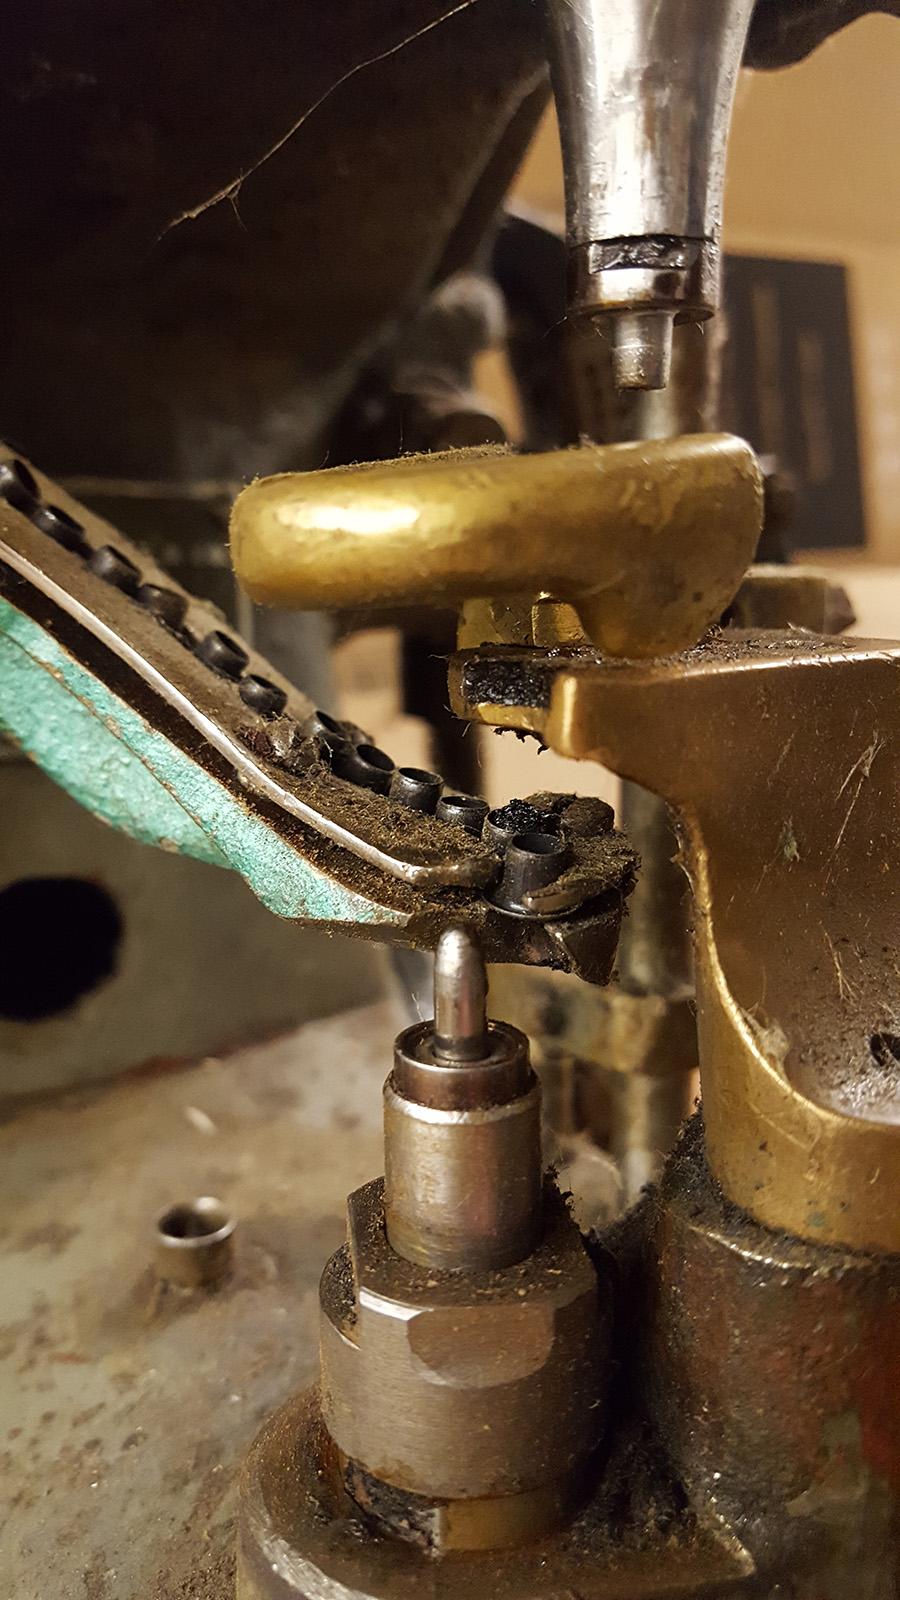
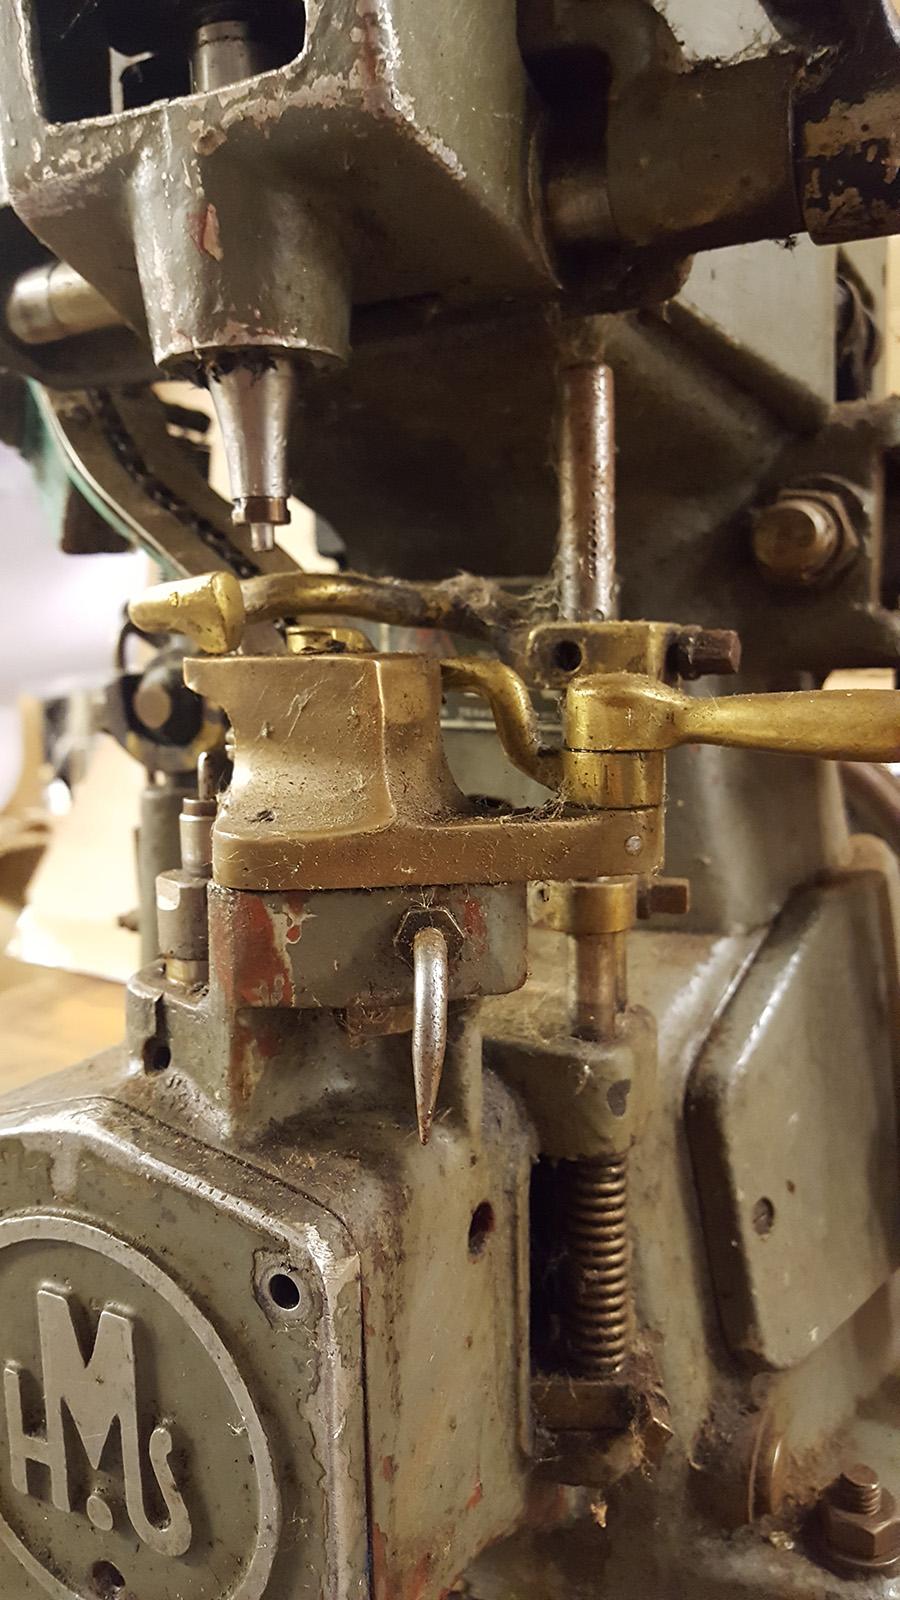
Looking for any information / manuals / parts / help for this automatic eyelet machine. Dataplate says (see photo) H. Sørensen & Co Maskinfabrik Glostrup - Danmark Type RD No. 33 Brug Texaco 7120 oil The seller had stored it for 6 years in his shed. He got it from a cobbler who bought it from from an old shoe factory liquidation sale long ago, so I have no way of asking the original users. I cleaned it up a bit after I took the photos and I got it working, but I am going to clean it more and replace the belts and maybe the motor before I put it to work. I'm probably going to at least need some punch tools for different sized eyelets. The machine came with three hoppers for different sized eyelets but only one punch. I have no idea if there is a standard for punches like these or if they are propietary for this machine. Thank you for any help.