brongle
-
Posts
8 -
Joined
-
Last visited
Content Type
Profiles
Forums
Events
Blogs
Gallery
Store
Everything posted by brongle
-
It's oiled! I just used some light silicone oil for now, but it's definitely not dry. The hook assembly is entirely out of the machine, so I'm not really sure what else it could be... I shot a brief video going over the issues, which might be a little more helpful. PXL_20260306_211936584.mp4 I suppose I could throw some lapping compound in there and spin it with a drill...
-
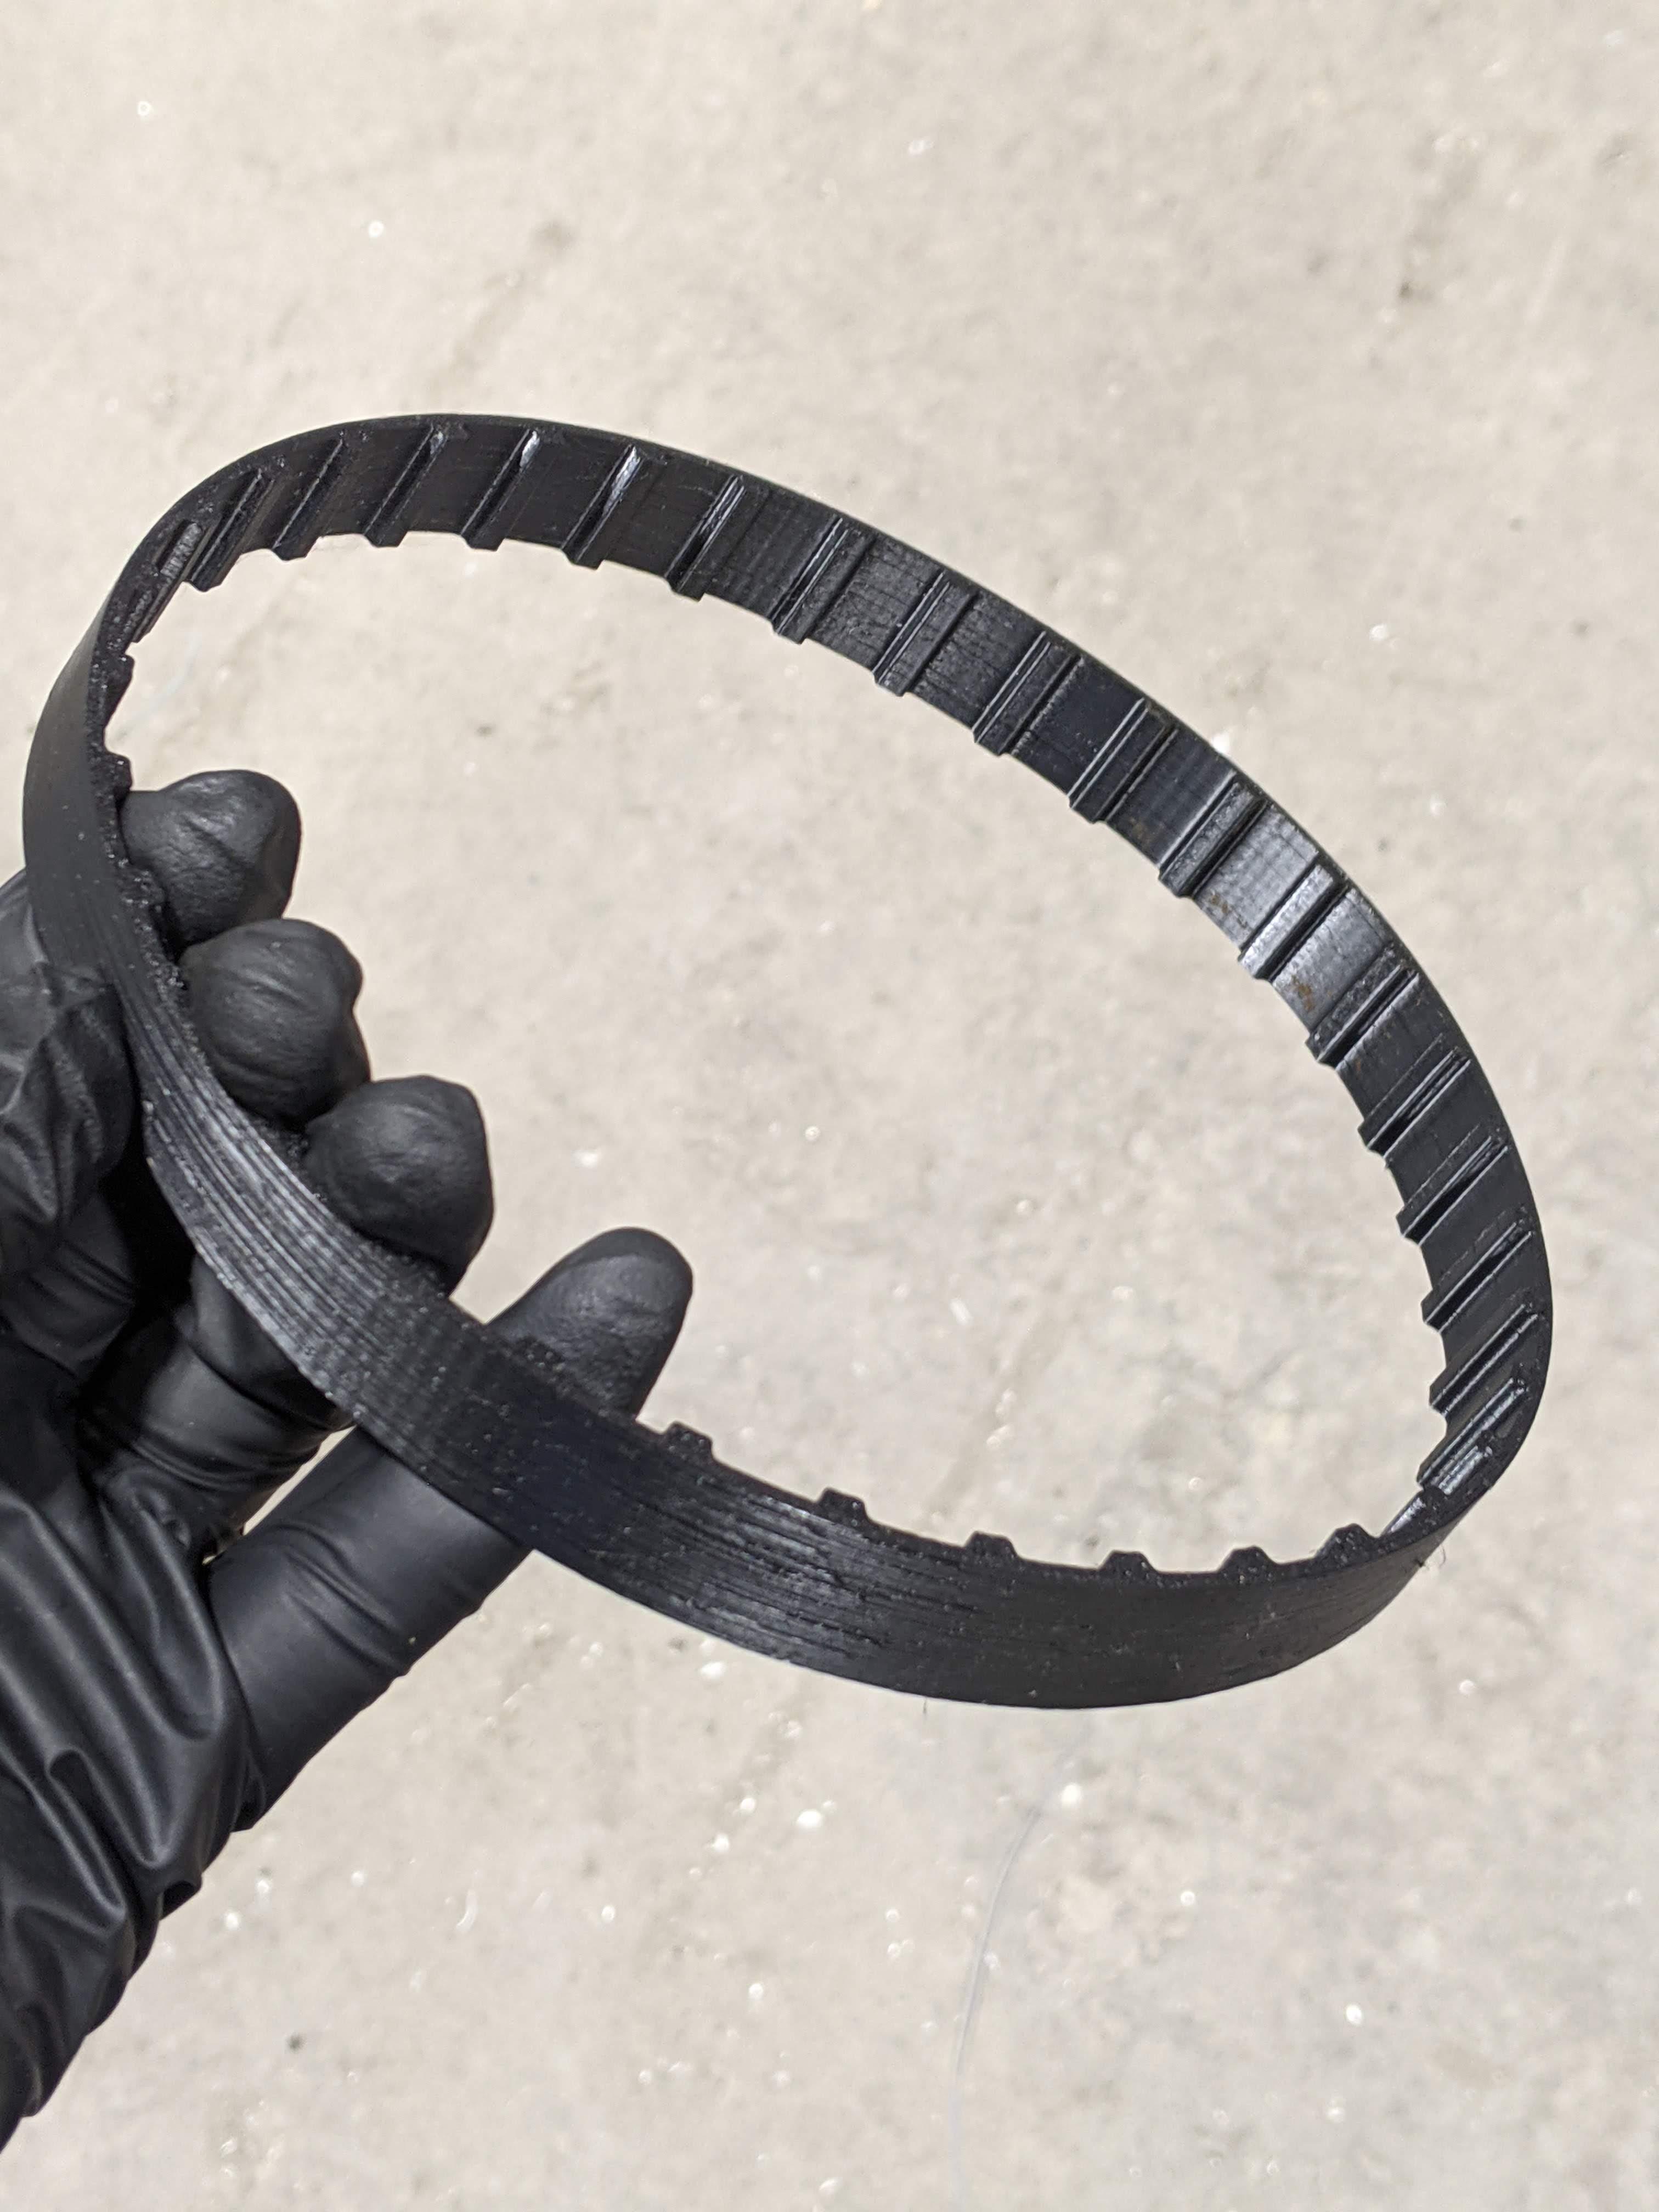
Oh that's interesting! I wonder what makes them louder? Made some progress on the timing belt today: Printed this today in Priline shore 98A TPU. I'm expecting this to work, given that a cloth belt with staples as teeth also works, but if it gives me issues, I can remove some of the clearance in there on a revised print to tighten up the engagement. I also found that the bobbin basket is intermittently binding up in the race. I ran the whole hook assembly through the ultrasonic cleaner, then each part individually after enough gunk came off to reveal the screws holding it all together. That didn't seem to fix it, and that leads me to believe that something is ever so slightly distorted, as there are no visible burrs or dings that would raise material. My intuition is to blue it up and find the contact patches, then remove the high spots until it doesn't bind anymore. Before I do that, is there an easier way to correct this in the sewing machine repair world that I'm not aware of, or is that normally when people just buy a new hook?
-
Gotcha! That makes a lot of sense.
-
Thank you! It seems like this is where all of the sewing machine nerds congregate the most, so I'm excited to join in. Based on a manual that I apparently only have on my shop PC right now, it appears they offered both two and four button setups! I don't think they were sold without those buttons, but I'm not positive about that. IIRC, Uwe shared a 272 that had the 4 button option a while back. There was also an optional stitch programmer panel that expanded the programmability of the drive, and I believe you could configure the buttons on the machine head to select different modes in the stitch programmer. The manual I have lists the pinouts of all the connectors and some signal timing diagrams for the various accessory ports, and I think it'd be pretty cool to hook up a microcontroller to duplicate that functionality, and possibly add more of my own. I wish those buttons were a little bit clickier, because the one next to the step/reverse function enables and disables auto backtack, and it's very easy to accidentally bump it without realizing. That's what I've seen in my searches too - it's a shame, really, because they're very cool drives, and they're actually much easier to convert to single phase or 110V than almost anything newer. I do have 3ph power at my shop, so I tested the machine on that before the conversion. The speed control isn't quite as stepless as a modern servo, and mine has a bit of a jump in speed at the very top end, but there are adjustments for that and I haven't played with them yet. I have yet to see an aftermarket servo system that can auto backtack, and I really like that feature. Plus, keeping the thread cutter functional would be considerably more difficult with a generic servo. The VFD I used is a 220V 1ph input unit from Hitachi that I had on the shelf, and it's quite oversized for the application with a 2.2kW max output. A 110V 1ph input/208V 3ph output VFD would've been even cleaner here, but I didn't have one on hand and was able to snag a 1kVA 110-220V transformer off eBay for about 40 bucks shipped, which I wired in reverse. No problems so far with that setup. I think that the significantly higher inrush current you see when reverse feeding a transformer is still small enough to avoid tripping breakers with a transformer that small, and I've now tried that setup in two different houses without issue. The only reason this works is because the variostop motor runs continuously, and the electronics take a single phase input that is normally tapped off the motor connections. To prevent the noisy VFD output from messing with the electronics, I pulled power for them directly from the transformer, although I suspect that the motor could act as enough of a filter to make that unnecessary. This has the funny side effect of powering up the drive before the motor starts, so some of the machine functions still operate with the motor off (namely foot lift). I have seen the motors available separately from the control boxes, and they did offer 110V and 220V single phase options, so I'd imagine the motor could be swapped if another one with the appropriate voltage came up for sale. Then it'd just be a matter of swapping out the internal transformer in the electronics for a lower voltage one, or maybe even just rewiring it for 110V, depending on the taps that are broken out on it. As far as I understand, performing a similar operation on any modern servo system ranges from challenging to essentially impossible, because the 3 phase units will throw a fit if they aren't seeing clean 3 phase power at the input. Seems really silly to me, given that these motors draw next to no power and it all gets rectified into DC before going back through an internal VFD anyway. I really don't know why they wouldn't just design one drive that can take a wider range of power options. I love the needle feed! It's so nimble and fun to sew with, and it's come in quite handy in situations where a drop feed machine wouldn't be able to keep fabric from slipping, particularly around curves. That's a double-edged sword though if you're making garments that need certain seams eased together, like when setting sleeves. I think I'll probably end up grabbing a cheap drop feed machine one of these days for that purpose.
-
Wow, this is great info, thanks everyone! Good to know! Looks like my feed dog has the same features as the linked one, so it should able to drive a swinging attachment plate. That slot in the side is quite interesting. I don't see it anywhere in the parts diagram or the machine manual, and the closer I look at this figure, the more I realize just how many artistic liberties were taken in the manual 😅 Any idea what the slot engages with, if anything? I couldn't feel much in there with the screwdriver, and the below is definitely a bit simplified. One thought that comes to mind is that it might act as a sort of flexure brake, expanding slightly against the inside of the driveshaft when you tighten it to keep it from shaking loose and reducing the stitch length as you sew. Those dimensions should work just fine for me, thanks! I can't imagine they were holding these to incredibly tight tolerances some 70-80 years ago, anyway. I'm not too concerned with getting the stitch length numbers dialed in just right (although it might be fun to add them later based on empirical measurements), but I can definitely get the taper plenty close enough to match the original range from what you provided. Fortunately, the hook is in good shape! But I'll bookmark that for later, just in case. All of this is really valuable info, thanks so much for sharing! I've come across a bunch of your posts in my time lurking here when I was first learning about industrial machines last year, and they were a tremendous help in developing a mental model of how these machines work. That's fascinating, I never would've expected that axial play in a hook would be tolerable, or that the needle distance would be fixed. My DA class 272 constrains the bobbin case pretty tightly, but the hook point is also attached to the outer part of the assembly. Haven't played with my Chandsew 100rb enough to know offhand if it's similar in that regard. Stuffing the hook makes so much sense! I had no idea you could do that with the needle guard (or really what purpose the needle guard served in the first place). Re: your (double) note there - do all rotary hooks rotate twice per stitch cycle? All three of my machines definitely do. Didn't realize you could end up grabbing the thread twice, but that makes sense. I'm wondering the same thing. I'd imagine it depends quite a lot on the specific materials you're working with, but I have to imagine that if it can feed the binding tape without causing problems, it should be able to feed normal fabric too... I'll definitely play around with that once I get this machine running!
-
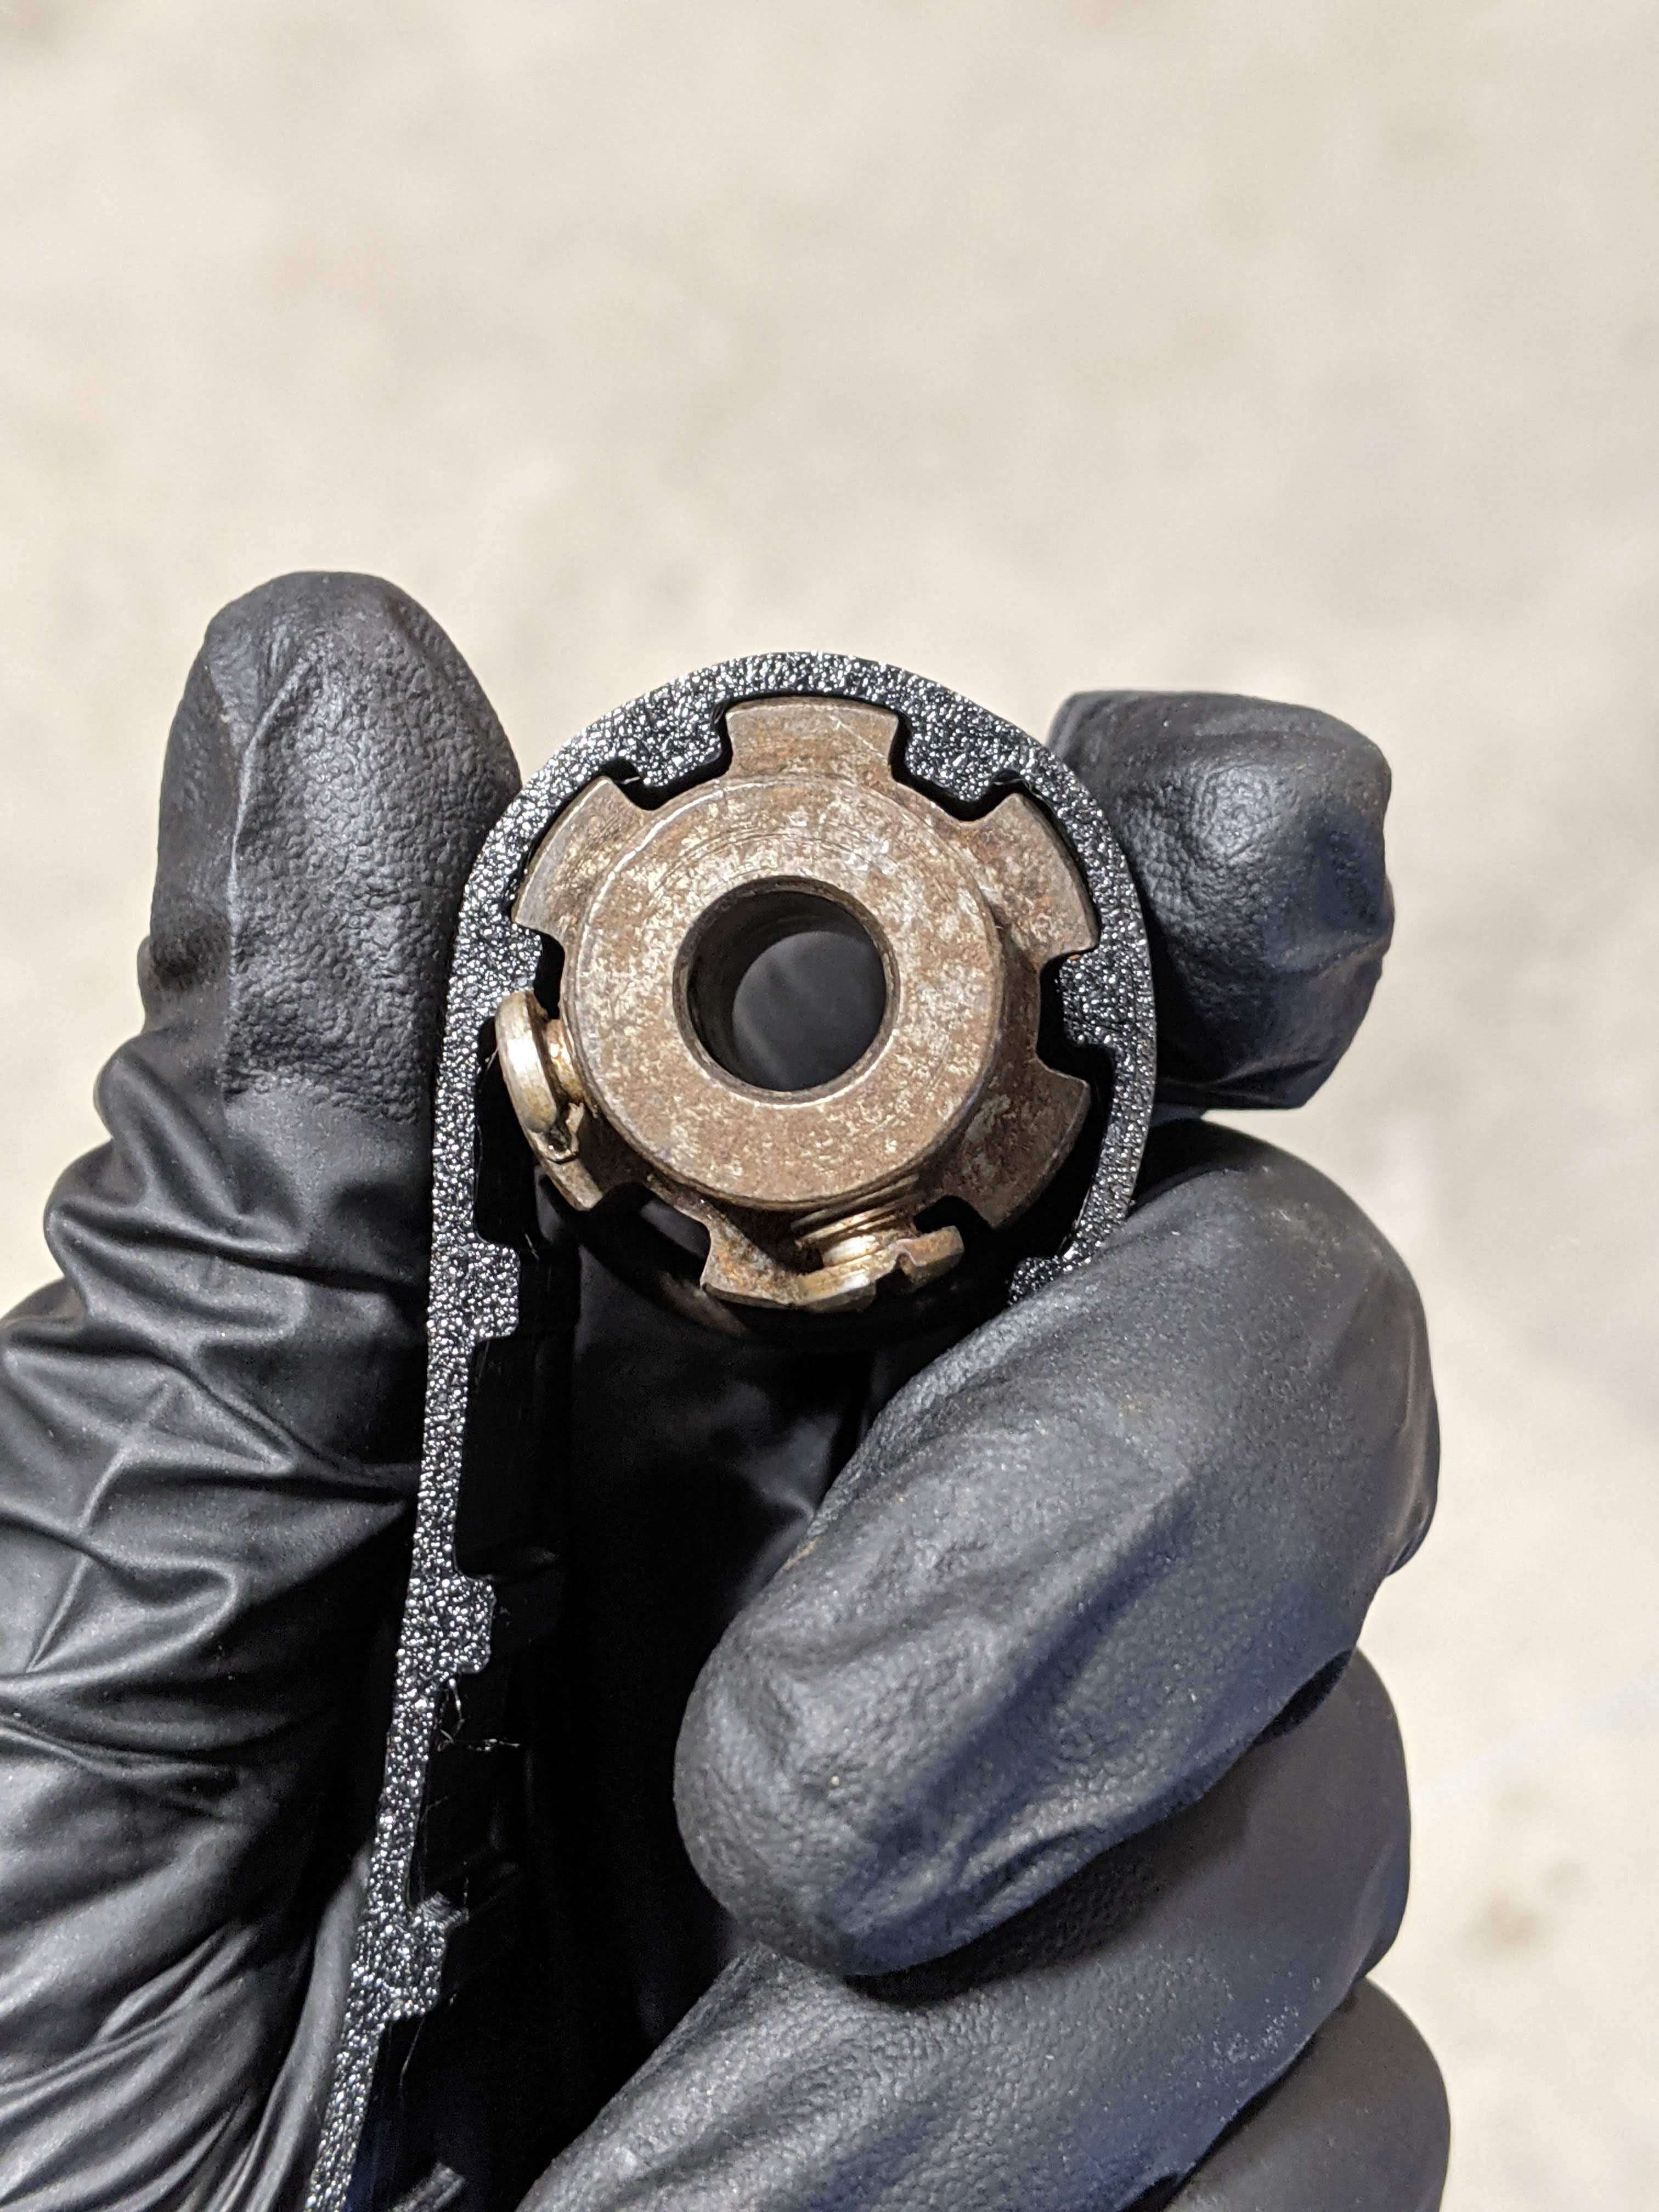
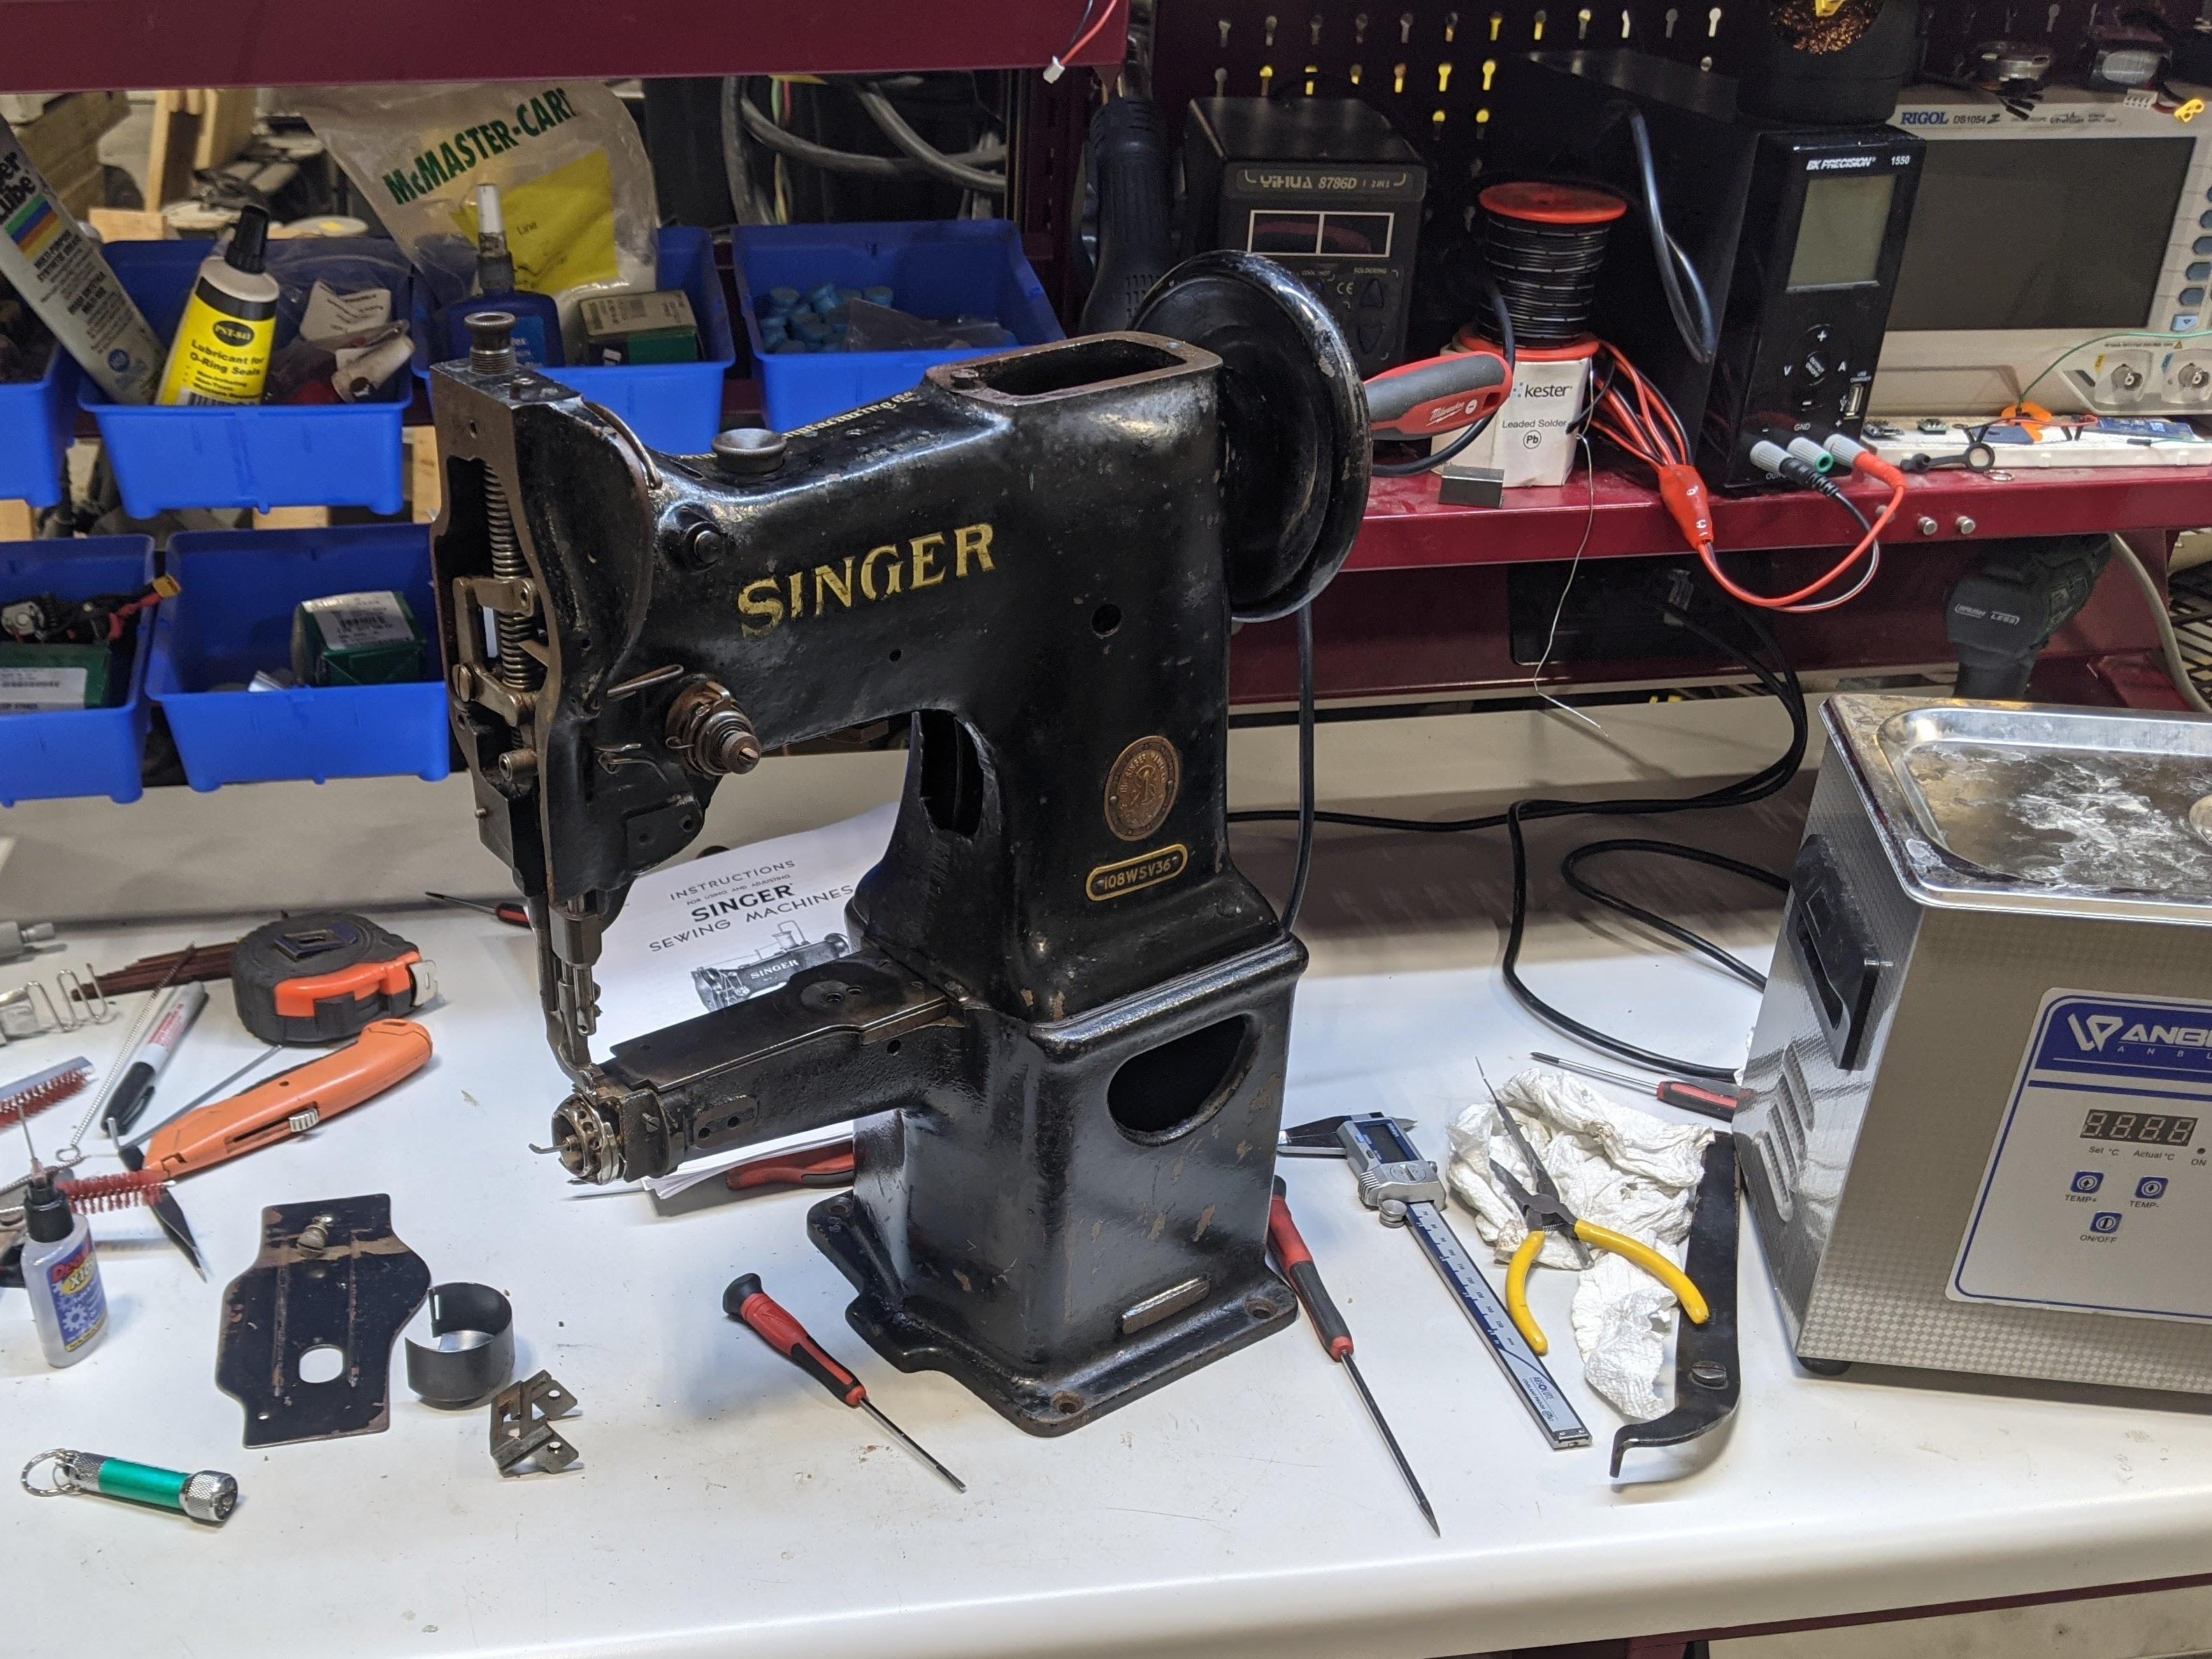
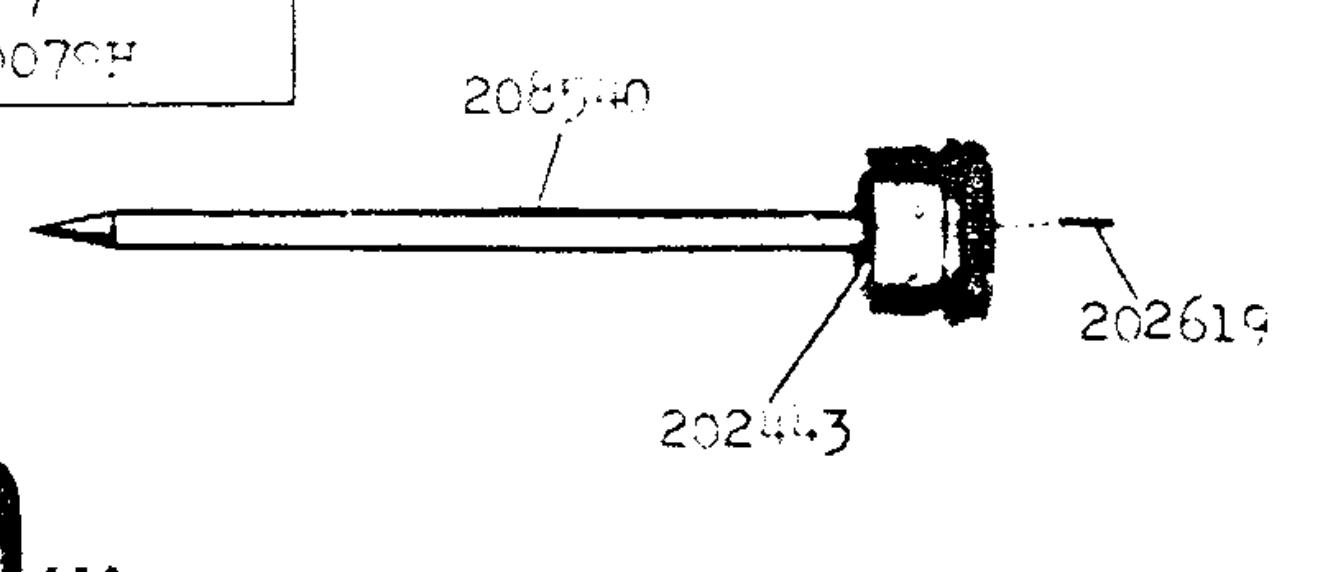
So, I impulse bought this machine the other day. Saw it pop up on facebook, the guy happened to be passing through my area the next day, and the price/timing was just too good to pass up - hell, it's the first time I've had a machine dropped off at my shop, really can't beat that. I've been looking for a cheap cylinder arm machine for a while now and learned that those words don't usually go together, so when this one came up for a few hundred bucks, I jumped on it. I'm planning on using this as a binding machine for my bag projects. It's a 108WSV36, apparently came out of a shoe factory in MA quite a while ago. I've found the limited info that's out there on this model - seems one other forum member had one with this specific subclass, but it's very similar to the 108W20, and that's the manual/parts list I've been referencing so far. I just started getting into it yesterday, and so far, I've identified the two primary functional parts that are missing: the cloth timing belt and the feed regulating spindle. Found the specs for the timing belt in another thread and was able to verify them against the pulleys in my machine, so I'm planning on 3D printing a replacement in TPU today, if not only to get things moving. I'm hoping a printed replacement can hold up for actual use too, as the cloth belts seem to be increasingly rare. I'll share that file here once I test it. If that doesn't hold up in the way I like, I'll probably end up making a jig to locate and crimp the staples for DIY belts that match the original style. As for the feed regulating spindle, it seems like I'm going to need to get a little more creative. I've got a screwdriver jammed in there where it'd normally sit, and was able to verify that the feed mechanism works! Surprisingly, despite this machine's condition and the fact that it hasn't run in quite some number of years, I haven't found much that's frozen up with rust or varnish. If anyone here with a 108 class machine would be so kind as to share pictures of their feed regulating spindle with a scale reference in the photo (a ruler is fine), that'd help me out tremendously. Seems like it's a 1/4" OD, based on the hole it goes into, but I'd like some reference for OAL and point length so I can reproduce it. I'd love to see a pic of the inside of the threaded cap as well if possible. Below is the subassembly in question. This particular machine seems to have originally been set up with a stationary binder of some kind, and there's no way to connect a synchronized binder to the drive slot in the feed dog plate through the cover that's on there. This means I'll also need to either make a new cover plate with those mounting features or modify the existing one. I'm leaning towards a reproduction there in order to preserve the parts it came with. I've got a cheapo generic single fold right angle binder that I'm going to attempt to set up as a synchronized binder. I'd love to see pics of any binding attachments that other folks have for their 108 class machines, particularly showing the mounting and drive features. I'll keep updating this thread as I get deeper into the machine, and I'm happy to share any CAD that I come up with in the process if other folks are interested in printing or machining replacement parts for their machines. I'm trying to make as much as I can here, because that's the part of this kind of work that I enjoy the most and it's pretty clear that the fairly uncommon parts I'm missing will rapidly add up to more than the machine itself cost me. A semi-related question that's been bouncing around my head - this machine, as well as my other two, has a horizontal rotary hook. I like that from a design standpoint, and I'm really curious as to why oscillating hooks seem to be a little more common. I understand that on larger machines that have a lot of needle travel and really big bobbins, it becomes impractical to wrap that much thread all the way around a hook, but I see a ton of smaller machines that still have oscillating horizontal hooks. Is one more reliable than the other? Gentler on the thread? More tolerant of a wider range of thread sizes? Seems like a rotary hook would be much smoother at high speeds and I don't really see any obvious downsides.
-
I'm curious - what advantage does a chain stitch machine have there? I've noticed they're used a lot on denim but I've always wondered why.
-
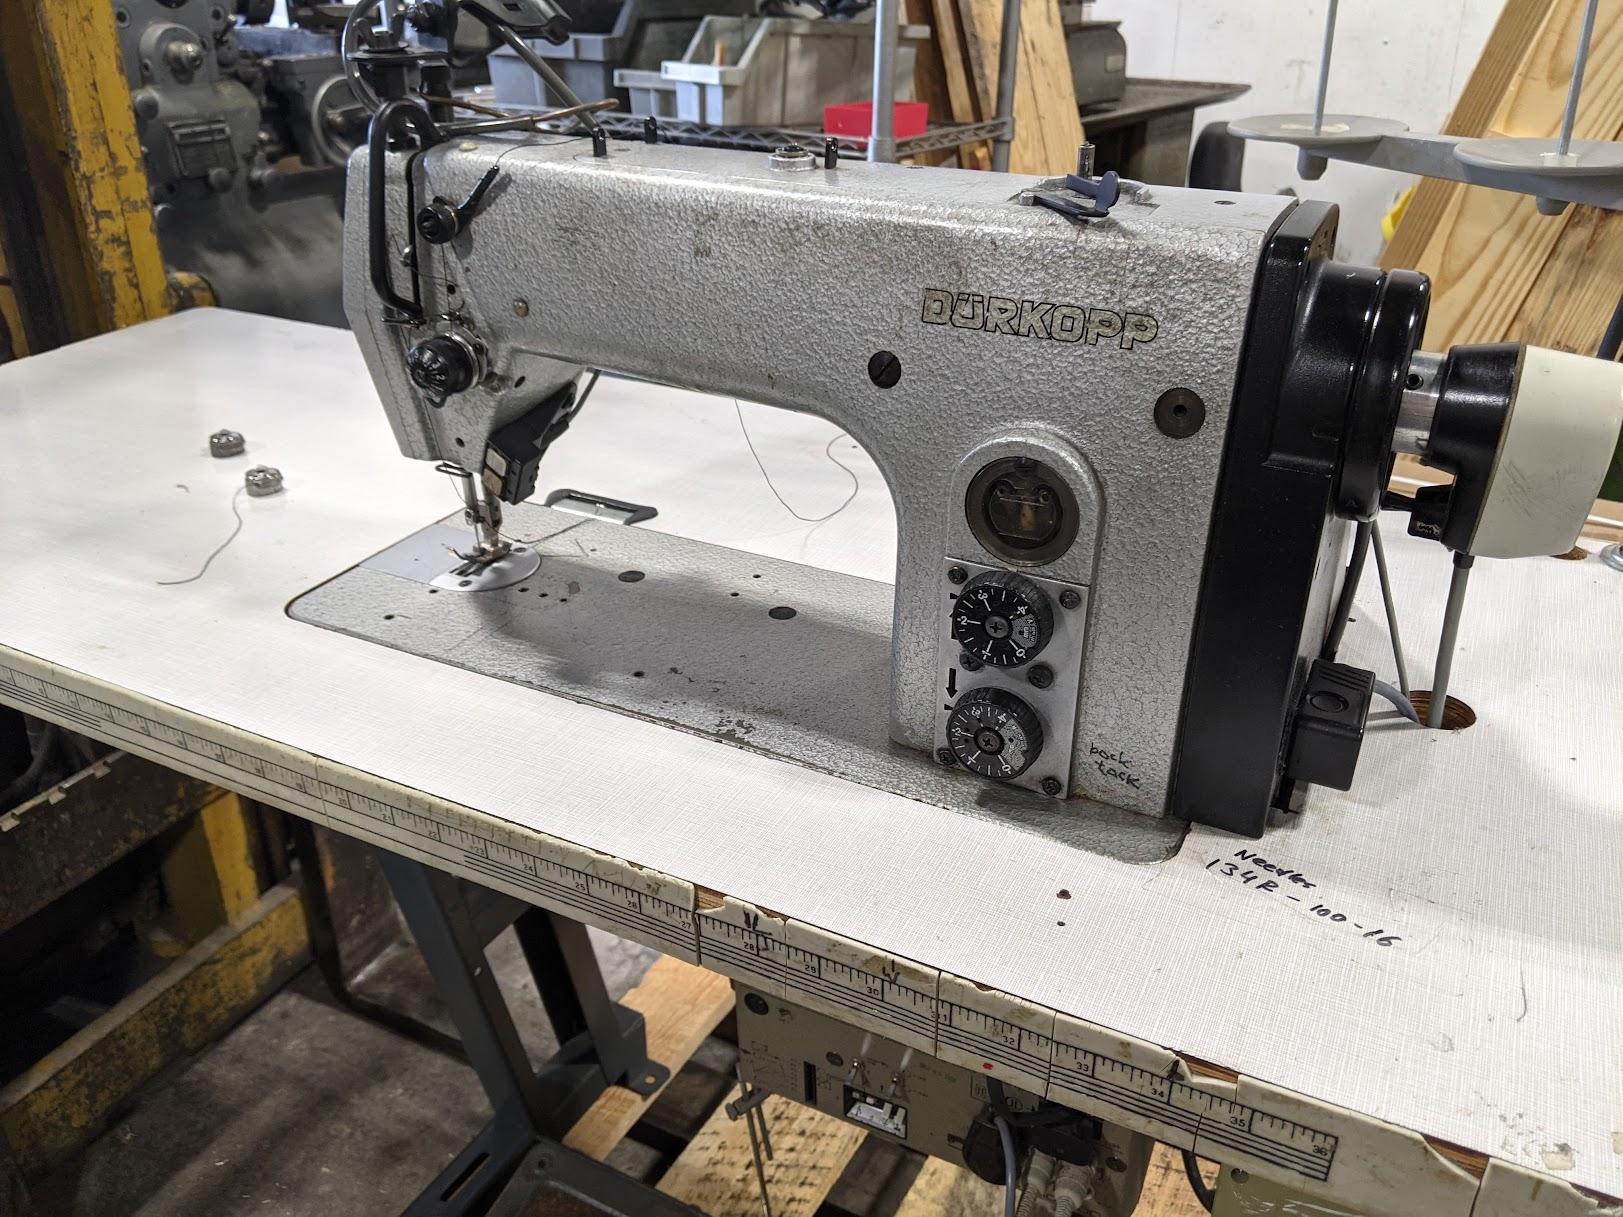
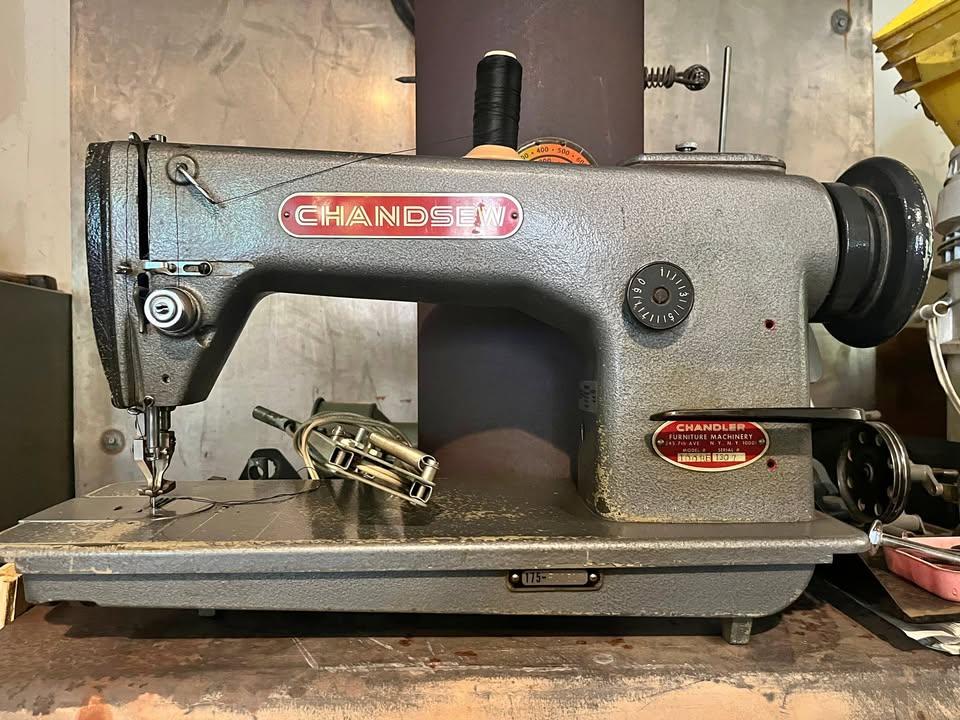
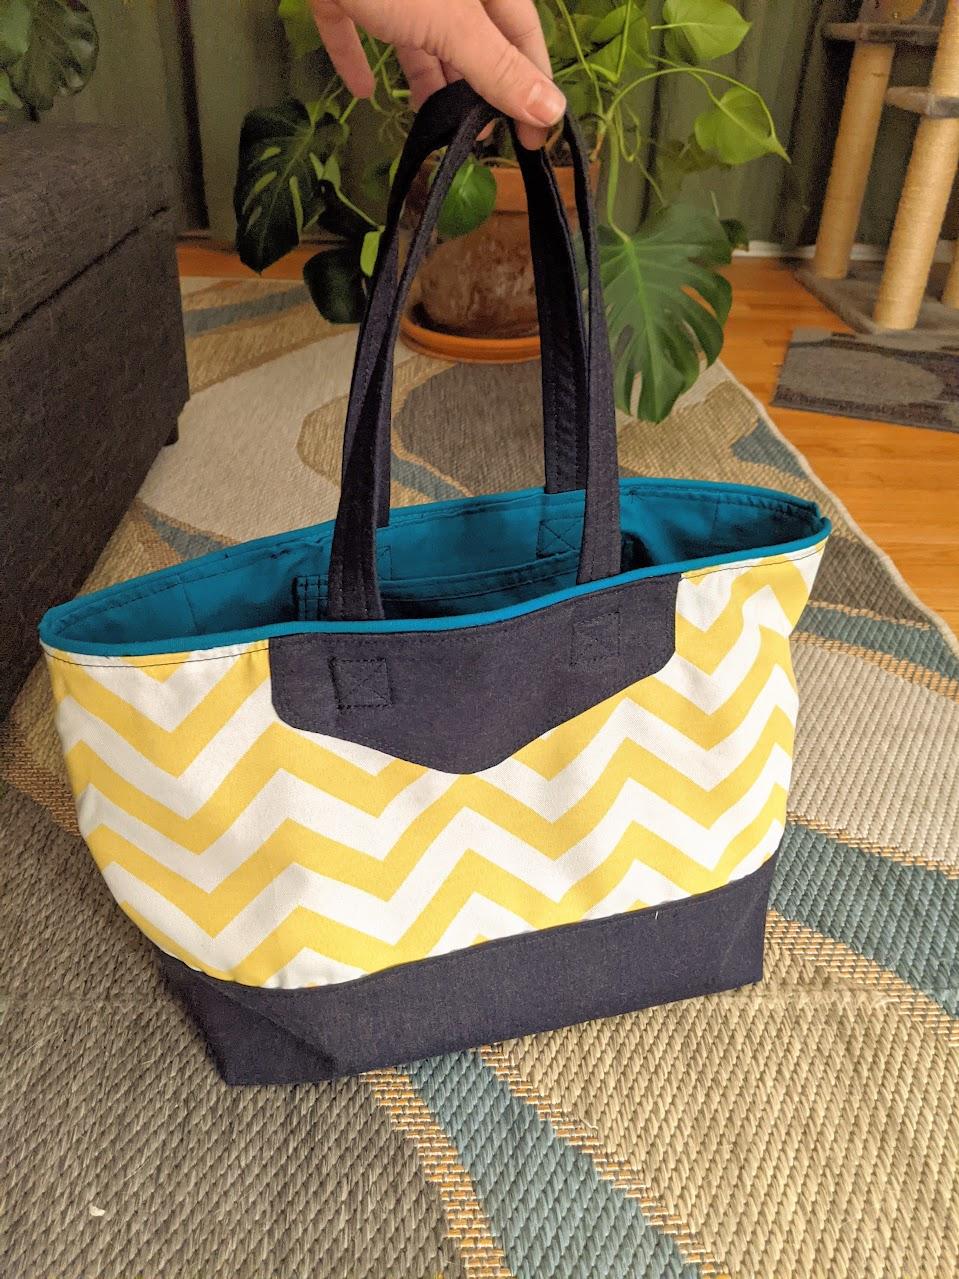
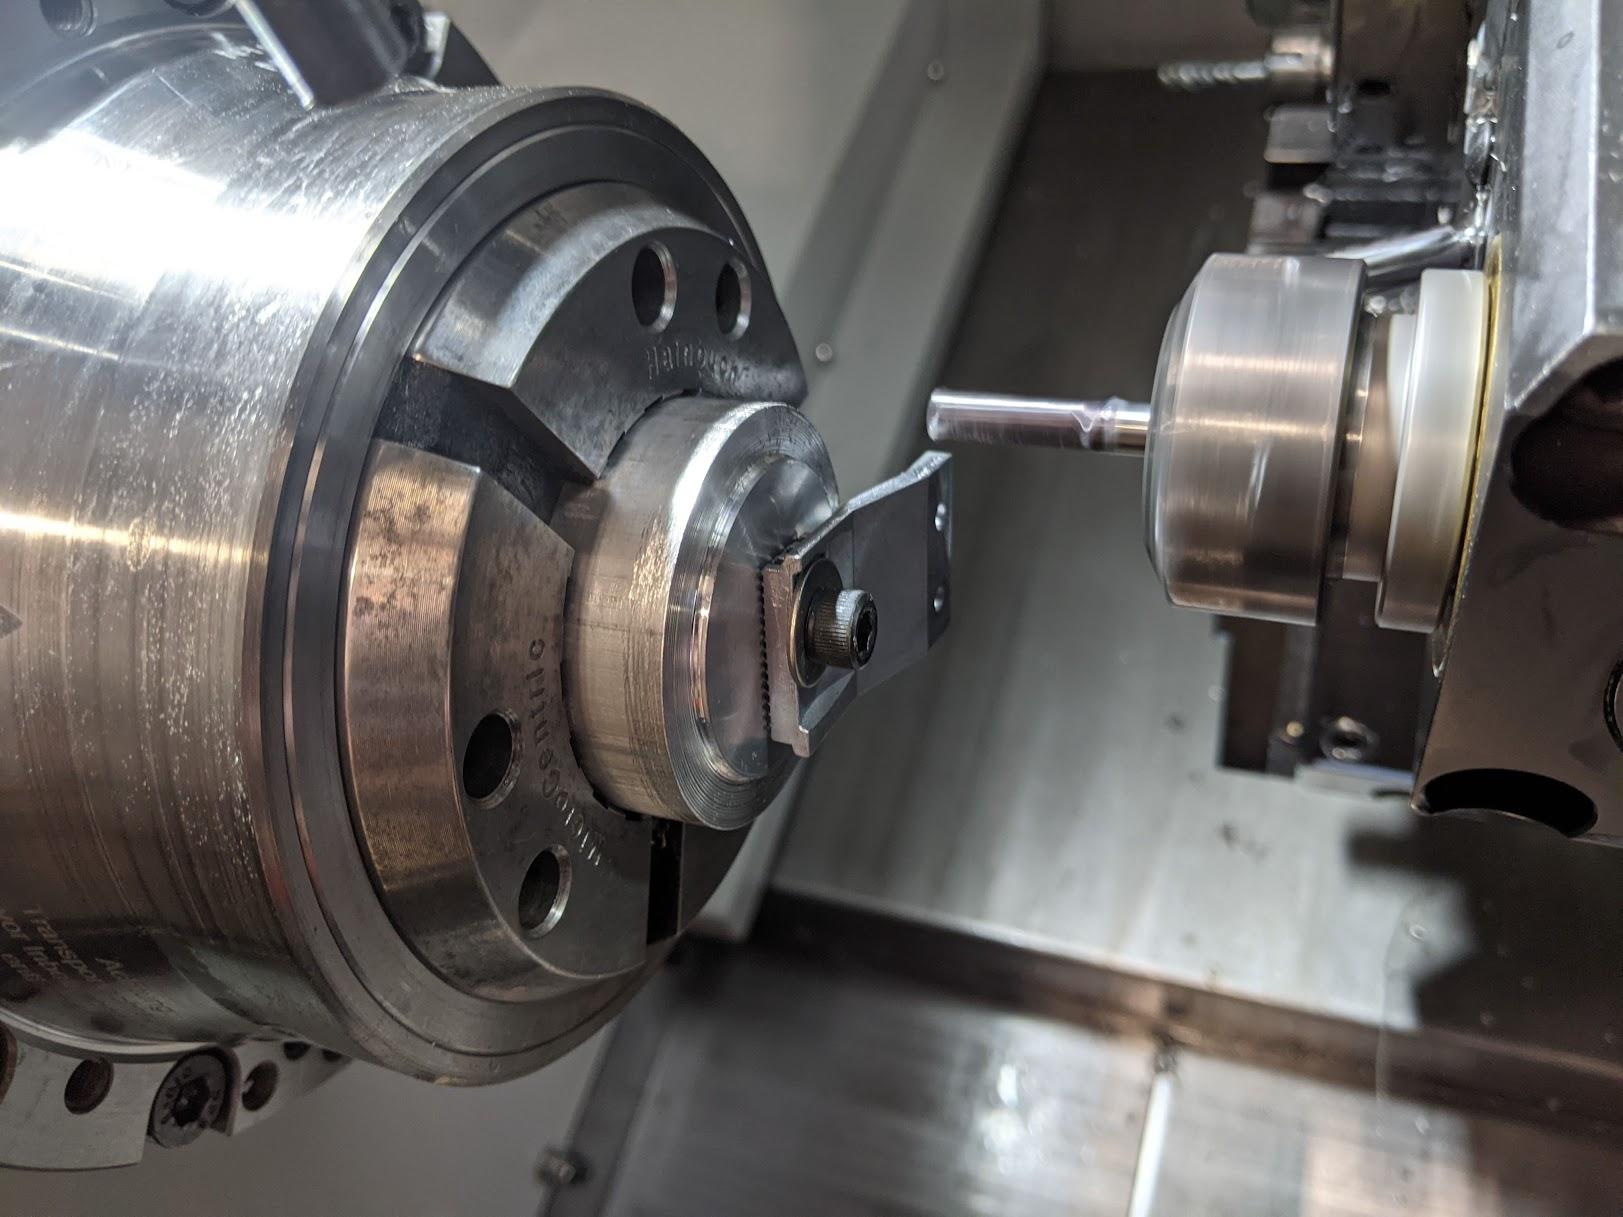
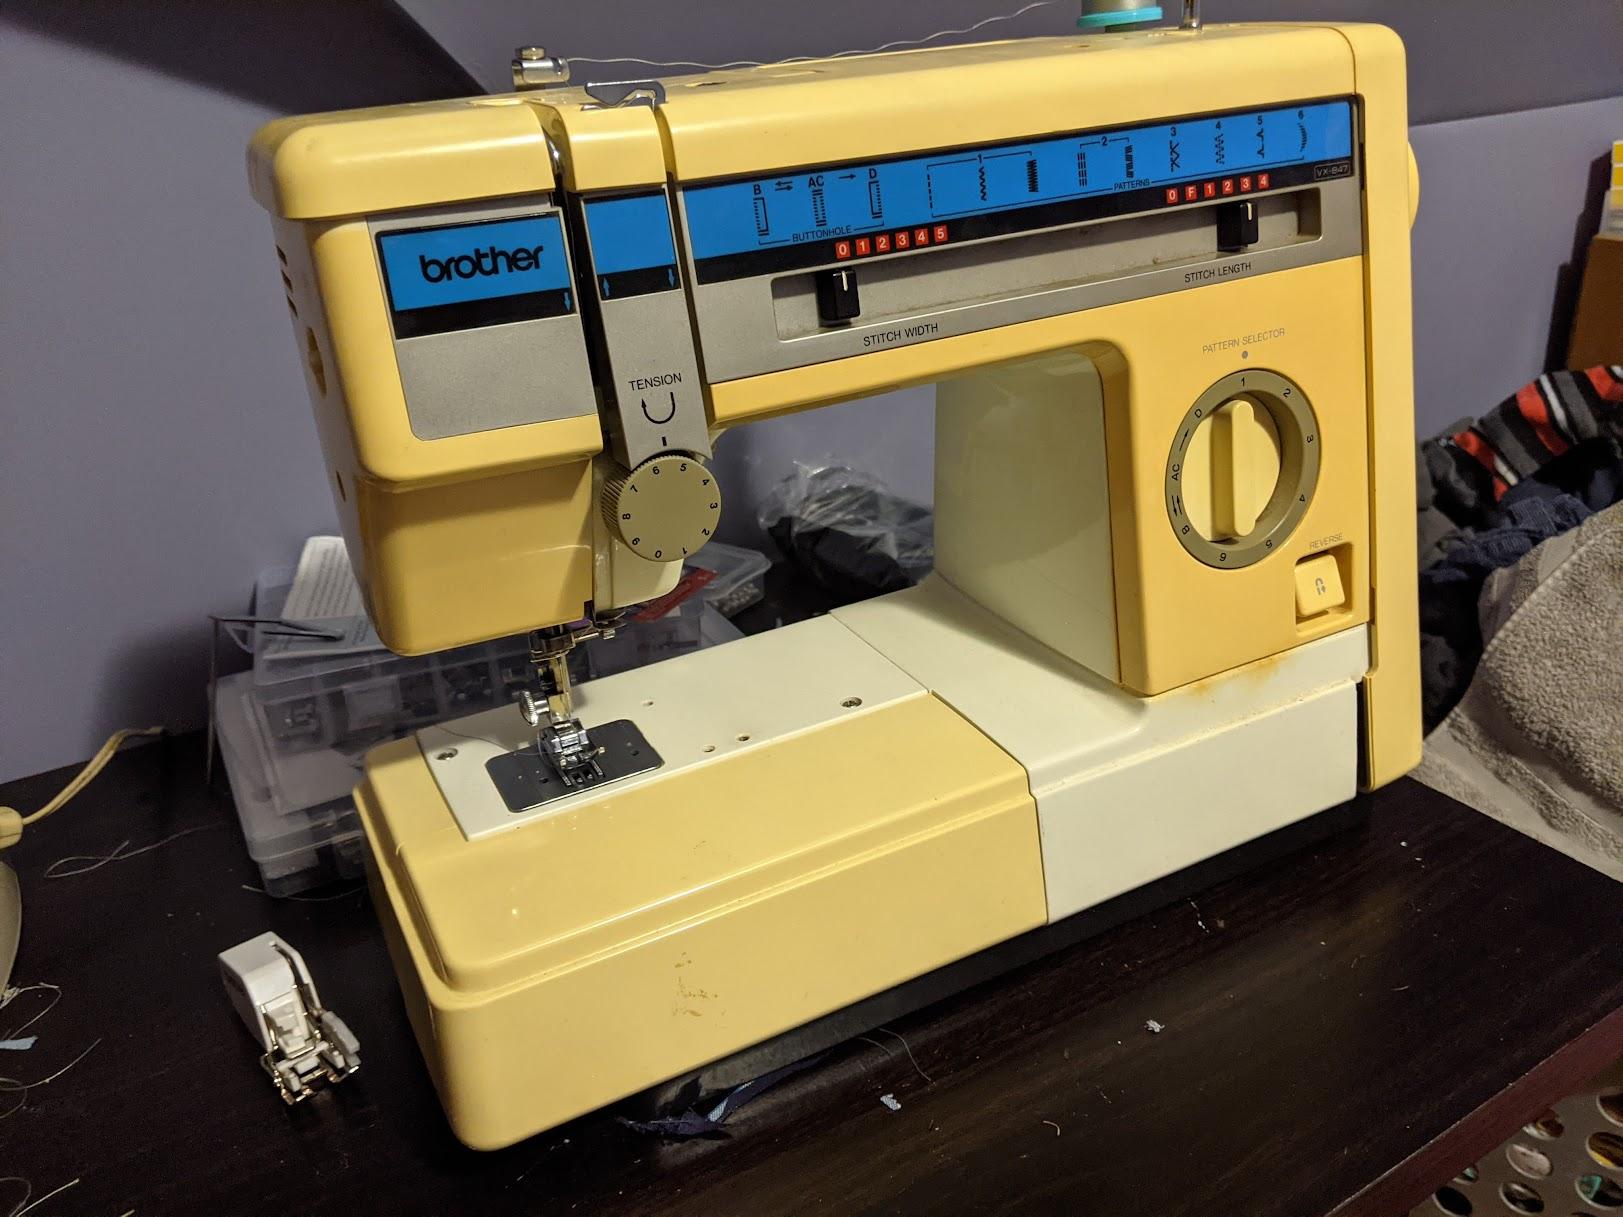
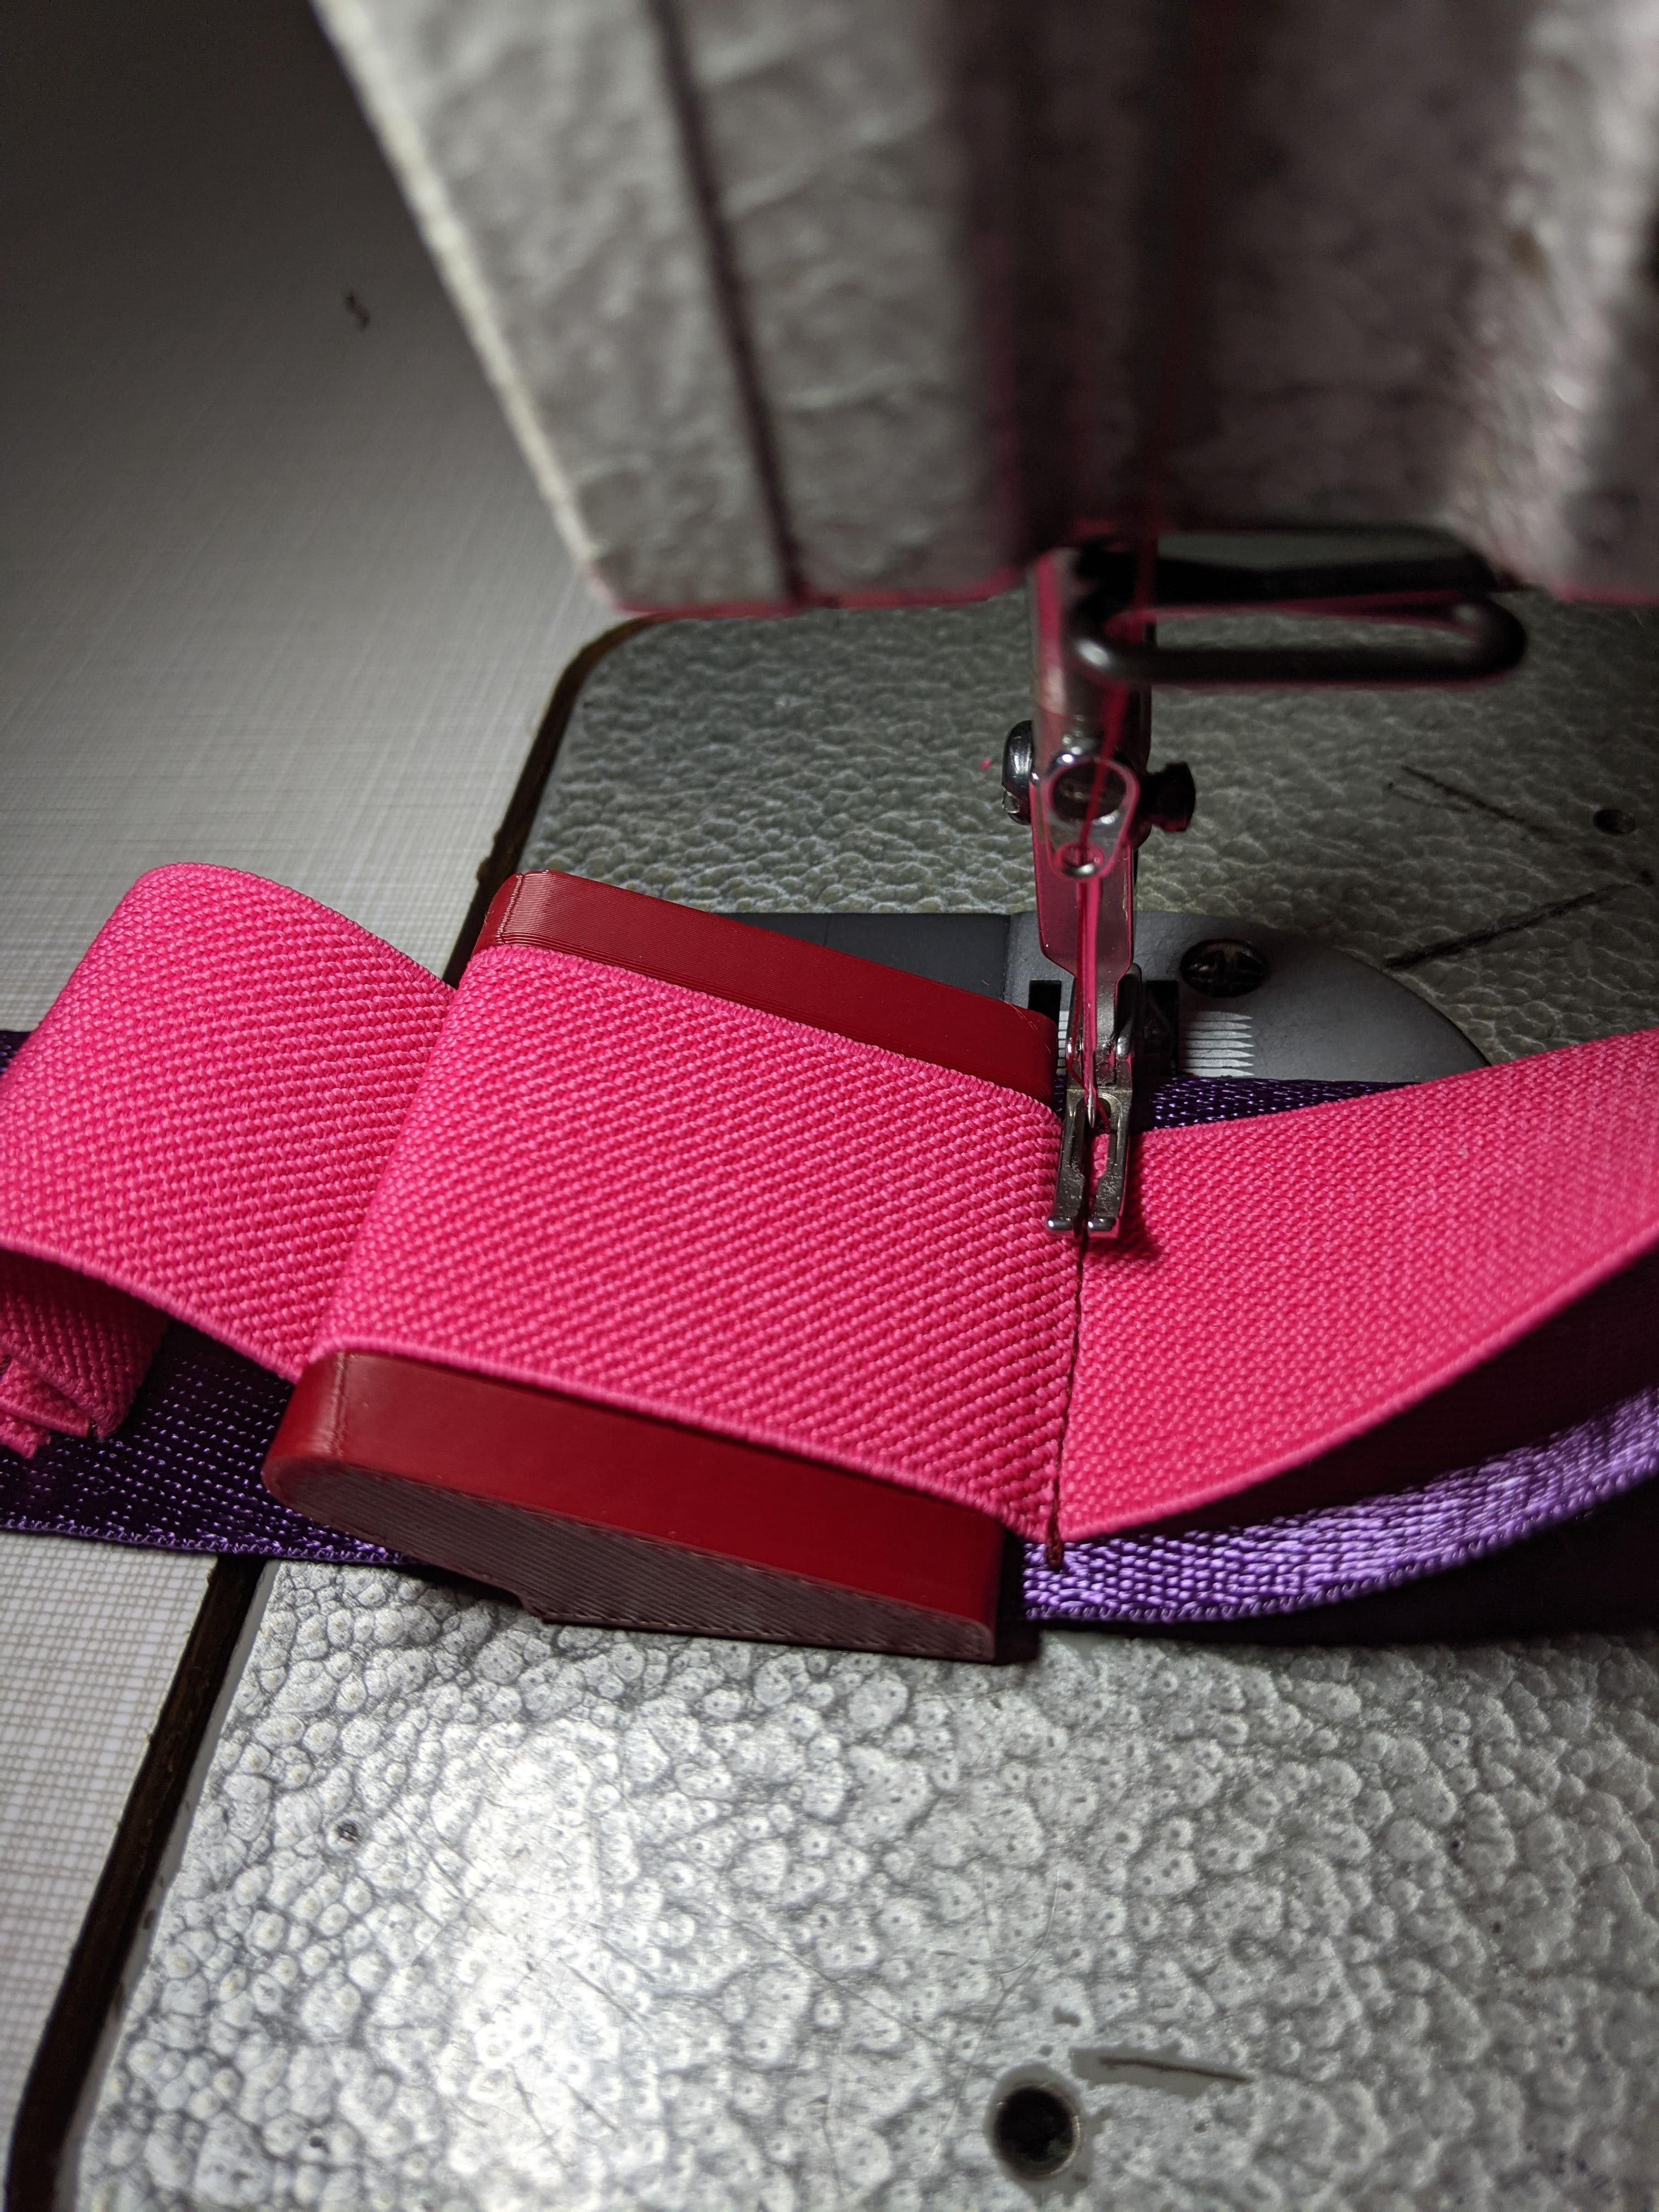
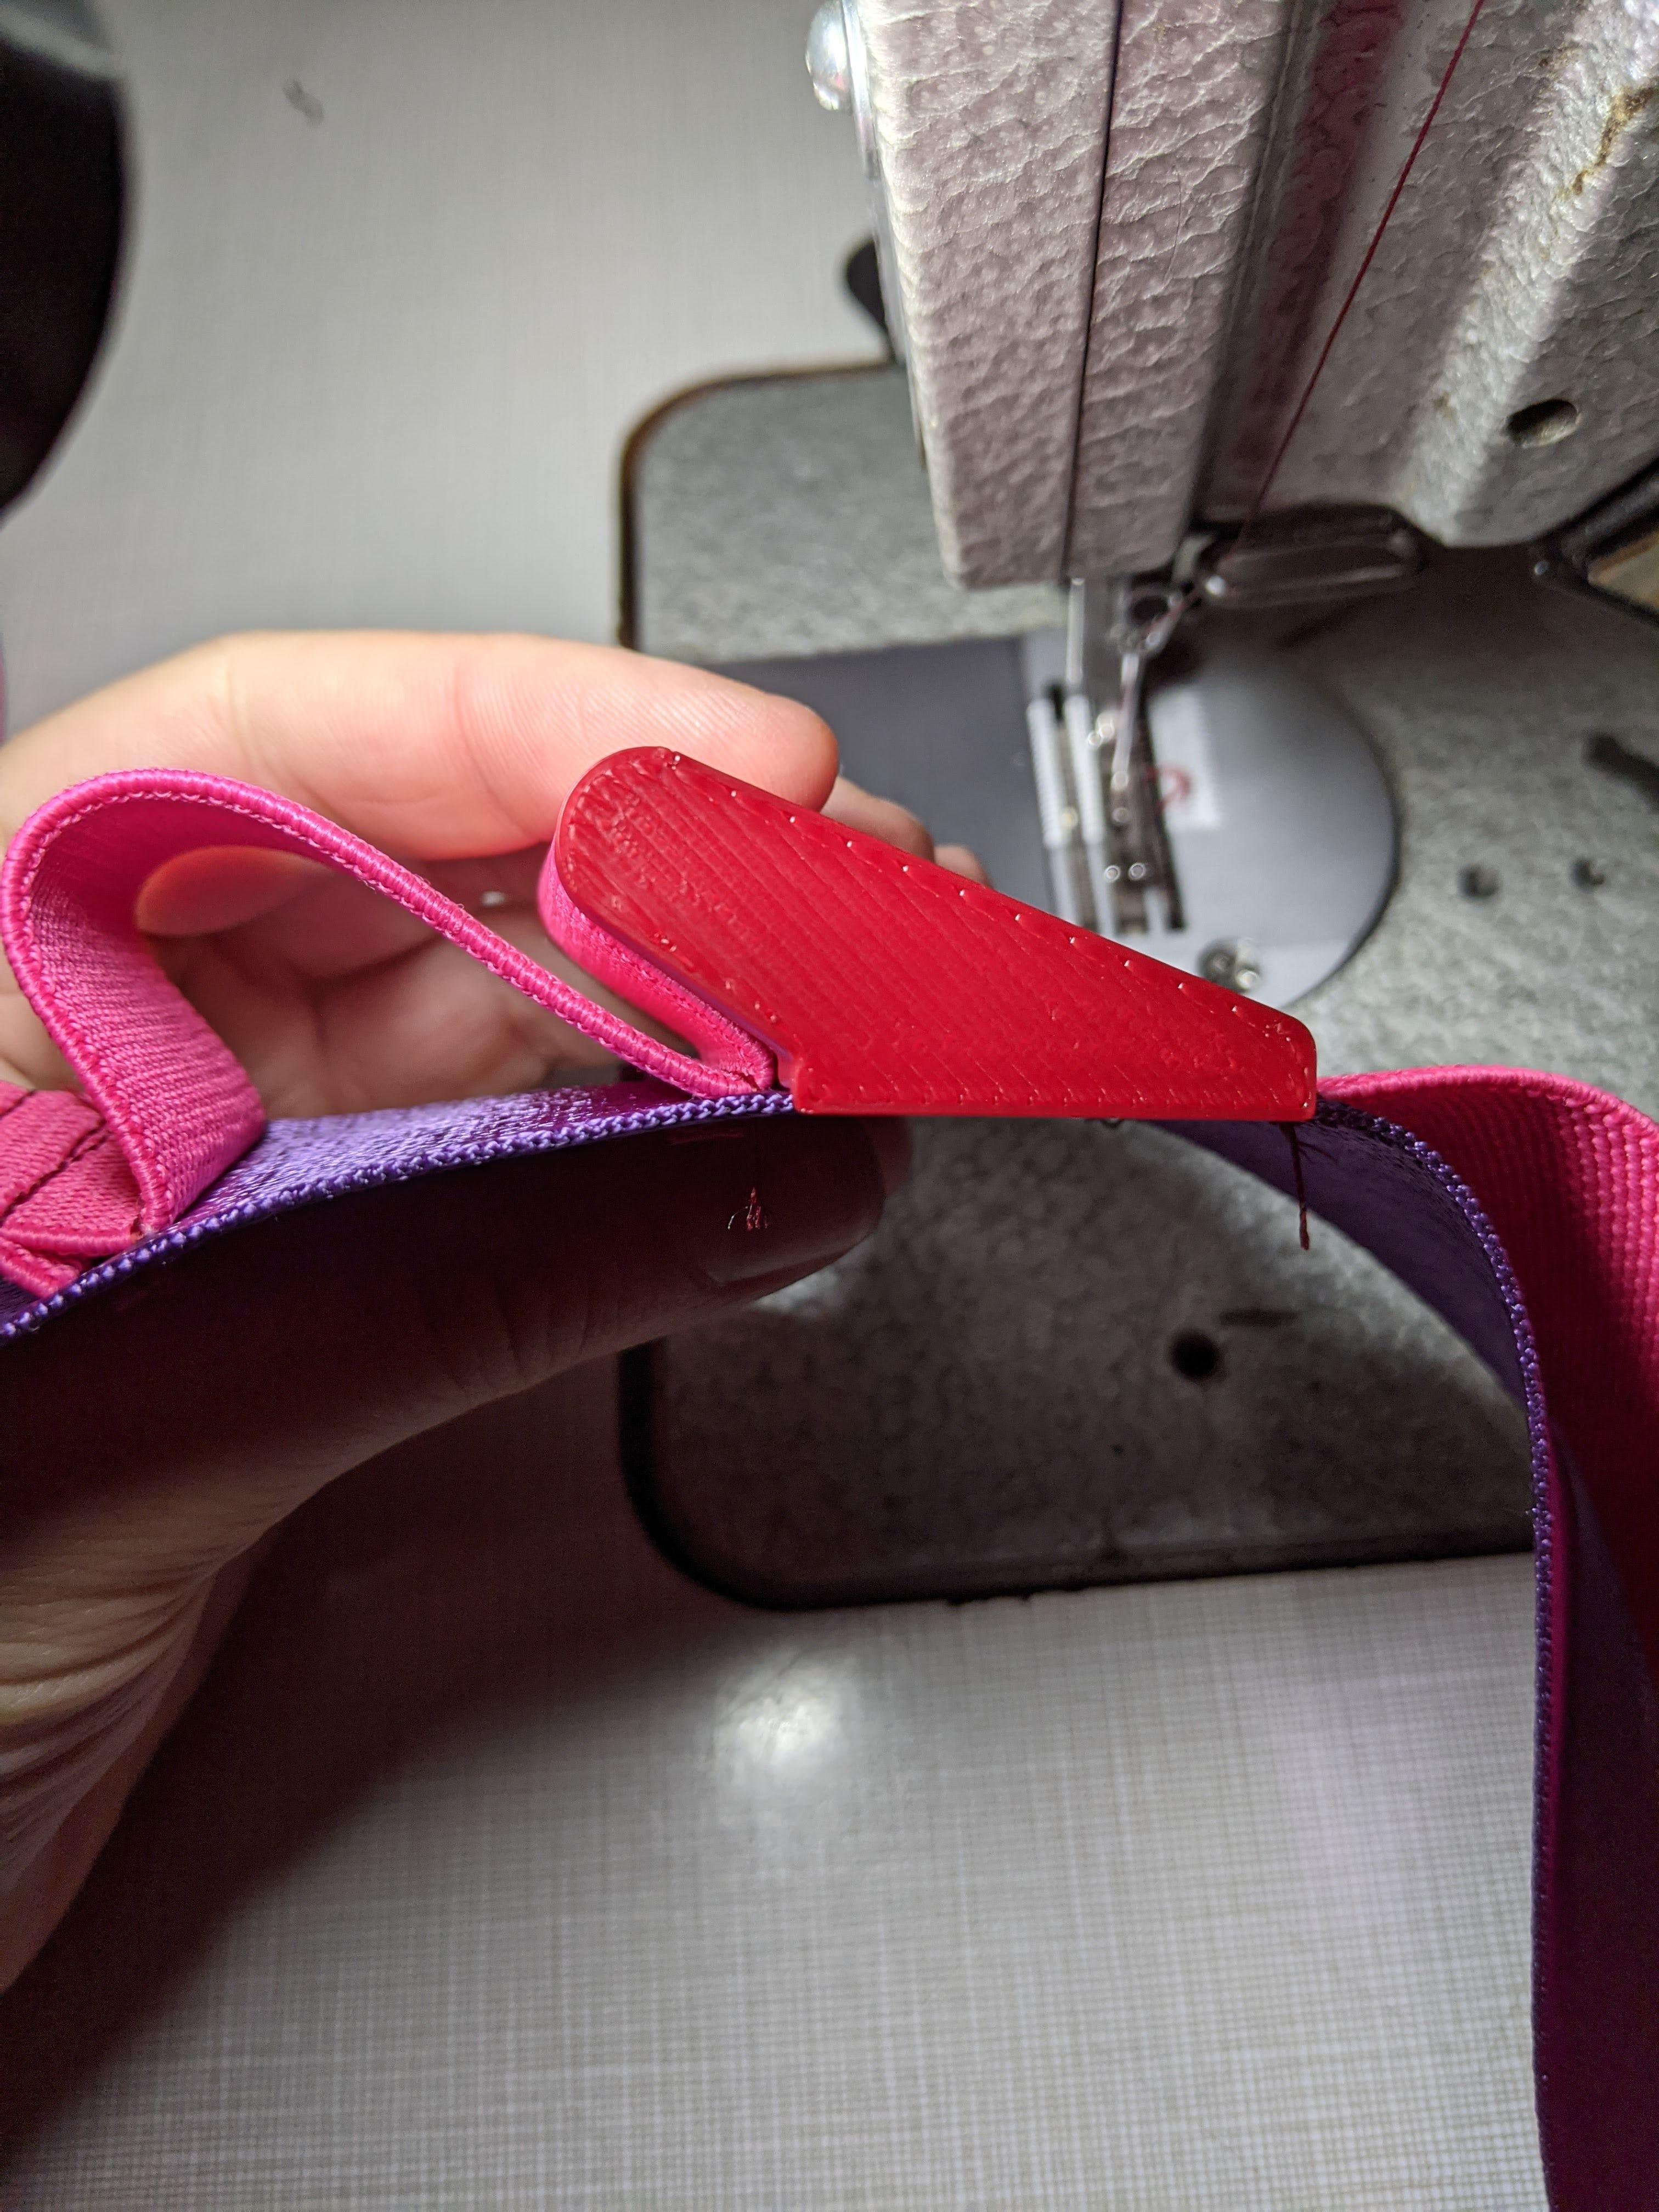
Hey all, Figured I'd introduce myself - I'm a self-employed machinist in upstate NY (capital region), and I've been working with metal for over half my life at this point. I have a couple bar fed, dual spindle CNC lathes in my shop and I make small parts for large steam turbines, nerf blasters, and hydrogen fuel cell systems. I also run a couple Formlabs Fuse series SLS printers. I've had a lifelong passion for making stuff that eventually turned into a passion for using, modifying, and maintaining industrial manufacturing equipment of all kinds. I found this forum when I got back into sewing about a year ago (mostly bags, some hats, and I'm now learning pattern drafting for garments) and quickly fell down the rabbit hole that is industrial sewing machines. This site has been an incredible resource for information about the range of sewing equipment that's out there! I started off with an 80s-era Brother Walmart-grade domestic machine, which was...frustrating, to say the least. The feed dogs were out of square with the presser foot and needle bar axis so it defaulted to sewing about a 6" radius curve to the left. Not great! I took it apart and remachined the mounting surface on the feed dog plate, which was out of parallel by somewhere around .020" across the ~1/2" wide mounting face 🫣 Didn't have a mill at the shop at the time, so it went in the lathe with a sketchy setup - tried turning that face initially, but the overhang was just too much and it chattered like crazy. Live tooling came to the rescue though, and I cleaned it up by jogging an endmill back and forth across the surface. Parallelism between the feed dog teeth and the mounting surface was greatly improved, on the order of .001-.002" as far as I could measure. The machine still pulled to the left a bit after that, though it was far more usable than before. By that point, it became clear that I needed something more capable, and I'd already started researching industrial machines. Within a month or so, I picked up a Durkopp-Adler class 272 needle feed machine with an Efka Variostop system on it, which I converted to 110V from 208V 3ph with a reverse fed transformer and VFD that I had laying on the shelf. That Efka system is incredibly cool from an engineering standpoint and is also much easier to convert to residential power because the motor runs continuously, using an electronic clutch and brake to drive the machine, rather than starting and stopping on demand like a modern servo would. Later last year, I grabbed a "Chansew" (Chandler) Model 100RB for a price that was too good to pass up, which is one of the various flavors of top/bottom feed machines imported under the Chandler, Consew, and Seiko names. Still working on putting together a table for it, and I'm debating how I wanna approach the drive system, since it came with an old clutch motor that I'm not very interested in using. The obvious route is a Chinese servo system, but I'm particularly interested in building my own out of some Clearpath servos I have leftover from an old project, with the eventual goal of adding a stitch programmer that I can set up for various repetitive tasks. All of my sewing so far has been fabric-oriented rather than leather, in part because it's more accessible, but also because it makes more sense for a lot of my applications so far. The 272 above is firmly a garment-class machine and could at best handle lighter leathers, but it's definitely not made for it. The Chandler is likely going to be my introduction into leather sewing after I get it set up, and I'm particularly interested in making leather bags with it. Currently lusting after a cylinder arm machine of some kind, ideally with a synchronized binder, as binding raw edges is currently one of my biggest struggles. Some of my work is below: Designed and made this tote bag yesterday! Needed a better bag for grocery-getting. This one's got two cargo pockets on the inside ends in addition to patch pockets near the handles and has a total volume of 16L. One of my other interests is in making tactical gear for Nerf blasters, where bright colors are preferred over the camo and dark solid tones traditionally available in that space. I made a bandolier a few months ago for some 3D printed shotgun shells that hold a variety of soft ammo types in various quantities, and printed a little jig to handle sizing and spacing the loops so I didn't have to measure and mark out each seam location. It's sized for my centered zipper foot and worked extremely well for the ~50 loops on the sling. The elastic ended at exactly the right spot and the whole thing went together very quickly - a very satisfying evening project. PXL_20251018_001414964.mp4