

larry1096
-
Posts
30 -
Joined
-
Last visited
Content Type
Profiles
Forums
Events
Blogs
Gallery
Posts posted by larry1096
-
-
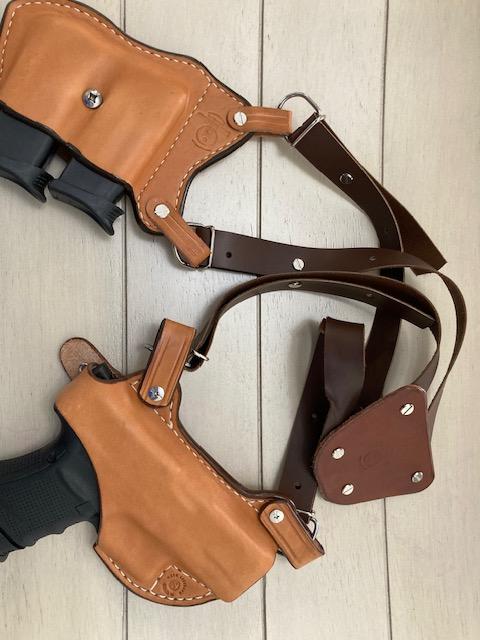
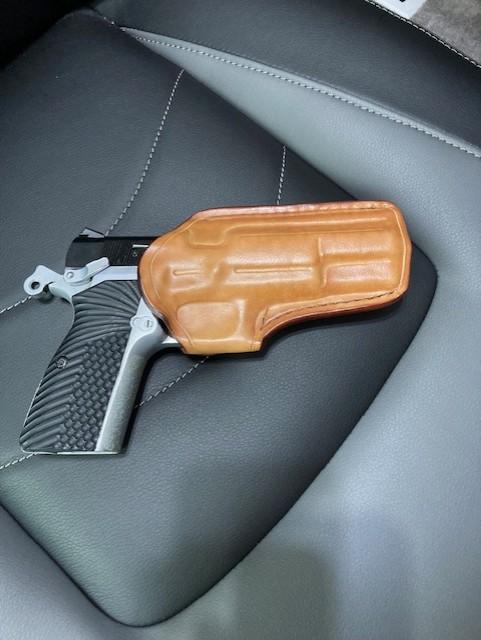
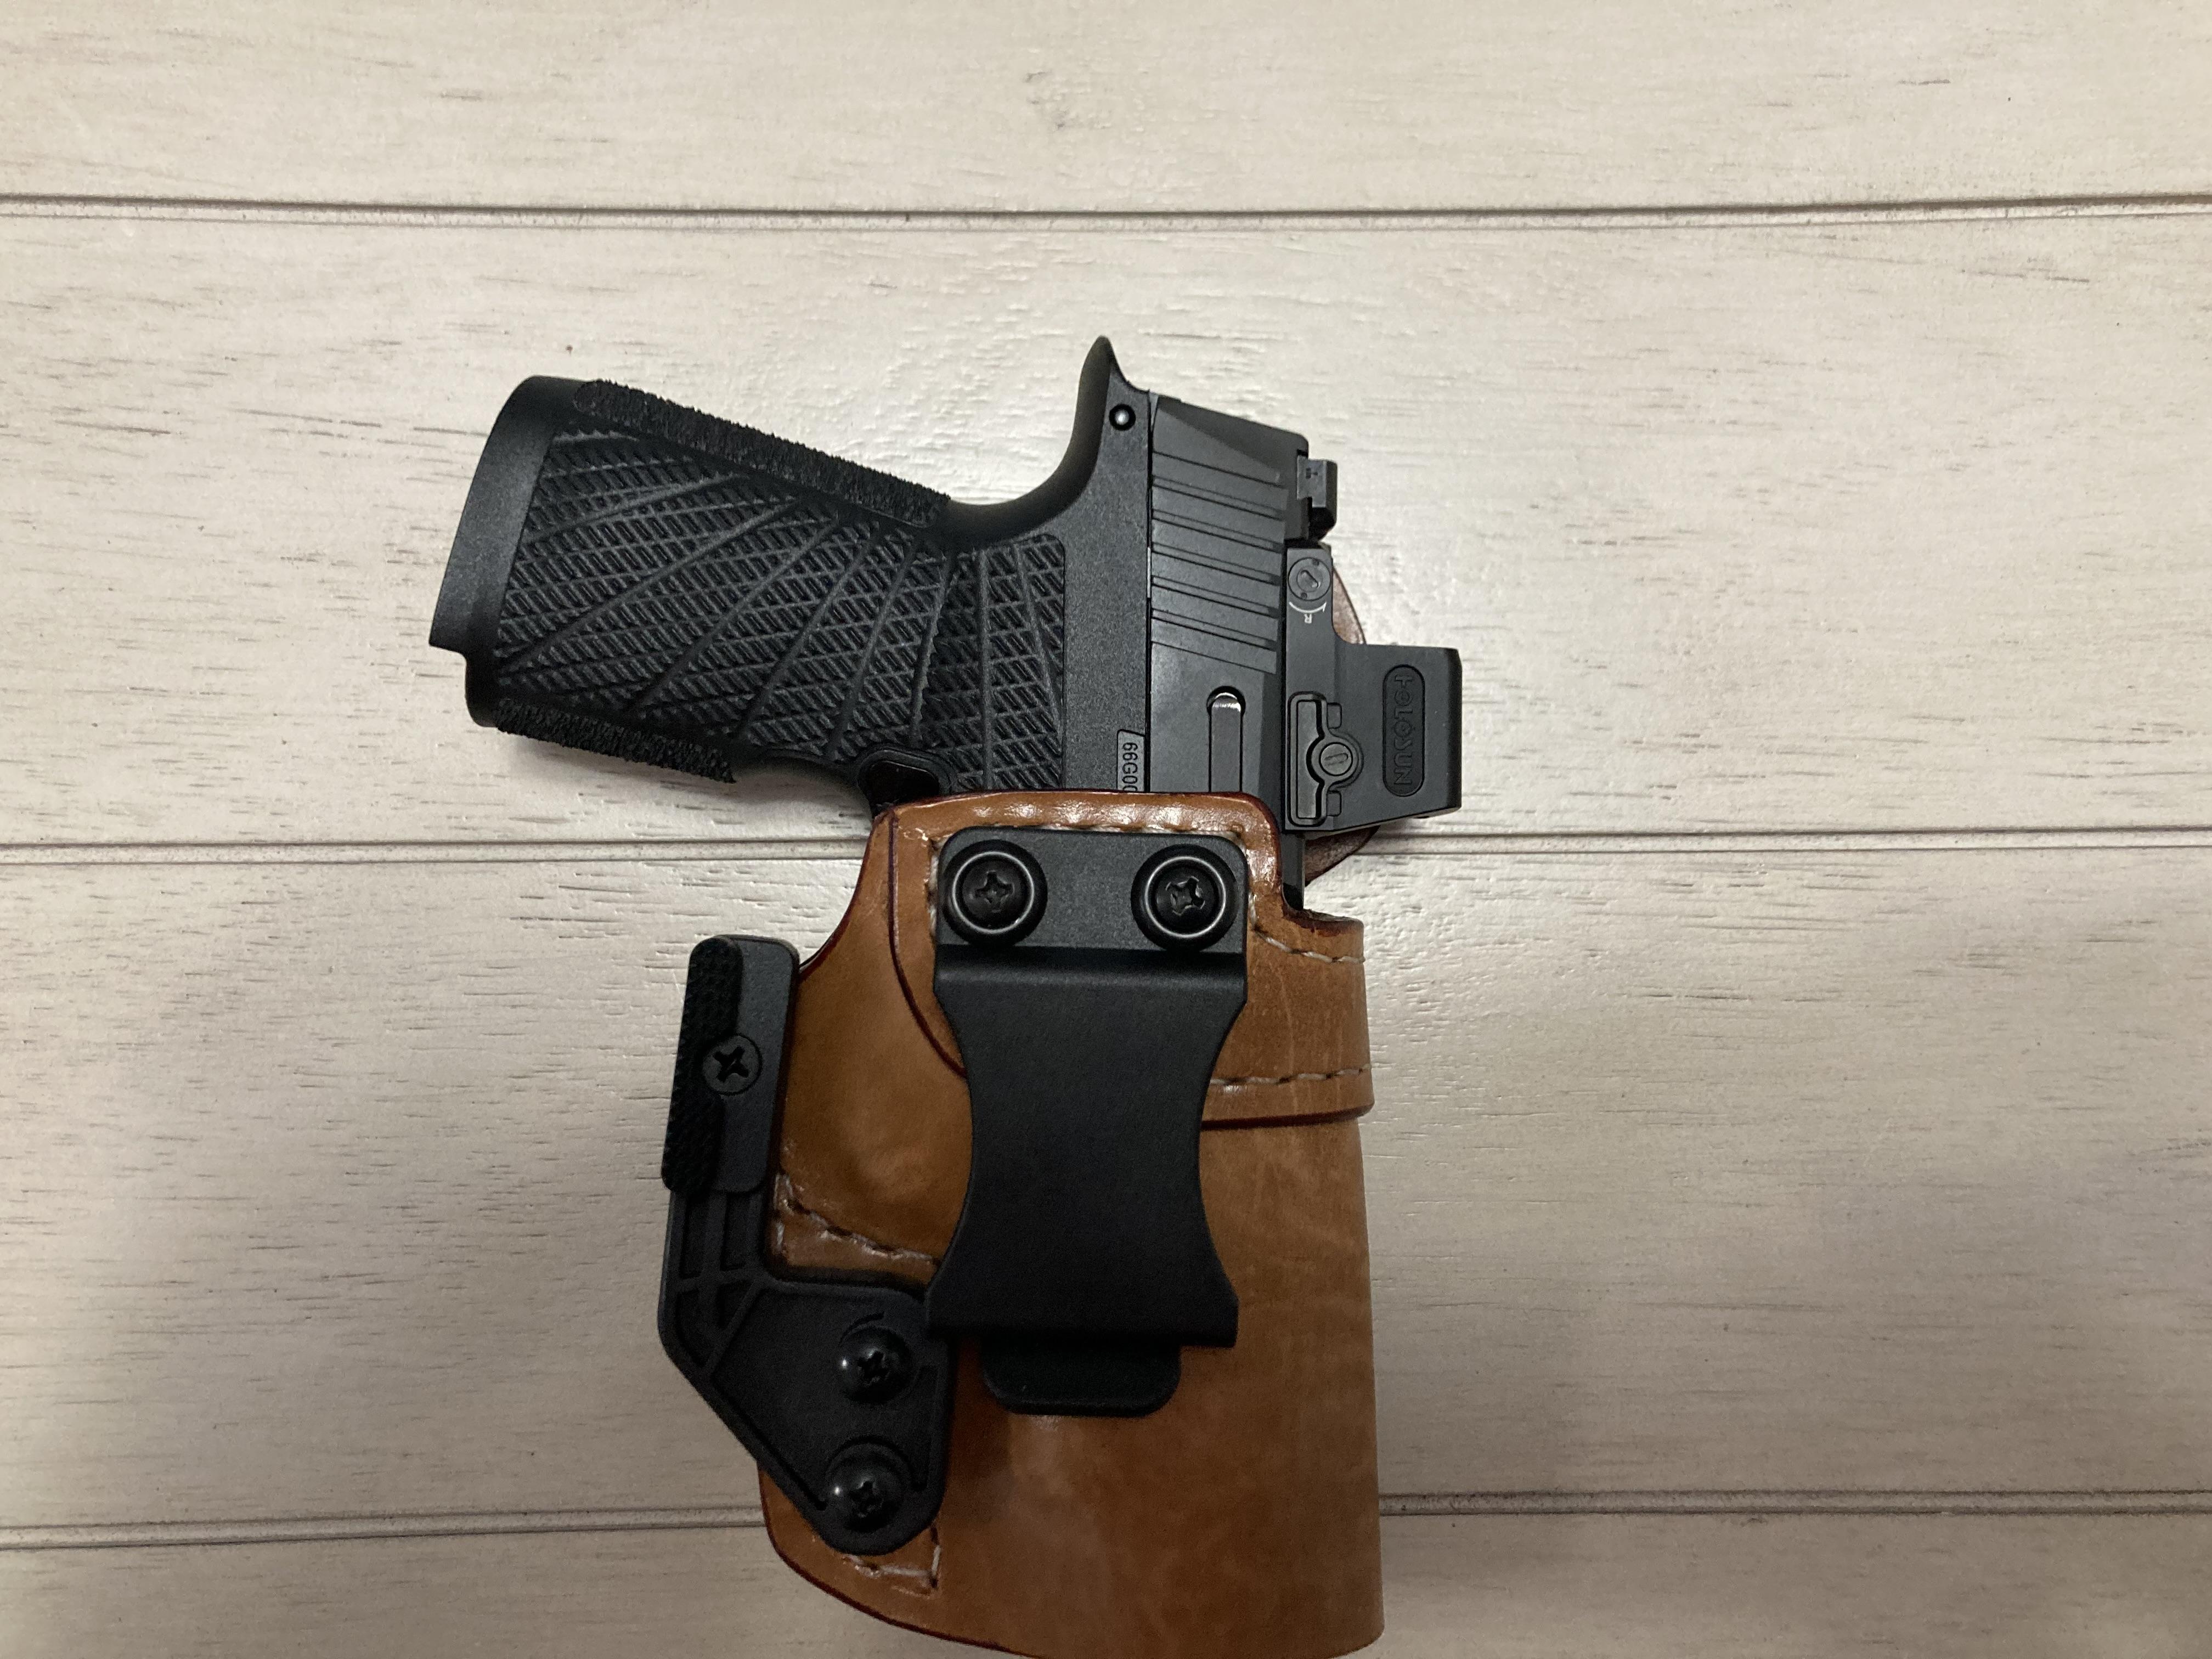
After years of being a hobbyist holster maker, I've decided to get a bit more serious about my leatherwork in my semi-retirement. Here are a few recent builds:
Larry
Zen Leather Holsters

-
Yes, as I mentioned you can use gum trag or other edging compounds to 'paste' the flesh side of leather. (I understand the confusion, by the way; generally, when folks say 'suede' I think the average leatherworker thinks of a split piece without a grain side remaining.)
Still, to make it weather/wear proof, you're going to need a topcoat on it, like Resolene or M&G.
Larry
-
I'm no expert, so I'm glad to be corrected, but here's my take: you can 'paste' a back with Tokonole or Gum Trag, but to actually weatherproof it you're going to want an acrylic topcoat like Resolene or Mop & Glow afterwards.
Larry
-
Those are very nice! It's interesting how you adapted the trigger guard cover from the S/A holster; don't often see that on holsters for semi-auto's, but it works very well.
Larry
-
Well, everyone, I want to thank you. Following your advice, I called a couple of the forum sponsors and got all my questions answered.
After I spoke to David at Leather Machine Co. and he made it clear that the service, support and warranty for the Class 4 machine Tandy is selling would be him and his team, I was able to take advantage of their special and get the machine, with the edge guide and tabletop, at a great price.
I can only say that the rave reviews I've read about LMC certainly seem justified; the man is obviously passionate about keeping his customers happy. In fact, I decided against a used machine at another vendor that could have saved me a few $$ just because of his warranty and willingness to help me.
Larry
-
Well, that's what I was hoping for-some solid advice from folks who actually know about these things. The thought of buying a $4,000, 600# machine, setting it up and going, "But it won't do this?!" is pretty daunting.
One thing I'll be sure to do is talk to the forum sponsors before I make my decision; not just because of their sponsorship, but because I see their commitment via their presence on these topics.
Thanks!
Larry
-
I'm suffering option paralysis in a big way. I've finally decided to invest in a sewing machine for my leatherwork hobby, which I'm planning to turn into a business now that I'm retired from the corporate world.
I generally make holsters, and hope to make belts (making belts with hand-stitching was pushing a very big rock up a very steep hill, I quickly found out.) I'd typically be sewing two layers of 8/9 oz leather, with an occasional welt bringing that to three layers, so I don't want to under-buy here. That said, I really can't see ever seeing a 15" arm for what I plan to make.
Right now I'm tossing between a Cobra Class 4 and a Cowboy 3500, and to confuse things further, saw that Tandy has a Cowboy 3500 branded with their name that comes with some extras I'd want (guide and work table) for about the same price as the 3500 from other vendors.
The goal here is to buy once, cry once without purchasing something so wildly over my expected needs I waste money that could better be used on other things.
I'm hoping the experienced folks here, and maybe especially those who do similar work, might have a pointer. Even a vote for a machine you have and like would be helpful at this point.
(I swear, I didn't research my last auto purchase this much-but then, I understand cars, and most decidedly do NOT understand these monster sewing machines.)
Thanks!
Larry -
3 hours ago, chuck123wapati said:
Maybe you need a better butter knife lol. looks like thin leather and a lot of practice.
Laugh if you want, but I've actually got a butter knife on my work bench for the holster I'm finishing. I'm not proud.
")
Larry
-
I've found another machine locally, so I'll be passing on this.
Larry
-
I'm no pro, so take this for what it's worth.
When I do a natural holster, I typically apply neetsfoot oil to give it a bit of a 'tan', rather than the fairly stark white some hides show. Got to be careful not to apply so much it softens up, though.
I will typically do the 50/50 M&G on something OWB, but just leave it at the oil for IWB and shoulder holsters. Since I only make these for myself, I have less concerns about longevity, and the uncoated leather seems more comfortable against the body (for me, at least.)
Larry
-
As I mentioned, he posted the boning process on this very holster. No idea if this like to the Instagram video will work, but I'm going to give it a shot:
Instagram video of Jason Ingle boning the holster in the photo (Hopefully.... :) )
Larry
-
That's what I would have thought, but Jason posted the video of him tooling this holster on Instagram (which I don't know how to link to, unfortunately.)
I wonder if there's a post tooling step to 'emboss' the leather back to that untouched looking condition, like pressing it AFTER boning?
Larry
-
I've been in communication with him, actually. He's working on figuring out shipping for me.
Larry
-
Hello,
I've been working on improving my tooling to get more detail, crisper lines and all the things I admire from the pro's.
One thing I can't overcome yet, is getting rid of the marks that come from molding the leather. I watched a video by Jason Ingles showing his boning technique, and then a photo of the finished holster-it looks like the leather has never been touched? No burnishing, and a perfect 'grain' surface like unworked leather. (I'm attaching a photo-note that's Jason Ingle's work, and posted to Instagram, so I believe it's ok to share it?)
Any idea how that final finish is obtained (or regained?) after tooling the leather? I'm finding it thoroughly impossible at this point.

Thanks for any help-
Larry
-
Any idea what shipping to 38572 would run?
Thanks,
Larry
-
I tried a foam roller (it was the same material as the cheap foam brushes I use for dye-lots of bubbles. Because you drag the brush along, but the roller 'picks up' on the finish continually, it seems to form bubbles more easily. Actually created a bit of froth when done quickly.
That said, I don't know if this was a 'high-density' foam, it was just a cheap disposable roller from a craft store.
Larry
-
Been awhile since I did anything in black; it certainly seems 'easier' than natural at my (low) skill level.
Larry
-
I've done this so many times, I've taken to writing 'Grain' and 'Suede' on my patterns. If the name doesn't match, it's upside-down.
Of course, this doesn't help with printing 'Grain' or 'Suede' on the wrong side to begin with...
Larry
-
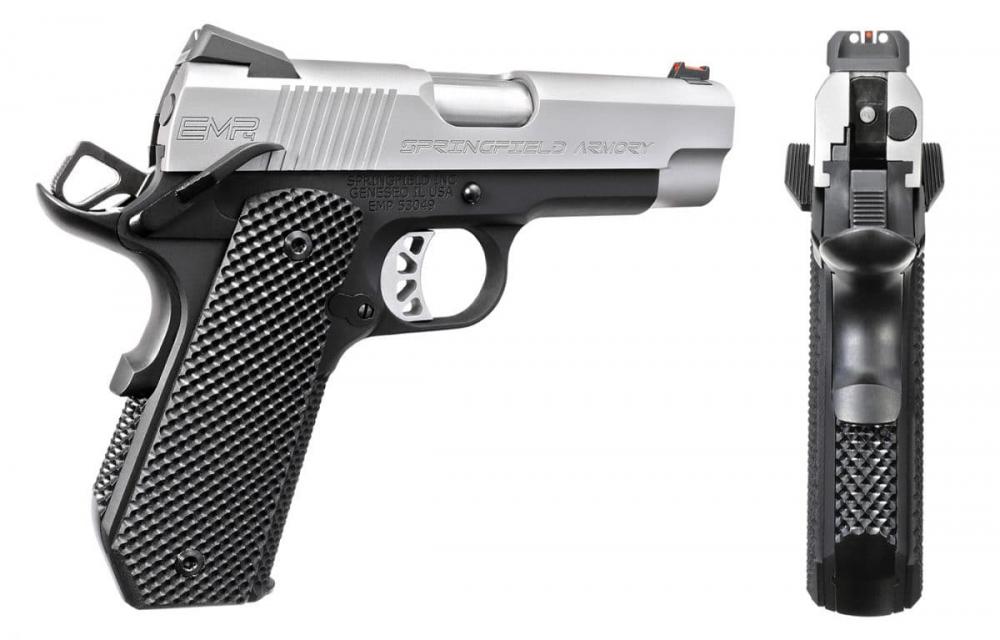
Dwight, that's a very helpful diagram, and sums up the issue nicely.
The problem, at least with the EMP, is that the slide is shorter (top to bottom) than a standard 1911, and with an extended safety, placing the snap on 'top' of the safety as shown throws it *way* out away from the pistol. That's why my last attempt moved the snap forward (toward the muzzle) a bit, but was too far from the thumbreak to operate correctly. <sigh>
If I do this photo right, it might show how little real estate there seems to be for the snap, or at least a 'normal' snap:
Again, thanks for the suggestions; I'm still trying to formulate a pattern that might work-
Larry
-
Thanks for the replies. I've tried moving it up on the slide, but there's not enough room to feel comfortable the strap is securing the weapon in the holster properly-it can 'pop' over the top of the slide.
I tried moving it downward below the safety, with an extra long thumb paddle and reinforcement, but it lost too much leverage at the snap. At the rate I'm going through prototypes, we're all going to to have to eat a couple extra cheeseburgers to avoid a leather shortage....
Larry
-
Hello,
I seldom make holsters with thumbreaks, but as I've been working on designs for a few shoulder holsters, have had to incorporate them in those designs.
For most striker fired guns, it's not a problem, but for a 1911 (and in particular, a Springfield EMP) it's been difficult; I find the snap mounted to the thumbreak (the part the thumb actuates, as opposed to the strap side which wraps around the gun) is landing right *on* the safety lever. This causes snapping the break in place to occasionally push the safety to the 'off' position, which is obviously not acceptable.
I"m wondering if anyone would be able to share where the snap side of their breaks (especially in shoulder holsters) is generally placed, and a photo would be most appreciated, if anyone has one handy.
Thanks,
Larry
-
A quick check of youtube can show what dangers a soft, floppy holster poses. I'd reject it in those grounds alone, to be honest.
Larry
-
One of my other hobbies is luthiery; I've been building electric guitars, from scratch, for about ten years.
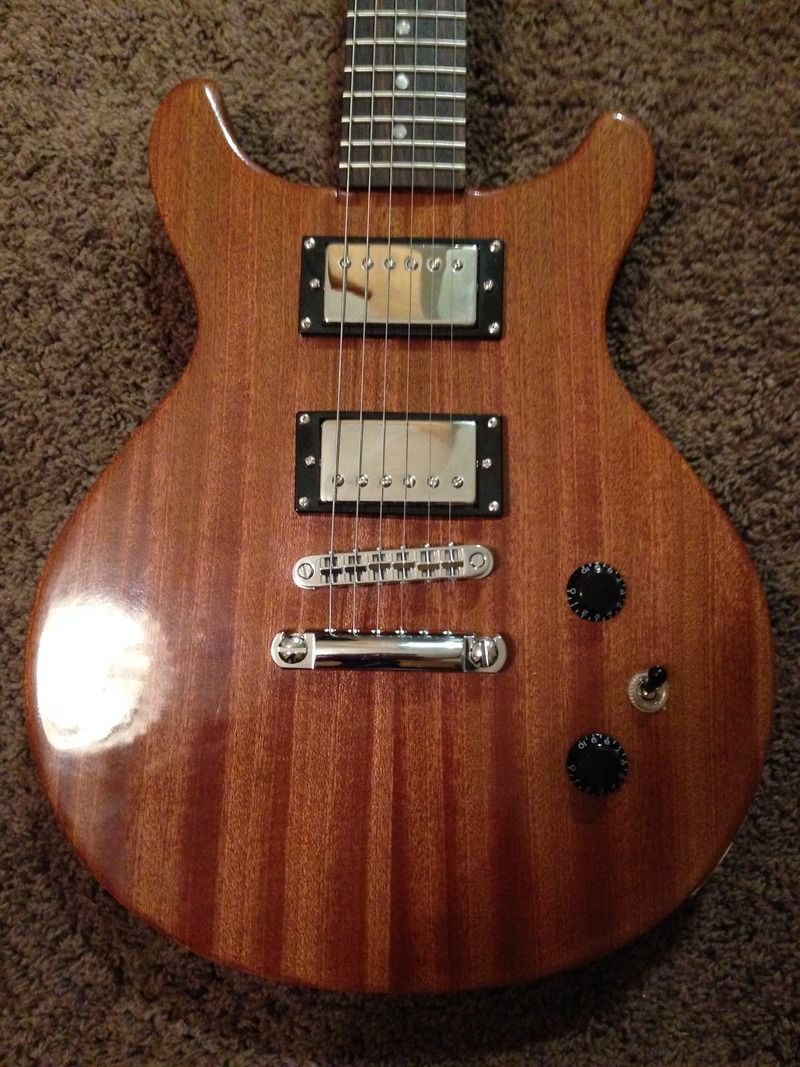
I needed a burnisher, and since I've got a nice supply of exotic woods, and my son has a couple nice lathes in our garage from his pen-making days, I figured I'd whip one up.
So...couple hours later, I threw that one away and tried again. Couple hours later...threw another one away.
Finally got one that *almost* worked, after FIVE attempts; then bought one made by a pro. If I'd seen these first, I'd have HAPPILY paid the asking price for one. If we price things based on the cost of raw materials and time, and exclude skill and experience, nobody here would ever sell a holster for more than $30, would they?
Larry
-
Just got a Euro bend (right before the sale, of course...derp) and, after selecting through the stack available, found a VERY clean piece. Compared directly to some A HO that I had on hand, it's paler, cleaner and has a better suede side.
Larry


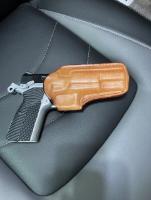
Gun Holsters
in Show Off!!
Posted · Edited by larry1096
Sorry for the delay; took some time off to rupture my left rotator cuff.") (I don't recommend it; giving it 0/5 stars on Yelp.)
(I don't recommend it; giving it 0/5 stars on Yelp.)
My molding is improving, but there's a long way to go. One thing that really seemed to help was beginning the molding with an actual press (I use one made for Kydex, some folks use full-size shop presses.) A few minutes under a lot of pressure goes a long way to get getting the basic outline of the gun started, and then a variety of molding tools can help pick out some detail.
Thanks for the encouragement; I've learned a lot here, and will continue to do so.
Larry