


marine mp
-
Posts
222 -
Joined
-
Last visited
Content Type
Profiles
Forums
Events
Blogs
Gallery
Posts posted by marine mp
-
-
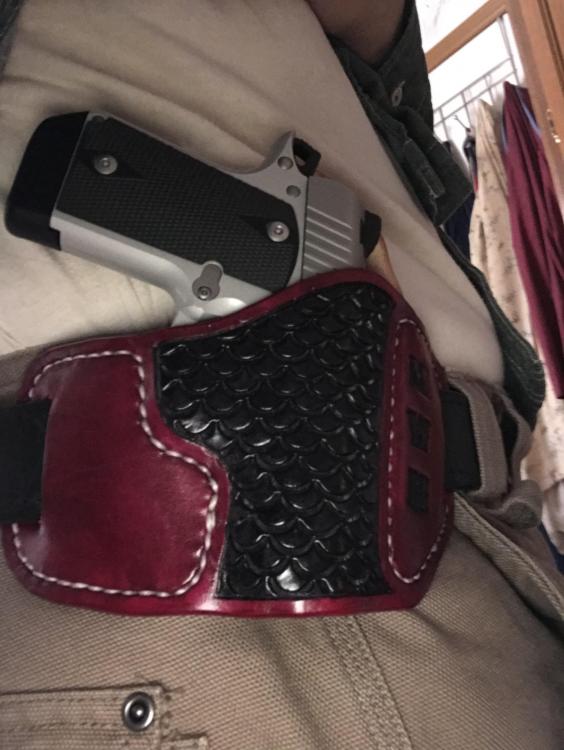
Hello the “holster” forum!! Sitting here in my chair and thot how long it’s been since I visited Leatherworker.net. I noticed some familiar faces from long ago, like Lobo, Dwight and Chief Jason to name a few. Still turn out a holster or two ever now and again!! Mama bought me. Micro 9 for Christmas, (gotta love that girl!!) so I had to stretch some skin for it. Good to be back!! Semper-fi & This We’ll Defend, Mike (ADL CH)
-
Hello again, it’s been about 3 years since I’ve posted anything on the forum, but being inside for the next few weeks or whatever, gives rise to the reconnecting with old friends!! Backyard knives, A quick homemade belt loop cutting die for those that don’t have a clicker or press die. Take a 1 1/8” pipe, threaded on one end, that’s about 6” long, (think schedule 40 or 80), and chamfer the unthreaded end so the entire round end is sharp. A metal lathe is helpful, but can be done in a vice or with a bench or 4” handheld grinder. Mark off 1” from the sharpened end. Put the sharpened end in a rugged vise, up to that 1” mark and start squeezing it. When it is almost closed up flat, put something 1/4” in it, to keep it from completely closing up. Squeeze it till it closes up to make a belt loop cutter. Knock out the 1/4” spacer, put a heavy cap on the threaded end, and there you have a belt loop die. Before you smash it through your leather, put some wax, or something to make it travel throughout the leather easily. The piece of leather will have to be picked out of it, or pushed “ through”. Empty by taking the threaded cap off. I’ve used mine for years. Works most excellent!! Semper-fi & This We’ll Defend, Mike
-
DoubleDaddy, congratulations on "coming-out" of the closet and participating in the conversation. Very nice work for a newbie and artfully done. I have to agree w/Dwight as the stitchline is way loose. You can correct it now by just putting another stitch line as close to the mold-line as possible. No harm-no foul!!!! With the sight tunnel, tape a 1/4" wood dowel just in back of the front sight and end it at where the holster mouth is. Too easy!!!! Carry on in the finest tradition. Semper-fi Mike
-
Blue Duck, Several options are at your disposal. I've used Resolene mixed w/tap water, same as dirtclod. I use a 10 cent brush from wal-mart to put it on...2 coates. Occasionally there may be a streak or two, but it disappears with the final application of Kiwi nuetral shoe polish...kinda like a "spit shine" but it is buffed out with a brush......a extra protectant is all.
Years ago, when the postman had no vehicles, unlike today, they were issued a large leather bag to carry the mail. It was protected by something called "bag-kote". Feibings. Hence...the name...bag-kote. If it is water-proof or water resistant...I don't know, but those bags seemed to last an eternity. I use it occasionally on holsters I know may see some time in the elements...customers seem happy with it...as same w/the resolene. I hope it works out and the piece is saved. Semper-fi Mike
-
I use 2 methods....as Katsass does.....nature is a excellent oven....and as ChiefJason....I use the dryer when nature ain't co-operating!!!!!! Nice thing about the dryer is that there is hot air circulating all the time. Has worked for me many-a-year and imagine shall continue same. Semper-fi Mike
-
Chief, Thanks for the kind words and thank you for your service also. I'm sorry that you have to be in Hotlanta at all, (lol) but keep me in the loop if the perspective buyer decides to back out. Thanks again. Semper-fi MIke
JFYI
(USMC 1974-1977, USAR Retired 2005)
-
Good morning Chief, I just noticed the Tippman and am kinda in the same situation as you are. I hand stitch all my holsters with 9 strand waxed cord and like the way it looks. Here's the ...but.....I have been thinking about a Tippman as of late. My only hesitation is that many comments have been made about how the bottom side of the stitch looks a bit "undone" or maybe a better word could be found. They say the top looks wonderful, but the bottom not as much so. Have you found this to be true??? I may be interested in the machine. I am located just above the Ga. line from Blairsville so the trip wouldn't be to bad at all. Thanks. Semper-fi Mike
-
Just as I figured!!!!! You are a funny man indeed. And I thot I had some weird ideas, chickens from dinosaurs, science, indeed!! Oh, and the "barhead" thing, ???????? Aparently you were looking to give me a compliment.....us "jarheads" gotta stick together, you know. Out here. Semper-fi Mike
-
My futile attempt at humor may have been lost on MontanaSlick, the jist of the post remains. What was old is now new. Preserving leather is as old as creation and most of the products that "iknowshaun" spoke of are the tried and true products that have withstood the test of time.
While the lesson on epidermal regeneration by MontanaSlick was most appreciated, I believe we knew how it works. Stay tuned next for the lesson on "which-came-first, the chicken or the egg". Semper-fi Mike
-
My my, incredible work and for a great cause. To the recipients of these 2 works of art, good-on-yah!!!!! To the Iraq vet and his or her family, thank you for your service. Semper-fi Mike
-
Shaun, all the products that you use in you own concoction have been used for millenium and then some. Neatsfoot is used extensively today as is olive oil. Belts have a lifespan that is prolly in the time frame of maybe 5 years????? I doubt that anything other than acetone or anything corrosive will damage the belt in that time. Just remember, the cow wore this garment for a lot of years, and he was out in the rain, snow, sleet, hail etc. He probably rubbed up against barbed wire, got mud and everything else on the hide that we can't mention and he couldn't ruin it. I doubt that we can ruin it outside of drying it out to much with applied heat. Overthinking this is something that we all do and we loose copious amounts of sleep over it. Make yer belts and sech and protect it as you best know how. The customer will be the benefactor of a great product!!!! Semper-fi Mike
-
Thank you kindly, Josh. I always like to get permission to use someone elses design. Have a great day and Semper-fi. Mike
-
Hey Mike...me thinks you been using that contact cement in an unventilated area and perhaps you need to get out in the fresh air and clear that brain-housing-group up a bit!!!!!!!!
 LOL!!!!! Semper-fi Mike
 -
Josh, Thanks for your service to our country. Also, thanks for the intel on the holster spacer and nuts. I would like to try a design similar to that with the spacers as it does make for a unique look and also does provide some "forgiveness" to the design if it was to tight. Would you allow me the permission to do so? Thanks again and Semper-fi Mike (C-Company, Mar. Bks, Phila. Naval Base, Cross-Country Chaser Unit 1974-1977., U.S. Army 210th M.P. Co, Murphy, NC 1993-2005)
-
Most excellent pieces, Josh. I like the ides of the two spacers sandwiched in between on the Askins-style. If you don't mind me axeing, hat are you using for the spacers and are the nuts sandwiched in between two pieces of leather??? Thanks. Semper-fi Mike
-
I've used vinegar black for several years and have never had a resperitory reaction as you describe. "Roon" will "gas-off" when it is first mixed up and then for several days thereafter. After heating it up and mixing it in a jar, it will require a ventilation hole to accomidate the escaping gases. Hence, there will be a small amount of gases, but it will dissipate after a while. I usually use it it the basement, but there isn't any type of "ventilation" per-se, so I cannot advise you as to whether the reaction was because of the "roon" or perhaps the weather or sech. Hope you are feeling better and "roon" on. Take care. Semper-fi Mike
-
Red Cent, Nice work. I myself have gone to just using H2O as my edge burnishing "secret " formula!!!!! Take care...Semper-fi Mike
-
As usual, too-cool-fer-school!!!!!!! I've come to expect no less from Lobo. You set the bar high. Semper-fi Mike
-
Babbs...I use a cheap paint brush that you can buy at Wal-Mart for like 50 cents. Because resolene is waterbased...I rinse it several times and re-use it. When the bristles start falling out...I throw it away. Now some folks use the sponge brushes and they seem to work good. Mine are the yellow wood handled cheap-o's!!!! I'm not a cheap-skate...but they are reasonable and work great. Don't fix it if it ain't broke!!! Semper-fi. Mike
-
If I grasp what yer axeing...I usually just transition to it with 1/2 the diameter plus a smidgen. I go at a 45 degree angle from the barrel to the underlug. When it comes to the cylinder I do the same,.....1/2 diameter and add a smdgen. The wheel-guns are a bit different for me as I make the stitch-line a bit less confining and also mold less. The radical differences in dimensions make the stitch-lines more radiused than the "squared-off" style on the semi's. Hope this helps some. Semper-fi Mike
-
I would imagine that you could get a grey by taking white and mixing black w/it. Semper-fi Mike
-
Tina, just a couple thots.....try redying the areas that you believe are spoiled, with dye that isn't water based. You might try sanding those areas with some med. then fine sandpaper before dying. Also, the spot that you originally wanted to "roon", sand that also and then try the roon or dye again. This stuff need something porous to adhere and soak into. Most pieces can be salvaged if we get some advise and use our imagination!!!!!! Semper-fi Mike
-
Roger, I've used "roon" for years and nuetralized it w/a tad bit of warm water and a teaspoon of baking soda... then a good rinse and pat dry. I make holsters and have never had one "fall-apart', fade, bend, fold, spindle or mutilate!!!!!! They will have a tendency to smell a bit but that is because of the roon. The odor will disipate eventually. one thing about roon in holsters is that you will find it has a tendency to "resist" molding or boneing. I use it after I've molded or embossed my work. But, don't overthink this and you'll do O.K. The animal who wore this coat of leather got rained on, sunned on, snowed on, pissed on and prolly even got stuck in the sewer a time or two. 'magine that...and we think we can destroy it overnight!!! We can do that by overheating or drying it to much...but it ain't done on purpose. Take care and Semper-fi Mike
-
Wanabe, I hate the pieces are ruined, but most projects are salvagable. I always used isopropyl alcohol to thin my Feibings dyes. I now use Angelus dyes and haven't looked back since and I still thin with alcohol. Now for the leather prep. I always put the pure neats-foot to it before dyeing as it seems to even out the color. JMHO.. Semper-fi Mike

Been gone too long…..
in Gun Holsters, Rifle Slings and Knife Sheathes
Posted
Thank y’all for the kind words. I mostly only make holsters for myself an family anymore. Retirement has been kind to me, so there is a lot to do for others…..when they know your retired and have “nothing to do”????????? Then there’s Mama’s “to-do” list, you know…the list that just never seems to end!! Gotta love her though, see did buy me that awesome Kimber?? Getting old isn’t for the weak hearted!! Take care. Semper-fi & This We’ll Defend, Mike