


Retired LE
-
Content Count
23 -
Joined
-
Last visited
Posts posted by Retired LE
-
-
I bought a piece of vinyl at JoAnn fabrics, . . . folded it over, . . . contact cemented the edges, . . . I roll the end & put it into a piece of 3/4" pvc that has a slot for it, . . . thread a 1/2 in rod in to hold the vacuum, . . . turn on the pump, . . . watch the vac work, . . .
Bag cost: about $15.
May God bless,
Dwight
How did you attach the vacuum hose to the finished bag? Did you make your own fitting or use an existing item?
-
I got it from veneer woodcrafters. It is 2'X4' which is actually enough for two bags if the first section I am using ever wears out. 2500+ holsters and still going strong. Cost was right at $100 after shipping.
Ok thanks. I will check out the site.
Mike
-
Thanks for taking the time to post a detailed reply.
Your comment about a vaccum reserve brings up another question. I assume the reserve acts as sort of a reverse accumulator which are common in pressurized systems. I did a search on homemade vacuum systems and most of them had some sort of canister made out of pvc pipe, old air tanks and even some used fire extinguisher tanks. You mentioned that it helps in the event of a leak. Doesn't it also significantly extend the time for a full vacuum to be reached?
-
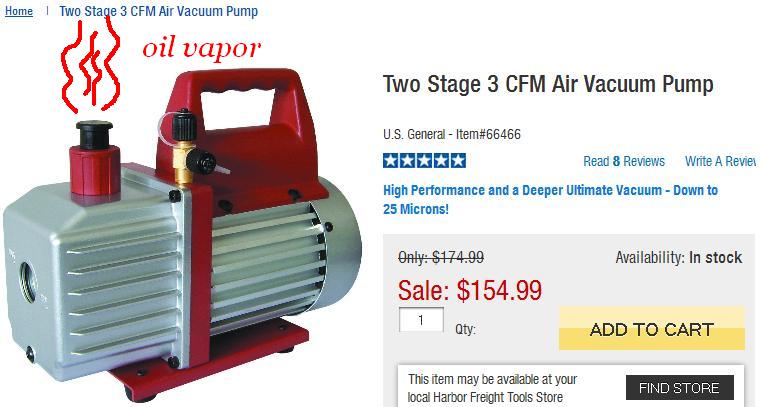
That is the same pump I use. The oil mist is from a slight overfill and will go away shortly. If you have not yet purchased a bag let me suggest that you invest in the poly rather than vynal. The poly lasts almost forever and works a hundred times better for molding holsters than the vynal and allows for boning the details through the bag.
Ok thanks. I didn't realize there might be a break in period for this pump. The instructions were rather sketchy.
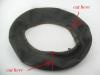
I lieu of a vinyl or poly bag, I am going to experiment with a used inner tube that I picked up for free from the local tire store.
I am working on an idea using pvc tubing to use as clamps/sealers on the cut ends. I also made up a vacuum hose using quick disconnect air fittings and a schrader valve fitting.
Only problem I can see initially is that I won't be able to see through my homemade bag to see what needs to be molded - but I think the outline should be distinct enough.
Will see how that works out.
PS: Where did you get your bag and how much was it?

-
Re: I wet the front piece and using my fingers and a vacuum bag to form it how I want around the weapon.
I read your post and noticed your reference to the vacuum bag. I am in the process of trying to put together my own vacuum forming system (without spending the big bucks if possible).
I have a pretty good idea how the system works and the components needed - but I am running into problems with selecting a vacuum pump. From what I have read, the hand held vacuum pumps take forever to reach a level of vacuum that will mold leather, and the wood veneer units are prohibitively expensive. In the middle of the price range are the electric vacuum pumps available from Harbor Freight. I purchased one of those yesterday (see attached pic) and after setting it up, I noticed it emits an oil mist out the exhaust while running. That might be ok for a mechanic working on AC system in a garage - but it's unacceptable for in home leatherworking - not to mention potential health issues.
So anyway, to avoid becoming long winded here.... I was wondering what system you are using.
Thanks for reading,
Mike
Edit: After posting this I realized i probably just hijacked this thread and should have started a new thread? Perhaps the moderators will step in and adjust accordingly?

-
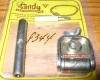
The item pictured on the right was sold in the late 80's by Tandy Leather as a "Concho" hole punch. Winter Bear's initial guess was accurate.
Well that would make sense since she purchased most of the stuff she had during the eighties.
Thanks for the reply.
Mike
-
I am working with a piece of 5-6 ounce for a wallet holster and when I put it in the water I could feel the bubbles (air) coming out
in the water and I could see them. Musta' been really dry. Thanks for the information. I'll let you know how it comes out!
Any update to this thread?
This inquiring mind wants to know.
Mike
-
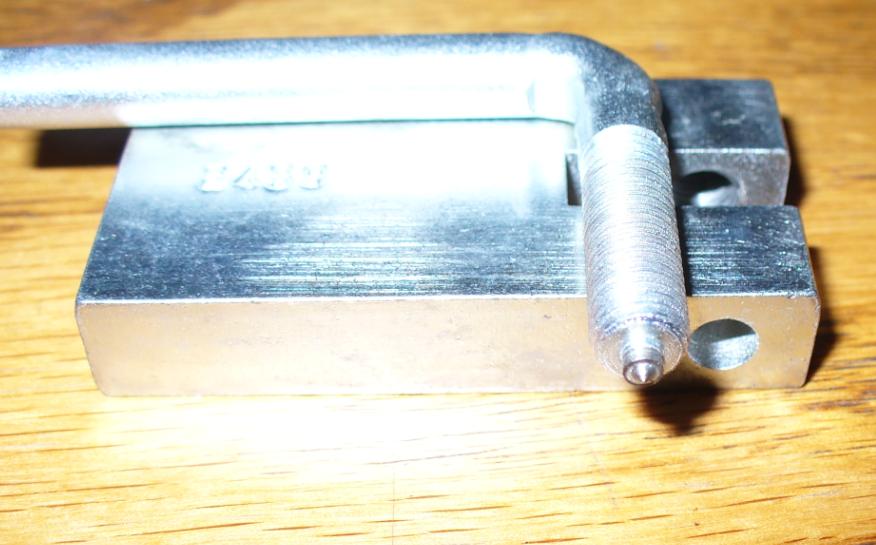
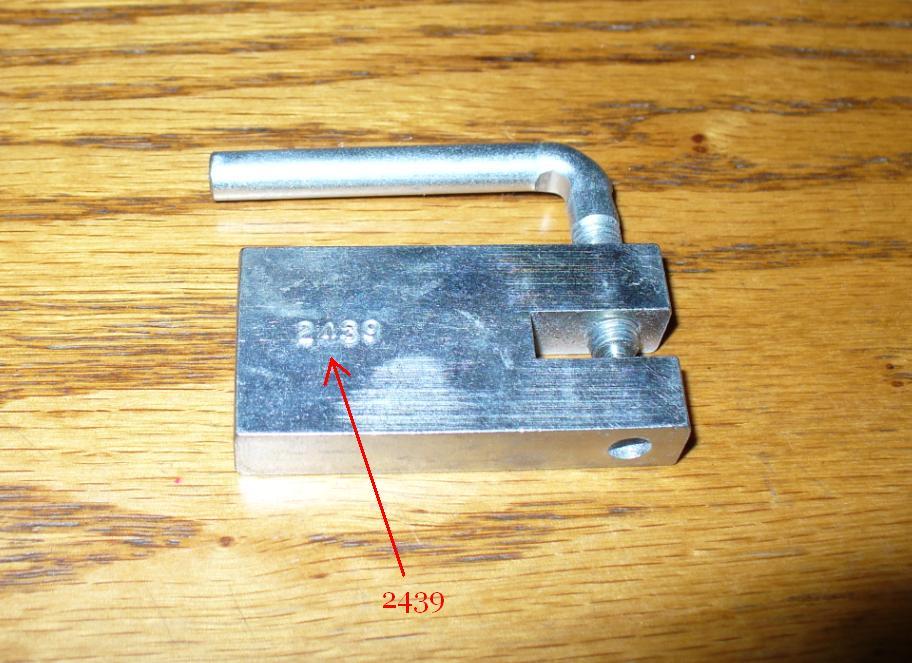
Reminds me of the tool to set the rivet in a chain saw blade
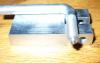
That's what I initially thought. But I don't think it's strong enough for that function. I did try to punch a couple of holes in a piece of leather with it and this is what I got.

-
Looks something like a screw-punch? Jewelers and some hobbyists use something similar to punch small holes in thin metal (usually brass, copper, and silver).
Here is a closeup of the threaded L-shaped handle.
-
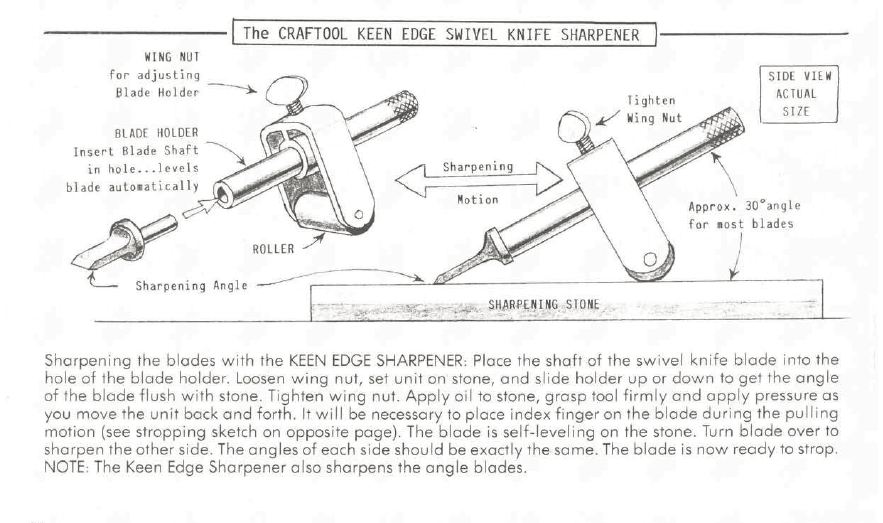
The one on the left is a sharpening jig for a swivel knife blade. Put the shaft through the hole the blade in the end, set the angle and sharpen your blade.
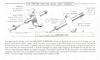
Thank you! Makes sense now. I did get the swivel knife as well.
-
I recently purchased some used leather working items from a friend who is no longer actively involved in the craft.
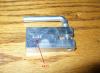
Among the items I received were two small tools - the purpose of which I have yet to figure out.
The first item consists of three separate components that were stored in a Tandy zip lock bag with the number '8344' in black magic marker written on the outside.
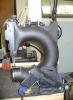
The second item was loose in the tool box and looks to be some kind of press.
Anyone care to take a shot?
Pics attached.
Thanks for looking,
Mike
-
Is that for left hand use?
Looks good. Nice work for a first.
Its for right hand wear with the gun canted forward. I may trim a bit more leather off of the front part of the thumb strap though to avoid that flap holster look.....
-
Looking for a mold for a 4" 1911. Rings doesn't make one. Any other place I can try?
If no molds are available, it sounds like a good excuse to buy a real one for your collection?
-
Update:
Just got back from a trip so haven't had time to post an update.
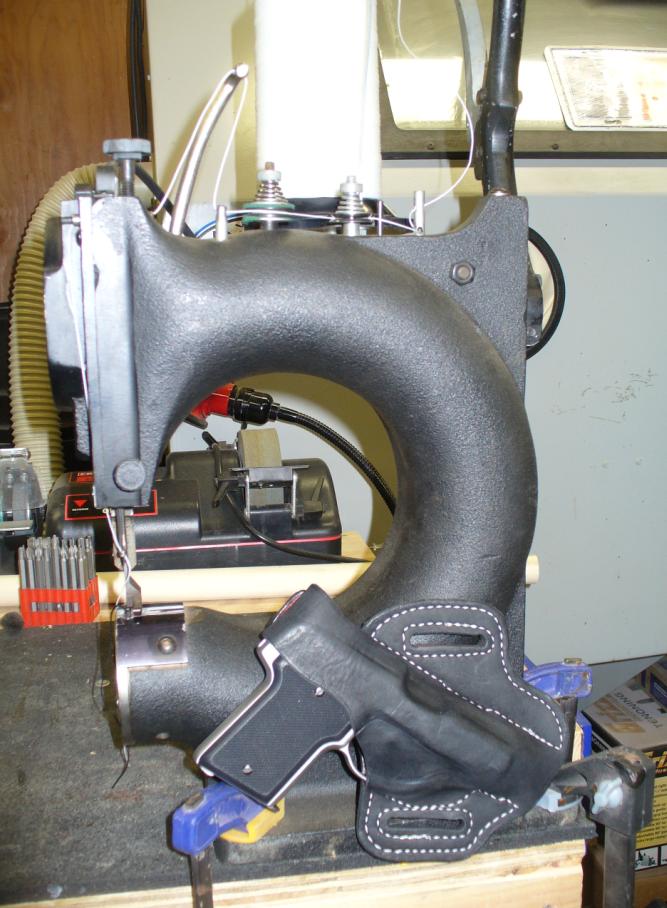
Anyway, I received the machine as promised and it didn't take much to get it into operating condition; just a bit of grease on the working parts, some fine tuning on the thread tension, and a longer bolt to attach the stitching handle to the gear shaft.
I attached it to my work bench with a couple of clamps and off I went.
Included is my first holster – made for my AMT 45 Backup. Its not fancy, but it serves the purpose much better than the cloth inside-the-pant holster that I had.
Thanks again to all for taking the time to read and respond.
Happy leathering. (probly not a word but what the heck)
Mike
-
Update:
I received the machine from the owner in Oregon. It arrived in the original wooden packing crate along with some accessories. Now to spend some time checking it over and familiarizing myself with it's function/operation.
Luckily, I was able to download an owners manual from the Tippmann site which will help a lot - but more useful was the web site's instructional video which showed thread tension setup and some other handy tips.
The only thing I noticed initially was how the stitching handle is attached to the shaft. It's only held on there by one 3/8 threaded allen head bolt. Doesn't seem heavy duty enough to handle the torque when operating that handle... I went ahead and installed a longer bolt which threads into the gear shaft just a bit further. More to come as I delve into this further.
-
Vacuum forming works very well for leather. Do a search in the holster section for a number of posts o n the subject.
Thanks for the tip. I found a great u tube video that 'splains' the process.
Mike
-
Has anyone used a press, like a press used for kydex forming or a book press, for molding leather? I have seen a few posting on various forums stating it can be done for greater detail than hand forming the wet leather.
Thanks ahead of time for your help.
Your post got me to thinking about another process called vacuum forming that is used for the production of products like spas, car dashboards, etc. I would think that a vacuum pump with enough suction power would be able to form wet leather around whatever object was placed under it and would be the cat's meow when making holsters for example.
-
On the first one, two needle feet broke, the lever that pushes on the uptake lever rotated on its shaft , you name it .....
On the second one the gear rack broke, plus a needle foot. This machine sounded like it was full of gravel right out of the shipping box. Quality control??
The operating parts inside an alum. Boss are made of presscast zink, a non durable (but cheap) solution, as opposed to the cast iron Boss parts which are made of steel. You can figure out yourself the difference between cast zink and steel parts. On the iron Boss you can do a simple modification that makes it even better, by adding a spring to the uptake lever that keeps the top thread in tension during the whole sewing cycle.
My advice, go for a cast iron Boss if you plan to buy one, or even better, save up some money and buy a used motorized leather sewing machine, Juki 441 clone or Adler 205
my 2 cents/ Knut
Thanks for taking the time to post a detailed report on your experience - which although it may not be typical, it does speak of products which are 'modernized' to the detriment of their quality and/or reliability. My gut was telling me to stick with the cast iron units so that's what I am going to go with.
Thanks to all who took the time to respond.
Mike
-
I have had two aluminum Boss sewing machines. Both broke down. Then I found a used Iron Boss and it has worked without problems. Would this info be of any help ?
/ Knut
I appreciate the input.
If I might ask, what exactly happened to the aluminum units to cause them to break? Was it a specific part or.....
-
One of the folks who works for Tippmann is named Ben, . . . call em up, . . . get him on the phone, . . . he'll help you.
May God bless,
Dwight
Thanks for the tip. I may have forgot to mention that I am impatient as hell and given this is a weekend and they are probably not answering their phones I thought I would tap into the knowledge base here before committing to the purchase of the unit in Oregon.
Mike
-
Greetings and salutations to all from a newby hailing from the Pacific Northwest.
I am a novice leather worker who is considering the purchase of the Tippmann Boss leather sewing machine to satisfy my cravings to produce leather holsters and knife sheaths. My efforts will be strictly of a hobby variety versus a production shop. Production sounds too much like work so I will shy away from that.
I understand they used to be made out of cast iron - but are now manufactured out of cast aluminum.
Seems to me the cast iron unit would be better (more stable due to the weight, and stronger). Are they the same dimensionally speaking or have there been upgrades/changes since going to cast aluminum?
Will parts interchange between the two? If not, which ones will and which won't?
Anyway, I located a lightly used cast iron unit for $900 in Oregon which is not too far away from me. From what I have read here and elsewhere, the price is just about right.
Any advice or suggestions would be appreciated.
Thanks for reading,
Mike


Need Some Help.
in Gun Holsters, Rifle Slings and Knife Sheathes
Posted · Report reply
Ok thanks Dwight. My apologies to the OP (original poster) for hijacking this thread....