Leb
-
Posts
8 -
Joined
-
Last visited
Leb's Achievements
New Member (1/4)
-
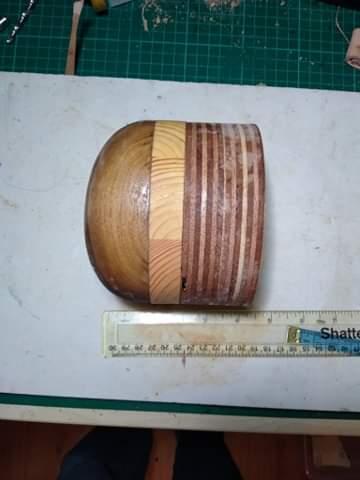
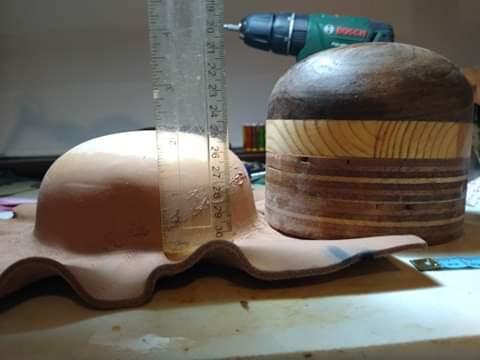
Since it's hard to get proper rawhide in small quantities quickly where I stay, I used one of those dog-chews for rawhide (which is just very thin low quality split side). And the thin leather did conform to the shape, but with many overlapping folds on the side. I also improved my leather press a bit, and managed to form the initial veg-tan a bit further, which gives me hope. I think I need to make a new form which changes more gradually and looks more like a bell, as someone mentioned at the start of this topic.
-
@mikesc Perhaps working "inside out" would work? That is, start with the first layer, and then shape the next layer on the wooden shape with the first layer of leather on it. However, I suspect you would need to come up with a "variable size outer mould" to adapt to the extra layers. Edit: Ah, I see toxo already replied. Anyway, if anyone has some bull scrotum they have for sale - let me know
-
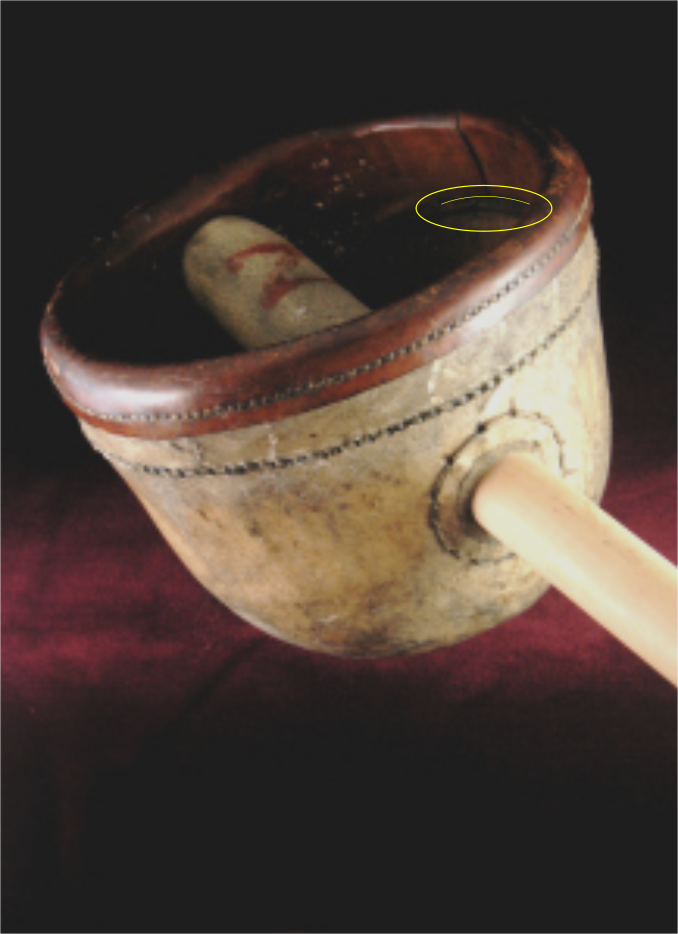
@mikesc Thank you for the clarification (and for the French lesson!), I think the way you describe the construction (with a "split") makes sense to me. By the way, I have learned the hard way about boiled leather some time ago, that's why I used "boil" Unless rawhide behaves differently, I don't believe it was truly boiled. I wish there was a good picture of the inside of the basket - I thought the lower line was just there to hold the brown rim (but I can almost convince myself there is a slight "dent" so it's possible the brown leather covers and holds an inner quarter-sphere leather shape you were describing)

-
@Matt S It does look like rawhide, doesn't it. I think I'll just have to order some rawhide of different thickness and see what happens. @RockyAussie Thanks for the tips, I guess the detergent acts to break up the membrane proteins to some extent to make the leather more pliable (and I suppose lubricates the leather to help with pressing?)
-
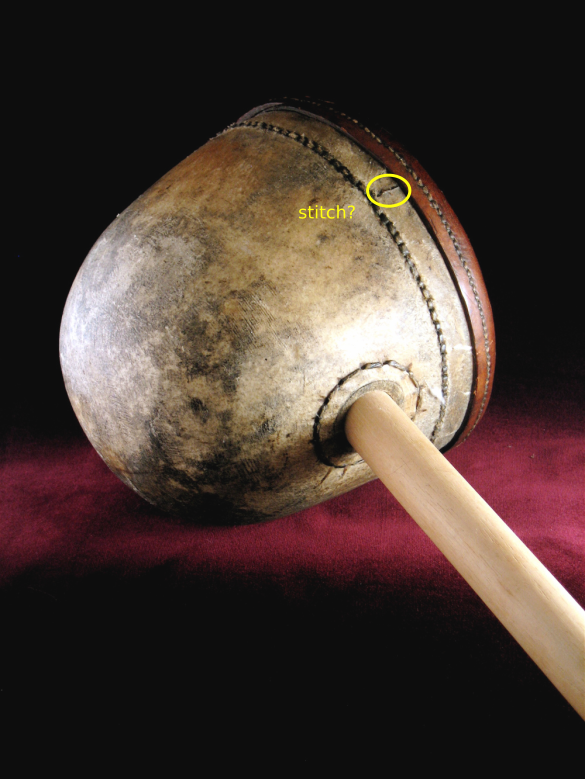
Thank you for the replies everyone. @garypl stitching another section is certainly something worth considering, thanks. @mikesc Do you mean these two stitches circled in yellow? Nice spot, I completely missed it, thinking it was just a scratch. Having only these pictures to go with, I think the construction you describe is certainly possible. However, it still escapes me how the outer "dome" is seemingly made form a single piece of leather. @chrisash Ah, very good point about the shape. The more gradual shape should help, and I do now see that it is more of a bell rather than an ellipse. Interesting suggestion regarding using very thin leather in multiple layers. I have just quickly thrown a ~ 1.5mm leather (so not that thin) to see what happens, and to my surprise it wrinkled more than the thicker leather. I'll need to try with some 0.8mm goats leather to see what happen. Regarding belly, I will keep this in mind, thank you. So far I have been using scrap pieces (not even sure anymore which parts of the hide are they...)

-
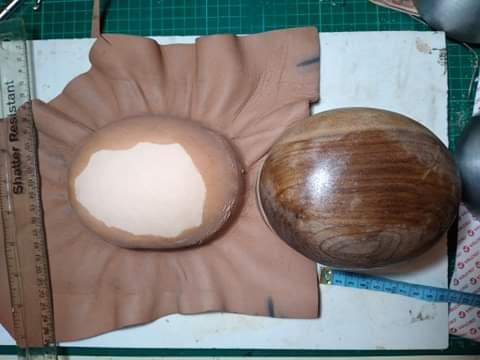
Hi everyone, I spotted this "leather basket-hilt" in the interwebs https://fencingclassics.wordpress.com/2009/01/08/leather-hilted-singlestick-britain-c-1900/ As far as I can tell, there are no visible stitches going across the hilt. I never tried wet-forming anything so extreme in the past (the closest thing was a flask, where I basically copied what this person did here: https://leatherworkingreverend.wordpress.com/2010/05/06/flackets-the-other-leather-bottle/ ), but thought I'll give it a go. I made a prototype which is about 10cm tall, and has a top-view profile of an ellipse with major/minor axis of 12 and 10cm respectively. The leather is about 3.5mm thick, and soaked it in room temperature water (maybe I should heat the water a bit more?). When I try forming the leather, I can only get so far before getting stuck due to wrinkles, and I am not sure how to get rid of them without the "cutting triangles" technique. I tried "pre-forming" on a less aggressive shape, but that didn't seem to make a difference. When I had wrinkles on my flask project, I got rid of the wrinkles by using a "multi-step" approach - that is, I would press as much as I could before the wrinkles would prevent me from going further, let the leather dry, resoak, and then press again, which would usually deal with the issue. However, multi-step approach doesn't seem to work here. I'd like to ask you opinion if you think this should be formable, and whether there are some crucial steps I am missing which prevent me from succeeding. I wonder, if rawhide forms differently to veg tan (perhaps it is possible to "boil" rawhide onto a shape?). I would also be interested in hearing some theories how the hilt in the first link could have been made. Perhaps forming on a half-sphere first, and then squeezing on the sides by hand to make an oval shape could be an approach? The "top view" size is about 12x10cm (which I suspect is one more problem, I guess it should have less elliptical) I am only able to form the first ~2inches before I cannot push my press any further with clamps or otherwise. This is due to wrinkles forming Now, perhaps I have left just a little bit too much excess leather, however, I wonder if this shape is in general too much for wet forming.


-
Hi John, and thanks for the reply and suggestions! >My first question is, what are you using as a base to do your carving and tooling? Make sure it is solid and use a piece of smooth marble or granite. I wansn't able to get granite/marble yet, so I am using a ~10kg sledgehammer head (it's smoothish, but not as smooth as marble/granite would be). I cover it with a layer of cling film. Cheers, Leb
-
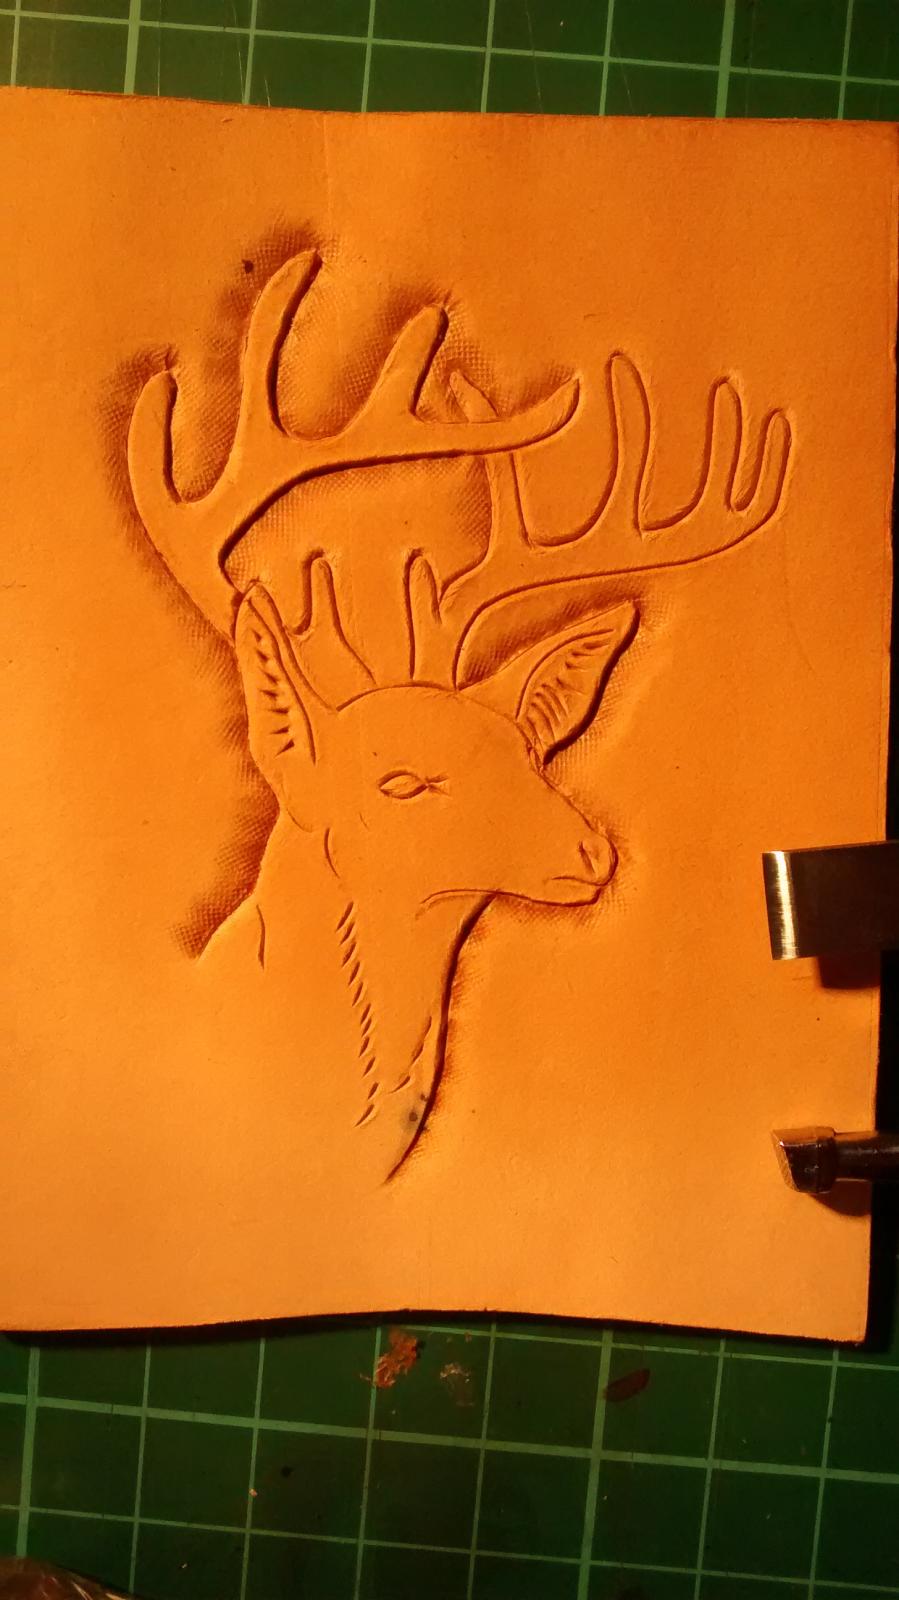
Hi everyone, I'm new to leatherwork, and would have normally chosen a craft where there is more room for error, because of my sloppy nature. However, due to my current location, leatherwork is the only feasible craft I can do (seems like getting a cheap workshop/garage for blacksmithing purposes in UK city is nearly impossible at an affordable price...). Anyway, I bought P.Burnett's leather carving bundle and have been trying to go through the excercises, however, I find them rather difficult. I attach an attempt to carve and tool the "deer excercise" from lesson 1, and would appreciate if anyone could advise what's the most likely reason for it looking bad? Some info: -No artsy background, so don't really have a feel for "lines of beuty". -I use a cheap straight swivel knife blade in a cheap swivel knife (one on ebay for ~£5). I wonder how much better would it be to use the angled blade (tiwst cuts are a bit of a pain with the straight knife). -I had to modify the swivel knife a little bit, it was not spining smoothly, but was getting stuck ~ 1/4 revolution. This swivel knife had 2 6mm bearings, one of which I had to remove, but now the knife spins really well (I hope it is meant to be spining freely and not get stuck ~ 1/4 rev !) -When beveling, I try do overlap 1/2-1/3 at each step, and try to do the "jackhammer" (I hold the beveler very lightly, just touching the leather and let it rebound as best as I can). -For casing, I try to do the quick casing described in Lesson 1. -I strop the blade regularly, but I'm not sure if it is sharp enough - if I cut deeply, the leather seems to "wrinkle" a little bit at the edges... Cheers, Leb