drummingpariah
-
Posts
9 -
Joined
-
Last visited
Recent Profile Visitors
1,268 profile views


drummingpariah's Achievements
New Member (1/4)
-
Educate me on my Champion machine
drummingpariah replied to drummingpariah's topic in Leather Sewing Machines
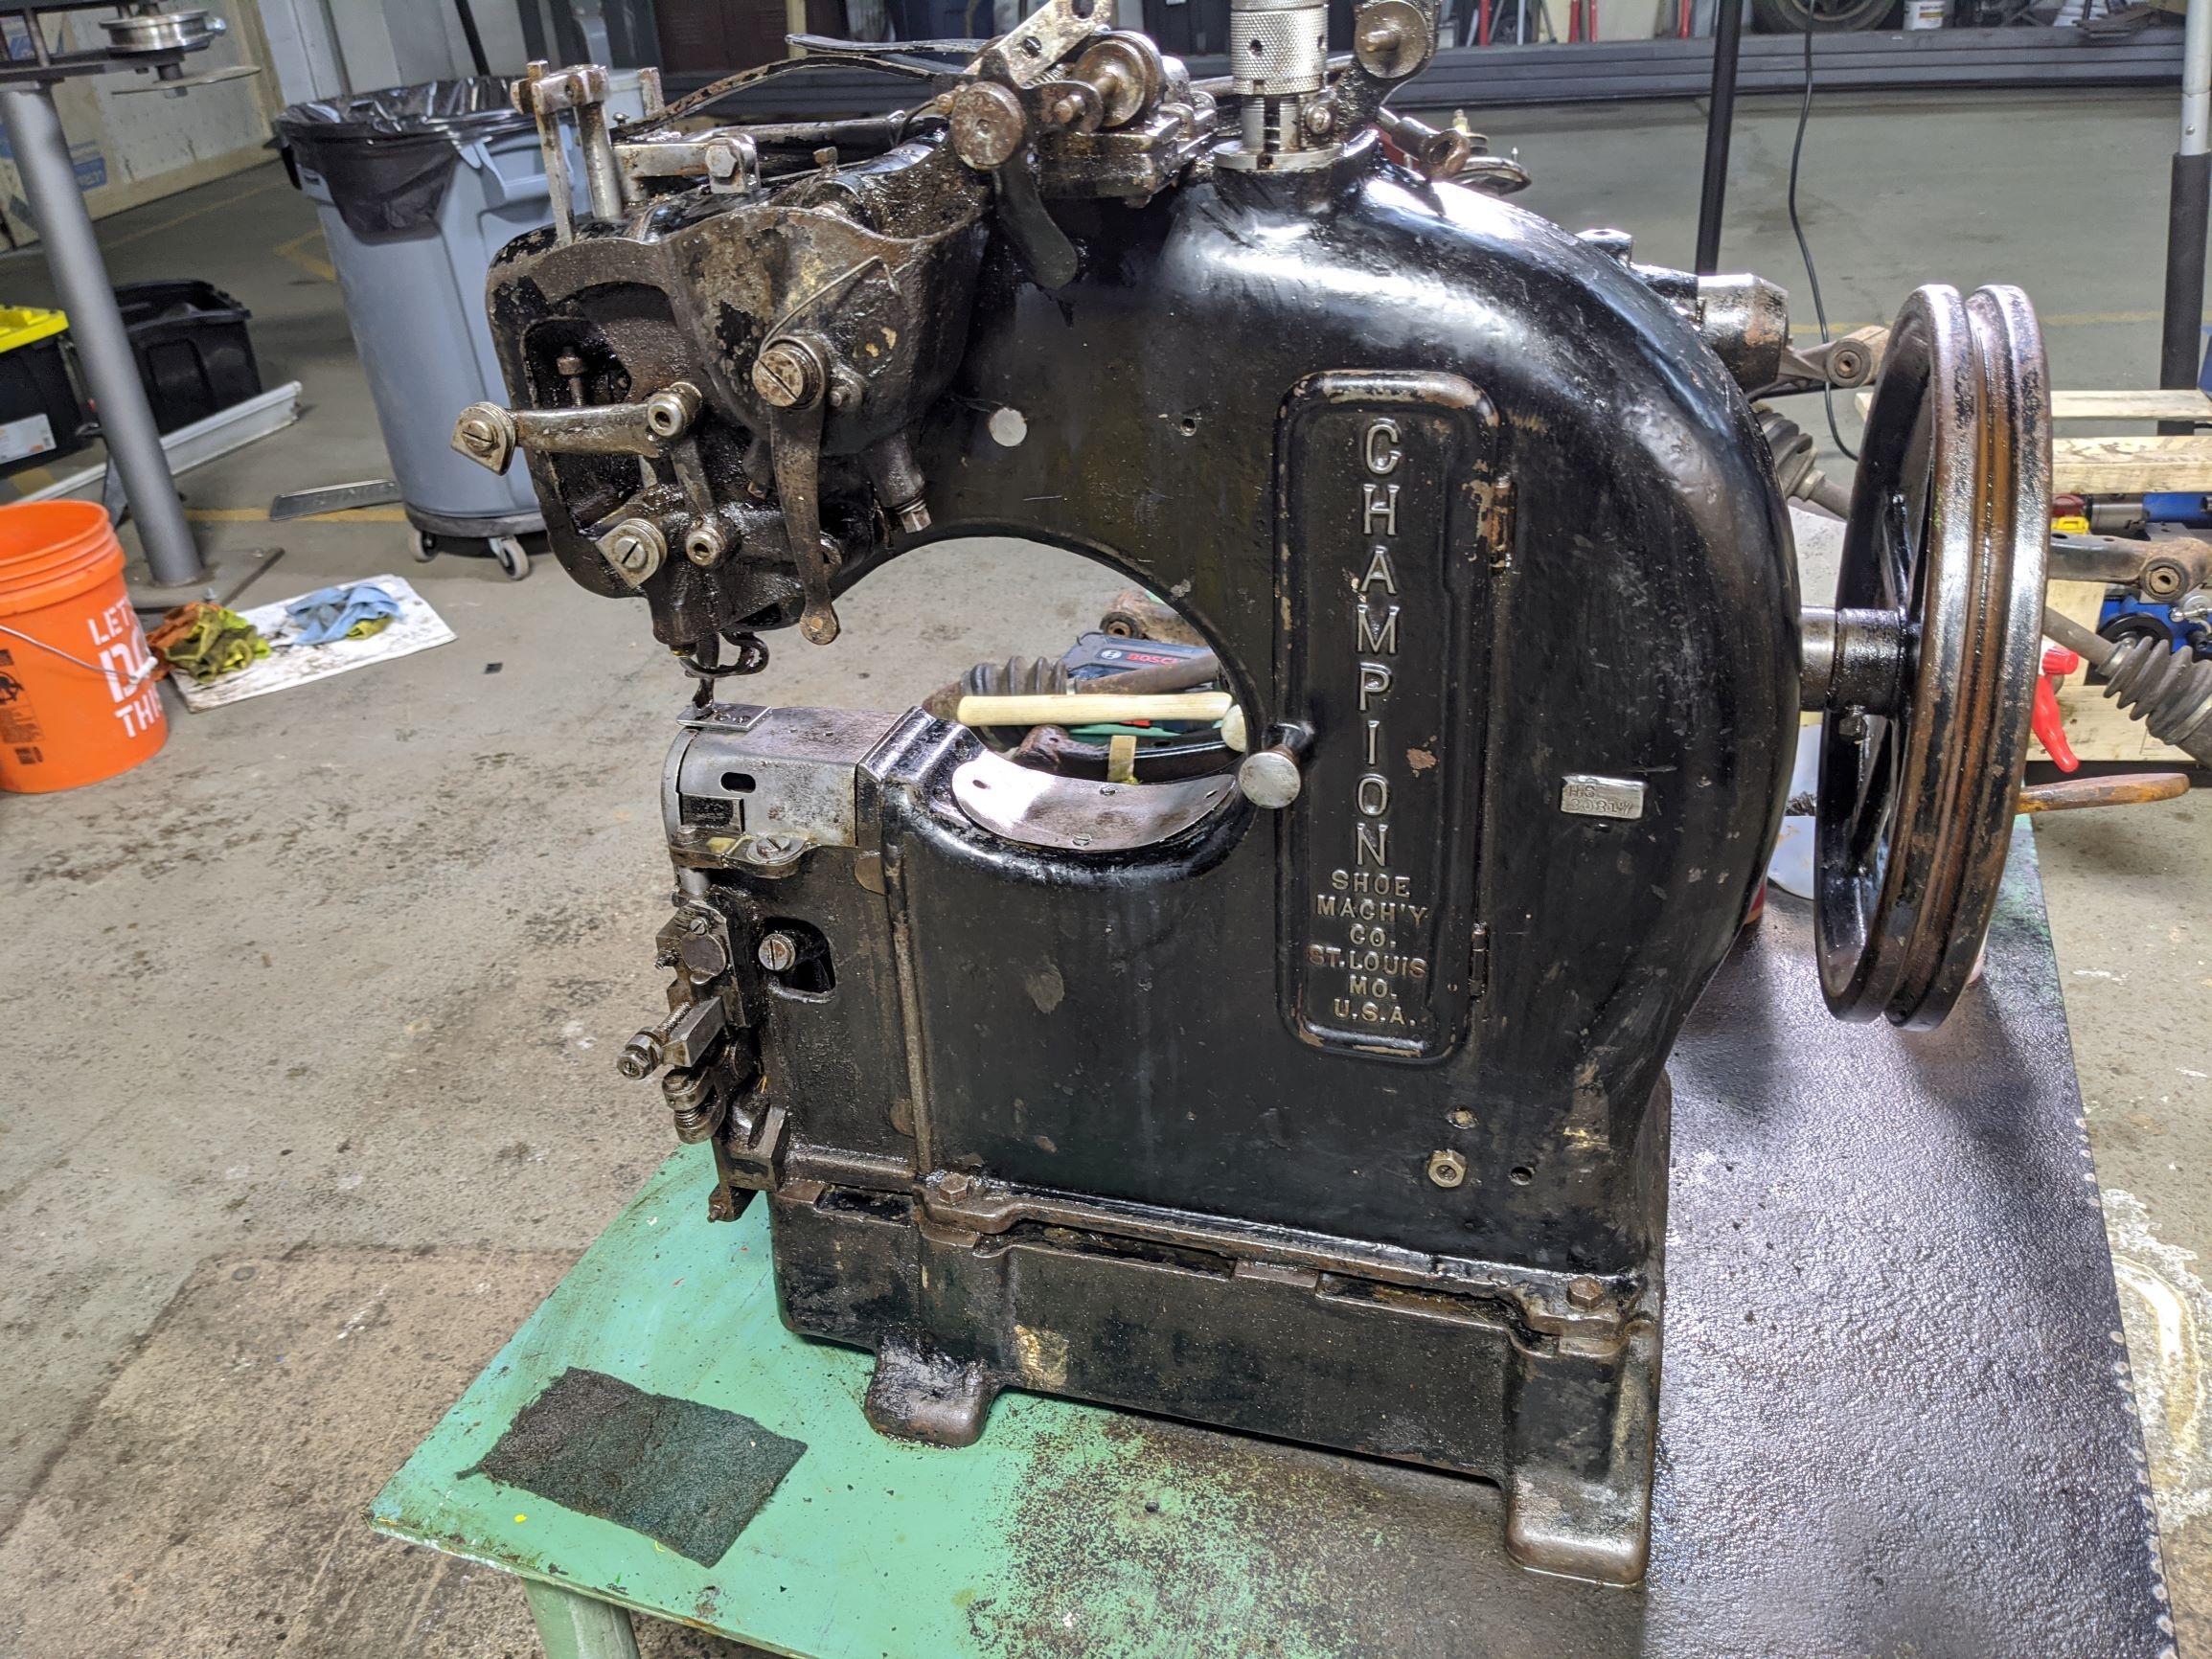
Thanks very much, I'll get ahold of him shortly. I don't mind investing in this machine, I just haven't come across any other resources like him. It has a Champion #4 hook in it right now, which I'm assuming is correct, but haven't been able to verify that yet. Just the minimum, which was a few swinging covers that retain the bobbin case/carrier. I didn't take anything out that could've cause this interference. Verified, I have that part right at least. -
Educate me on my Champion machine
drummingpariah replied to drummingpariah's topic in Leather Sewing Machines
That explains it, of course! That means I probably just have something inside the needle seat keeping it from going all the way down, or this needle is too long. I'll be able to spend some more time on it tomorrow. -
Educate me on my Champion machine
drummingpariah replied to drummingpariah's topic in Leather Sewing Machines
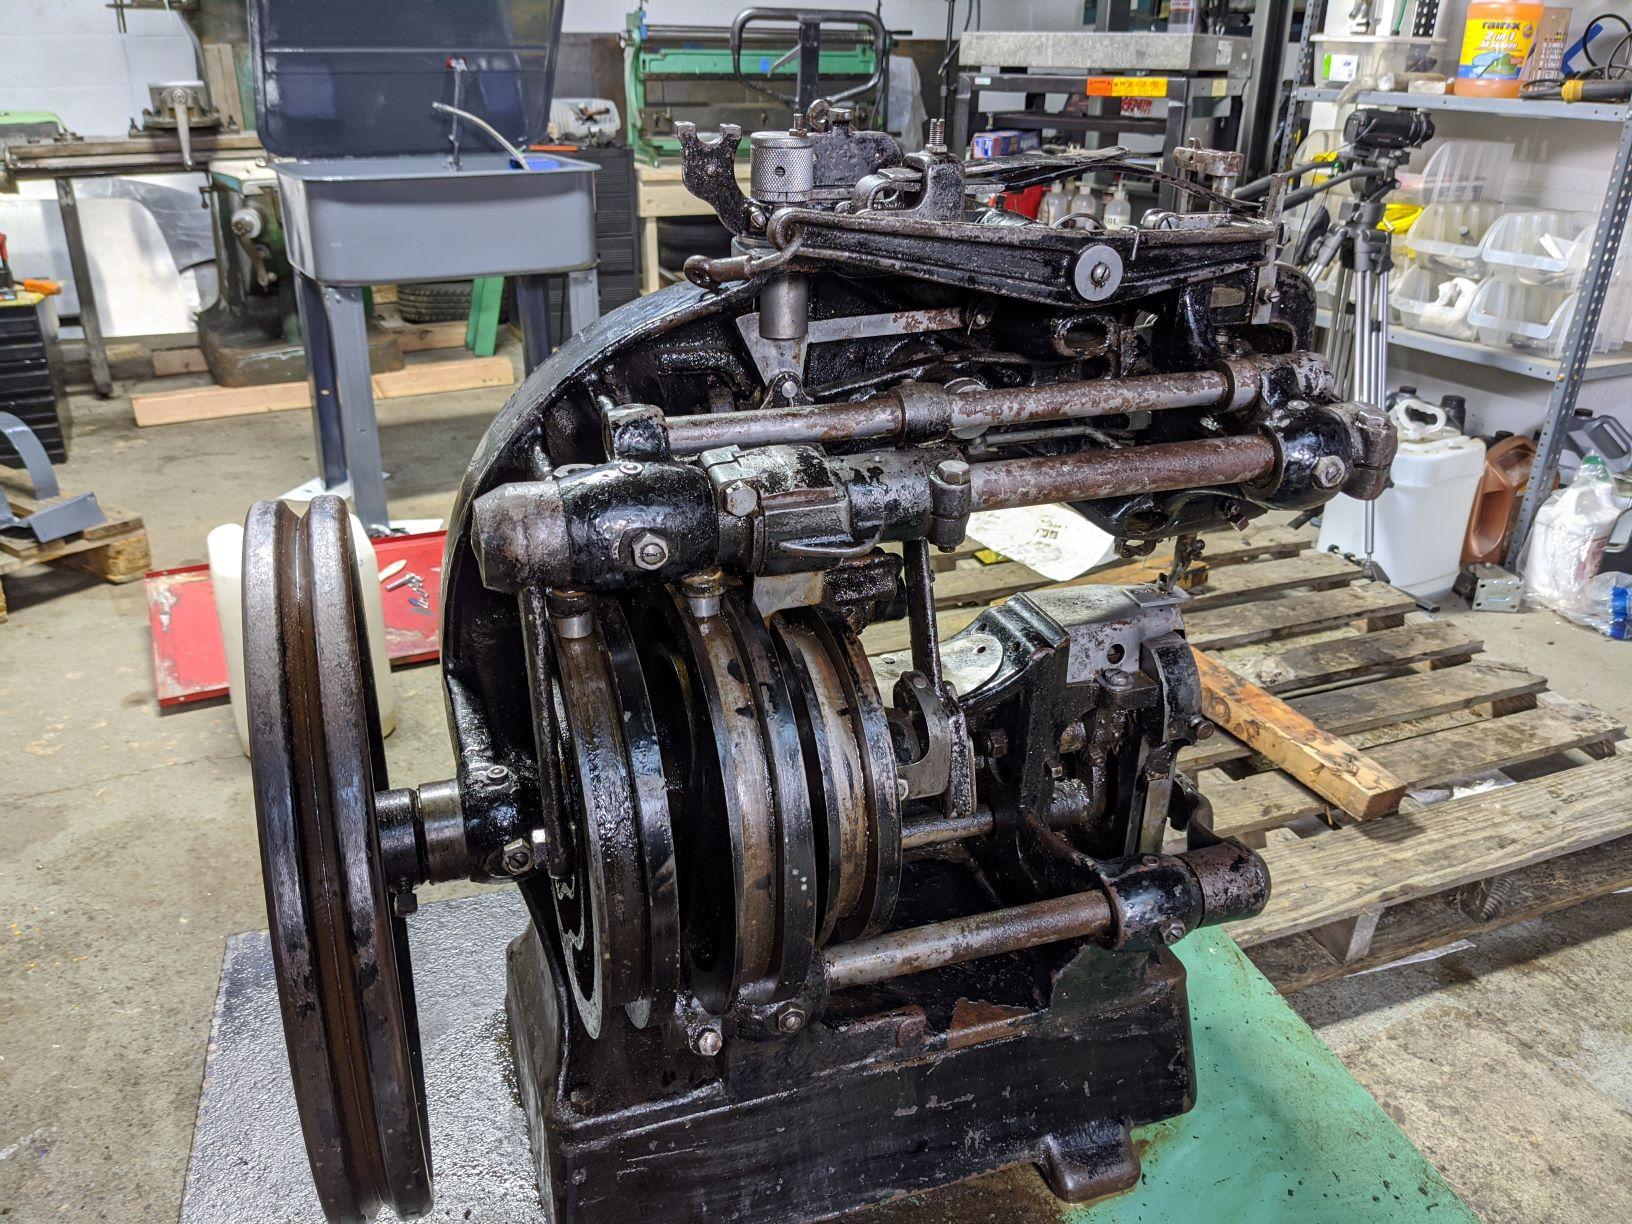
The engineering that went into some of these mechanisms is breathtakingly elegant. I'm trying not to disassemble everything at once; If experience has taught me anything, it's that I'll find a way to install some component backwards and it'll take ages to figure out what was wrong. Instead, I've just been purging all the journal areas and taking one component apart at a time. It's tedious, but cathartic. I just pulled the gibs on that needle guide apart, and it was pretty disgusting in there. I'm still trying to sort out why the needle pops back up partway after making a stitch. It has a lobe on the cam, so it must be intentional, but I'm definitely missing a critical piece of information. -
Educate me on my Champion machine
drummingpariah replied to drummingpariah's topic in Leather Sewing Machines
I haven't found any model information anywhere on the machine, other than a "366" stamped inside the needle area. It looks like it's an old wide throat machine, but haven't gotten much further than that. I have it cycling pretty well without the hook (apparently it's a hook, not a needle) installed. With the hook installed, I've found a definite timing issue. I haven't internalized how the machine runs yet though; I need to spend some more time looking at the 'lower mandible' parts to understand what they do and how they're supposed to work ... but right now, I have interference whenever I try to cycle it with the hook in. -
Educate me on my Champion machine
drummingpariah replied to drummingpariah's topic in Leather Sewing Machines
That looks like the same machine, and it does answer a couple of my questions. I still don't know what the big cast rocker arm on the top does though, and haven't been able to find any kind of specs on spare parts. So far, I haven't uncovered anything that I need to replace. One interesting thing that video shows is that the bobbin carrier retracts into the machine. That's the biggest problem I have with the timing right now, but my machine isn't doing that yet. I think that might be the secret sauce to getting it running! -
Educate me on my Champion machine
drummingpariah replied to drummingpariah's topic in Leather Sewing Machines
Thanks, and you aren't kidding, this is nothing like the little Chinese patcher. I'm working my way through its components, trying to get all the grit out of the bearing surfaces and free up rusted/sticky adjustments. So far, so good. I'm really glad it came with an awl and needle, since it's starting to look like I'll have to make my own spares for it. I managed to get the bobbin carrier out, but it seems like it was a lot more work than it should've been. Figuring out the timing on the bobbin has been really awkward as well. There are a pair of cam lugs on the front that cause mechanical lockup with the needle carrier, so I'm going to have to do some experimentation to figure out its intended alignment. I'll get a video of it moving through its cycle sometime this week, to illustrate why I'm confused.

-
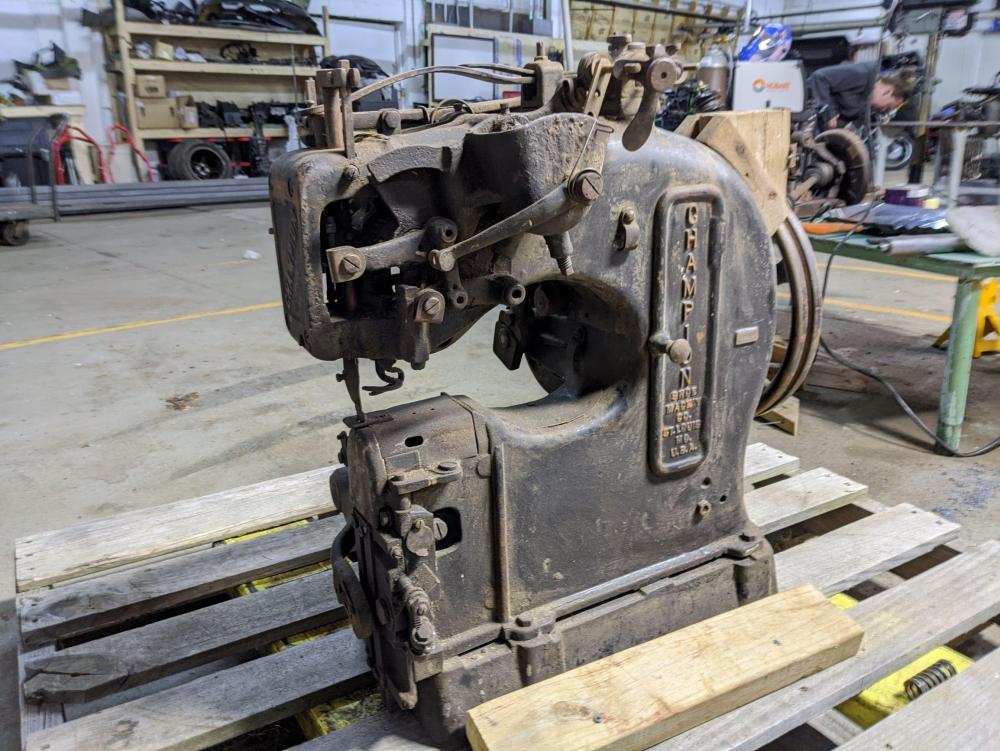
I've been fighting with a Chinese Shoe Patcher machine for awhile, and haven't been impressed with its consistency. When I saw this Champion machine show up, I decided it'd be worth trying to clean it up and see if I could get it running. If nothing else, the body should be quite a bit more rigid than the cheap little Chinese one. The catch is that I've had a tough time finding any information on it, or a maintenance manual for it. Everything seems to move freely, but I'd like to confirm that I have the timing right and figure out what the correct thread path should be. Any help would be greatly appreciated, I'm just soaking the whole thing in brass-safe degreaser right now, hoping to come up with a bit more information before machining any parts that are missing. Thanks!

-
Second 1911 Holster
drummingpariah replied to drummingpariah's topic in Gun Holsters, Rifle Slings and Knife Sheathes
Thanks guys! I started a bit of mockup with cardboard (I found a few other people doing that here, and thought it was ingenious), and got ... well ... nowhere. I'm going to try my hand at that pattern you just posted instead, Dwight. I hadn't used any contact cement previously but it certainly would've saved me a lot of extra hassle, and it would have cleaned up my stitching spacing. I've been using a fork on both halves to score spacing marks, then hoping that I can get the holes reasonably square with the leather. I've been relatively lucky so far, but don't expect that to continue. I've been pretty happy with the diamond-shaped awl I picked up from Tandy, but had to order another since I broke the first one -
I finished my first holster (and first leatherworking project) in March, a simple IWB holster for a 3" subcompact 1911. It came out rough-around-the-edges and unfinished, as I only had a pocket knife, awl, and a couple of needles for tools. It's still going strong, even after wearing it every day since then. The stitching isn't as tight as it could be, the boning could be a lot better, the edges have 0 finish work, and most of the stitching is wobbly and wherever-it-lands. Overall, I consider it a massive success. I used a lot of resources and recommendations from this forum, and I don't think I would've had a good result if not for you fellows. Thanks for that. HOLSTER #2 Now I'm starting to plan out my second project, and would like to step up the quality this time. I haven't been able to find an OWB holster for a full-size 1911 with a flashlight attached. I toyed around with a few different types of leather, but haven't been able to find anything nicer than what i was working with for the last holster (ordered online through Distant Drums). I have a bit of that left, but don't want to waste it on mockups/test-fits. Since this will be a range holster (there's no way I'm concealing this gun anywhere on me), I'm also considering making it a drop holster with a leg strap. I'm pretty excited, but would like to plan this out a bit better, and ideally be able to give the plans away to others as well. For the last holster, I just kept test-fitting and adjusting so I never made a proper pattern for it. I have a few rough measurements for this 1911 (thickness and height in several areas) but nothing too concrete yet. The biggest problem I foresee is getting good retention out of it. The light is both wider and taller than the trigger guard, which is where almost all of the tension was on my last holster. I can't make the trigger-area smaller/tighter than the light, because then I wouldn't be able to fit the gun into the holster to begin with. Any suggestions at all are welcome, including criticism on my first holster. I imagine there's plenty of room for improvement that I hadn't even considered yet, being such a novice leatherworker. When I started that project, I actually tried hammering a needle through the leather before I realized I was supposed to have an awl for that. Thanks for all the advice so far!