ginny
-
Posts
27 -
Joined
-
Last visited
Content Type
Profiles
Forums
Events
Blogs
Gallery
Store
Everything posted by ginny
-
wiz, this confirms my 'fears'. i did the same for mine, (it is the exact same dimensions as yours btw, little over 11" long and 1/8" thick) and my arch is significantly greater. when measuring from the bottom to the top of the metal, (including the 1/8" thickness) it measures 1/2", and if measured to under the metal, 3/8" (obviously this makes sense as it is simply 1/8" less, or the width of the bar). i am off to charleston sc for the weekend, to visit with family, but i will be online if i can, and will def. check in on sunday night. thanks for this WONDERFUL thread, all the replies and this great website, leatherworker.net.
-
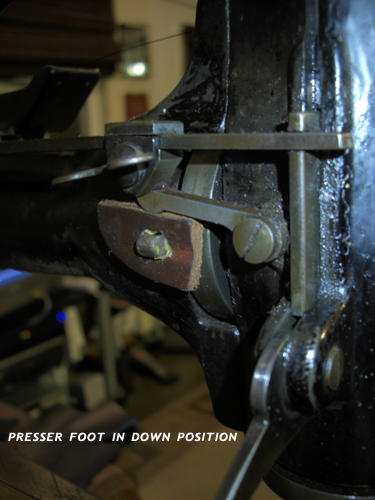
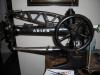
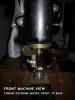
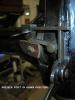
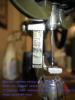
ok, so one person has objected to the bending of the spring... however, others of you have suggested that after looking at their machine, their spring isnt as curved. the reason i feel that the spring may be too far bent is that the presser foot is very heavy... making foot markings (even when not sewing, just dropping the foot down) even in its lightest setting. so it appears that the spring is pushing the foot mechanism down too hard, because of the curvature. i'll re-post the picture too, maybe some folks can take a look and compare it to theirs...
-
Trox and Wiz, thanks for your input. i havent gotten to play with the machine yesterday or today... but will be messing with it tomorrow, so should have some more feedback. as for the instruction manual, i have: 1. adler 30: manual for mechanics 2. instruction manual for singer 29-4 3. instruction manual for 29k70 i will def. look into a new spring, and possibly a new feeding mechanism. will let you know how tomorrows 'experimenting' goes! thanks! keep the ideas coming! i am SURE this thread will be useful to others down the road too, so im happy to keep the discussion going on behalf of ALL 30-1 users!
-
Wiz, i am actually going to see if i can get someone who knows steel/cast iron? to bend it back straight.... or straighter... i have experimented both with and without the leather spacer... i think that fixing the spring will eliminate the need for the spacer, but we will see. unfortunately, flipping it over kinda just takes it from one extreme to the other, but i really think there is a happy medium somewhere!! i am still having difficulty getting the tension right on the thread. i have the bobbin tension set as tight as i can. i have loosened the top tension as much as possible, even to the point of just taking the spring off. i still have 'tight upper tension' according to the example images in the instruction manual. any thoughts about this?
-
ok, flipped over the spring... and have some 'jerry rigging' going, but sucessful! i am getting longer stitches (i think because the foot isnt pressing down so hard, it can advance properly)... and so far so good. ultimately, the patcher isnt the solution to my stitching needs, but it will keep me going for now... until i get my cobra from steve!! and, a quick plug for steve, he called me today to check in on the adler. though i have promised to buying his machine, he has not received a penny from me, yet took the time to call and check in on my used adler, and offer any support he could. thanks steve! and thanks to all of you for taking the time to help me with this machine! i am more grateful than you will ever know! -ginny
-
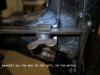
anyone have any thoughts on the rear spring?? see picture/comment about 3 posts ago. can i 'flip' it over and use it the other way to bend it back? or is it supposed to be that curved to begin with? thanks!
-
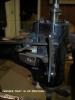
so i took the leaf spring off the back, and noticed that it has a pretty significant curve to it. is that normal, or has it 'warped' over time?

-
wiz, thanks for your confirmations here... you mention the "You set the pressor foot tension with the thumbscrew in the middle of the leaf spring" which # is that, or did i even give it a #? any resources for parts (websites or whatnot) that i should try? i do have a shop kinda near me that works on commercial/industrial machines so i will call them too, but i dont think i want to pay what they are going to ask... id rather do it myself if possible. thanks again! you ALL are a blessing and a Godsend!!
-
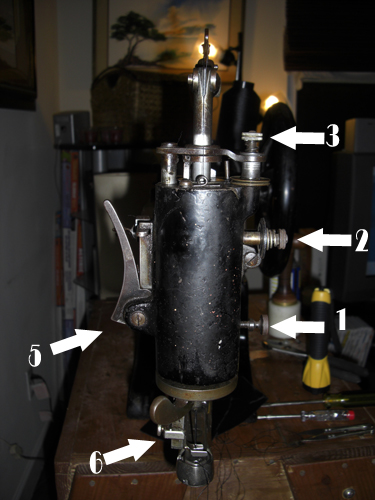
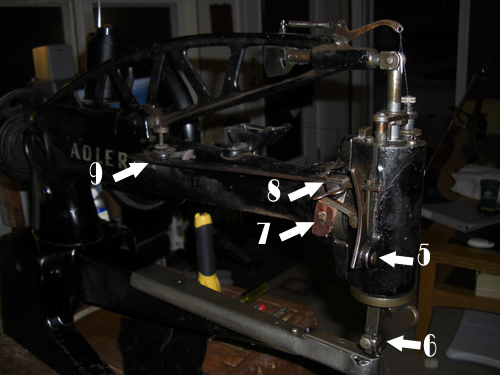
ok, its time for parts quiz time!! put your thinking caps on, and NO GUESSES! please add/correct anything i have wrong/missing.... 1. Thumb Screw - locks/loostens the foot (swings 360 degrees) 2. Tension Plates - FOR DARNING?? 3. Tension Plates (upper) - using this one, knob adjusts tension on upper thread 4. Take up lever adjustment 5. Presser foot drop down 6. Stitch length regulator - the lower the bracket, the longer the stitch? (at lowest setting now, still getting 10-12 stitches per inch... too tight!) 7. Leather 'washer' over 'puck' - unsure of why this is here, but machine will not work without it. 'puck' doesnt raise enough without it to reach the bar to move the foot 8. Wing nut - adjusts the lift of the foot? 9. ??? does this adjust the pressure of the foot onto the material? (i am getting pressure foot marks on the material, its pushing down too hard) THANKS!!!


-
WE HAVE STITCHES!!!!!!!!!! apparently clockwise on the wheel works better ok, so the foot isnt traveling very far on the uptake... thus, not advancing the material... i know that the stitch regulator bracket can be changed... improving how much the foot swings forward/back (decreasing stitches per inch) but what controls how high the foot comes up to clear the material in order to allow for that swing forward/back?? also, does the machine stitch in reverse (ie turn the wheel the other way) or, do you just utilize the 360 degree rotating foot to back-tack? THANK YOU TO ALL!!!
-
ok, first issue. any suggestions on seized/stuck screws? trying to remove the first two screws... per the instructions: "parts can be examined or removed from the rack box by taking out the two screws (f) the cover plate" seems two screws (f) are stttuuuuucckkkk.... i have started in with the wd-40...
-
thanks Knut! i will start working on it. i take stuff apart all the time, im not intimidated or anything, just didnt know if thats what i was SUPPOSED to do (i just imagined the sewing machine in parts all over the living room, when someone walks in and says.. 'didnt you just know to turn that screw there 1/2 turn?') lol lastly, if i need the shuttle to be coming forward sooner, i ASSUME i move it one tooth clockwise (if i were looking at the arm from underneath)
-
ok, here is the the position of the wheel. i have been rotating counter clockwise...

-
ok, so i dont think the timing of the shuttle is correct. how do i correct this? per the instructions i have, i can remove parts from the rack box... ultimately taking out and repositioning the shuttle carrier. is this the correct way to adjust the shuttle, or is there another way? in addition, there is mention of adjusting the shuttle driver by way of the eccentric pin... is this relevant as well? in addition to adjusting the shuttle, do i need to adjust the needle bar lift?
-
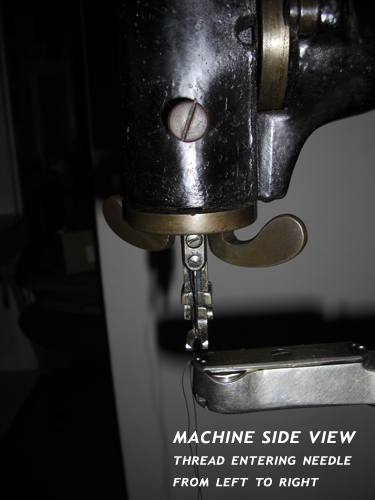
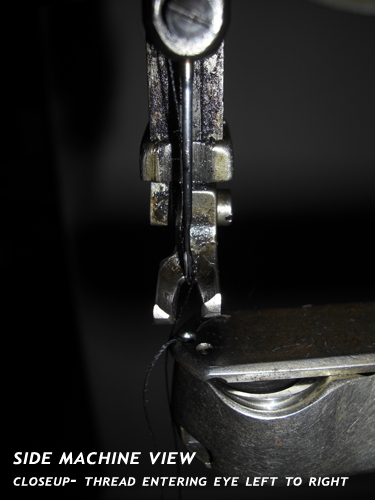
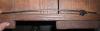
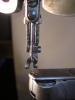
in addition... here is a closeup picture of the needle...

-
ok, i think we are getting somewhere!!! keep with me folks, your time is appreciated!! i am uploading another video... after watching the needle action as Wiz described (thanks for the step by step) i THINK that the needle is coming up too soon, or the other option is that the shuttle is not timed correctly, and is starting its return motion too late. after the needle goes down, and makes its slight up/down motion, the thread flips over to the right (i assume thats what people mean by 'loop') and lays over the groove in the shuttle. however, the needle begins to rise (and takes the thread with it of course) before the shuttle begins to return to its 'home' position. the result is that by the time the shuttle is in place to grab the upper thread, the thread is already too high. not sure whether the issue is the timing of the needle or the timing of the shuttle... but hopefully my analysis is correct?!?! still would like some confirmation after the video is watched... is this flipping over of the thread on the right the correct 'loop' formation??? thanks. http://www.youtube.com/watch?v=ubqsluIfrpc
-
thanks to further posts. i have to run out for a bit, but i will be back around 2pm EST, and will try wiz's method of checking, involving the flashlight etc. thanks! will give a full update.
-
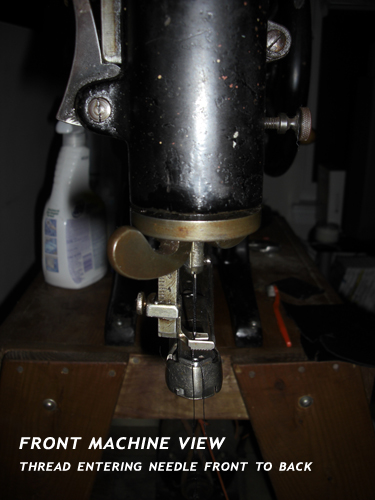
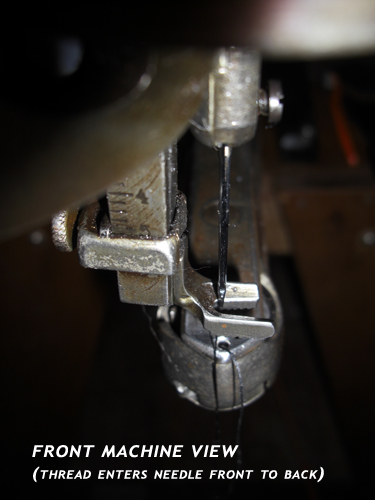
Thanks to everyone who is posting! i would like to state that despite my computer literacy being pretty high, i seem unable to note the pg 1 vs pg 2 designation at the bottom of the page. i have refreshed the posting several times in the last day or two... and feel pretty silly about now. SOOOOOO WITH THAT SAID... 1. i know it is a 140 needle... Groz Beckert. it is a round barrel all the way around, and has a groove in the shank. the best i can tell you is that this specific needle worked about a year ago. so, i ASSUME (with risks! lol) that it should work again. based on a 1:1 chart i found of their needles... i can tell you it is NOT a thread left or right specific needle, it is also not a twist point. if i had to GUESS, i would say its a 2099 series or a 29 series 2. as for the needle being in the wrong position, i am AGAIN confused, because some people are telling me its correct, and some of you are telling me it is incorrect. i am posting pictures again of its most current setup. 3. as for the stitch length bracket, it IS at its lowest physical position, resulting in about 10 stitches per inch.. or should i say holes per inch, as the stitch is not being created.

-
hahaha... pictures are worth a 1000 words... shouldnt have used that picture! as i stated in the last post, "the presser foot is only advancing the material when the stitchregulator bracket is at its lowest point (resulting in very very shortstitches). when i move the bracket up to simulate longer stitches, thefoot begins to simply go up and down" so, i DO have the bracket in the lowest position, UNLIKE where it was in the picture. so, with the bracket in the lowest position, it IS advancing the material... however in much smaller increments than 5-6 per inch, more like 10-12 per inch. in addition, i still dont think i am getting a loop when the needle goes down, which as far as a know is the root issue...
-
Wiz, no prob about tonight/tomorrow... we'll get to it as soon as we're both available... 1. so i tried stitching with material with the stitch length regulator in a variety of positions... and most importantly, i still have no thread being pulled up by the bobbin... so the primary issue remains NO LOOP? 2. that aside, the presser foot is only advancing the material when the stitch regulator bracket is at its lowest point (resulting in very very short stitches). when i move the bracket up to simulate longer stitches, the foot begins to simply go up and down... though i can wiggle the foot back and forth, and it has more 'play' as it should. 3. per the pictures, you will note there is a leather 'wedge' that has been fashioned for use below the rear spring. now this has been in place since my brother in law got the machine, and the machine HAS sewn correct stitches for him... so i dont know if it is a repair to replace a missing piece or a modification... but it shouldnt be impairing the machine function? sooooo, back to zero at this point... i still think there is a loop creation issue that from what i can tell isnt happening... you just let me know what you think, and your further advice, im open to trying anything!
-
wiz, thanks again as usual... ok, so, i dont think the needle is forming a loop? i have tried manually pushing the bobbin thread up thru and then adding the material, dropping the presser foot, and trying to sew, with no luck. two interesting things to note here, again... still no 'loop' from what i can tell... so needle penetrates the material easily, but does not create a 'stitch'. now, 2nd thing... does the foot not 'advance' the material much like a walking foot? if it is supposed to, it is not... simply goes up and down in the same position, with the needle passing thru the same hole repeatedly. i do not know if this is a 'separate' issue... or a symptom of the lack of loop/stitch etc.
-
ok, now we're improving maybe a bit... 1st off, thanks for clarifying the needle position... by describing on the right side (facing the inside of the machine). i thought that the right side was the right side while facing the machine headon, but based on your description, the right side is the 'inside' side... when facing the machine from the side... if that makes sense. ok, so i rotated the needle to what i think is the correct position now (will attach picture to confirm) it is also firmly seated up in the housing, but i did loosen and move to the right the TOP screw... so that the needle lays closer to the bobbin when it inserts into the arm, beside the shuttle on the down stroke. as for the shuttle, it is rotating clockwise as is supposed to... now this is where i lose you, because you specify a 'pickup point' and i am not sure where this is on the shuttle, so i am not sure if the shuttle is advancing far enough in the rotation? i DO see the point in the process however where the needle takes a slight lift, before going down again, and then the full take up... so it seems to be correct in its action there. so my next questions are these: 1. when i lay the bobbin into the shuttle, does the thread lay forward towards me, or behind? additionally, when the plate swings into place, should the thread from the bobbin be facing me, or going 'off the back'? 2. explain the pickup point as questioned above? 3. along with #2, the 'loop' you describe that is made, is with the top thread? should i be able to see it? 4. as i understand it, prior to 'sewing' on material, depressing the needle to make the loop and pull up the bobbin thread will pull the bobbin thread thru the swing plate so that it is then prepared to sew... i do not MANUALLY thread the bobbin thread up thru the swing plate, correct? will send more pics/video if needed to see current action.
-
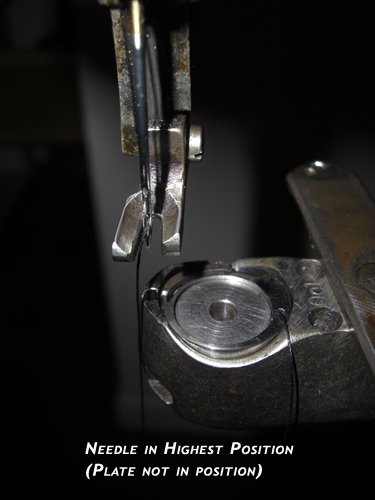
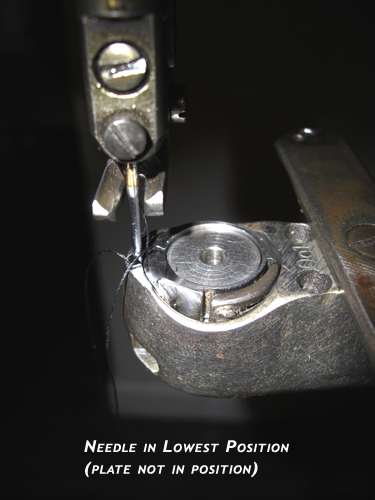
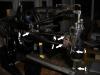
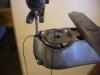
ok, soooo... im a visual person, so i took some more pictures and uploaded another video with better lighting/focus. luke, i dropped the needle down as far as it would go so that it was as low as possible when in the down position. still no luck. 1st are the shots of highest/lowest needle positions, with the plate in/out of position so you can see better. the video shows the correct thread path, including going under the pressure plate etc... followed directions exactly for this, dont think its the problem. 1st thing to note in the video... something as simple as the thread coming off the bobbin... does it go to the left or the right of the machine (front or back in the video, since i am looking at it from the side) also, no matter which way it goes, the thread does not pass UNDER the plate when rotating... is it supposed to? http://www.youtube.com/watch?v=G3iOT7VnU3Y thanks to everyone for their continued patience... it is much appreciated!


-
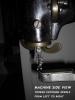
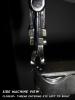
sewmun, thanks for your feedback... that issue was already addressed. the needle has been turned correctly, and still the same action. here is a picture of the location of the shuttle groove, when the needle is in the full down position. hope this helps!
-
Tony, I confirmed the needle is placed as you described... still no results, but at least that is not the issue. thanks!