JLSleather
-
Posts
7,385 -
Joined
Content Type
Profiles
Forums
Events
Blogs
Gallery
Store
Everything posted by JLSleather
-
for a cheap, oily "notebook" which appears designed to sell "templates", that method might work. FOr a Bible, which is likely 1 1/4" or MORE thickness, you're going to want a leather ZIPPER GUSSET. Somebody probably does make zipper tape wide enough, but I wouldnt' expect any longevity out of it. AND, though it may seem obvious, always use a brass zipper - not that nylon stuff. These done as Stohlman shows in that book. Looks like a lot of words and drawings, but once ya lay it out in front of ya it aint that difficult Sew or lace as desired (triple loop lace used on the bottom two).

-
man, them things must have gone up A LOT. I didn't pay that much for TWO.

-
may not be the brush. do you have a moisture trap in the line? sometimes compressors condense moisture, and that's what makes em "puke" (plus the condensed water doesn't mix with the alcohol dye)
-
If you're making a VOLUME of rounded items, may be worth getting. OR, a guy could drill various hole sizes through a board, cut the board in half, add a hinge
-
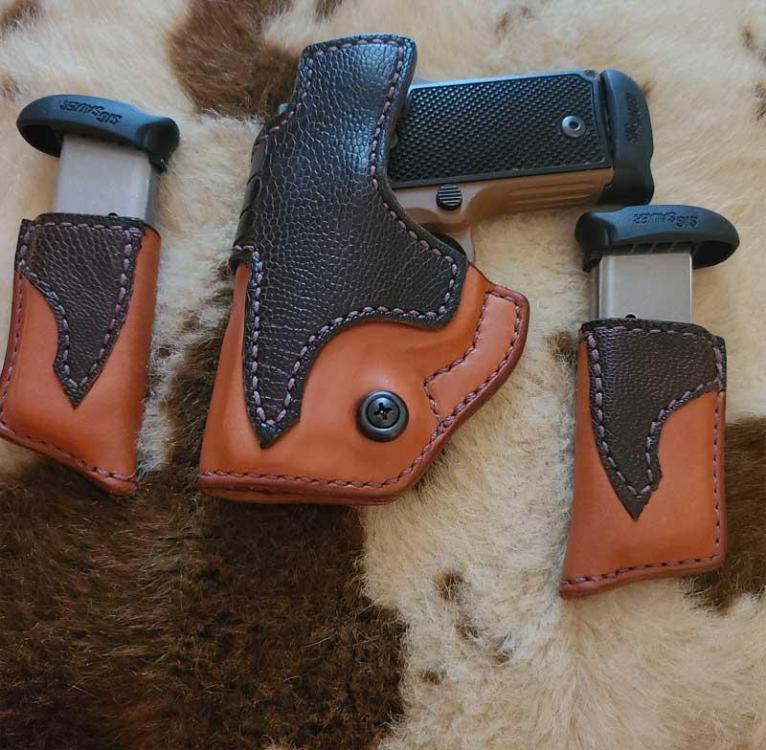
Added pattern for single mag carrier, fits G43x, G48
-
Colt Mustang (Duncan's aluminum) Glock 19 Glock 21 Glock 30 Khar PM9 (with removable CT laser) Kimber SOLO Sig Mosquito Sig P238 (KnifeKits MultiMold gun) Sig P320 Full Sig P320 Compact Sig P365 SAS (Cook's) Sig P938 Smith Wesson 442 Revolver Smith Wesson 38 spl j frame Smith Wesson Bodyguard .380 (with CT laser) SMith Wesson M&P Shield 9 (same as .40) Smith Wesson M&P Shield .380 EZ Springfield Armory Micro 1911 .45 Springfield XDE-9 Springfield XDM-40 (3.8") Springfield XDS-.45 (3.3") Taurus Millenium G2 (Cook's) Walther PPK
-
Found the Glock 19 which I'm adding to the list. Also found a Ring's mag for Springfield XD .40 subcomp Colt Mustang (Duncan's aluminum) Glock 19 Glock 21 Glock 30 Khar PM9 (with removable CT laser) Kimber SOLO Sig Mosquito Sig P238 (KnifeKits MultiMold gun) Sig P320 Full Sig P320 Compact Sig P365 SAS (Cook's) Sig P938 Smith Wesson 442 Revolver Smith Wesson 38 spl j frame Smith Wesson Bodyguard .380 (with CT laser) SMith Wesson M&P Shield 9 (same as .40) Smith Wesson M&P Shield .380 EZ Springfield Armory Micro 1911 .45 Springfield XDE-9 Springfield XDM-40 (3.8") Springfield XDS-.45 (3.3") Taurus Millenium G2 (Cook's) Walther PPK
-
Most are Rings. A few from Cook's and a couple from Duncan's (aluminum) guns. One from KnifeKits, as it was more accurate than the Rings for that gun. I got a few more to dig out, but found these so far. $30 each. OR 4/$100. OR buy all 20 together for $450. Plus shipping Colt Mustang (Duncan's aluminum) Glock 21 Glock 30 Khar PM9 (with removable CT laser) Kimber SOLO Sig Mosquito Sig P238 (KnifeKits MultiMold gun) Sig P320 Full Sig P320 Compact Sig P365 SAS (Cook's) Sig P938 Smith Wesson 442 Revolver Smith Wesson 38 spl j frame Smith Wesson Bodyguard .380 (with CT laser) SMith Wesson M&P Shield 9 (same as .40) Smith Wesson M&P Shield .380 EZ Springfield Armory Micro 1911 .45 Springfield XDE-9 Springfield XDM-40 (3.8") Springfield XDS-.45 (3.3") Taurus Millenium G2 (Cook's) Walther PPK
-
I got some 'blue guns' i'd sell ... for about half off. Message if interested, I should be able to check about Sunday.
-
Leather Cases, Vol 2 has great info on making YOUR OWN pattern - very helpful. Or, Amazon has a bazzillion Bible covers for not much money. As for whether to zipper or not, YES! A CLOSED case is mandatory if your Bible is dropped, or hit, or slides off a car seat. So, YES!
-
For wallet liners, I like kidskin (goat). Chrome tanned, thin, quite strong (though realistically, you don't need a lot of strength for wallet innards). For holsters, goat again but veg -tanned. very tight grained - forms, burnishes, and dyes very well and looks great. can even be tooled if ya cared to.

-
 I like Fiebing's dyes, including on the edges. Edge and burnish with water only. Then when dry (or almost dry, it's fine) use a dauber to apply dye directly to the edges. It won't wick - not a problem. When that's dry, I burnish again with water only (Usually I do this end of the day and just leave it over night, but thats not required). When I "oil", it's Neatsfoot oil. A soft cloth (I like a piece of an old t-shirt, ideally) over the mouth of the bottle, tip it do "wet" the cloth (so you can see we're talking about a very small amount). "Swipe" that across the project (don't "soak" it, just kinda sweep it on). It will appear a bit "streaked" or blotched, but that will quickly disappear (quickly as in a few hours, not immediately). this is almost a "feel" so test on a piece of scrap to see what I mean. I'm sure i have pics somewhere of natural or very light leather with dark edges, to show this. Checking ...
 -
added Taurus G2C mag (single) and S/W SHield 9/40 double mag
-
Uploading a couple NEW patterns over there JLSbydesign - Etsy Glock 17/19 double mag is on and ready. Bond Arms Bullpup 9mm mag ('pancake'). Sig P938 double mag hi angle (guy wanted it designed to carry almost in back).
-
I like 277 over and 207 under. I've tried other combinations, but I like this one. Yes, for holsters, belts, sheaths. Doesn't matter, long as it's smooth faced. I've seen some that were plated. Sounds nice, anti-corrosion and all that. Until the plating chips, and then you're just scarring everything you try to crease.
-
you didn't mention WHICH glock, but I had a guy send me a pic of teh G43 holster I made him like 6 years ago, still carries it every day.
-
Exactly this. I've tried various things, but this one has always been the one I go back to. And I use oil ONLY on the grain side. It will work its way through well enough. Tough to "spread" it on teh flesh side. And less is better. You can always add and apply more, but if you go too far you have a problem. Don't worry if it's "uneven".. it will even out quickly.
-
I absolutely HAVE got "bad" dye. Most often was the saddle tan - had a different smell, and would not dry evenly even when dunking the leather in the dye. Ordered another quart, same thing. Fiebings said they'd send a replacement, which turned out to be just fine. Cause me to wonder if there's a shelf life for the stuff, or maybe just was a bad "batch" that the distributor had on the shelf. Once I tossed out that "old" dye, no more problems. Long as I'm on this type of topic.... Do not "mail order" your tan-kote or other acrylic type stuff in northern climates in the winter. It will likely freeze sitting on a UPS truck somewhere and even after warming up it will not function correctly. Guess maybe it separates, er sumthin'.... Straight from Fiebings "do not freeze", so I always drive to get these products if I have need to replace in cold months.
-
I like a creaser. I started out with a groover because Al Stohlman's books said so. And I still think they have their place in saddles and other heavy work. But for most stuff, I like a crease. Distance, or spacing, is set by thickness of the stuff i'm sewing (also from Al, actually). Most holsters and belts for them are a "strong 1/8th" in from the edge, and it would be common to find me doing a double stitch line with the same spacing between lines. The idea is to recess the thread a bit, protect it from buffing/fraying. If you're using heavy thread, the groover makes sense. But most of what I use is 277 machine thread, so not really necesary - the dent from a creaser is enough.
-
This is ENTIRELY UNACCEPTABLE. Somebody sent me that would not have to worry about any more of my time or money. I wasted quite a bit of time with a couple of US "outlets"... no amount of phone calls/complaints seem to get through to them so finally (and too late, really) just cancelled them from my list of suppliers. I'm not afraid to name names -- Weaver took my money ONCE, and never again. What they sent was SO bad there was no possibility of a mistake. And Springfield Leather (MO) would nod and smile to my complaints, then send the same garbage next time. One side of 5/6 I could literally stretch over an inch with my hands. And who was that one guy... Robert and I both ordered a couple different cuts to see the quality he was selling when he showed up on this site. ALL of it was just sad - some of it worked for NOT TOOLED belts, the rest ... just trash. Didn't even try to send it back or complain,.. just ate the cost and lost the guy's number. Cheryl at Goliger Leather is quite good (CA, US) though I imagine the shipping to you would be crazy. Otherwise, H.O. direct has NEVER given me a problem, and almost could say the same for WIckett-Craig. THE PIECES you show have WAY too many wrinkles. I expect some of that in the shoulder area, but NOT IN THE BACK OR BEND. That piece isn't good for anything but maybe a floor covering to wipe your boots on.
-
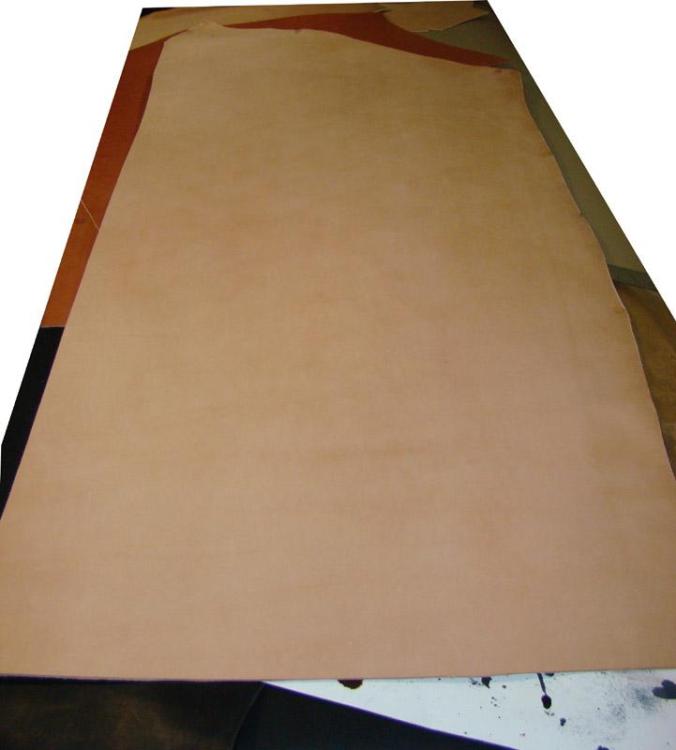
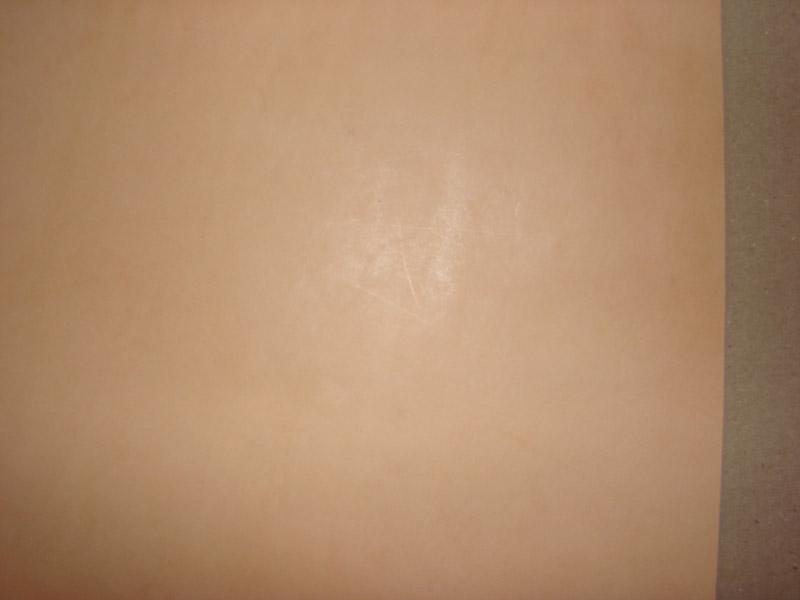
H.O. and W/C both make some very good leather. They both also have lower "grades", so the name itself isn't the whole story. But H.O. sells A/B, I have never got them to send JUST "A" grade leather. Maybe I'm not writing big enough checks, but they will tell you up front if you order (which is min 10 sides), they will send a mix of "A" and "B". But they will not charge for "A" and not send "A". MOST distributors are counting on the customer not knowing the difference. BY FAR THE BEST I've found if you like Hermann Oak but are buying less than 10 sides would be http://www.goligerleather.us/. Cheryl is quite good and will get you FIRM leather. They don't con anybody - there IS a markup for their service. But what you'll get is what you paid for... you'll be happy. Very nice A-grade Hermann Oak every time I ordered there. W/C is great leather, for the most part, though I have had a complaint on more than one ocassion. They offered me a discount on the order. But like you, I don't want to pay less and get less, I want the GOOD STUFF and don't mind paying the premium price long as I'm getting the premium stuff. Overall, W/C has been quite good. But that's ordering DIRECT FROM W/C ... I have ordered from "distributors" who either don't know what top grade is supposed to look like, or more likely , they thought I didn't know. Here's a pic of some A-grade Herman Oak "holster" leather, just to show what that's SUPPOSED TO LOOK LIKE. Second pic is a closeup of pic 1
-
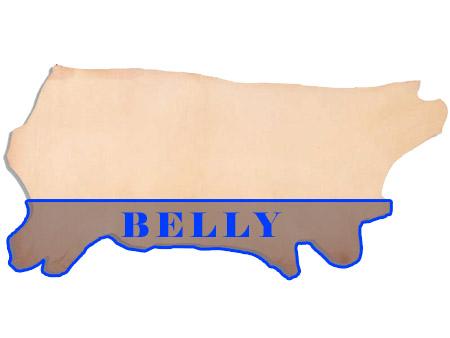
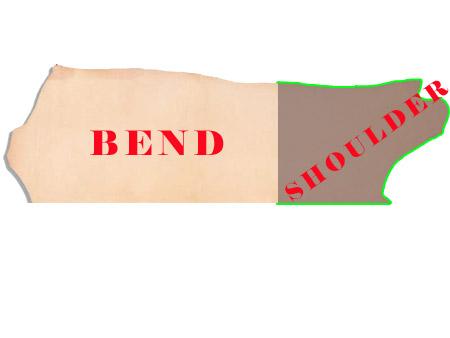
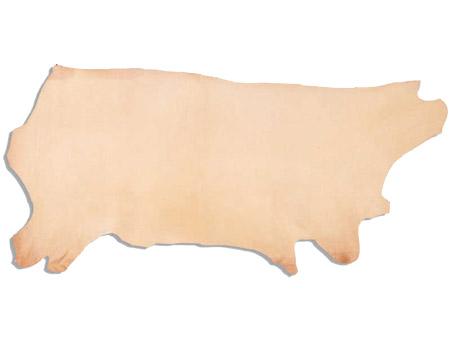
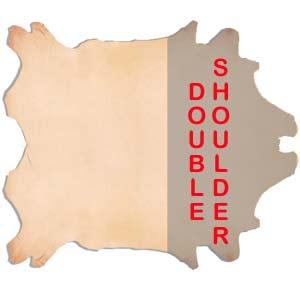
Again - the BACK is the best part of the leather, all else equal. If you take a cowhide, cut it in half lengthwise, that's 2 "sides" (obviously). The "sides' include the BACK, SHOULDER, and BELLY. I have made MANY belts from "double shoudlers", some folks really like the natural "wrinkles" prominent in double shoulders. Good leather will allow for this to be done and still get a FIRM belt. Still, BACKS are the preferred cut. Belly leather is okay for linings, and not much else (saddle boys n girls have a few more uses for it, TBH). Glued in and sewn in, this leather is usually fine for "thickening" up a belt or for smoothing the inside of something like a case or bag. Single shoulders - which you'd get by cutting the top end off of a BACK - just have too much waste for me. Anyway, here's a pic might show you some info. A cowhide "side". One side of the whole skin. This is a "back".. the side with the belly removed. And this "back" includes a "single bend" and a "single shoulder. Or, cut the double shoudler off before cutting the sides
-
Either will work. Sides or shoulders, you want to stay away from the "spongey" bits at the edges. As a rule, sides will be more money, but end up being more economical cut as more of the leather is useable. Actually, i buy BACKS, which is just the side with the belly removed. And I do not shop at Weaver, ever.
-
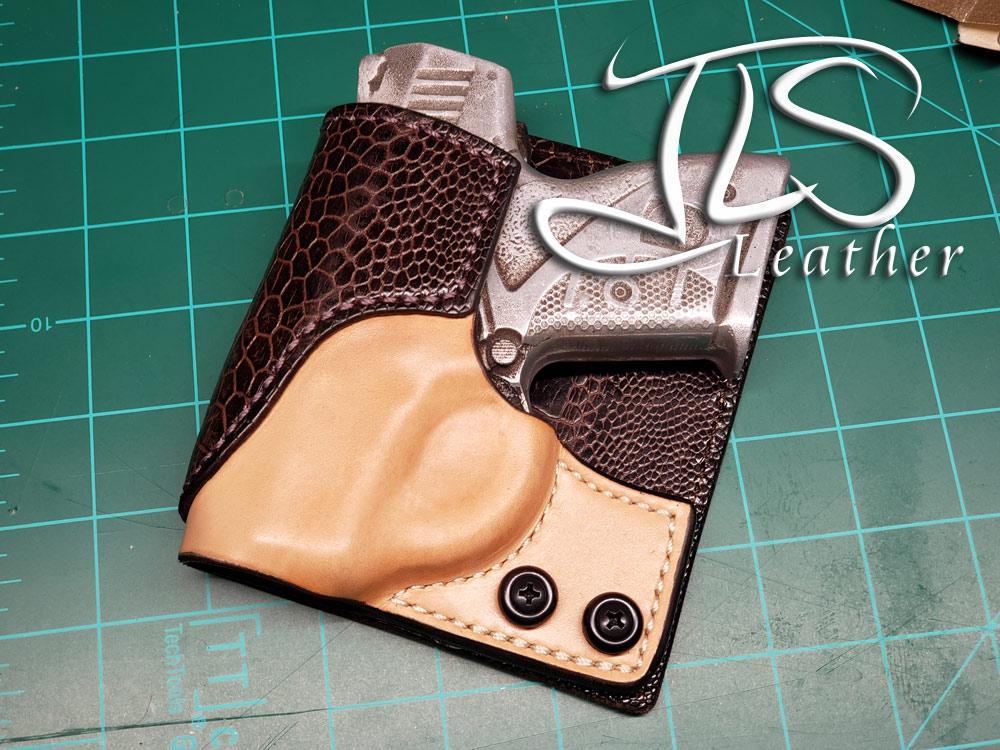
You're right around that line, thickness wise, where its' heavy for the one and light for the other. I'd personally go with the 3200, but CALL BOB. He'll be able ta tell ya what ya need an why. Some examples are shown below, with short explanation, but seriously - if you read around here you'd think there are TWO types of machines for leather (SO not true). So - call BOB KOVAR or see his web site at this link - he'll put ya right. I can say that I make many of the same things, and that 3200 (which I do not own) lookin purdy sweet. I do have machines much like it, and I sew all but wallet-weight leather without too much trouble.. Lemme see ... Two layers of 7 oz, sewn on machine very much like the 3200. Oh, and the ostrich leather is about 1-1/2 oz, and sews to the 7 oz cowhide easily with the 3200. Zipper gusset 4/5 oz leather sewn on machine like the class 26. Gusset then sewn to 7/8 oz back using machine much like the 3200. Wallet liner sewn on singer 188, then assembled and sewn on class 26 "type" machine.