


rodeomic
-
Content Count
39 -
Joined
-
Last visited
Posts posted by rodeomic
-
-
Does he have an old set that can be use for a pattern?
No, I asked. Short of the commercial brands on the internet, I haven't found a thing. I have a hunch he may just want to order a set from Stihl, or another maker. Thanks for the response.
-
I have a request for "arm chaps", to be used by an employee of a local tree company. I know they are sort'a, kind'a, similar to cowboy cuffs, but I believe they would have a thumb hole. Anyone out there have some how to advice on these? Patterns, etc.
Thanks in advance!
Roger
-
I have a request for "arm chaps", to be used by an employee of a local tree company. I know they are sort'a, kind'a, similar to cowboy cuffs, except I believe they would have a thumb hole. This site has never failed me yet, so I hoping someone out there can offer some how to help, patterns, etc.
Thanks in advance,
Roger
-
Natalie,
Hello down-under. Did you see the movie "Bucket List"? One of my bucket list goals is to get back to Australia. I was in Sydney while in the service, and fell in love with the country. Maybe one day!
Anyway, thanks for the response. That made perfect sense. I did order volume 3, but sounds as if I should order the other two.
Thanks again.
Happy trails, and G'Day.
Roger
I am just starting out in leather work, and made a pouch just using info I found here.
Then I brought all 3 of the making cases books, and found out how to 'not do' all the things I did wrong the first time!
You will need to get all 3, rather than just volume 3 as they do build on each other, and 3 refers back to the previous two volumes for more basic instructions (the projects get harder and more complex in each volume)
as someone said above, the info on handles, straps, fastenings and gussets etc is very good and can be applied to many idea's
well worth the money! especially if you don't like to just follow a standard pattern and like to 'alter' things
Natalie
-
Thanks for the response. Most of what I do is from pattern pak's, then add my own flavor! But, just from what you said, sounds like the Stohlman book could be a good investment.
Thanks again.
Happy Trails,
Roger
The book does show you how it is done with measurements. There are no cut and paste patterns per se. I used this book twice to make two previous project and I used the measurements as a 'general' idea for the size I wanted. I use poster board to play with the size I am looking at. I would recommend a good investment in poster board or butcher paper to cut out the size and see what will work for you. On a side note, I haven't really found many books that have cut and paste pattern pieces unless you buy a 'pattern pack' item.
Good luck.
-
I keep seeing "The Art of Making Leather Cases, Vol. 3 by Al Stohlman" referred to. Is it just a bunch of pictures of his stuff, or, are there patterns available, and is the book really that helpful? I ask because I have purchased books by other "experts", which were basically a work of "look what I did".
Thanks!
Roger
-
Hello-a comment on your "sore hands". But first, nice job on the bags. I prefer hand-sewing most projects. One thing I did some years ago to help ease the "sore finger land", was buying a pair of relatively cheap, padded palm drivers gloves. I modified the gloves by cutting the fingers off at the knuckle, (just above your ring). I restitched the cut area for reinforcement. The padded palm acts great as a needle push, and the fingers makes a hug difference when tensioning the thread. I also cut the thumb completely out, and reinforced that area with a strap and glove snap. Hope this sort of makes sense.
Hi all, First project post ever.
This is my very first big project, I have been working on leather since christmas (belts, small bags, a wallet, etc.), so when you see a lot of mistakes (I do) please understand I am still a total newbie.
The Project: I wanted saddle bags that were taller and more slender to hold a water bottle or two upright to discourage leeks. The pouches are going to be about 8 by 11. I made the pattern based on my own saddle, designed the tooling pattern, then learned how to do all that sinue sewing... These bags are for myself, and why I wanted to learn how to deal with leather. I have a newfound and profound respect for those that can hand sew so beautifully! I havent managed to bleed on anything yet, but did poke myself a couple times. After finishing the sewing on this one half of the project my hands hurt so bad I had to have my husband peel the potatoes last night. So, here is what I have so far:


The other half of this is still needing to be sewn, but everything else is done...can't wait to finish but have to wait for my hands to work properly again.
-
Will do! Thanks Bill.
Roger
rodeomic,
You may want to check out the discussion in the "Fabrication" section in the subsections: "Sewing Leather" and "Leather Sewing Machines".
BillB
-
Not sure this is the right forum for this, but----I have been eye balling the Tippmann Boss sewing machine for quite sometime. Anything, good or bad you might be willing to share will be greatly appreicated.
Thanks in advance,
Roger
-
Roger,
There ain't no dumb questions. If I understand your question you're talking about the adjustable billet on the back of the strap, this picture shows one way of accomplishing this and it is the most popular. I make some straps with buckles on the front but they are predominately decorative, I normally have the front of the strap taper down to the pin hole and only have a two piece strap as in this picture, if you use the buckle on the front it becomes a 3-piece strap.
Hope this helps,
Ken
Wow! Not only did it help, it solved the mystery for me. Thanks so much Ken. I appreciate that.
-
For practice braids, I traced a circle and spiral cut the string with shears. Is a wing divider just like a compass, making a circle only? Or, does a wing divider draw the spiral so you get accurate string width? I just eye-balled my 1/8" string from tracing a salad plate on a leather scrap.
Melanie, I will just ditto Casey here. Tandy sells pretty decent strap and lace cutters. To me, the wing divider is most useful for measurements and setting space distance.
Good luck,
Roger
-
Hello all- This is probably a dumb question. But----I have found folks here to be most forgiving and willing to help. Friend asked me to make him a guitar strap. I was sort of like, OK---hmm, now what? I'm ok with the buckle setup for the front guitar button, but, even after looking at several pictures, I can't determine how the back billet anchors. I see how it will attach to the button, but don't know quite how to keep it from slipping. Thanks in advance!
Roger
-
This question will kinda go along with which thread to use. I am trying to figure out another way to make holes for hand sewing. The method i have been using is a small drill press. I go through and groove where i am going to stitch then use overstitch wheel to see where i need to drill holes. The reason i started using the drill press is that i use 5 min. epoxy to glue leather before dyeing. And drilling is easiest way to get through the epoxy(that i have found).
Also if there is another way to glue leather together with super strong bond like epoxy please let me know.
Thanks
Thomas
Thomas, as advised earlier, I to would steer away from epoxy. It's too stiff, and I would wonder what the lasting affects to leather would be, if any. As far as the stitching holes, you and I aren't far off there. I use a dremel tool, with bits one size smaller than the needle I will be using. I started this method solely due to my hands just not taking the pressure from the awl anymore. Something to do with age and arthiritis? Nah---couldn't be. ;-) Good luck.
Roger
-
My late wife was a librarian and she used "Goo Gone" to remove tape residue from books. I was wondering if anybody had ever used it on leather?
No, but I have used acetone. Not familiar with Goo Gone. Good luck!
Roger
-
Howdy to all,
This a pair of new spur straps I completed for my buckaroo boots. It is my own variation of the beavertail strap. I wanted to use the big etched conchos on the straps, so that required tweeking the original pattern. No buckles, (the only drawback on this style is, you have to have the button holes positioned just right to fit the boot properly) The straps are lined, as well. Thanks for takin' a look!
Timber
You did a nice job of fitting them to your boots. I have made several sets of the beavertail strap, but have not incorporated the concho in such a way. I really like that----great job. Now, all ya gotta do is introduce them to the ole pony!
-
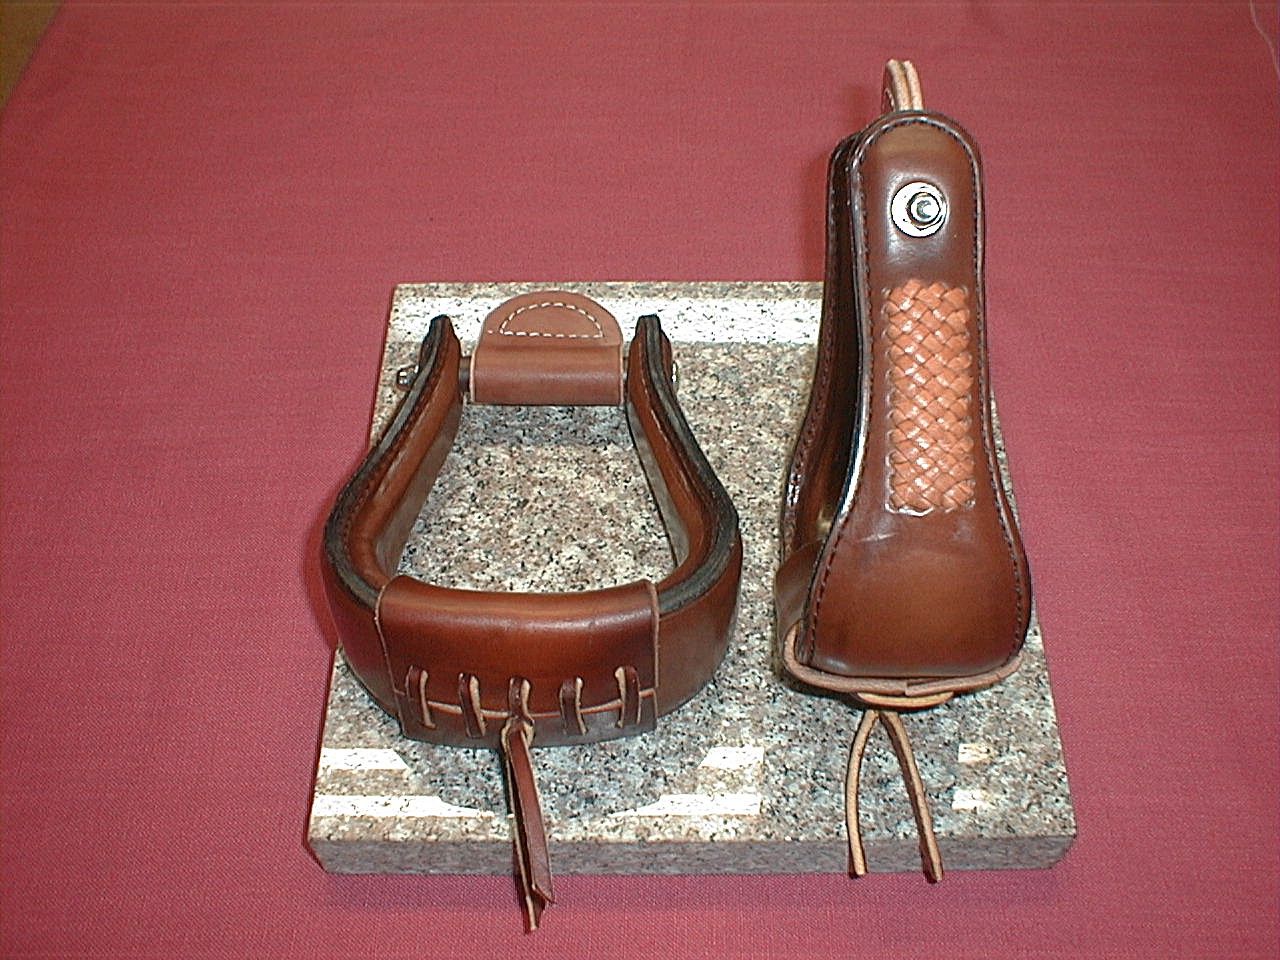
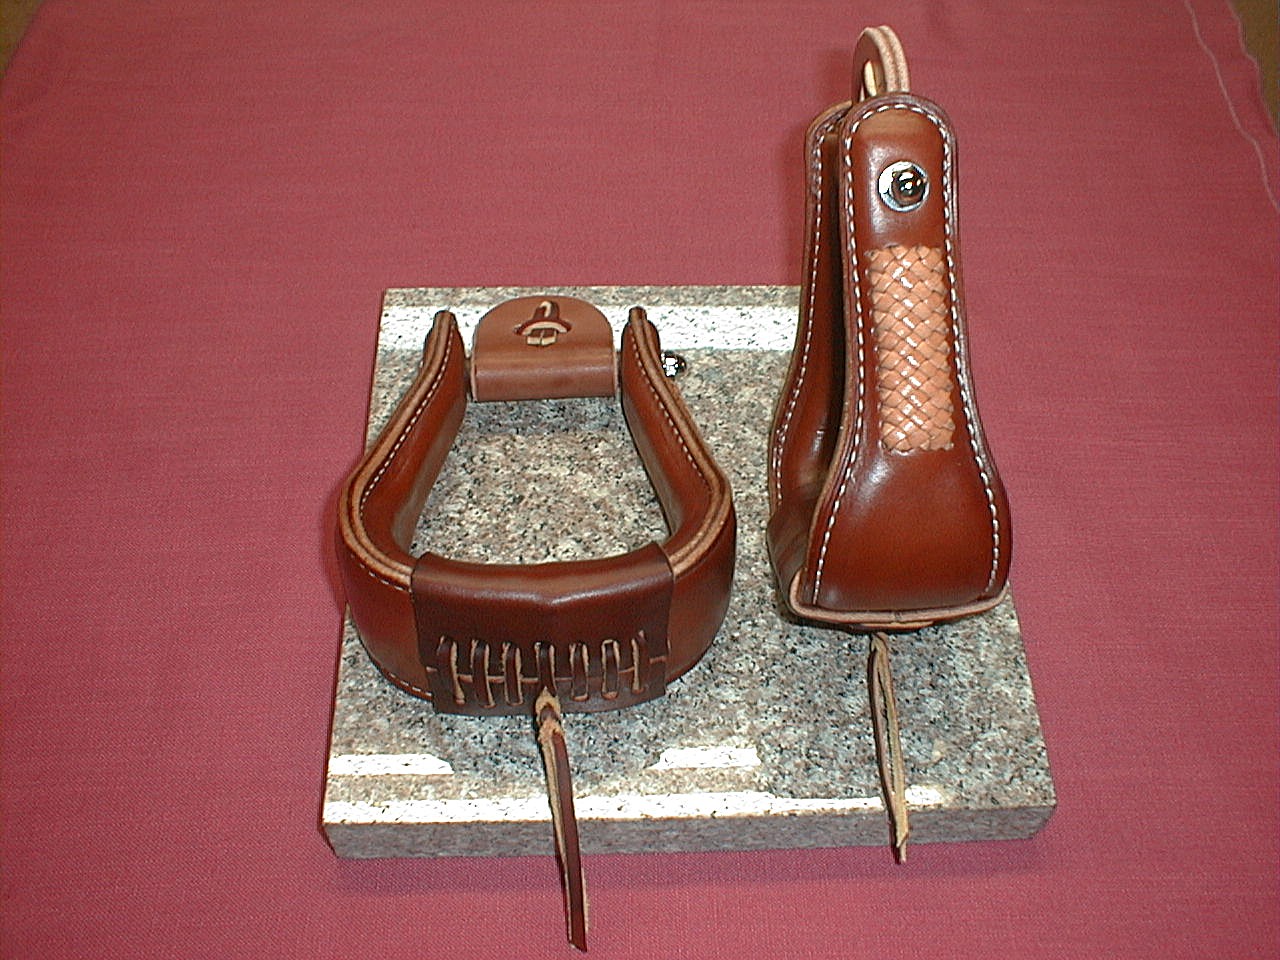
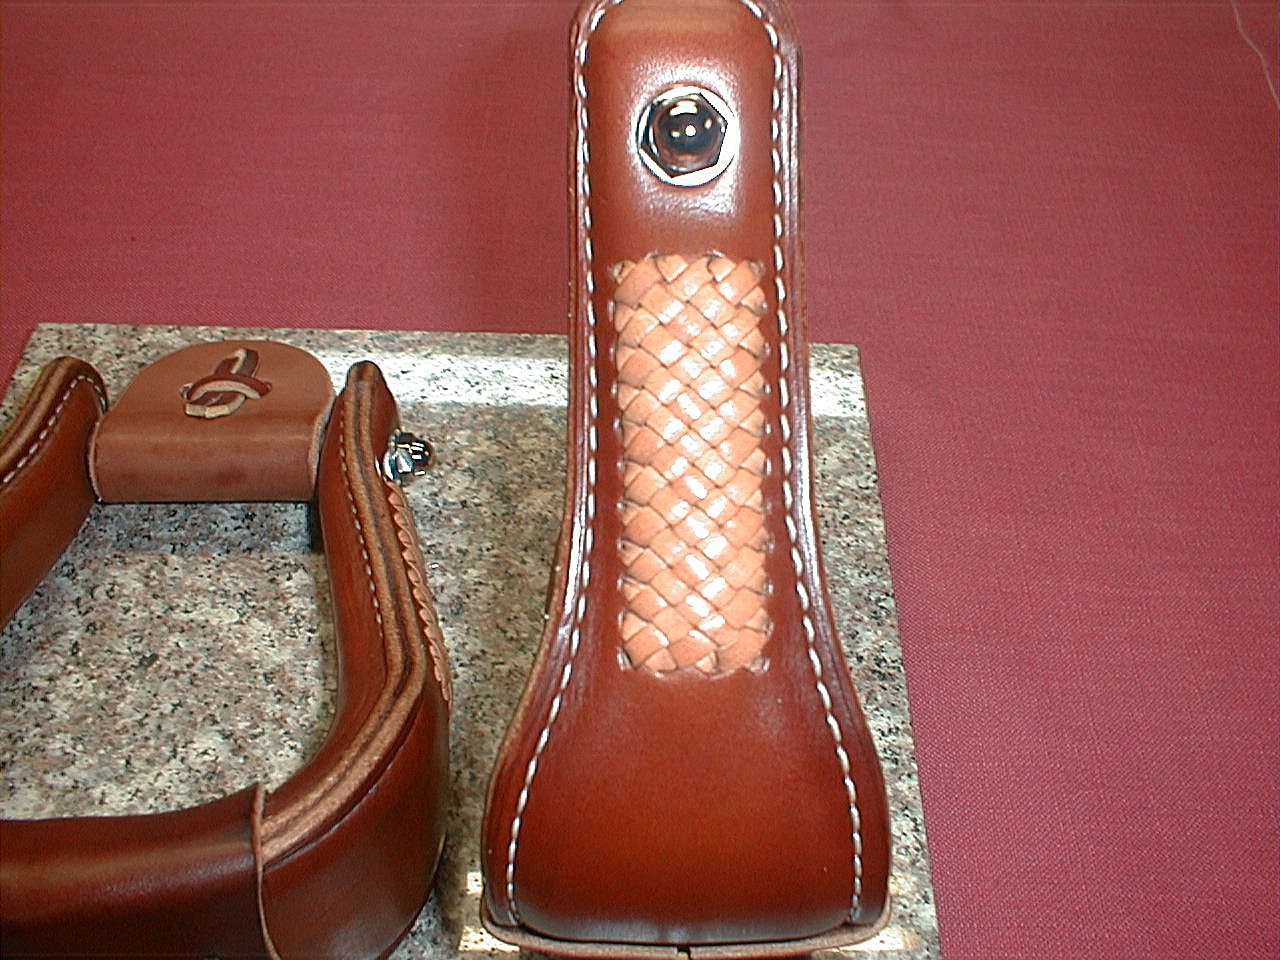
Decided to do something a lil' different on some stirrups and do some weaving with lace on the ouside. The first pair turned out as one would expect...like a first pair.
However, i learned a lot from them and the second pair came out almost flawless.


Well-----how about WOW! Beautiful set of stirrups. Nice job!!!!!
-
Hello all,
This doesn't have a great deal to do with leather, but it can come in handy. Most of you have probably discovered it already. I'm aways looking for containers for anything from dye to glue to water, nuts, bolts, etc. I recently found that if you cut the bottom----about three inches or so from a 2 litre soda container, they work great. If you want to get really picky, RC cola has a flatter bottom, but I buy whatever is a dollar special at wal-mart. Also, would like to think those that responded to my question regarding the use of virgin olive oil.
Happy trails and Stay warm!!
Roger
-
OK--I have a small Tandy embossing tool--the kind with the different wheels that attach to a handle--and have tried several times, unsuccessfully, to use them. How do you use them effectively? What am I doing wrong? I do not get a consistant pattern.
Charlie R:
Thanks for your question, and to those that responded. I had considered buying that setup, but have held off due to being unable to find any articles on them. You folks just saved me some money!! So, what do I owe ya!! :-)
Thanks,
Roger
-
Good morning. I have read articles recently where the author mentioned using virgin olive oil for their finish. Could someone please speak to that, and maybe share your experience using that oil?
Thanks in advance.
Roger
-
John, If I may add to JayMack's response regarding Tandy scabbard patterns. I would recommend buying the "Old West Collection" pattern pack, item # 6015-06. I have found the Tandy pattern packs leave alot to be desired. Just my two cents worth.
Happy Trails,
Roger
John, Old West Collection is offered by Tandy as well.
Roger
-
Thank you! I will try to contact her.
Happy trails!
Roger
Roger, we have a member here that does amazing braiding with horsehair.....her user name is 'horsehairbraider"
-
Does anyone put spots in their leather? I use the 1/2" pyramid spots. Just wondering what type and weight leather you use? I use an adjustable slot punch like this:

I've got a Tandy single shoulder 6 ounce leather that I find difficult to punch. Sometimes the prongs bend. I was thinking of either going with a smaller weight like 4 ounce, or maybe looking to see if there is a different type of leather that is easier to punch? I've used some leather years ago that was thicker, but was easier to punch than the thinner Tandy leather.
Jason,
Good morning! Don't laugh, but I use a horse shoe nail to pre-punch for the spots. The spot prongs follow that shape created by the nail pretty well.
Happy Trails!
Roger
-
Good morning,
Does anyone out there know of someone that still practices the art of horse hair braiding?
Thanks in advance.
Happy trails!
Roger
-
Wow! Beautiful scabbard, and not one ounce of tooling! Seems like more and more folks concentrate on fancy tooling than they do the construction of a fine piece of leather work. My comment is always "why did you hide the leather"? Looks like roany doesn't mind the positioning of the scabbard either. I liked the extra piece of leather above the scope. I am also jealous of the sunburst effect you have there. LOL.
Happy Trails,
Roger
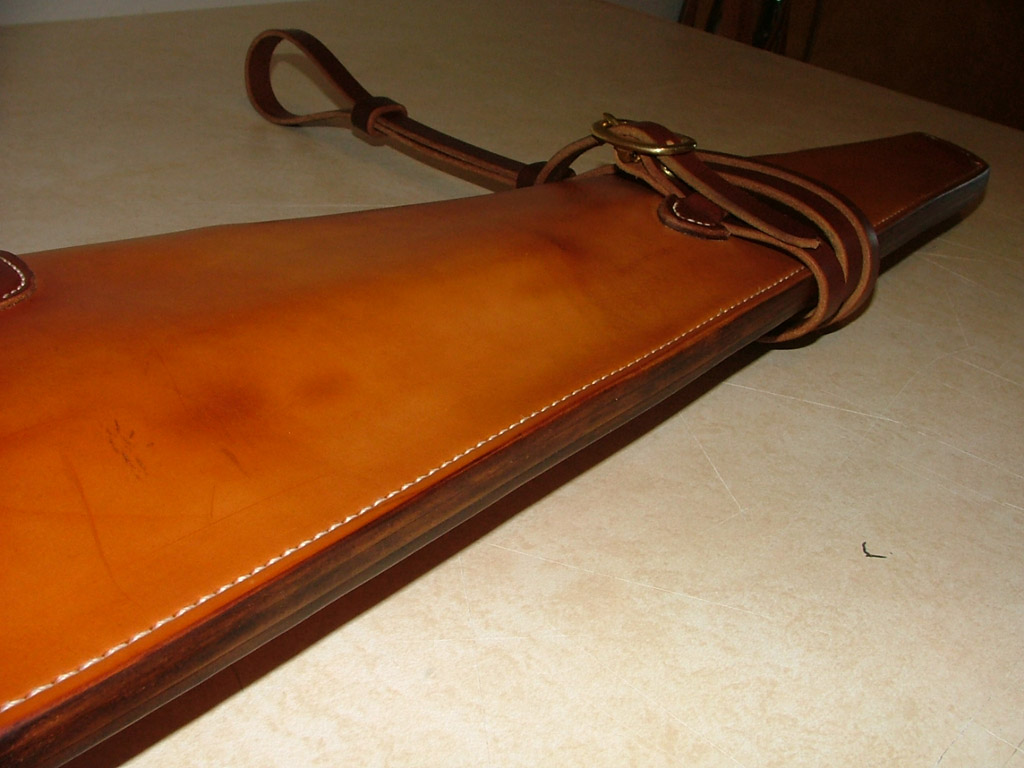
Here's a scabbard I just finished for a customer. He wanted a scabbard for his scoped 700 that was as slim and trim as one for a lever action. Well, he didn't get that exactly but it is nicer than most you see. Nice and simple.
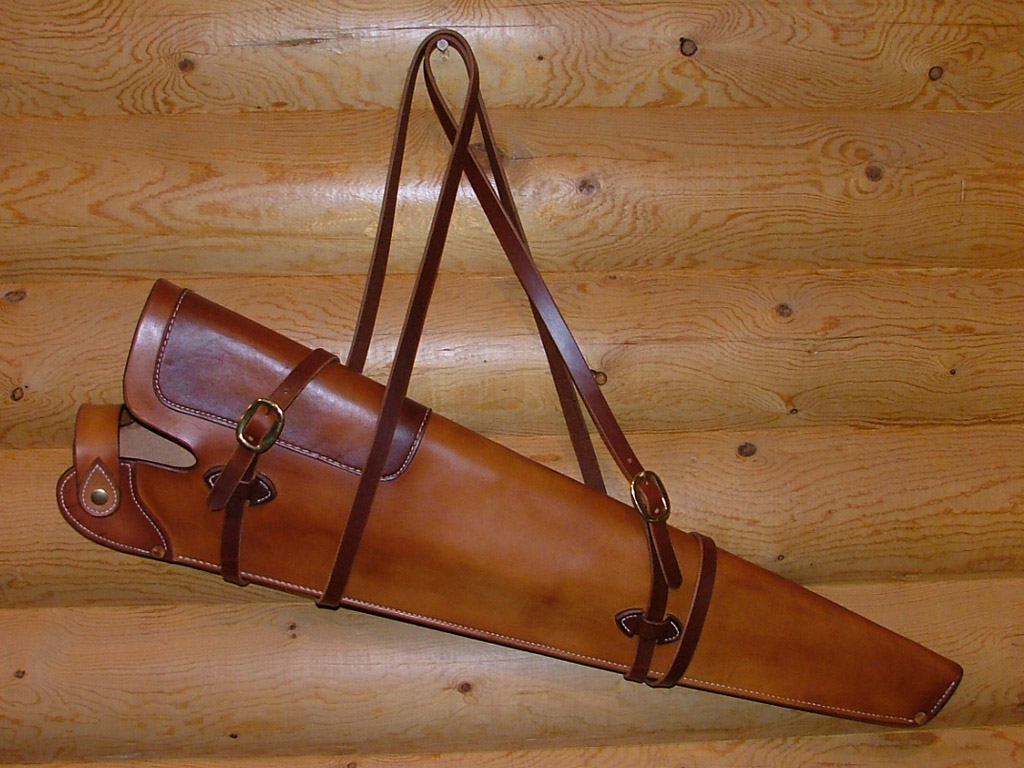
The body is 12-14 oz skirting. The straps are 10-12 oz skirting and the "stiffener" around the scope is 4/5 oz. All W&C skirting.
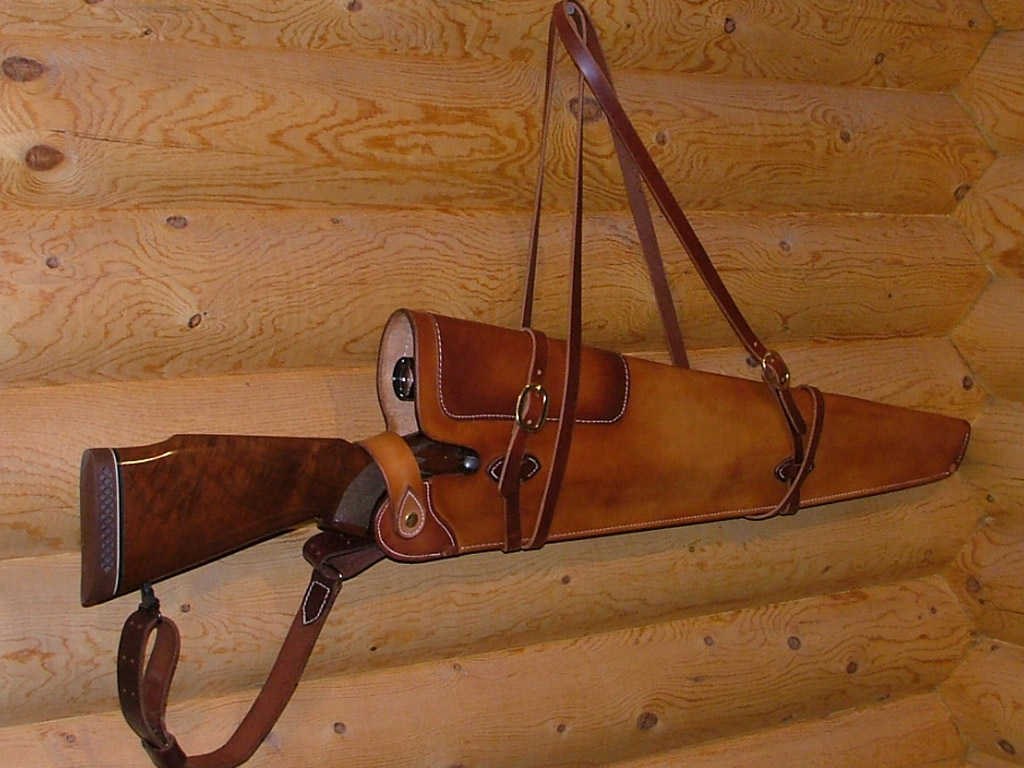
It's hard to see in these pictures but I did some wet molding around the forend to get his fairly wide sling to fit.
Here's some close ups
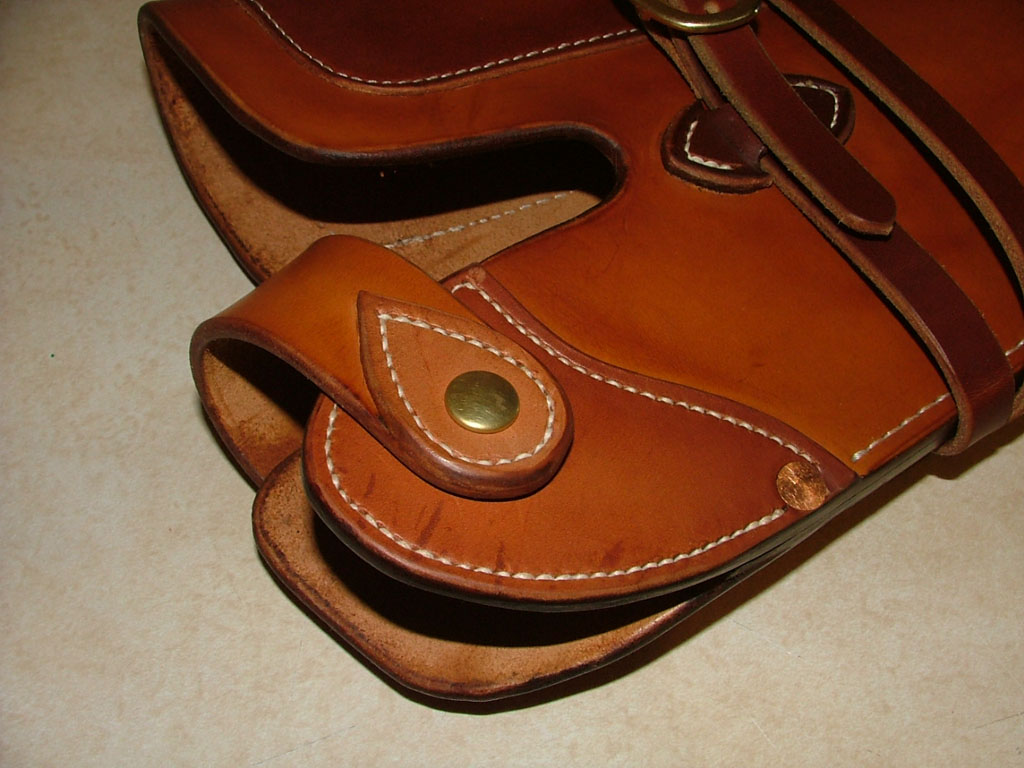
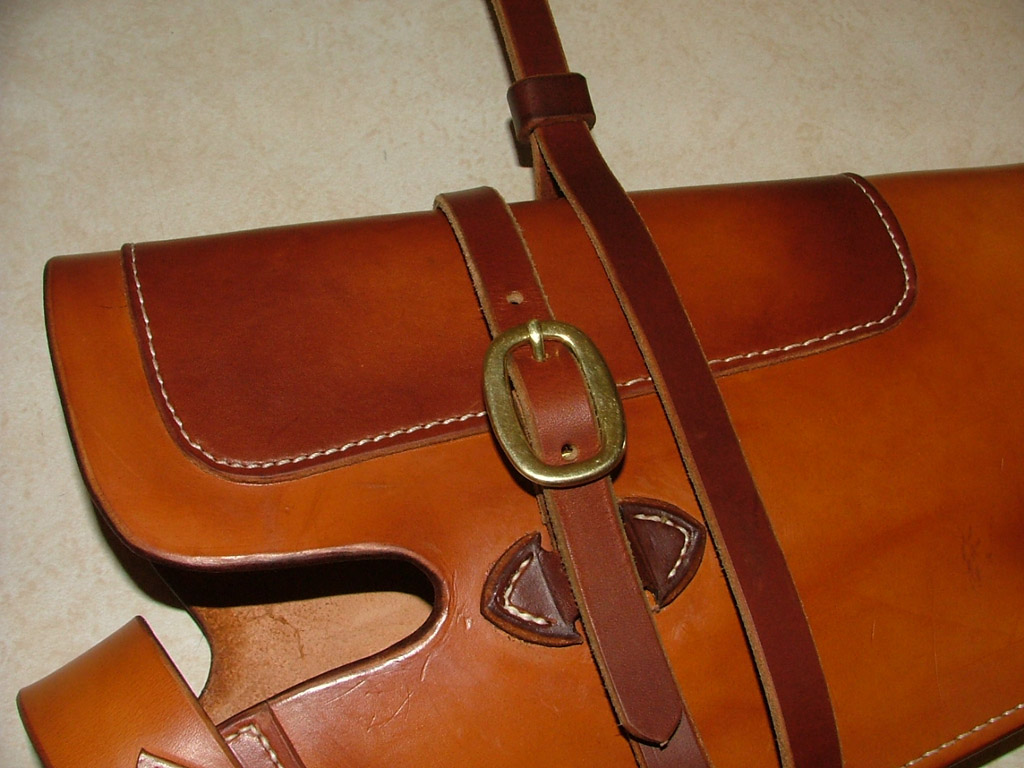
The modest sunburst effect on the scope stiffener is just the extra oil penetrating the edge of the leather. Just got lucky on that.
And here's one of my girls wearing it
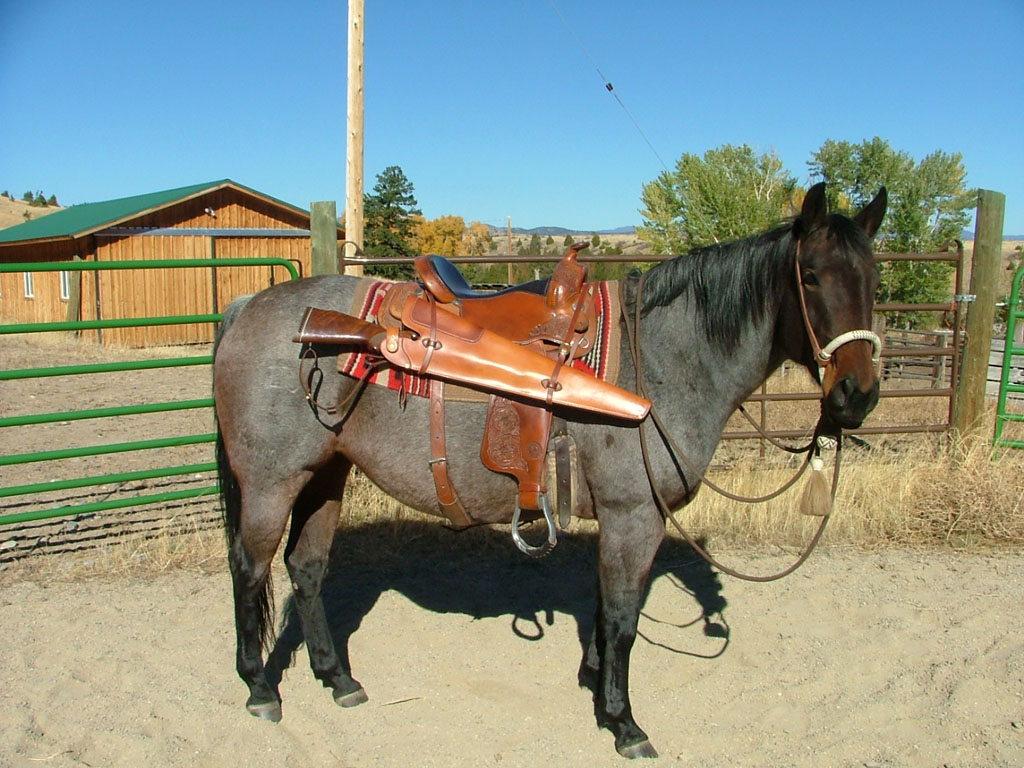
When I put the fender over the top of the scabbard the tip was pressing on her shoulder and she wasn't happy. With the fender under the scabbard as shown she didn't seem to know it was there. Did a little loping and trotting as well as walking around. Even threw in a couple turn arounds and rollbacks.
I think the buyer will be happy.
ETA, Most of the stitching was done on my new Cobra Class 4. The smaller details for the snaps, strap keepers etc I stitched by hand. For those small pieces hand stitching was easier since I'm not as confident with the machine in those small spaces yet. But a three foot long stitch is a snap with this machine.
Dan

Help!
in How Do I Do That?
Posted · Report reply
Thanks everbody. I think I'm going to try and modify a cowboy cuff pattern. I made a prototype from heavy construction paper, and I think it can be done. Probably use a lighter leather than I would use for a cuff. Any idea's out there?
Thanks again,
Roger