


TomG
-
Posts
1,008 -
Joined
-
Last visited
Content Type
Profiles
Forums
Events
Blogs
Gallery
Posts posted by TomG
-
-
2 hours ago, Northmount said:
I use the one from Weaver. Pricey, but worth it.
Be sure to order a few spare rubber 'faces' for the jaws. They will wear out over time. I used to make specialty leashes that had about 8 Chicago screws holding things together.
I used a small drill with a Phillips bit to set them. I also used the blue Harbor Freight version of Loc-Tite.
Worked great. -
Yes. . See previous comments on the subject.
But. Don't dilute it too much. As with all dye, you can always add, but can not subtract color in most cases.
The only issue with the paste is if you use too much, it can flack out after it dries. -
There should be a hole in the table behind the machine. The peg fits in there. You tilt the machine up and back and it rests on that post.
-
I don't use Tan-Kote, but I've used LB/AW for 15 years. I primarily make dog collars and leashes.
I apply it liberally, front and back. I give it a couple of minutes to set and then pull the item over a round, wood rod, front and back, while keeping tension. This breaks the fibers from getting stiff with the dip dye process.
Then, a good buffing and I'm done.
I have used Resolene and still do periodically. I found that if you don't dilute it 50/50 with water, it can crack. Even diluted, I've seen it do that.
-
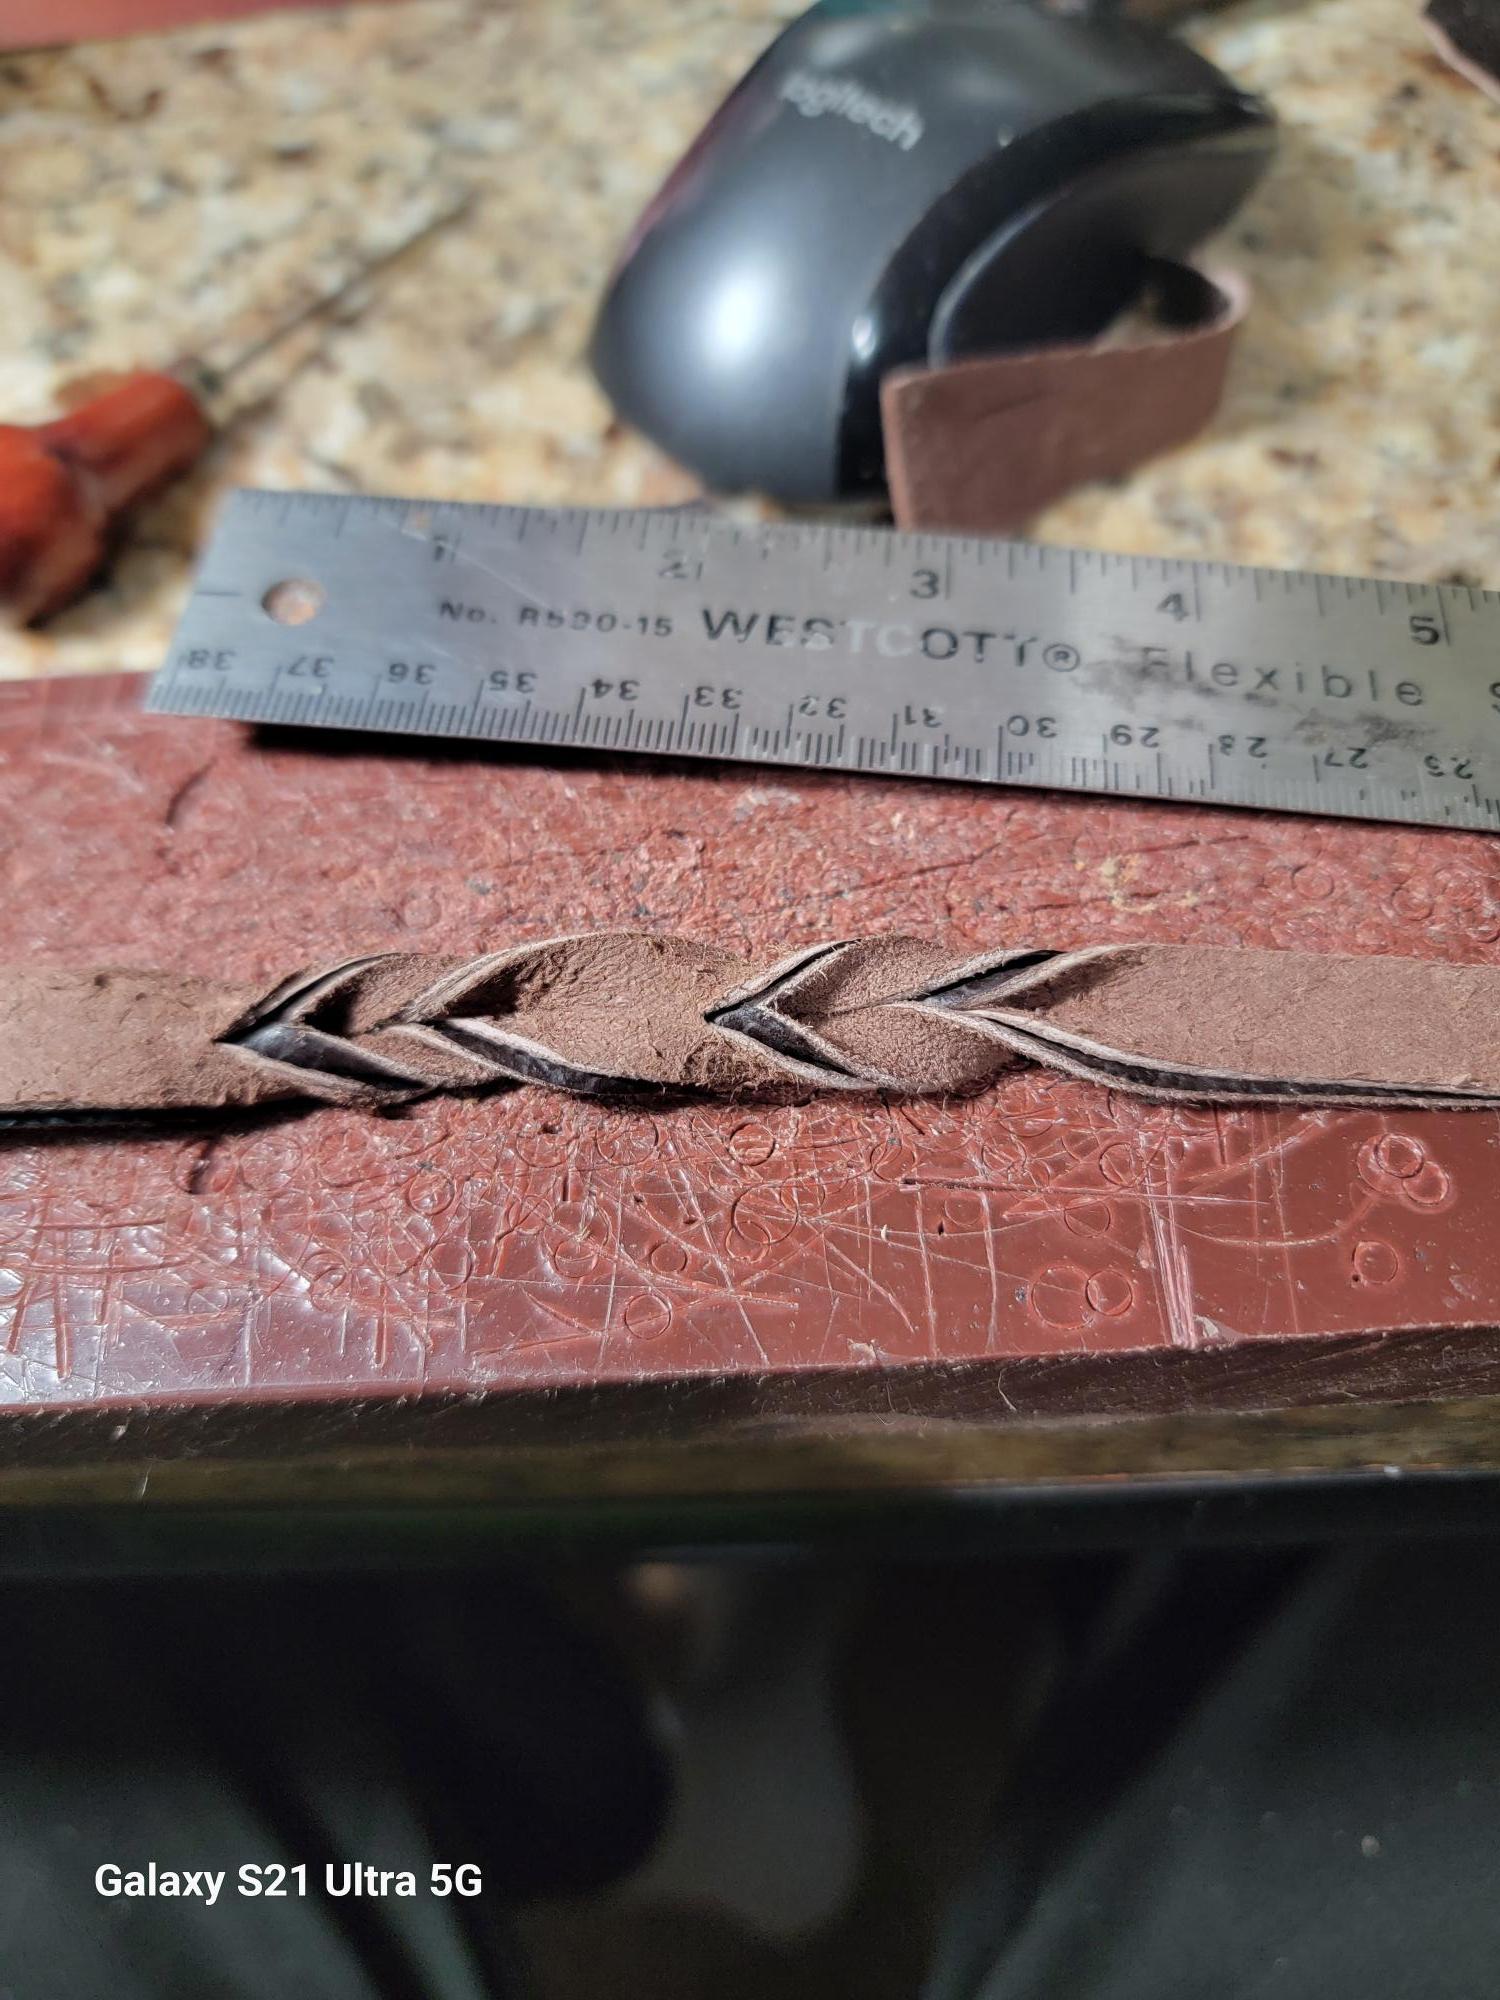
Well, I can tell you that it is NOT a bleed knot. I used to know the name of it, but old age has erased that knowledge.
I've made a couple of items using it years ago, and I use a short version to secure the ends of my dog leashes.
Try this.
Take 2 straps of leather, around 5/6 or so as it's easier to play with, about 3/4" wide Maybe 1". remember that you're experimenting and can adjust things after you figure out the technique..
Cut 2, 1" slits in each one, about 1/2" apart.
Lay 1 on top of the other, with the slits on top of each other. I THINK I put the rough sides together, but not 100% sure.
From the back side, pull both straps through the first slit, pull tight.
Take the same ends and pull them through slit 2 from the back.
Repeat for the length of the strap.
I slapped together a quick demo photo. Sloppy, but you can get the idea. This is 1oz leather.
Couple of points.
Thicker leather tends to look better and hold together better.
Make the slits twice the width of the leather strap. I use 1-1/2 for 3/4" wide 10/12 straps. Also, the leather thickness can affect the slit length.
You will need to experiment with the spacing between the slits
Good luck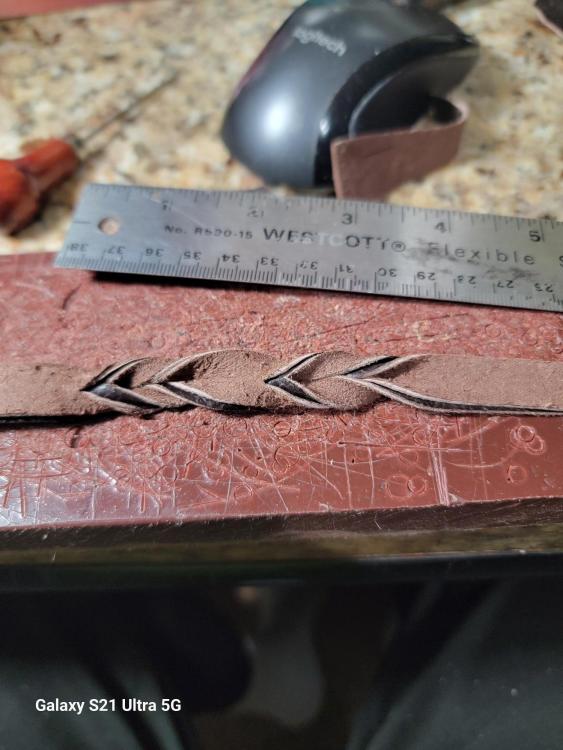
-
You can buy pre-dyed VegTan, And yes, you can wet it and stamp it. Just make sure that they have not pre-sealed it with anything.
I dip dye almost all of my VT leathers. In general, I use Fiebings Pro dyes and dilute 50/50 with 90% alcohol. That works well, in general.
Blues, Greens, Reds, etc, I usually have to so test dips whenever I buy a new bottle. I have had to dilute up to 80% for some colors like a Pink.The problem with that is that it gets too transparent and the leather shade comes through. I found a fix for that color by using Angelus Rise, cut 50/50.
I don't use NFO, like Dwight mentioned, solely because I have never been able to apply it evenly enough to NOT make it blotchy <g>.
You do NOT want me to ice your birthday cake, LOL. But, maybe if I had the time and patience to try it more and a few times, I'd develop a 'touch.
But, yeah.. Try Dwight's method. I know a lot of the masters use it for their work with great success.
Oh, Use PURE NFO, not the neatsfoot compound. -
Sew them into a square pouch and use it as a light weight sandbag. Hold down tracings, prop up edges, etc.
-
I dip dye 95% of my VT leather and can tell you what works for me.
I use Fiebings Pro dye and most of it I dilute 50/50 with Isopropyl alcohol (90%).
I use Rubbermaid plastic tubs that are about 10" x 4" or so (don't remember the exact size).
I drag the straps through slowly, so that every inch is submerged for about 5 seconds.
In general, I get good, even color, with adequate penetration of the dye.
Now, I have actually seen these kinds of marks the few times that I tried rolling the straps up and soaking them in the dye for a minute or 2 and then unrolling them as I pull them from the tank. The dye can't get to the inner rolled portions.
But even those were not dyed really deeply, even on the outer portions of the roll.
You could try to zig-zag them n the tank and move them around a bit.
Next, Oxacilic acid is not used to dilute anything. You wipe in on the strap to bleach it and let it dry, then dye.
Finally, You might have a very fatty side of leather.
I personally have never been able to dye through and through. I think tanners do something different to get it all the way through.
Try the long plastic tank and just drag it through slowly. Usually the slower the pull the darker the color.
Let us know how that works. -
Well, I found the book, However, it's from 1893 or so, and uses chemicals common from that era to make the stuff in it. Not readily available these days.
I also did a quick search and all found was to boil acorns to make a brown dye.
I still think your best bet is maybe an art store and how about a paint store. They have dyes for wood that may be perfect for you.
Good luck -
I think your profile said Israel. Do you not have art supply stores? How about beauty supplies? Maybe liquid hair dye could be used.
I did a search for Dyestuffs, which leather dyes are made from, but didn't find any unless you wanted to buy it by the ton.
Somewhere, I have a digital copy of an old leather craft book. I'll see if I can find it. I seem to recall it had a section on making dyes from natural ingredients. -
If you I have a fabric or sewing store, or a Walmart, etc., look for Ritz dye packs. You mix with water.
Many grocery stores used to carry them as well.
I've heard that they work well in many cases.
-
I mainly make straps of various sorts.
I almost never use NFO as I never mastered putting it on thin enough to not get blotchy.
I case, stamp and dry. Then Dye.
I use Fiebings Pro dyes and dip dye 99% of my stuff.
Once dry, I buff either by hand or, in the case of black or dark brown, with a buffing wheel in a bench mounted buffer.
I then apply Leather Balm with Atom Wax to the back, liberally, and then to the front. I avoid waxing any lettering or places that I'll paint. I use a Q-Tip or small rag to apply it to the outline of the letters or design.
After the front, I put the strap over a round bar in a "U" shape, and pull tight and pull it back and forth a few times, front and back. This breaks up the fibers a bit and in most cases, make the strap limp and limber.
If there looks to be any gloss, I may hit the letter surfaces with a piece of sandpaper or scratch it lightly with an Exacto blade.
I then apply the acrylic paint using little disposable 5ml, needle tip bottles (Amazon).
I try to use Angelus paints now. I used to use the $2/bottle ones from Hobby Lobby/Michaels. I found that I usually had to mix a little Liquitex PouringMedium in (not too much) to make is flow properly. I do the smae on the Angelus. if needed. But, they produce virtually no brush marks.
Another product I've used is Ready-To-Pour acrylic paint. Those need no additives.
Have fun!
-
I have a large 'side' of shearling that I've had stored and now has a bit of a musty smell.
Can wash this and if how, what is the best way. -
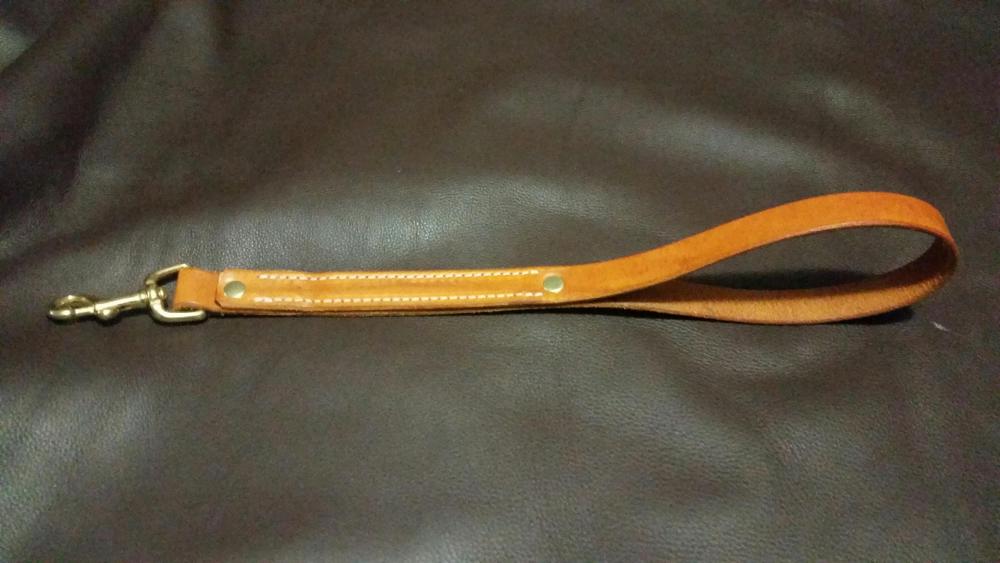
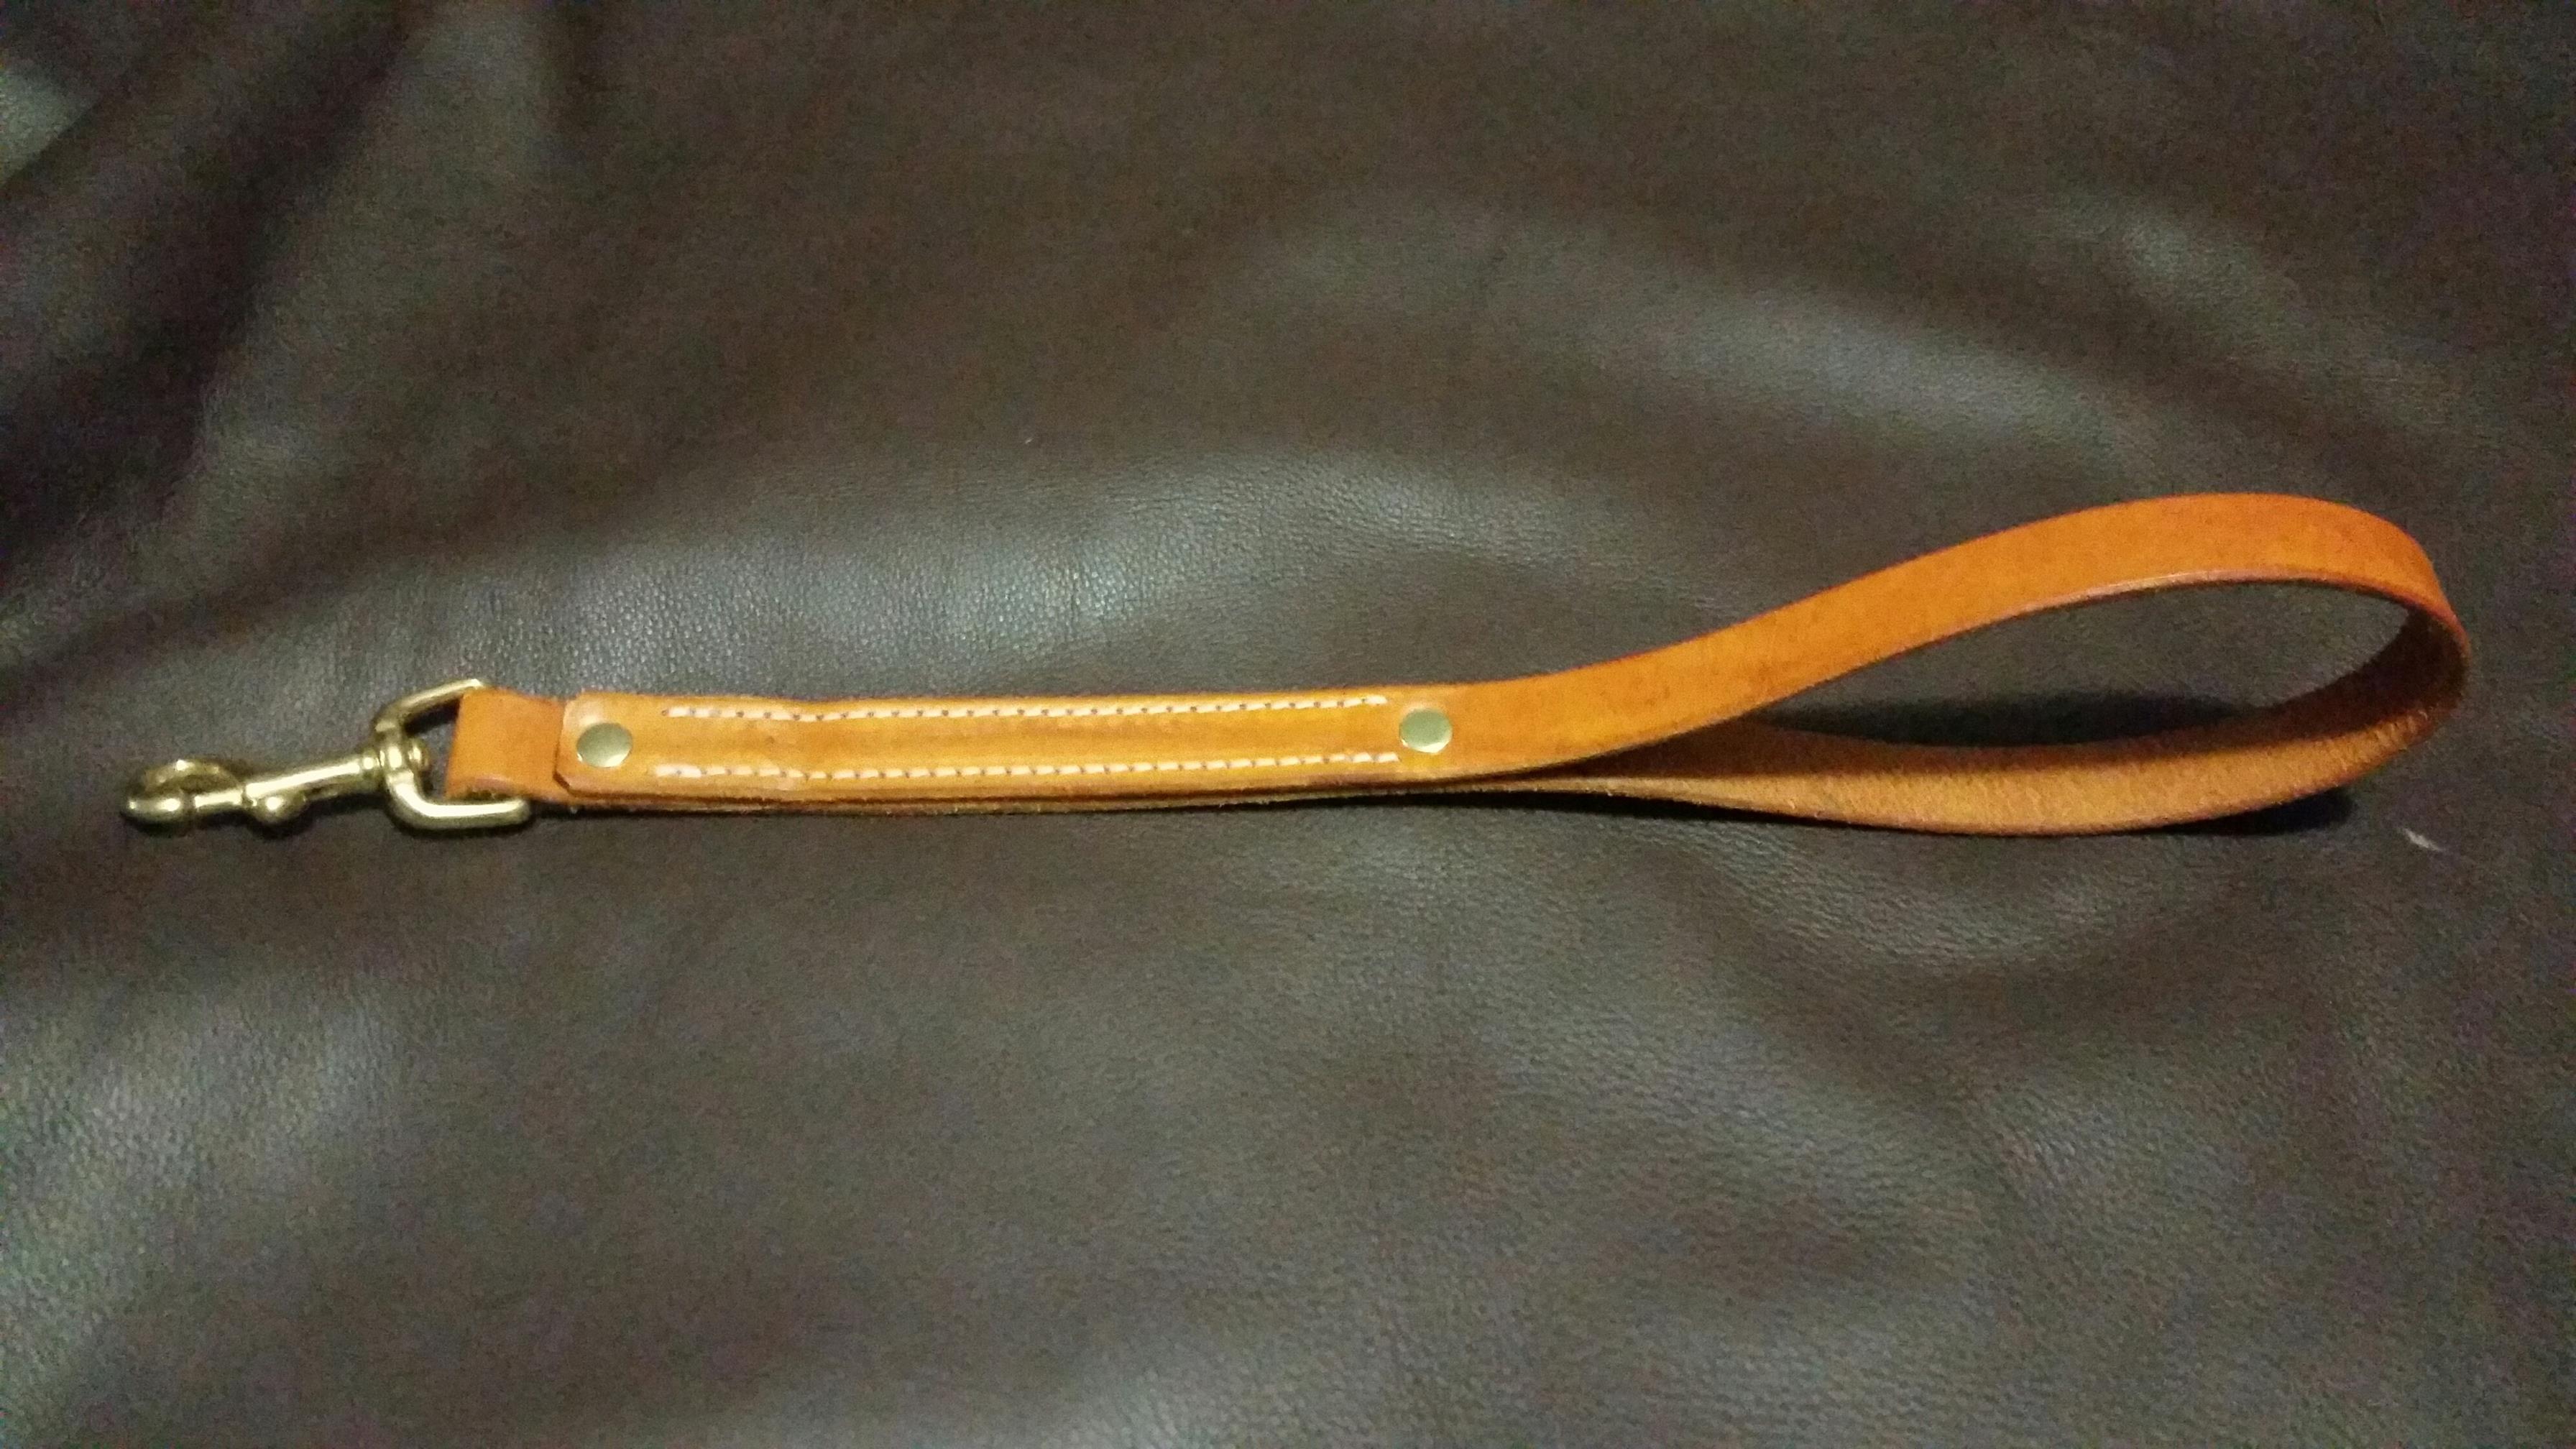
I have a long-time customer whom I am no longer going to be able to service. Worsening arthritis in my hands is making it harder to make them, without too many 'oops' errors during sewing. (All I have in a cylinder arm machine.)
She orders what are called Tag Leads for dogs. She places 1-3 orders per year, in quantities of 35 to 50, as a rule.
If you are interested in taking it on, shoot me an email and I'll send you more details and her contact info.
Tom
-
Thanks for moving it.
-
I'm thinking of selling my machine as I don't use it more than 2-3 times a year. Plus, I am phasing down what I make and purging stuff.
Can someone give me a ballpark idea of the value of it?
Admins - If this is in the wrong area, please move it. I wasn't sure where to put the question. -
Have you called them? That would be the fastest method, possibly. I just called them and they answered.
I've bought a lot of stuff from them over the years but have switched to different vendors for a number of reasons. High S&H costs was one of them.
BUT... Please do remember that postal rates are higher than ever and things like liquids and hardware are heavy. I just sent out 2 Latigo dog leashes with brass snaps. 13oz. My Pirate Ship cost was over $6. It used to be around $3-$4 for the same general area.
-
Like Dwight said, you can dilute Black with thinner or 99% rubbing alcohol. But, you need to remember. Dyes are made from Dye Stuffs, which are mainly dyed powders. But, they never actually totally dissolve, in my experience. Black is by far the worst, which is why it is so prone to rub-off and transfer.
I use dip dying for 99% of my stuff, and even though the tank that I use gets stirred real well each time. you still see tiny particle on the surface as it comes out of the tank.
I ramble about this, because in my experience, with any dye the more you dilute it the fewer dye stuffs you have and therefore, the less color penetration into the leather.
I, and many others, always dilute dyes 50/50 with alcohol to get the actual color it says on the bottle. Except for a 'true blue'. I always struggle to get a nice, rich blue color without it looking too translucent.
-
Well, fact is, wet leather stretches, so any bending while it is really wet will likely deform.
With the understanding that I have never actually tried this, but have stamped leather for about 15 years or so and I can suggest a couple of things to try.
I am not sure if you are trying to form it around the rope as you stitch or not, but I'd suggest you not do so.
I would do my stamping and then let the leather dry thoroughly. Then use a dowel rod just a tad large in diameter than the rope and use that as a form.
LIGHTLY mist the back side and let it sit for a minute or 3.
Then do your forming and sewing. Let it all dry before you thread the rope through the handle and then curve it. Again, if you have a problem curving it, you may have to to the light misting on it again.
Remember, this is just ideas based on straps that I've have to curve from time to time, so it may not work.
But, it can't hurt to tray.
And maybe someone who has actually done this before will chime in and help you out.
-
I've had one for years and love it. I do a lot of straps and 2 quick pulls does the job.
The 4-cutter version is much more expensive and for my need was not worth the extra money.
I've also read that the 4-cutter version can be tricky to adjust for even cuts, but don't have hands-on to confirm. -
21 hours ago, bruce johnson said:
Here's my experience. I don't seek out craft tool stamps to resell, but still over the course of the year in buying sets and estates we end up with about 800-1000 of them. I used to list some on my website but it was not worth the time and effort to break them out even in the small sets for what they returned. Even in a small set someone would just want some one would just want one stamp and ask that we break the sets. It wasn't worth it for a five dollar tool, and then kick about the shipping costs. There are a few rare and collectible craft tool stamps, but not many. Jim Linnell usually buys those that we have. Otherwise it can be a tedious experience to catalog, take pictures, deal with buyers and shipping.
Thanks. I am not looking forward to the cataloging and selling.
I do have a few people who I will be donating some to. My mentor was generous with me years ago when I started and I am going to honor that by helping a newbie.On 2/8/2024 at 5:38 PM, DieselTech said:Tom I'm no expert on this, but some of the vintage tandy stamps on pro leather carvers. Are priced from $30-$50 each depending on what stamp they are.
There is some older tandy stamps I would like to find. They made nicer stamps back then.
Wow. Not sure which stamps would carry that price tag, but I'd love to find a dozen or so of them in my collection, LOL.
-
23 hours ago, Sheilajeanne said:
I acquired a large number of stamps from a pawn shop back in 2019. There were quite a few duplicates, and some were not Tandy, but a cheaper brand made in Taiwan (Ivan).
What I did was TEST THEM ALL. The older Tandy stamps were not always the best, and the newer ones were not always the worst. This could be due to the amount of use some of the older stamps had over the years.
As for the age of the stamps, Tandy stamps with no letter are the oldest, followed by Craftool Co. with a letter and number, then Craftool Co. U.S.A. The most recent stamps are Craftool U.S.A. As a rule, the first two types of stamps listed are considered to be much better than the newer ones.
I charged $4.00 per stamp for the Craftool Co. stamps and $3.00 for the newer ones and Ivan stamps.
Thanks. that's kind of the ballpark I was thinking, but was just not sure.
NOW, for the task of cataloging them all and do the listings. I'm going to put them here on the Leatherwork section first. eBay will be the absolute LAST place I'll list them. By the time you pay the fees, you get a buck a tool, it seems. -
I am starting to downsize, and I'm beginning with some of the extra hand stamps that I have accumulated. I'm not sure how to price them fairly.
They are 99% Tandy, but span years.
How do I tell which are the older, better tools from the newer, not as sturdy ones? And what pricing for the different ones?
Thanks
-
If you haven't found this yet, it's worth a read.
How do I get this brown?
in Dyes, Antiques, Stains, Glues, Waxes, Finishes and Conditioners.
Posted · Edited by Northmount
Fixed typo (relaxed > related)
I would never undercoat with anything but pure NFO.
Resolene is an acrylic sealer, closely related to floor wax.
You might want to try dip dying for even coats.