


ItsJustNC
-
Content Count
27 -
Joined
-
Last visited
Posts posted by ItsJustNC
-
-
Nice....you certainly make use of what you have.. You even got a sander. The edges look good, you should try to dye them brown and then burnish so we can see a nice dark edge. Thanks!
Ralph
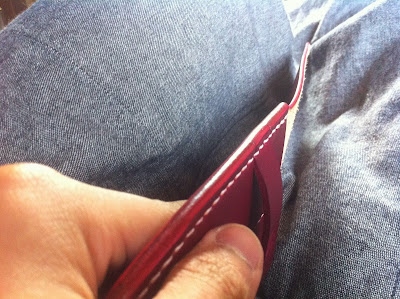
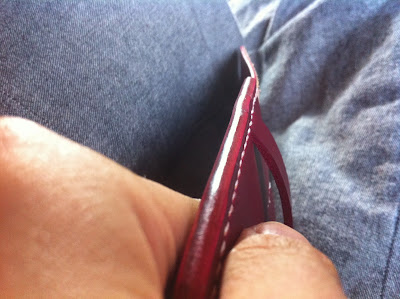
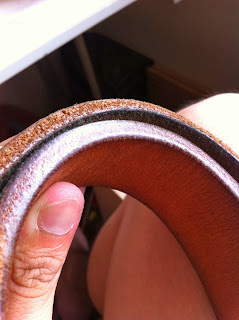
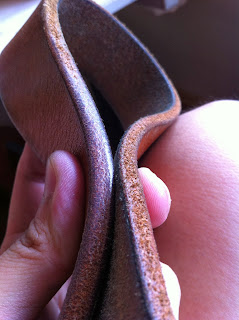
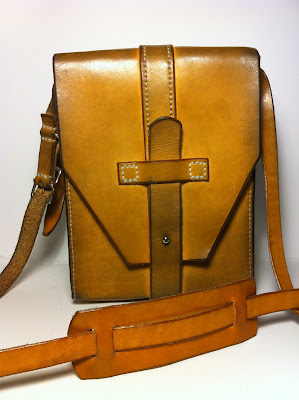
Like promised, here are the better burnishes I've churned out with this burnisher..! Just a simple process of sanding, burnishing with water, and waxing with some homemade burnishing cakes and canvas.
-
I'm glad that does what you wanted it to.
It's always nice when things work out.
Yup..! Really am glad with how well it works.! And the torque is surprisingly high..! I'm guessing the thickness of cake batter needs a motor with significantly high torque, which works out great for us leathercrafters.!
Interesting. A do-it-yourself way to do that would be:
- get a tool w/ a wooden handle
- cut off the tool part
- mount it, then shape the wood w/ files and sand paper
Haha.! I decided to use that burnisher because i happened to have one lying around, and where i'm from, power tools aren't easily accessible/affordable.. But your suggestion would work too.! A nice cocobolo one would be awesome...!
Nice....you certainly make use of what you have.. You even got a sander. The edges look good, you should try to dye them brown and then burnish so we can see a nice dark edge. Thanks!
Ralph
I've actually done better edges with this thing before.! The one shown was done as a quick demo. Once i'm done making my next batch of fountain pen cases, i'll post some pictures to show what a wicked burnish this budget bad boy can do. Haha.!
That is a great idea but..Does this mean she quit baking cakes..
Oh hell no.! I'd much rather hand burnish for life than quit eating her cakes.! HAHA.!
-
Here is a follow up post for those who were acctually following this thread.!
-
So this idea started off when my girlfriend was about to chuck a beat up old cake beater away, and i was in the midst of making a strap for a bag. I was hoping to make an electric burnisher by using as little effort as possible, and for as cheap as possible.
And after working together with Tree Reaper in a postthat i made earlier on, this is the end result.! It not only burnishes but sands down the edges too. The burnishing demostrated took roughly 3 minutes.?
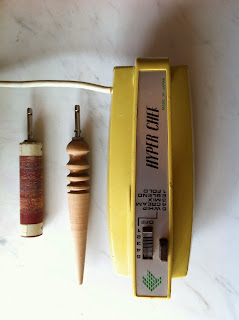
Just wanted to show an alternative of an electric burnisher that doesn't involve buying a dremal or a motor. Hope this is of help to you guys out there looking to make/get one..!
-
Hey Kevin, i just dropped you a message..!
-
Thanks for the suggestion, but the problem is i lack the tools to bore a hole centered enough to mount on the cake beater without it wobbling. Haha.!
-
Haha.! I wouldnt mind doing a write up if this project pulls through...! Pictures included...! Haha.!
Yea, the one that i have is a used one. And the torque was surprisingly high for a motor that small. So i figured it might be a feasible idea...! Worth a shot seeing as it'll cost me not too much. And if it works out, it'll be a great DIY and cheap burnisher that'll anyone can try out...!
-
Thanks for the reply guys...! I've actually had the same concerns too initially. I tested the motor and it seems to have a really high torque and the speed is pretty decent too. So i thought it was worth a short...! Thanks for highlighting these concerns.!
-
Craft Sha Leathercraft Leather Edge Dye Dressing Black Gloss Lacquer Finish from Goodsjapan works pretty well.
-
Oiling helps too..! But rmb to remove the soot at the edge first.! Those stuff can stain natural coloured leather really easily...!
-
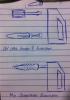
The thickness of the rod that goes into the cake beater is 5.5mm. So i think a hole of 5.5mm in a depth of 5cm would be awesome...!
-
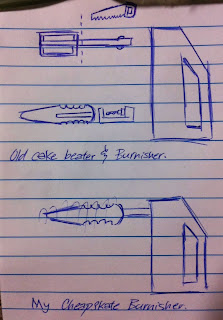
Hey guys, I've got an old cake beater that i've been planning to turn into an electric burnisher for some time but i don't have easy access to a lathe machine and a Tandy store where i come from. So i was hoping someone could help me out here...! Will pay for shipping and wooden Tandy burnisher...! Any helpful soul willing to help me out here please....?
P.s. Pardon the amateur sketch...! I hope you guys can understand it...!
-
I was looking for some quick fixs too for this back then. I never did get around trying it but i remember some people reccomanding watered down white glue or resolene.
-
A glue pot is essentially a small pot for you to transfer a bit of your glue into it. So if it dries up from opening and closing, at least the amount of glue that dried isnt as substancial as a whole tin of glue. (Its more cost effective to buy them in larger amounts of you do this craft often enough.) And the fancier ones are coated with teflon, so its easier to clean up.
I personally prefer using "pots" than squeeze bottles. Personally feel more in control with a brush than a nozzle. If there a big surface area to cover. Use a big brush. If its a small seam. Small brush. And i prefer brushes simply because its easier to get a thin coat of glue on your workpiece. So that way, your glue ain't gonna get in the way of your burnishing.
And i would believe any old thinner would suffice. Cause i've been mixing random brands of contact cements and thinner and still gotten pretty good results. Either im one lucky guy, or they all have similar solvents.
-
And if you wanna give them a unique makers mark. Dip you hand in dye and smack it right on the leather. I've done it before.! Pretty fun.! Just make sure you dont have any biometric locks around the house.

-
Well... I usually hand dye my stuff so the dye stays on the surface, but i've dip dyed a few times. And the thing is, if the dye, especially spirit based dyes, has soaked all the way through, your leather is gonna dry out really badly. You'll have something as stiff as cardboard.
And tbh, you'd be better of buying drum dyed leather. To dip dye your own stuff is going to be really expensive and not cost effective, unless you are doing things on a huge scale. If not. Just let the tanneries do the dyeing. At least you know for sure that u are gonna get a nicely dyed piece that isnt dried out.
-
You could use Edge Kote, but yea. These techniques aren't generally reccomanded cause they may be easy and quick, but lack durabilty. So more often than not, burnishing is a way better solution. If done right, you could get a glassy edge that is way more durable.
-
WHOA.! That's an amazing texture..! How on earth did you get this..?!

-
Yea, I see what you mean..! However, what do you think about the difference in quality when cut along with the grain flow in say... A bridle for the horse.? (Im just guessing you make bridles too since you do saddle..!)
-
OH..! Thats a pity Denster. No firearms policy down here in Singapore.! Haha.! Thanks for the suggestion tho.!
-
Really...? No one has any opinions on the matter...?

-
Hmmm.... Great point Johnathan.! I see a lot of wet molded knife sheaths and lighter cases planned for my bellies next time.! Thanks a lot for your suggestion.!
-
Sounds like a plan Ken, thank you for your suggestions.! I should try lining ti and double plying it to reduce the stretchiness..!
Other suggestions still welcomed..! Some pictures would be perfect.! Would love to see what are some of the other things you guys do..!
-
Hey guys, I've always been more partial to items that are built with a more rigid construction, so i often find my scrap bin full of belly hides. Not wanting to waste them, i was wondering, what are some of the things that you guys make out of them...?

Cake Beater Burnisher..?!
in Leather Tools
Posted · Report reply
Thanks...! I'm really satisfied with how well it works out...! Cuts down the time it takes for a burnish significantly..! And it doesn't seem to be compromising on the quality of the burnish. At least from what i can see..
Er.... Whisk mode...? Hahaha..! I just crank it up to the highest or 2nd highest, but i'll keep a closer eye on it not to "over burnish" the edges. You'll be able to get a burnish with all the speeds from what i've seen, just a matter of how fast. Over burnishing makes it look a little crackled and darker. Or charred if you will.
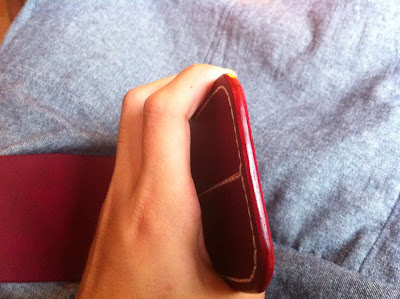
Haha.! No worries...! It's actually hand dyed. Fiebings spirit based Red. I like the cloudy effect of hand dyed leather more. I find drum or dip dyes a little too homogenous. And hand dyeing doesn't seem to bleed or rub off for me.