


Anonnymouse
-
Posts
17 -
Joined
-
Last visited
Content Type
Profiles
Forums
Events
Blogs
Gallery
Posts posted by Anonnymouse
-
-
Just let the horse walk around in some cockleburs; you'll have a lovely braided tail sooner enough! :D Sorry, couldn't resist...
-
I think I see what you mean... The cardboard was very thin, and it did not cover the v-gouged grooves.
-
I don't use stuff that says "Not For Sale In California."
-
Who IS Bezier and what does he do for a living???
Bezier is the Paths tool.
-
When I wet, myself, I just take a sponge to it and I have a glass of water nearby, and I spread it out evenly. I usually start stamping a couple minutes after wetting, but it seems to make darker spots for some reason. Not sure if this is a good method or not.
-
What I am assuming people are talking about here is using something like Bezier paths to make tooling patterns? Or actual patterns like for holsters, etc. In my experience the GIMP bezier tool is much easier to use than the Photoshop bezier... That could just be my in experience, though.
-
I am not sure what you mean by mitering the edges of the cardboard?
-
Those look very complicated, very pretty! Good job; are they adjustable?
-
I would assume it would work, so long as it was completely even. But don't take my word for it, I don't know.
-
Hi,
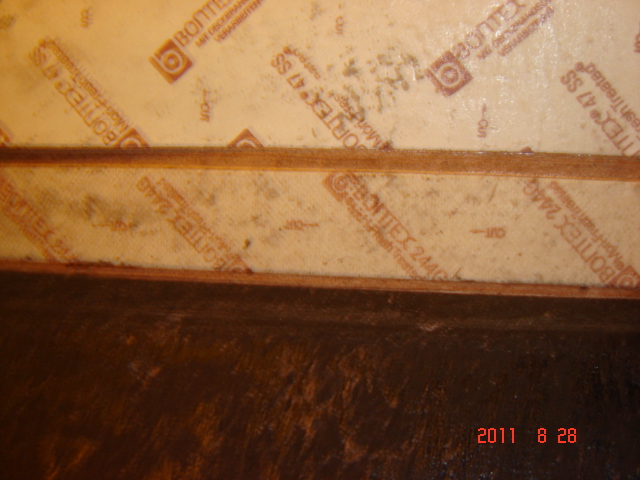
Thanks for the comment, it made sense for the most part. I did some more work on it, and I have managed to make it lie very flat when opened with only a slight wrinkling at the spine dips. I stopped using the Tandy cement stuff and used some good Elmer's spray-on glue; I use it to make my origami paper. It worked great on the leather. Overnight I set some huge textbooks on it with some pieces of cardboard set on the grooves. I'll post a pic later; perhaps when I'm finished.
-
Could you get very far in leather with an awl? Seems to me like the awl would be rather imprecise. Plus I think the awl would not go very far in tough leather (4+ ounces)? I'll be using a 4-prong chisel for lacing; I think it should work all right.
-
Hello,
I am having difficulty gluing my two leather articles together. It is a notebook. The veg-tanned front has been tooled, and has had cardboard glued on the back. There were three peices of cardboard; 2 large cover chunks and a spine piece. I used a v-gouge to cut out two lines for the notebook to fold on. I have one half of the calfskin (I think it is calfskin) glued on with some crappy Tandy Eco-flo cement. My problem is that I cannot avoid the wrinkles. If I form the calfskin into the cracks between the cardboard chunks, while the book is flat, then when I fold the notebook up the calfskin wrinkles. If I form it while it's folded, then it wrinkles or just pulls apart when I unfold it. Argh! I'm pulling my hair out over this one. Thanks in advance for any suggestions.
Cover:
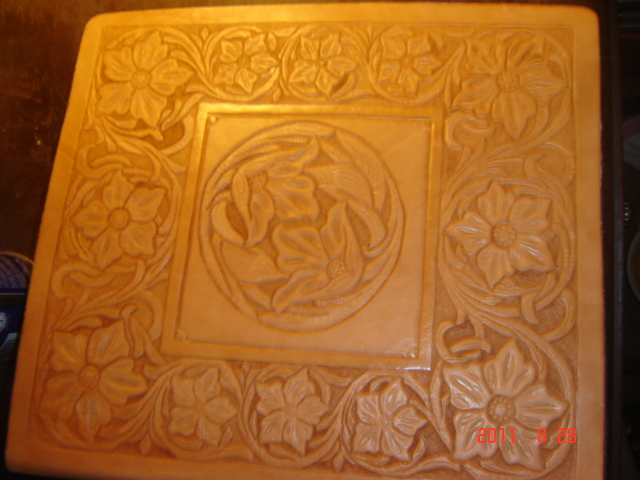
This is a wrinkle:
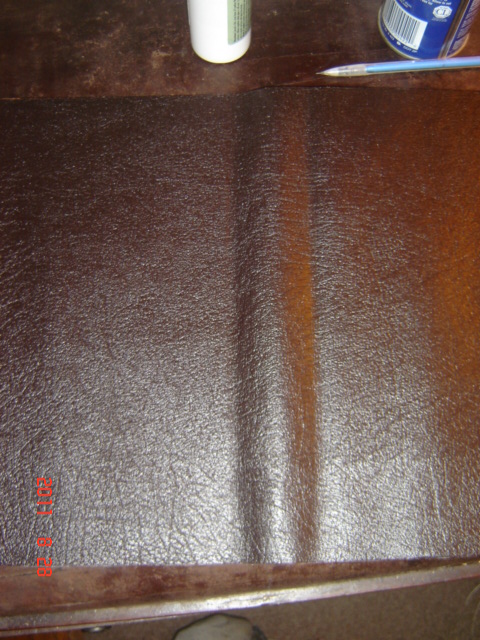
This is the cracks between the cardboard. I am trying to shove the calfskin into those cracks, but it always wrinkles when folded or unfolded (the reverse of how it was formed).
-
First things first.....Welcome to Leatherworker.net, best site on the entire internet!
+1 on reading the article(s) on casing leather. vegetable tanned Leather needs to have a certain moisture content to carve and tool it. If it is too wet, it will mush around; too dry and your impressions won't take.
Highlighting is almost a misnomer, because the solution/paste darkens things. When using it,It really helps if you can think in terms of negative space because you are darkening everything you DON'T want to stand out. It is supposed to get down in the cracks and cuts. It works by making the background and tooling darker than the rest of the piece, visually making the 'highlighted' sections "pop" out from the rest of the leather. Steps for Highlighting: Have design, case leather, stamp/cut/tool design, apply conditioner if needed, apply resist (and let dry), apply highlighter and let dry, use damp cloth to remove highlighter from 'raised' (meaning not pressed/stamped/tooled down) areas, repeat as necessary, apply top coat and finish.
On some things, like floral carvings, it is not unusual for the maker to actually dye the backgrounded/matted areas that are visually behind the floral components.
.
Hi everyone, thanks for the replies!
So, I take it you're saying to just let the highlighter get into the cracks? It causes the color to be uneven and it darkens the depressed regions.
-
I'm new here... Just got started in leatherworking! I have a couple questions; thanks in advance for answering!
1. On designs that cut deep into the leather, how do you dy/highlight it? It gets into the deep grooves and I can't get it out; it makes a miss-matched look. I've tried cotton balls, towel, and paper towels to try and get the excess dy/highlighter out but not very good. This happens a lot with the basketweave design. Is it possible to just highlight the design before tooling?
2. Can you run a leather article through water to tool it? I've been told to just get it damp, but it doesn't seem to soften it enough to tool it. I saw someone, a tutorial here, just run a belt through a bowl. Will this damage the leather?
Tippman Reliability?
in Suppliers
Posted
Their site was a very bad WOT rating. See
http://www.mywot.com/en/scorecard/tippmannindustrial.com
Have any of you ordered from them?