


jimmy eng
-
Posts
128 -
Joined
-
Last visited
Content Type
Profiles
Forums
Events
Blogs
Gallery
Posts posted by jimmy eng
-
-
Looks like heavy weight glossy cardboard.
-
Need a photo of the back. It seems like it's the top piece is wrapped over the edge then a shorter back piece is glued on top then both are stitched together.
-
Don't know what type of glue but I'd skive the skin side of the leather where you want to finish so when you glue it, the glue sticks better to the end of the roll.
And the loop part, I'd stitch to the beginning of the roll and then glue at intervals when you roll so the tassel won't unravel as easy.
-
I do the same as CST and press the stamp directly but if I need to do multiple copies I use a bit of my contact cement to keep it on (and stamp on a bit of scrap to set the stamp in place and prevent any slippage). I've found that thinner leather needs a thicker piece of scrap leather under it whereas I only need a steel base for 8oz or higher to get a clear mark.
The biggest I've ever used on my 1 ton arbor is a 50 x 50mm stamp. I also mark in permanent marker the centre of the image on the stamp to help alignment.
-
I've only had the back stitch come out once on my own wallet after a year or so but I back stitched two holes instead of three and cut flush. Use more wax on your thread? You could try tying a double overhand knot in between the layers.
-
You don't have to knot it. Once you've gone through the hole a few times pull the thread in between the layers and cut it there (leave a 'tail') so the end is hidden. If you want to knot it, cast the needle around the thread that's in the layers and do a overhand knot.
-
The Claire Shaeffer book Nuttish suggested is awesome, I have the non updated hard copy.
Since you've already made the cut I'd suggest a welt buttonhole (also called a bound buttonhole). http://www.sewalongs.com/anise/anise-tutorial-bound-buttonholes
It's suitable for leather and much more stronger than a typical machine/hand blanket stitch style.
If you want the typical buttonhole look though, hole punch the ends of your slit and blanket stitch by hand so it helps if from ripping at the weakest points (the ends of your cut). Use a upholstery or denim thread for this method. Use a sew-in intefacing if you think youd need more strength in the area.
-
I didn't want to admit it to myself I guess. Cheers electrthon. I'll buy an arbor press to do the job, use this one for printing or something.
-
The topic is meant to say 'Modified embosser not making a strong impression', stupid phone correction!
-
I've got a round bar with a threaded countersunk plate on one end made for my drill press hoping it would convert it to a dedicated embossing press but the impressions are very weak. So far I can only get it to make a okay impression on veg tan if I wet the surface.
Any suggestions would be appreciated to try and get a better result from it. My housemate said drill presses don't really exert pressure, so I guess that's my issue. I've tried to put different sized bricks underneath to see if the spring will compress more but it doesn't. I wanted it to do quick stamping jobs.
-
Any leather will emboss, you're only pressing a hard metal stamp onto a surface.
I'm assuming by saying pre finished you mean a chrome tanned leather with some kind of gloss or matte look. You need to provide more details; how thick is the cover going to be, how are you stitching the leather (are you top stitching on a machine/hand sewing, bagging out, linging it?...) .
-
Muslin isn't stretchy, it's a thin loose weave cotton fabric (the fibres are not woven tight together so they let through a lot of air) so it could seem to be stretchy.
-
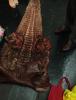
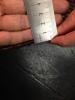
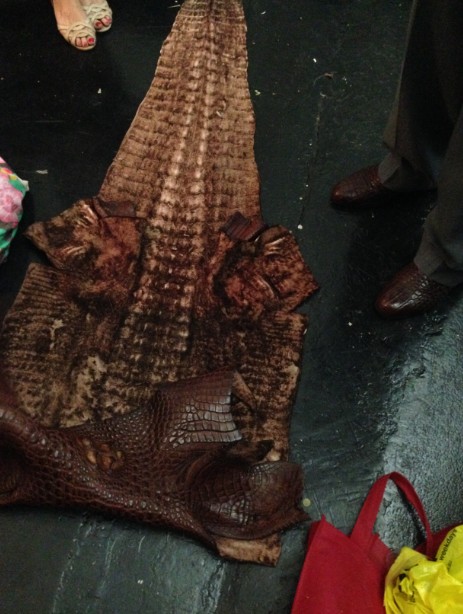
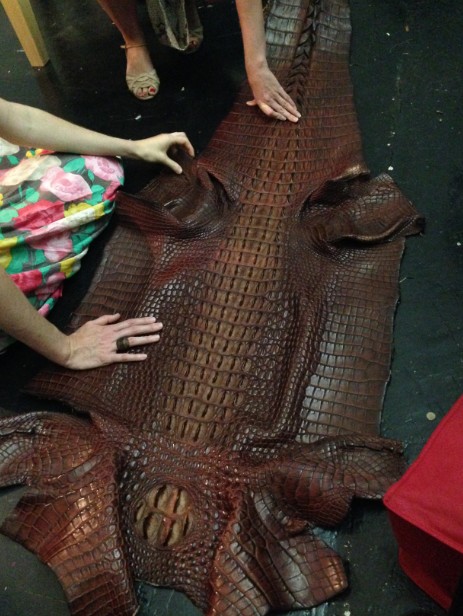
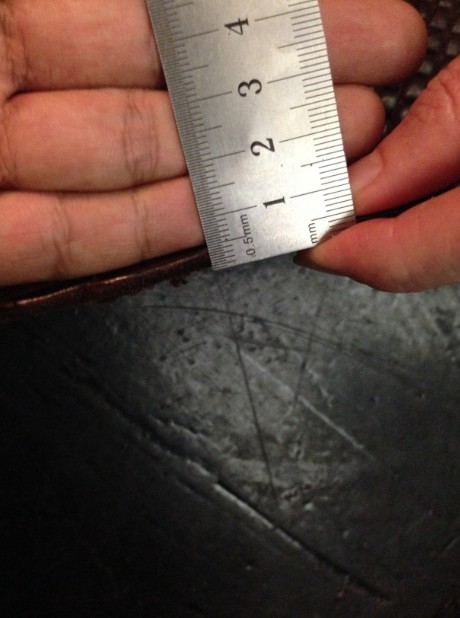
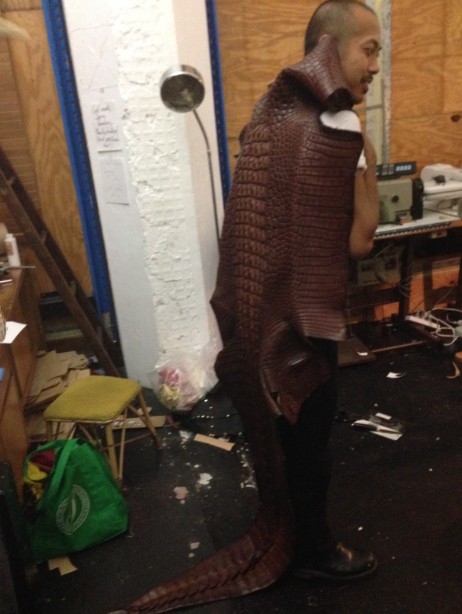
This fella John has asked me to make him a three quarter length coat in a few crocodile hides he's prepared (he hunts, taxidermies and tans leather of crocs and smaller animals in Australia and Papua New Guinea and gold prospects in PNG too) but they're about 4-5mm thick (10-12 ounces). I didn't get the ruler flush with the leather in my photo.
To make a garment I'd need it to be at last half that or ideally a quarter of that thickness.
I've never used a splitter before so I don't know how it would go with the scales of the skin side. I'm going to ask the companies Packer and Maclace in Australia and also thought you guys would have a great idea on how to do it. To do it myself, John suggested I could sand it off, he tried by hand but it's too laborous for him. A mate knows someone with a splitter with the width of 700mm so that should be sufficient so they'll get back to me. I'd cut off the limbs on the hide so it would be flat I reckon.
On a side note regarding the job: To make the coat John wants the scales in the centre of the back of the coat and that's the only requirement. The rest of the garment would look better using full belly pieces which are smooth and flat but I reckon he wouldn't have any hides cut down the back so the belly isn't divided down the middle so they'll be a lot of seams in the coat. If it ends up being only split half thickness I'd have to sew the seams on top of each other, without a seam allowance.
-
Cheers for the local term update bluey, muslin in Australia is cheese cloth!
-
I'd do what Feraud said. Get a large hole punch and punch a few circles out of a scrap and then punch a hole in them the same size as you rivet to make a washer.
-
I use the same thread (cord 3 = literally three cords of thread wrapped around each other) and beeswax to coat it. It doesn't take much, I put the thread around a post, pull it taut and give a few light rubs of a block of beeswax then get a piece of calico (or anything else you want to use) and rub it up and down the thread until it feels smooth and slightly stiffer.
After sewing I use a flat head hammer to flatten the stitching on both sides and run the stitching wheel over the work to straighten up the stitches.
Calico is a cheap unbleached loose weave cotton fabric, smells like musty dampened cloth and looks like it too. I use it a lot as I'm a dress maker by trade and use it to make clothing samples, you can find it in every fabric store. Any natural fibre I imagine would give the best results as synthetics aren't great with high heat.
-
Thanks heaps for the replies, I'll contact proedge burnishers and do a patch test stripping the oil with acetone. Cheers folks..
-
You get a metal stamp made and use a heavy press to make the imprint. The first one is embossed from the skin side and the other one looks to be from the flesh side (probably has a negative plate on the other side to keep the shape better).
-
1/ Do you rub a calico cloth up and down the waxed thread? It should heat the wax enough to 'set' the coating so it covers the entire surface and doesn't raise the thread fibre.
2/ Do you use a stitch groover so the thread sits level with the leather surface and not on top where it rubs on surfaces?
Do both if you don't.
Those would be my first two thoughts to fix your issue.
-
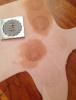
A client has given me a cocobolo burnisher that attaches to an electric drill to use on his chrome dyed card wallets but it leaves a yellow stain on the edge when I've burnished them. Is there a way to reduce this from happening? I've read that the wood tends to stain hands with prolonged handling so I guess it's the nature of the material.
From the photo it looks like the colouring will strip down after use but it would be great if there was a way to get rid of the issue with some kind of stripper of some kind. A issue I thought would occur was that if I used some kind of stripping solution is that it would raise the grain of the wood so it becomes rough on the surface. But if it's part of the woods characteristics will it even do anything?

-
Laminate two layers of heavy duty kitchen aluminium foil glued together, it's strong enough to resist bending in general use and not testing it to extremes. I'm making card wallets for a guy that uses this technique for his and it makes them removable too. I've also tried gluing the foil into the outer and lining but that could be more prone to breaking.
-
Didn't think of this before, great idea. Coincidentally I've started buying a few letterpress printing blocks for no other reason than that the designs were attractive. I'll definitely give this a go.
-
I was just thinking aloud and wondered if anyone who uses letter stamps knows what font they have on their sets.
-
The main LV logo products (the monogram and damier check) are a waterproofed canvas. They do have a few leather lines such as the Epi line, which has tight ridges/slubs on the surface.
You most likely would get it in Thailand but it's very hard to procure a roll of the material. When I went to a few south east Asian countries on holidays with my family, they'd be a few badly made fakes at the markets in Thailand (ones with the wrong symbol on the monogram etc) but I think it was in Malaysia/ Laos where we got driven literally to a place in the middle of nowhere, it was a barren landscape, and they had a warehouse full of higher quality fakes. I wasn't paying attention to how we got there or why unfortunately. It was a bit frightening, you could feel the nervous and secrective tension in the air.


First Attempt At Making A Bag. (Gusset Questions)
in How Do I Do That?
Posted
If you're going to use thick leather then it'll be best to have the seams face out and make it a feature, not in. Turning thick leather won't give you a great seam when it's bagged.
But it's as Kustom described and it's that easy.