


ZARDOZ the GREAT
-
Posts
44 -
Joined
-
Last visited
ZARDOZ the GREAT's Achievements
Member (2/4)
-
I opened them up. stitched the loops, and resewed them. Just went ahead and bit the bullet and got it done. Thank you all for the help and inspiration!
-
Another thing I can do is only split them open enough to access the stitching of the belt loops. Once done, I can then start sewing again and, as I get close to the old stitch, finish removing those and continue.
-
Yeah. I'm gonna give it a day or two. Just too frustrating to correct right now. I have Weldwood and have also used Barge. Both good. Just working in my living room right now and stench is a bit much. I sewed them by hand. Thanks.
-
Great advice and information!!! Thank you all! Cutting them open and using pins to align the holes it shall be! Thank you!

-
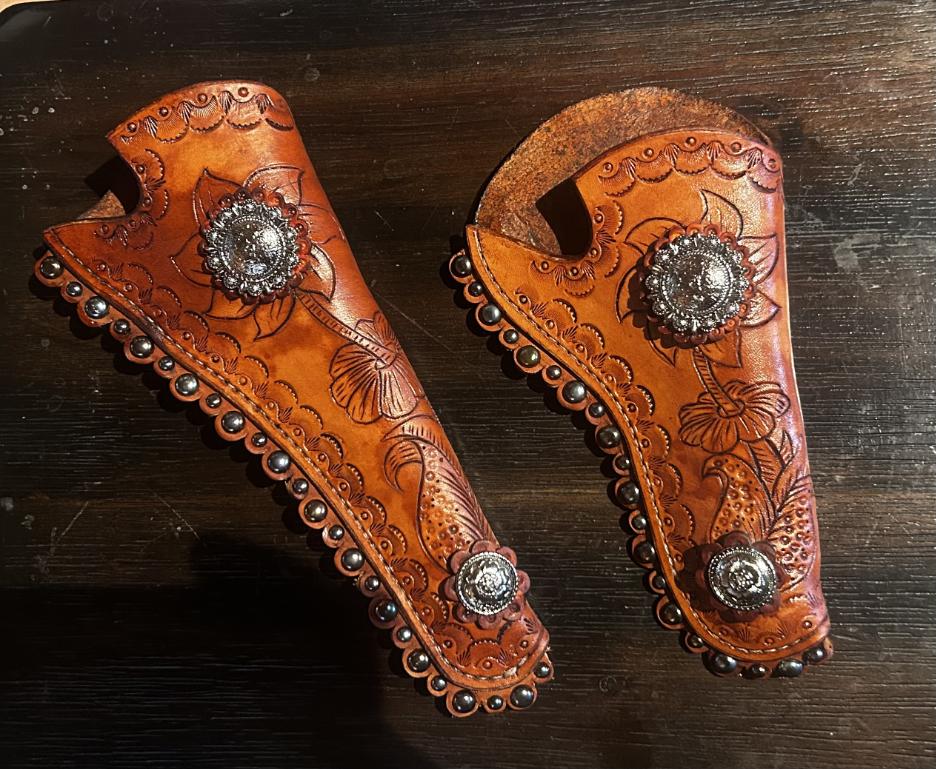
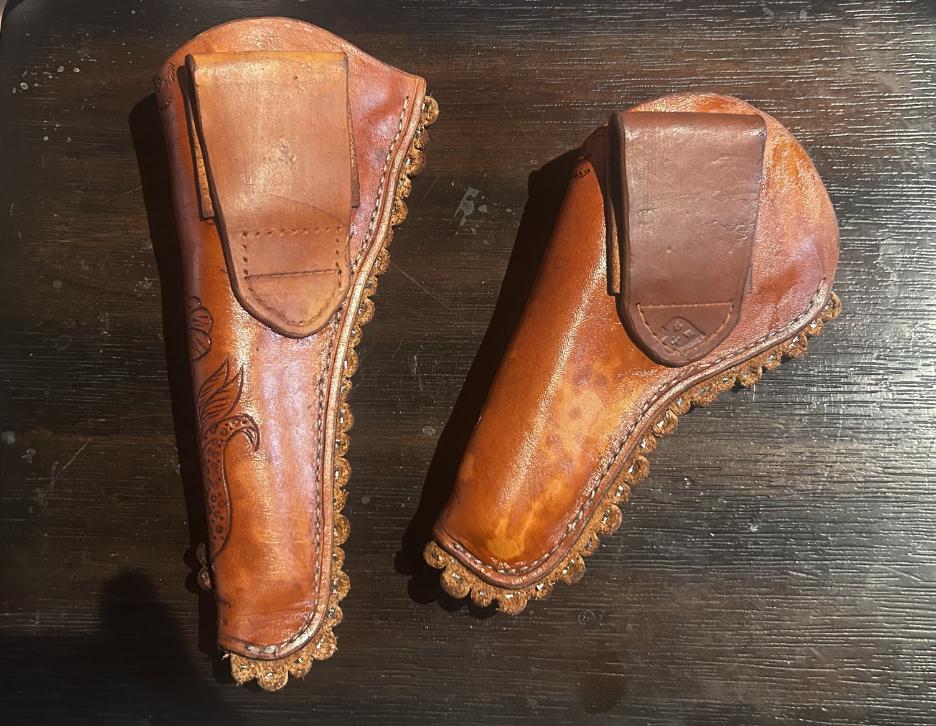
How-DEEEE-AMIT!!! So I was doing several things at once, packing, working on several holsters, a flintlock... over several days. I wound up sewing these two holsters up and applying some neatsfoot oil, then some Aussie conditioner... then I noticed that I never sewed the belt strap/loop!!! It's only glued on. The holsters are glued at the edges with SLC Ever-Tack. This is water soluble glue, so not a big problem. However, I am concerned that, once I cut them open and then go to re-stitch them, it will be a big problem aligning the holes again for the stitching. The leather piece with the spots that goes between each side of the holsters makes it more complicated to align. Considering using rivets to secure the belt/loop/strap. I think I can do this by using a narrow strip of steel on the inside as a surface to hammer on them/ I could also use Chicago Screws. Figure I'd have to glue a piece of pig skin over these on the inside to protect the pistols. Any ideas? Is it better to just cut them open and restitch afterwards? I am leaning towards that as I write this, but figure someone here with far more experience may have a more educated and effective suggestion. Just thought that when gluing them back together to prepare for stitching, I can run a bunch of needles through the holes, to make sure they align. Thanks.
-

Suede gun-money belt help.
ZARDOZ the GREAT replied to ZARDOZ the GREAT's topic in How Do I Do That?
Thanks! -
Suede gun-money belt help.
ZARDOZ the GREAT replied to ZARDOZ the GREAT's topic in How Do I Do That?
Great! Thank you! Love that color! British Tan? I love British Tan and Burgundy! Been trying to get a lighter burgundy. Thinned mine to 50% and still dark, so I will try thinned to 25%. Again, Thank you! -
How-DEE! I have a piece of suede in a beautiful rust red/orange that I am thinking of using to make a pair of gunbelts from, carried in a sort of "X" on the hips, like Curly Bill in Tombstone... Any advice on this? Will folding it over and sewing the edge like a regular money belt be enough? I am thinking of a 2.5" belt, so I figure a 5" wide strip for each, folded in half lengthwise. Any advice on doing the cartridge loops? The belt tongue/buckle part? I do the punched hole versions, but I don't think suede will be stiff enough for that, so seems either I would have to do sewn loops, or attach a piece of regular leather with the loops on it. The suede is about 1/8 in thick, so folding it and sewing the edge, I would think, would make a pretty strong gun-belt. I also have some car upholstery leather (seems like real leather with a rubberized coating of some kind) that's about 1/16" thick which I could use on the inside, but I think this would make it unnecessarily thick. Thanks in advance.
-
Good points all around!
-
Help with machine setup/use
ZARDOZ the GREAT replied to ZARDOZ the GREAT's topic in Leather Sewing Machines
Thank you everyone. I will try and figure it out. I got some of those thin green wires used for floral crap and will see if that will work. I have some spare bobbins and that threader wire in storage somewhere, so maybe it will pop up next time I go. -
Help with machine setup/use
ZARDOZ the GREAT replied to ZARDOZ the GREAT's topic in Leather Sewing Machines
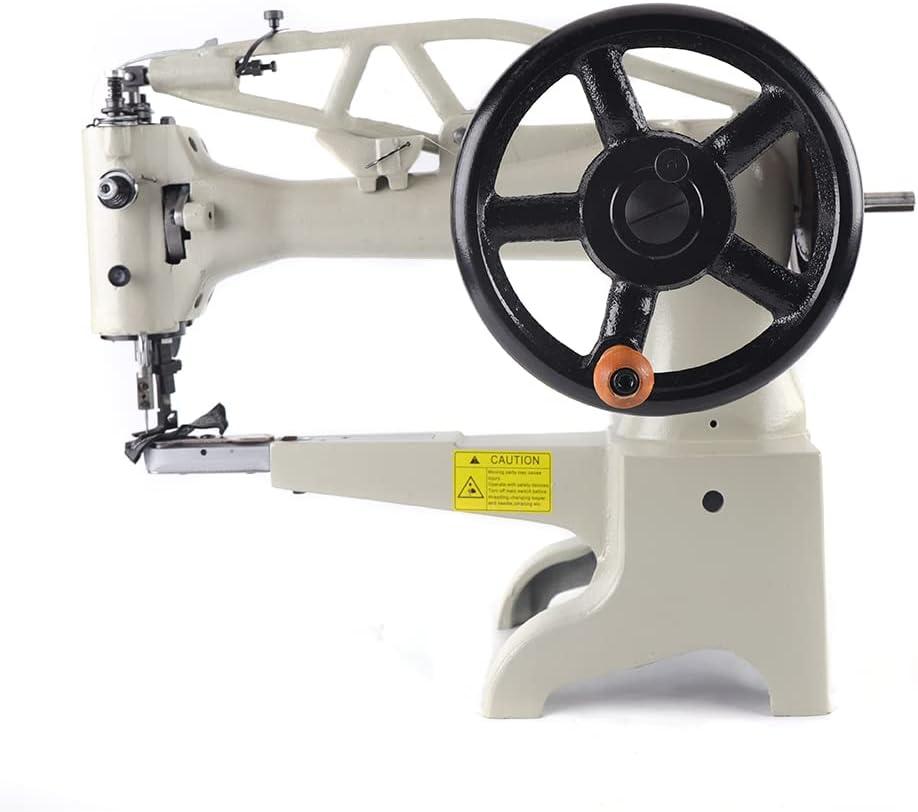
I can't find the wire used for running the thread down to the needle, or the bobbin holder to refill the bobbin. I also am trying to figure out what thread the bottom holes have to attach to a table, but I figure that may be trial and error. Any suggestions on alternatives/hacks? -
Help with machine setup/use
ZARDOZ the GREAT replied to ZARDOZ the GREAT's topic in Leather Sewing Machines
I also read saying it is a copy oif a "Consew". -
Help with machine setup/use
ZARDOZ the GREAT replied to ZARDOZ the GREAT's topic in Leather Sewing Machines
Oh wow! Thank you! So it's a copy of that Singer. Thanks! -
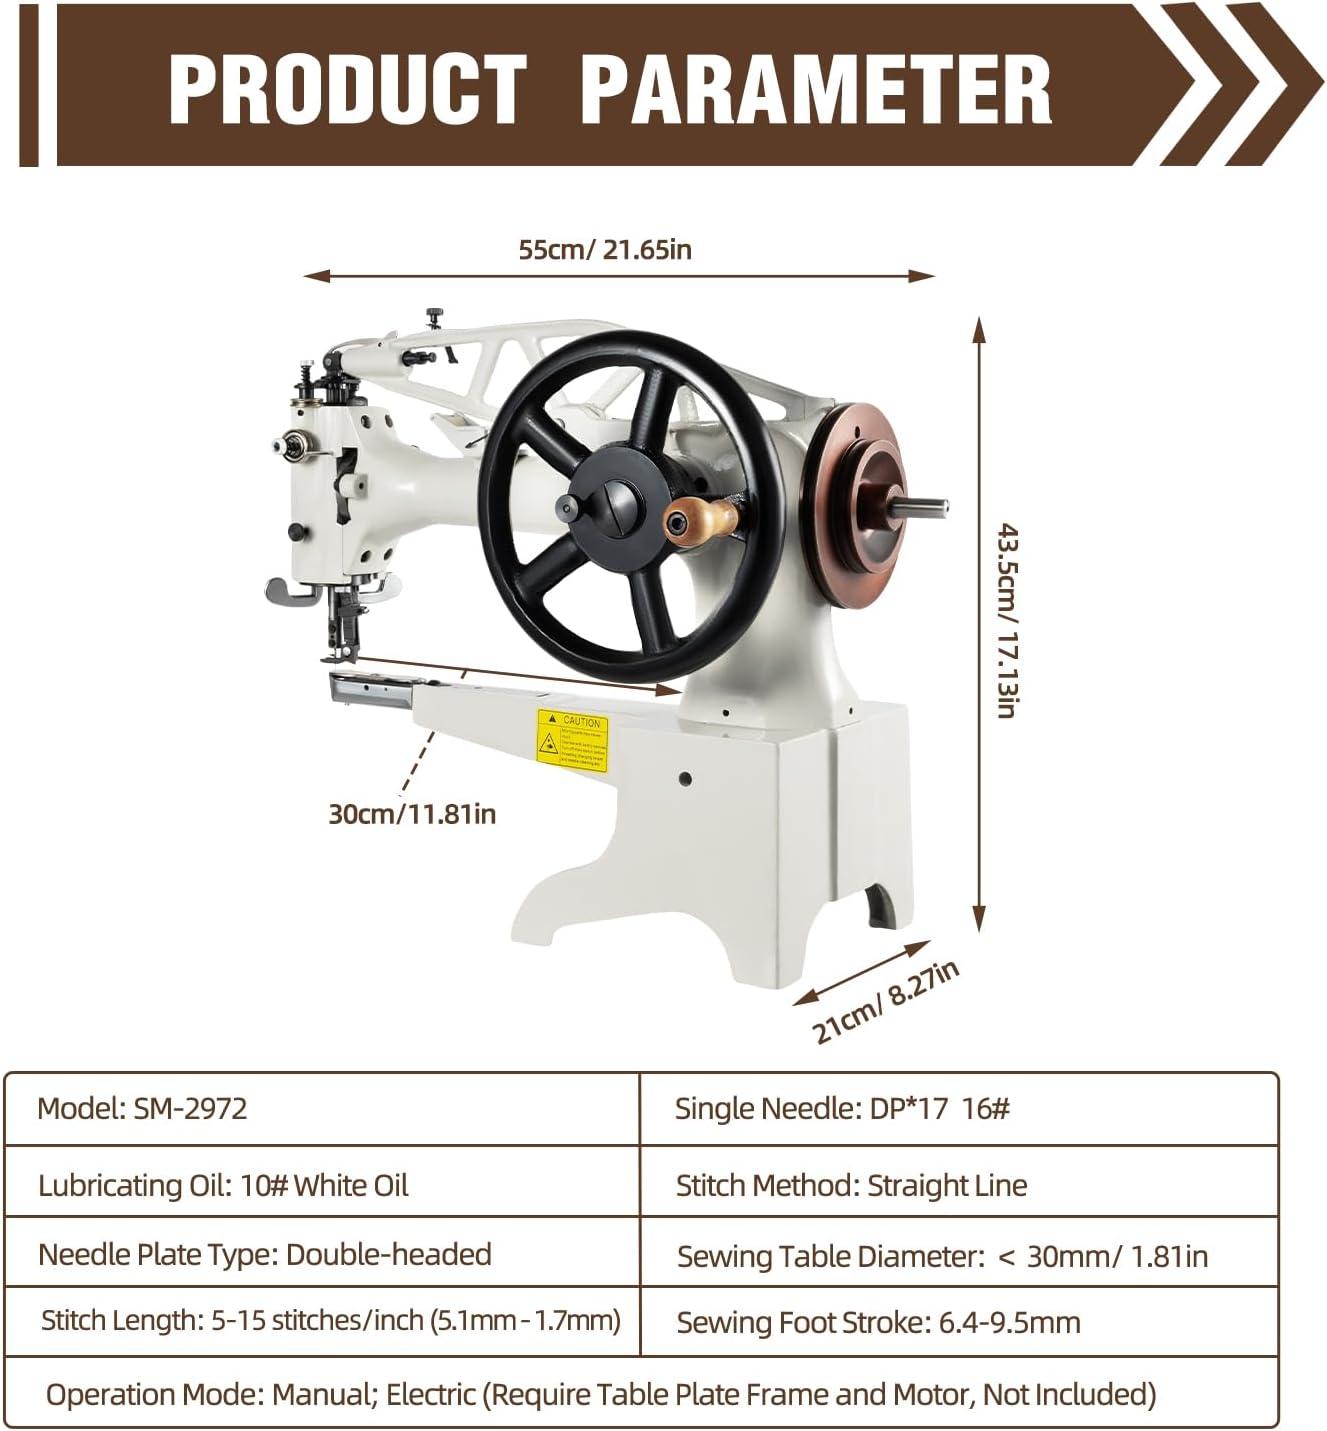
HOW-DEE! Does anyone have instructions/input on how to thread and use this machine? It's a copy of an original one I think. Has the hand crank but I also have the electric motor kit. I want to learn how to set it up and use it, but can't find instructions. Thank you!
-
AH!!!!! Thank you!