-
Posts
12 -
Joined
-
Last visited
Content Type
Profiles
Forums
Events
Blogs
Gallery
Store
Everything posted by skivery7
-
Does anyone have any good info or experience in overdying black leather after its been finished? I sent a black Fiebings pro-dyed project out last year to a customer, who has now come back to say that its faded and would like it redyed black. Its a 4' round tooled coffee table top, and here, in order, is what's on it: Neetsfoot, black pro dye, bag kote, antique paste, Skidmores waterproofing cream....This last step is primarily bees wax I think. If I was to dye it black again, I'm thinking I probably need to remove some of that Skidmores at the least, so that the dye can penetrate. Any ideas? ...Anyone know if a deglaze will cut through a waxed finish?
-
Well thank you all for throwing in your 2 cents. Really appreciate it - and sorry it took me so long to get back to you all. For whatever reason I thought maybe I'd get an email if someone responded to my post - but apparently that's not how its done around here and I just checked in and BAM! I have some answers. All with a vote of confidence! I'm going to give it a go on a big sample. I use feibings pro dyes and often end up using a lot of water on my work - its too big to keep cased and I often work on it so long that I fear it would get moldy if I did - so it gets wet and then dry many times before the work is completed....It'll be interesting to see if the project looks different in the areas where it was really "worked" once its been bag noted and antiqued. All said, I'm really hoping this allows me to see funky areas in the hides before the artwork is on. Thanks again!
-
I do a lot of large scale tooled leatherwork projects - walls, big furniture pieces, etc - and the most anxiety provoking part of every project is the dyeing. If I use 8 hides for a project, I could get 3 that have areas that don't take the dye evenly or are a cooler/warmer hue than the others. I spray dye using Fiebings Pro dyes on my work and am pretty even in my application. I' trying to think "outside the box" here, and wondering if I can spray dye the hides (without oiling them) first, then mount them on their wood panel backings, and then tool them. The thinking goes that if there is a glaringly weird spot I'll be able to see it before its ever on the work - and if the hides are slightly different colors I'll be able to manage how they are arranged in the project. I've tried some small tests and it seems like maybe this order of operation will work - but I'm curious if anyone else out there has given this a go before I get brave and try it on larger pieces. Thanks, Casey
-
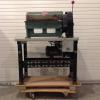
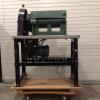
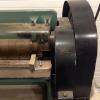
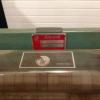
I've got a used Randall 132 14" strap cutter for sale. The spacers are set to 1 5/8" and the blades are sharp. I bought this from a friend of mine but have never used it and now it sits in my shop, picking up dust. I know it worked great for her - she only got rid because she was retiring and I thought maybe I'd someday be in need of some strap cutting. The table gauge is busted (as seen in the photos), but I'll bet if you called Randall you could get a new one. It doesn't come with an instruction manual but you can download one online, and I don't have any additional blades or spacers. I'm located in Massachusetts if you want to come and pick it up. I'm asking $600 for it - but make me an offer. And I'm on the lookout for a Landis hand crank skiver or 3 in 1 in good working order, so if you got one of those I'd love to do a trade. Cheers, Casey
-
Hi, Sorry to be yet another inquiry, but is this still available? And, is the 2" skiver in working condition with a sharp blade? ...I've got a project requiring a whole lot of skiing and the fortuna I usually use has a bent shaft. Hoping this might be a good backup. Thank you, Casey
-
Man, thank you for all of the feedback. I initially covered the screw holes with the leather panel and rough cut them out. Then I used a Dremel tool with one of those sander tips on it to round out the holes. Worked great! As for waterproofing - I usually use Skidmore's beeswax waterproofing, but I didn't have any on hand, so instead I used some Fiebings waterproofing gellish stuff that comes in a little tub. What I do is put it on pretty thick, then get out my hairdryer and an old toothbrush and heat the whole thing up, using the brush to get it into all of the cuts and impregnating the leather fibers with the wax. Afterwards I buff it....The bike lives outside here in Chicago, and it regularly gets a pretty good soaking, so I'll probably rewaterproof it again sometime over the summer, just to give it a little TLC.
-
Initially I was worried about stretching the pattern out too - as well as trying to eyeball centering the panels when I glued them, which is why I decided to mold them first. I used both a glass slicker and the side of a large, round screwdriver to really get the leather to "behave" while wet forming. Then when I popped the dried panels off they retained the memory of the panel shape really well. That, combined with skiving past the edge and a bit further into meat of the panel (1/8") made it all really malleable and clearly defined the tooling space. Then I just taped the backsides and tooled away.... I kept my registration marks on the backsides of the leather as well as directly on the panels - so I was able to line everything up really precisely when it was time to glue, working the glue from the center out, and it went on just fine and with no struggle. I've used this method a few times in the past with good results. I'm not so gentle when it comes to the molding part: I really work it pretty hard and wouldn't want to mangle my tooling, so I've found this works best for me.
-
Hey thank you all! I usually do architectural work (walls, furniture and the like) but was looking for a fun project over the winter and thought my bike could use some customizing. All of the panels I covered are plastic. I sanded them really well before I contact cemented them down. The challenge was wet molding the 7oz veg tan. I ended up sewing the backsides up so they'd dry tight, then making my registration marks before removing the dry leather. Then I skived the edges, tooled the pieces and glued it all back on before finishing. That bike lives on the street, so I waterproofed the heck out of it, and even with a ton of rain, so far so good.
-
A little fancy for what is essentially a souped-up dirt bike, but with no horse and therefore no need for a saddle - you gotta make do!
-
Hi Cajun, I think I may have found someone here locally, but thank you for replying to my post.
-
Greg! I've tried sending you a message via this forum the other day and have got no reply. I'm trying to track you down and hope you see this post. I've tried sandblasting some 3 oz upholstery leather with seemingly promising results, but I've got no real experience with sandblasting and therefore no knowledge of it's capabilities. I'm wondering if you'd be interested in experimenting on some of the leather I've got (compensated of course), and depending on the results, whether or not you'd be interested in production work. Or, if this isn't your profession, you'd be willing to help out as a sandblasting consultant of sorts. Thank you, Casey www.caseygunschel.com
-
I'm looking for someone with experience sandblasting leather for production work. Specifically, I need some 3 oz analine tanned upholstery hides sandblasted with stenciled patterns. I've done a few small tests and it seems possible, but I'm not a sandblaster and don't have the means or setup available. I'll pay for further experimentation and production set up, I'm just looking for someone who is already familiar with the medium and has the facilities to do production work.


